
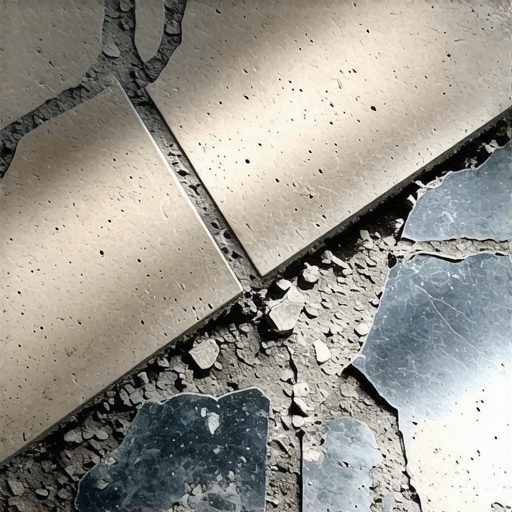
I was walking toward the kitchen for my first cup of coffee when I felt that unmistakable, gritty crunch under my heel. I looked down, and there it was—a jagged piece of grout the size of a fingernail, sitting on top of the tile like a tiny, annoying tombstone. My hallway, the busiest thoroughfare in the house, was literally shedding its joints. It’s a gut-sinking feeling because you start imagining the worst: is the foundation shifting? Did I get scammed on the installation? Today, I’m going to walk you through exactly why this happens and help you distinguish between a simple cosmetic fix and a deeper structural issue so you can finally stop the decay.
Stop Blaming the Grout and Start Looking Beneath the Tile
In my early DIY days, I made the classic mistake of thinking I could just scrape out the loose bits and smear some new grout over the top. I thought it was just a bad batch of material. I was wrong. The grout is rarely the villain; it’s usually the victim. Most of the time, grout falls out because the subfloor is moving. If your floor has even a tiny bit of flex, the grout—which is basically just rigid sand and cement—will snap. I learned the hard way that stopping your subfloor from squeaking or flexing is the only way to keep those joints intact. When you walk through a hallway, you’re exerting a huge amount of concentrated pressure on a small area, and if that tile isn’t perfectly supported, it’s going to pivot.
Is This Going to Be an Expensive Nightmare?
It is the question everyone asks when they see those cracks. You’re likely worried that you’ll have to rip up the whole floor and start over. While it’s true that floor leveling challenges are a common culprit for long-term failure, you might just be dealing with a localized issue. Sometimes it’s as simple as the original installer using the wrong type of grout for the joint width, or perhaps the grout color looks splotchy because it was mixed with too much water, making it brittle. According to the Tile Council of North America (TCNA), the maximum allowable deflection for a floor to be tiled with ceramic is L/360, which basically means if your floor bounces more than a fraction of an inch, the grout is destined to fail. Have you noticed any specific tiles that feel like they move or ‘click’ when you step on them?
The Hidden Danger of the Hollow Sound
If you want to know if you’re in real trouble, try the knuckle test. Tap on the tiles surrounding the missing grout. If they sound like a hollow drum, the thinset has detached from the subfloor. I’ve spent hours trying to detect a hollow tile before the grout actually starts flying out, and it’s a skill that saves a lot of headaches. If the tile is loose, no amount of high-quality grout will stay in place. It’s like trying to glue a moving car to the driveway. We need to address the bond and the movement before we ever touch that grout bag again.
Fix the Flex Before You Touch the Grout
To stop the cycle of crumbling grout, you have to treat the floor like a building’s foundation. If the floor is ‘bouncing,’ the grout is simply the first thing to break. I start by performing the hammer test for finding loose subfloor nails. If you hear a thud instead of a sharp ping, your subfloor isn’t properly anchored to the joists. One of the biggest mistakes I see is people installing expensive stone over thin, flimsy OSB. You need to ensure you have the plywood grade you need for a stable tile underlayment, which usually means at least 5/8-inch thickness to prevent the vertical deflection that snaps grout lines like twigs.
Re-Seating the Loose Tiles Without a Full Tear-Out
Once the subfloor is stable, you have to address the tiles that have already come loose. If you have a single tile that clicks when you step on it, don’t just regrout it. You need to carefully pry it up. I’ve found that using an oscillating multi-tool with a diamond blade is the safest way to clear the old grout without cracking the surrounding pieces. Think of it like surgery; you have to isolate the problem area before you can apply the cure. When resetting a tile, the ‘back-buttering’ technique is non-negotiable. Spread a thin layer of mortar on the back of the tile itself as well as the floor to ensure 100% coverage. If you do happen to nick a corner during the process, don’t panic; there are ways to learn how to fix a chipped tile without replacing the whole piece.
The Messy Lesson of the Over-Watered Mix
I remember a kitchen project three years ago where I was in a massive rush. I added too much water to my thinset because I wanted it to spread faster and ‘self-level’ on its own. It looked fine when I laid the tile, but as the water evaporated during the curing process, it left behind tiny air pockets. Within six months, three tiles were hollow and the grout was turning to powder. I had to learn how to detect a hollow tile before the grout starts cracking the hard way—by listening to the literal crunching sound of my own failure every time I walked to the fridge. Now, I always use a high-quality primer to ensure a rock-solid bond, because I know why your floor primer is peeling off like a sunburn if the surface is too dusty or porous to begin with.
Pick a Grout That Actually Stands a Chance
For high-traffic hallways, standard cement grout is often a recipe for repeat repairs because it lacks flexibility. If you’re fixing a small area, look into high-performance acrylic-modified grout or even an epoxy-based product if the joints are tight. Before you mix the whole bag, how to spot a bad batch of grout before you apply it is a skill that saves hours of cleanup; if the powder is clumpy or won’t incorporate water smoothly, throw it out immediately. If you’re in a hurry to get your life back to normal, you can use the fast set mortar trick for same-day tile grouting, but only if you’ve already addressed the movement in the joists below.
But even if you have the right grout and the right mortar, there is a fundamental law of physics most installers ignore. I’ve seen homeowners spend thousands on premium materials only to watch them crumble because they mistook ‘level’ for ‘flat.’ These are not the same thing. A floor can be perfectly level—meaning it’s parallel to the horizon—but still have dips and humps that will snap a tile in a heartbeat. In my experience, chasing a bubble in a spirit level is a waste of time compared to ensuring your floor is a perfectly flat plane. According to the National Wood Flooring Association (NWFA), a floor must be flat to within 3/16 of an inch over a 10-foot radius for most installations to survive. If you ignore this, you’re essentially creating a series of tiny bridges with your tiles, and bridges eventually collapse under traffic.
Stop Chasing the Bubble and Start Chasing the Plane
The biggest nuance most pros won’t tell you is that a slightly sloped floor is fine; a wavy floor is a catastrophe. If you are working with modern, large-format tiles, the margin for error disappears. You need to master the secret to getting a flat floor for large format tiles before you ever open a bag of thinset. I once watched a buddy try to ‘build up’ the mortar to compensate for a half-inch dip in the plywood. He thought he was being clever, but as the mortar cured, it shrank at different rates, pulling the tile downward and creating massive lippage. This is one of those flooring installation mistakes to avoid for lasting results because once that mortar is dry, your only tool for repair is a jackhammer.
The Self-Leveler Trap That Ruins Perfectly Good Mortar
Many DIYers think pouring a bag of self-leveling underlayment is a ‘magic eraser’ for a bad subfloor. It isn’t. In fact, if you don’t prep the surface, it’s a recipe for disaster. I’ve seen cases why your self-leveler developed spiderweb cracks overnight, and it’s usually because the installer skipped the primer or didn’t use the roller selection that prevents air bubbles in leveler. Without those tiny bubbles being popped by a spiked roller, the cured surface is as weak as Swiss cheese. Even worse, why most floor levelers fail on top of painted concrete is a lesson in chemistry; the leveler simply won’t bond, and you’ll end up with a ‘floating’ sheet of brittle cement that will crunch under your feet in weeks.
Can You Actually Tile Over Old Vinyl Without It Failing?
This is the advanced question I get most often from people trying to save time on a renovation. The answer is a hesitant ‘yes,’ but only if the vinyl isn’t cushioned. If there is any ‘give’ to that old floor, your new grout will turn to dust in a month. You have to know how to install tile over an old vinyl floor without tearing it out properly, which involves scuffing the surface and using a specialized high-bond primer. If you don’t, you’re just piling weight on top of a failing foundation. Have you ever fallen into this trap of trying to take a shortcut with an old subfloor? Let me know in the comments. If you’re struggling with a specific dip or a bounce that won’t go away, feel free to contact us for a deeper look at your project.
The Gear That Separates Pros from Weekend Warriors
If you’re going to tackle a project that involves both tile and wood, you need to stop guessing and start measuring. I never start a job without my pin-type moisture meter. It’s the only way to know if your subfloor is actually ready for a new layer of material. I’ve seen beautiful, expensive installations fail because the installer didn’t know how to use a moisture meter before you lay wood floors, leading to cupping, gapping, and grout failure within months. For the leveling phase, I swear by a specific 18-inch spiked roller. It isn’t just a fancy accessory; it is the roller selection that prevents air bubbles in leveler from turning your smooth floor into a weak, porous moonscape. These tools aren’t cheap, but they are significantly more affordable than the cost of a full teardown. I also recommend investing in a HEPA-filtered vacuum system for any sanding work. If you’re refinishing, you really want to look into the dust-free move for hardwood floor refinishing in kansas city styles to protect your lungs and your home’s HVAC system.
How do I keep my new flooring looking pristine for years?
Maintenance is where most homeowners lose the battle against time. If you’ve just invested in a complex transition between materials, you need to understand hardwood floor care secrets to longevity and shine that go beyond a simple mop and bucket. One of the biggest mistakes I see is the obsession with ‘deep cleaning’ using high-heat tools. I have to warn my clients daily about the truth about using steam mops on luxury vinyl planks—they will literally melt the adhesive and warp the core of the floor. According to the National Wood Flooring Association (NWFA) Sanding and Finishing Guidelines, a floor’s longevity depends heavily on the environment. You must maintain a consistent indoor humidity between 30% and 50%. If the humidity swings too wildly, the wood expands and contracts, putting immense lateral pressure on your tile joints and eventually snapping the grout.
Precision Measurement is the Future of Home Improvement
I predict that in the next five years, we will see a complete shift away from manual spirit levels toward affordable LiDAR scanning apps for smartphones. We are already seeing high-end pros use precise floor leveling techniques to achieve flawless surfaces by mapping out subfloor deviations digitally before the first bag of cement is even mixed. This technology takes the human error out of the equation. If you are struggling with a floor that feels ‘off,’ don’t just dump more mortar on it. Understanding flooring installation fundamentals means knowing that preparation is 90% of the victory. My best advice for your next project? Get a high-quality moisture meter and check your subfloor in at least ten different spots. It is the single most important advanced habit you can develop to ensure your floors don’t just look good today, but stay solid for the next twenty years. If you find a spot that’s too wet or too warped, don’t ignore it—address the source before the first tile is laid.
My Hardest Lessons from a Career in Tile
If I could go back and talk to my younger self, I would tell him that tile isn’t just about the surface—it’s about the soul of the floor. My biggest mistakes always came from rushing the ‘invisible’ work. For instance, I used to think that a slightly damp subfloor was fine as long as I used a good primer. I was wrong; the moisture eventually works its way out, weakening the bond and turning your grout into chalk. Another myth I had to bust was that thicker mortar could fix a wavy floor. In reality, thick mortar shrinks more as it dries, which actually pulls the tile out of alignment. If you want a floor that stands the test of time, you have to embrace the slow process of preparation. Using tile installation pointers that save time and money is helpful, but never at the expense of structural integrity.
The Tool Kit That Actually Makes a Difference
You don’t need a truckload of equipment, but you do need the right stuff. Beyond the moisture meter we discussed, I trust a high-quality 10-foot straightedge more than any laser level on the market. It doesn’t run out of batteries and it never lies about a dip in the plywood. I also recommend following our step-by-step guide to flooring installation and leveling success to see how a simple notched trowel choice can dictate the life of your floor. I personally use a premium high-flex mortar for any area where I suspect even a hint of vibration, as it provides that tiny bit of ‘give’ that prevents cracks during seasonal shifts.
#IMAGE_PLACEHOLDER_E#
Your Foundation is Ready for the Next Step
Taking on a floor repair or a full installation is about more than just aesthetics; it’s about building a solid base for your daily life. It can feel daunting when you’re staring at a pile of tools and a dusty subfloor, but remember that every pro started exactly where you are. By focusing on flatness rather than just levelness and respecting the moisture levels of your materials, you are already ahead of 90% of DIYers. You now have the strategies to avoid the most common flooring installation mistakes to avoid for lasting results. Take it one tile at a time, trust your measurements, and don’t be afraid to reach out if you hit a snag. You are fully capable of achieving a flawless floor leveling before tile laying that will keep your home quiet and beautiful for decades. Have you ever found a surprising structural issue once you pulled up a loose tile? Let me know your experiences in the comments below!