
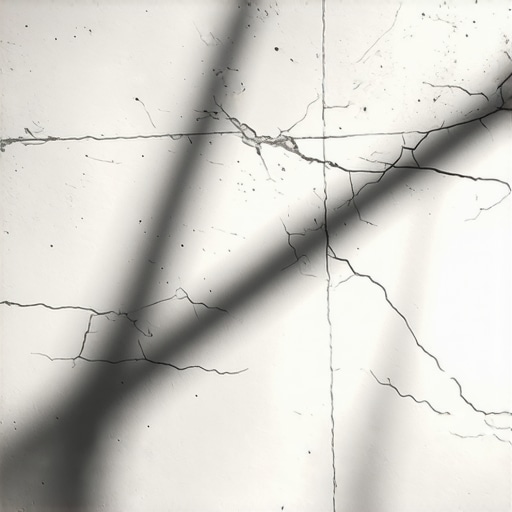
I remember walking into my kitchen at 6 AM, coffee in hand, ready to admire a glass-smooth surface. Instead, I found what looked like a shattered windshield. Total heartbreak. I had spent hours prepping, yet those tiny, jagged spiderweb cracks—technically called crazing—were zig-zagging across the entire room. If you are staring at a similar mess right now, I know that sinking feeling. But before you grab the sledgehammer, let me tell you that most of the time, this is a fixable chemistry problem, not a structural disaster. Today, we are going to dive into the ‘why’ behind this failure so you can stop the damage and finally achieve that floor leveling for a perfect finish you were dreaming of. [IMAGE_PLACEHOLDER]
Why Your Floor Leveler Turned Into a Puzzle Overnight
The primary culprit for this mess is usually ‘plastic shrinkage.’ Essentially, the top of your leveler dried significantly faster than the bottom. When the surface loses moisture too quickly, it shrinks and pulls apart, creating those characteristic spiderwebs. This often happens because the subfloor was too ‘thirsty.’ I learned this the hard way during my first big remodel when I convinced myself that primer was just a marketing gimmick to get me to spend more money. I skipped it, the dry concrete beneath sucked the life out of my mix, and I ended up with a cracked, dusty mess. In fact, according to the American Concrete Institute (ACI), the evaporation rate of surface water should never exceed the rate at which bleed water rises to the surface, or you are practically guaranteed to see crazing.
Is my subfloor just fundamentally broken?
It is the first question everyone asks when they see cracks, but the answer is almost always ‘no.’ Your subfloor is likely fine; it was just poorly prepped for the specific thirst of the leveling compound. If you didn’t use the spiky roller secret to release trapped air, or if your mixing paddle speed was so high that it whipped air into the slurry, you’ve created a fragile surface prone to snapping as it cures. Have you noticed if your compound bubbled before it cracked? That is a huge clue that the bond was failing before the material even set. Tell me, did you see these cracks appear immediately, or did they only show up once you turned the heat on in the room? Knowing the timing can help us figure out if the issue was the prep or the environment, setting the stage for a perfect repair.
Scrub the Surface Until it Shines
Before you even think about pouring more product, you have to deal with the existing mess. If your leveler is chalky or loose, it has to go. I remember a job in a damp basement where I thought I could just ‘pour over’ a slightly dusty patch. Big mistake. Within three days, the new layer started delaminating and peeling up like old wallpaper. It felt like walking on potato chips. Now, I always use a heavy-duty vacuum and sometimes even a diamond grinding cup to get back to ‘virgin’ concrete. You need to know the best way to prep a dusty concrete floor for adhesive or you are just building on sand. If the surface has an old sealer or paint, you might even need the concrete etching step you shouldnt skip before leveling to open up those pores so the bond actually sticks.
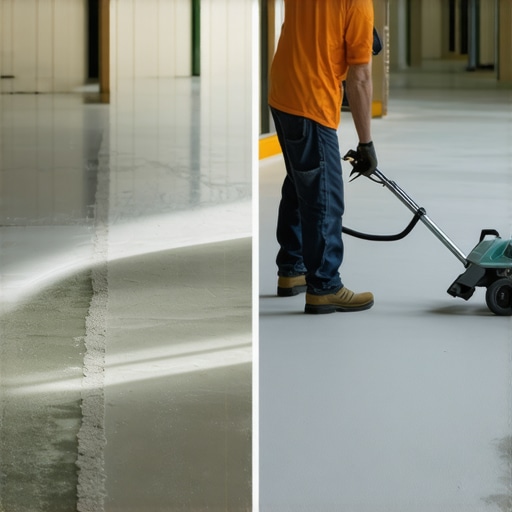
Priming is Your Insurance Policy
Think of primer as the handshake between your subfloor and your leveling compound. Without it, the subfloor steals moisture from the mix, leading to those spiderweb cracks we discussed earlier. When you are learning how to achieve flawless floor leveling before tile laying, the primer is your most powerful tool. It seals the subfloor so air bubbles can’t escape upward and moisture can’t escape downward. I typically apply two coats: the first one is diluted to soak deep into the concrete, and the second one is full strength to create that tacky, neon-colored film that tells me I’m ready to pour.
Stop Whipping Air Into the Slurry
The speed of your drill matters more than you think. If you go full throttle, you’re basically making a meringue, not a floor. High-speed mixing traps micro-bubbles that turn into pinholes or weak spots later. I always stick to a low-RPM setting—usually under 650 RPM—and use a specialized egg-beater style paddle. Using the wrong mixing paddle speed can literally ruin your leveling compound before it even hits the floor. It is also vital to follow the water-to-powder ratio exactly. Even an extra cup of water can weaken the polymer chains, leading to a soft, dusty finish that won’t support choosing the right hardwood floors for your home or heavy tiles.
Work Fast and Use the Right Tools
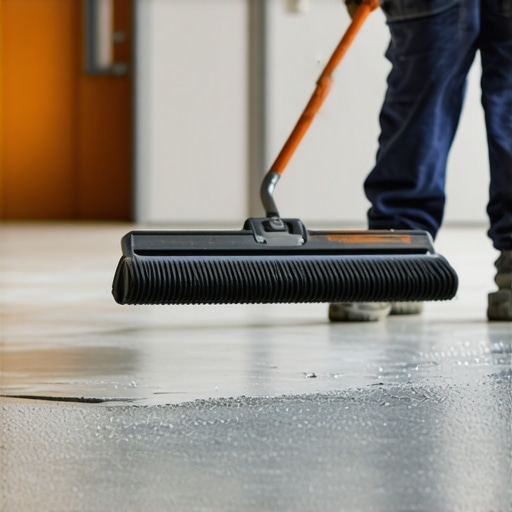
Self-leveler has a ‘wet edge’ time of about 10 to 15 minutes. Once it starts to skin over, touching it is a recipe for disaster. This is where the spiky roller secret for a mirror smooth pour comes in. This tool doesn’t just move the product; it breaks the surface tension and lets the trapped air escape. If you miss this window, your floor will look like a topographical map instead of a flat plane. It is all about the flow—start at the farthest corner and work your way out, keeping a continuous stream of material moving. This is the foundation of mastering floor leveling pro secrets for perfect installations. You want a seamless transition from one bucket to the next to ensure a uniform cure.
Stop Treating Self-Leveler Like It’s Just Water
The industry name is a bit of a marketing trap. Many DIYers—and even some seasoned pros—assume that ‘self-leveling’ means the product will magically find a perfectly horizontal plane on its own. In my experience, if you just dump the bucket and wait, you are going to end up with a mess. You need to assist the flow. Think of it more as ‘self-smoothing’ rather than ‘self-leveling.’ Without active intervention using precise floor leveling techniques to achieve flawless surfaces, the material’s surface tension will often cause it to hump up in the center of the room. I’ve seen countless flooring installation mistakes where the installer blamed the product, but the reality was they didn’t use a gauge rake to help the slurry reach the corners or even out the distribution.
Why does the surface look like a dry lake bed even if I followed the mixing ratios?
This is where the nuances of chemistry meet the harsh reality of your job site. The Tile Council of North America (TCNA) emphasizes that environmental conditions—specifically ‘drafts’ and ‘surface temperature’—are just as critical as the mix itself. If you have an AC vent blowing across the floor or a sunny window heating up one patch of concrete, the leveler will cure at different rates. This causes ‘mapping,’ where you can actually see the outline of the subfloor underneath. This is one of the most common floor leveling challenges that people overlook. You might even see why your self-leveling pour looks like a topographical map if the humidity drops too fast during the critical first hour of the cure.
The Temperature Trap You Are Probably Ignoring
Everyone looks at the water-to-powder ratio, but almost no one checks the temperature of the water itself. If your water is coming out of a garden hose that’s been sitting in the sun, you’re in trouble. Hot water accelerates the chemical reaction, leading to a situation where your self-leveler is drying faster than you can pour it. I always keep my five-gallon buckets of water inside the house overnight so they reach an ‘ambient’ temperature. This simple habit gives me the full 15 minutes of working time I need to ensure a flat finish for flooring installation and leveling success. If you rush this process, you’ll end up with ‘cold joints’—those ugly ridges where two separate pours didn’t blend. This is a nightmare if you are installing tiles like a pro because those ridges will cause lippage, making even the most expensive tiles look poorly installed.
Don’t Let Your Subfloor Steal the Moisture
The most sophisticated mistake I see is underestimating the ‘porosity’ of the slab. Even if you primed once, a very old concrete floor can be so thirsty that it sucks the moisture out of the leveler in seconds. This is often the hidden culprit behind why porcelain tile is cracking in a straight line later on—the leveler never actually bonded because it dehydrated too fast. Use the ‘water droplet test’: drop a few beads of water on the concrete; if they disappear in less than 60 seconds, you need a second coat of primer. Have you ever fallen into this trap of assuming one coat was enough? Let me know in the comments below, because I’ve definitely been there. Getting this right is the only way to avoid telegraphing from the subfloor when you transition to your final hardwood or vinyl finish.
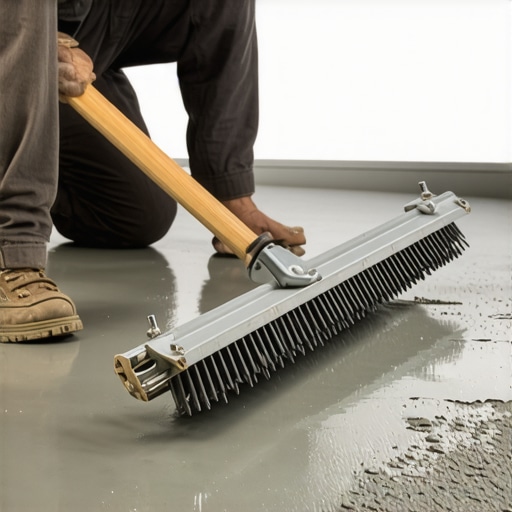
I used to think a regular trowel was enough to move product around. I was wrong. Now, I never start a pour without a gauge rake set to the exact depth I need. This isn’t just about moving mud; it is about mechanical precision. If you are prepping for the secret to getting a flat floor for large format tiles, even a 1/8-inch variance across ten feet can ruin your layout. I use a rake with adjustable pins because it allows me to maintain a consistent thickness even when the subfloor is fighting me. This tool is the bridge between a ‘good enough’ DIY job and a pro-level surface that won’t cause your floating floors to sound hollow when you walk on them later.
The National Wood Flooring Association (NWFA) Technical Publication No. C100 specifically notes that the ‘flatness’ of a subfloor is the single most critical factor for preventing squeaks and structural noise in hardwood installs. It is why I am so obsessive about the ‘chalk dust’ method. By using the chalk dust secret for finding low spots in subfloors, you can visually confirm your leveler did its job before you commit to expensive materials. I personally take a long straight-edge and drag it across the dry leveler with a handful of chalk dust; if the dust remains in a pocket, that spot is low and needs a feather-finish patch. Don’t skip this, or you will be chasing flooring installation mistakes for the next decade.
Looking ahead, I see a shift toward 3D-mapping technology entering the residential market. We are already seeing professional lidar scanners that can map a room’s topography and calculate exactly how many bags of leveler you need down to the ounce. This tech is becoming more accessible, and soon, mastering hardwood floor refinishing expert tips for 2025 will likely revolve around digital floor analysis before the first bucket is even mixed. This will eliminate the guesswork that causes so many of the ‘topographical map’ issues I see today.
How do I keep my leveled floor from failing over the years?
The secret isn’t actually in the leveler itself, but in managing the climate of the room. Once that leveler is down and your flooring is installed, the expansion and contraction of the subfloor can still cause the leveler to de-bond if the environment isn’t stable. I always recommend a high-quality dehumidifier for basements or ground-floor rooms. If you’ve upgraded to wood, following hardwood floor care secrets to longevity and shine is non-negotiable. You’ve spent the time getting the base right; do not let a lack of environmental control crack your beautiful work from the bottom up. For tile installations, this means ensure you are installing tiles like a pro by using uncoupling membranes over your leveler to handle any minor future shifts without cracking your grout. My final piece of advice is this: Before you pour your next bag, go get an adjustable gauge rake. Stop relying on gravity to do the work of a professional tool. If you want a result that lasts a lifetime, you have to control the depth yourself.
The Most Expensive Lessons My Failed Pours Ever Taught Me
- The 15-Minute Window is Absolute: I used to think I could go back and touch up a spot twenty minutes in. I was wrong every single time. Once the material begins to skin, touching it creates ripples that are impossible to sand out. If you miss the window, let it dry and address it later.
- Primer is the Secret Language of Concrete: I’ve seen countless floor leveling challenges that were blamed on the product when the real issue was a thirsty slab. If you don’t seal those pores, the concrete will steal the water from your mix, leaving you with a brittle, cracked mess.
- Mixing is Not a Race: Using a high-speed drill is the fastest way to ruin a bag. I now stick to low RPMs to keep air out of the slurry, which prevents the tiny pinholes that can ruin a smooth finish for how to achieve flawless floor leveling before tile laying.
The Trusted Gear I Never Leave in the Truck
Experience has taught me that the right tools are what separate a DIY look from a showroom finish. I never start a project without my adjustable gauge rake. It allows me to set the exact depth of the pour so I’m not relying on the material’s ‘self-leveling’ marketing to do the work for me. I also highly recommend a thermal moisture meter; mastering how to use a moisture meter before you lay wood floors is the only way to know if your subfloor is actually ready to bond. Finally, an egg-beater style paddle is a must-have for a consistent, lump-free mix that flows the way it was designed to.
Transform Your Space from the Ground Up
It is easy to feel defeated when your first attempt at leveling looks like a shattered windshield, but remember that even the pros started with a few cracked pours. By slowing down, prepping the surface with flooring installation fundamentals, and respecting the chemistry of the product, you can create a mirror-smooth base that will make your final flooring look incredible. You are building the foundation for a home that feels solid and high-end. Have you ever had a pour start to set up on you faster than you could spread it? Tell me your story in the comments below!