
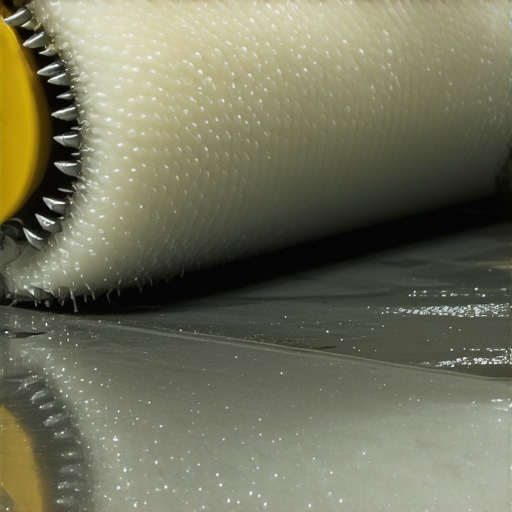
I stood there with a bucket in one hand and a look of pure horror on my face as my expensive self-leveler turned into a series of miniature mountain ranges. I had followed the instructions on the bag to a tee, or so I thought. I figured gravity was a universal constant that would naturally iron out the kinks. Boy, was I wrong. Instead of a glass-like surface ready for my new tiles, I ended up with a lumpy, bubbly mess that looked more like the surface of the moon than a subfloor. It was a disaster that forced me to learn precise floor leveling techniques to achieve flawless surfaces the hard way.
The Day I Realized Gravity Is Not Your Friend
Let’s be honest: we’ve all been there. You pour that liquid gold onto the slab, expecting it to behave like water, but it acts more like thick molasses. My biggest mistake early on wasn’t just the mixing; it was the arrogance of thinking the material would do all the work. I didn’t realize that trapped air and surface tension were conspiring against me. If you’ve ever wondered why your self-leveling pour looks like a topographical map, it’s usually because you didn’t help the bubbles escape. Today, I’m going to show you the one tool that changed my flooring game forever: the spiky roller. We are going to solve the mystery of the ‘pockmarked’ floor and ensure your next pour is so smooth you could practically skate on it.
Does a Plastic Roller Really Live Up to the Hype?
I used to be a massive skeptic. I thought, ‘Why would I spend extra money on a rolling pin with spikes when I can just use a squeegee?’ But here is the cold, hard truth: a squeegee moves the product, while a spiky roller finishes it. One of the most humbling moments of my career was when I skipped the primer step and tried to fix the resulting bubbles with just a trowel. I learned quickly that you must prime concrete before every leveling job or you’re just begging for failure. The roller isn’t just about moving the mix; it’s about breaking the surface tension and releasing the pinhole-sized air pockets that ruin a finish. According to research by the American Concrete Institute, air entrapment in thin-layer cementitious materials can lead to significantly reduced surface durability and unsightly ‘ghosting.’ Have you ever spent a fortune on self-leveler only to have it look like a piece of Swiss cheese once it dried? It’s a gut-wrenching feeling. But once you master this ‘secret’ tool, those days are over. We’re moving past the common floor leveling challenges and straight into the pro-level results you deserve. Let’s get into the nitty-gritty of how to actually use this thing without making a bigger mess.
Stop the Cracks Before You Even Open the Bag
Before you touch that roller, you need a clean slate. I once tried to level a garage floor that had some old oil spots. I thought the leveler would just bridge over them like a heavy-duty rug. Total rookie move. The whole thing peeled up like a bad sunburn a week later because the bond never formed. This is why the concrete etching step you shouldn’t skip before leveling is non-negotiable for smooth adhesion. It creates a mechanical ‘tooth’ that keeps your floor from turning into a floating sheet of brittle chips. You also need to know if you are dealing with hidden moisture. A slab can look bone-dry but be sweating internally like a marathon runner. If you do not check, that moisture will push your leveler right off the floor. I have learned that you must understand how to use a moisture meter to prevent floor failure before committing to the pour. It is the difference between a floor that lasts decades and one that fails in months.
Pour Like a Pro Instead of a Puddle
When you start the pour, think of it like icing a giant cake. You are not just dumping material; you are strategically placing it. Start at the farthest corner and work your way toward the exit. If you are working over specialized systems, be extra cautious. For instance, if you do not pay attention to the depth, you will quickly find out why your floor leveler is cracking over radiant heat pipes—usually because the layer was too thin or the pipes moved during the pour. I remember a kitchen remodel in Troy where I was rushing and poured the mix too thick in one spot and too thin in another. By the time I realized the air hadn’t fully escaped, the material had already started to set. I ended up with a surface that looked like a sponge. I had to go back and investigate why your subfloor patching compound is cracking under pressure just to patch the holes I could have avoided with better preparation.
Give Your Spiky Roller the Right Dance Moves
This is where the magic happens. Once the leveler is down, you take that spiky roller and move it through the wet material in a cross-hatch pattern—north to south, then east to west. Think of it like aerating a lawn but with much higher stakes. The spikes do not just ‘roll’; they break the surface tension and pop the air bubbles that cause those annoying pinholes. If you are prepping for tile, remember that how to achieve flawless floor leveling before tile laying requires you to keep the roller moving constantly but slowly. If you whip it around like a paint roller, you will actually introduce more air, defeating the whole purpose. The goal is a uniform, glass-like finish. Also, pay close attention to your transitions. If you do not blend the edges where the leveler meets the existing floor, you will be stuck searching for how to hide a bad subfloor transition without a transition strip later. Keep the roller wet with a bit of leveler and feather those edges until they disappear into the slab. This ensures a seamless base for whatever flooring you choose to install next.
Watch the Clock and the Consistency
Self-leveling compound has a ‘working time’ shorter than a toddler’s attention span. Usually, you have about 15 to 20 minutes before it starts to gel. If you keep rolling after it has begun to set, you will leave permanent tracks that look like tire ruts in the mud. I’ve seen pros try to save a ‘dead’ pour by adding more water, but that just ruins the structural integrity. Always follow the water-to-powder ratio on the bag exactly. If the mix is too thin, the aggregate sinks; if it is too thick, the spikes won’t be able to do their job, and you’ll end up with how to prevent ghosting marks on your self-leveling finish as your new number one search query.Building on that mix consistency, there’s a trap most pros won’t tell you: the temptation of the ‘extra splash’ of water. Everyone says a little more water makes the leveler flow better, but in my experience, it’s a recipe for structural disaster. Research published by the Tile Council of North America (TCNA) warns that exceeding the water ratio by even a fraction can lead to surface chalking and a total failure of the bond. We are moving into the territory of mastering floor leveling pro secrets for perfect installations where precision is the only currency. If the mix is too thin, the polymers separate, leaving you with a dusty surface that will never hold a tile.
Stop Treating Self-Leveler Like a Magic Eraser
Many people believe that self-leveler can bridge any gap or fix a sagging structure. This is fundamentally wrong. If your subfloor has a ‘bounce,’ no amount of liquid stone will stop the eventual crack. You need to address the bones of the house first. I’ve seen homeowners pour buckets of expensive material over a dipping kitchen floor, only to have it shatter like glass underfoot because they didn’t realize how to fix a bouncy floor with a few well-placed screws before starting the pour. It is one of the most common flooring installation mistakes to avoid for lasting results. Leveler is for flatness, not for structural integrity.
Is Your Subfloor Actually Stiff Enough for That Heavy Tile?
This is the advanced question that separates the weekend warriors from the masters. It’s all about deflection—the measure of how much a floor bends under a load. If you are installing large-format porcelain, your floor needs to be significantly stiffer than it would be for carpet or even vinyl. I remember a project where a client skipped the extra subfloor layer, leading to the plywood mistake that causes grout cracks in troy bathroom remodels. They had a perfectly level floor, but not a stable one. Always check your joist span before you pour. If the subfloor moves even a millimeter, you’ll be searching for why your porcelain tile is cracking over plywood seams within six months. Even hardwood isn’t immune to these sub-surface issues; while wood is flexible, the finish and the tongue-and-groove joints are not. If you’re switching to a finicky material like exotic wood or bamboo, remember that why bamboo floors need triple the acclimation time is a lesson in patience you don’t want to learn the hard way. Another hidden nuance is the relationship between the underlayment and expansion joints. Most beginners pour a monolithic slab from wall to wall, ignoring the fact that buildings move. This oversight is exactly why your tile grout is cracking at the room corners. You must honor those joints even through the leveling layer. Have you ever fallen into this trap of thinking level meant structural? Let me know in the comments.Once you realize that a level floor isn’t necessarily a structurally sound one, you start to see maintenance through a different lens. If you’ve gone through the sweat and tears of a pour, the last thing you want is for your daily cleaning routine to slowly eat away at the finish. I see so many people spend thousands on a remodel only to ruin it with a mop bucket full of harsh chemicals. You have to treat your new surface with respect. For example, if you’ve chosen natural materials, you must stop using vinegar on your hardwood floors immediately. The acidity breaks down the polyurethane bond faster than you can say ‘re-sand.’ Instead, look into hardwood floor care secrets to longevity and shine that focus on pH-neutral cleaners and micro-fiber technology.
Why You Need a Laser Instead of a Prayer
Professional results require professional measurements. I don’t care how good your eye is; it isn’t a replacement for a 360-degree green beam. When I’m laying out a complex room, I always rely on the laser level move for perfectly straight hallways. It allows you to see the high and low spots across 40 feet without ever having to crawl on your knees with a 4-foot level. This isn’t just about vanity; it’s about ensuring that your tile selection tips for elegant hardwood floors in 2025 actually result in a floor that doesn’t have ‘lip-page’—where one tile edge sits higher than the next. According to the National Wood Flooring Association (NWFA) Technical Manual, professional installers are required to document moisture content in both the subfloor and the finish material before installation even begins. Failing to do so can void your warranty and lead to the very issues we discussed earlier, like cupping or crowning. 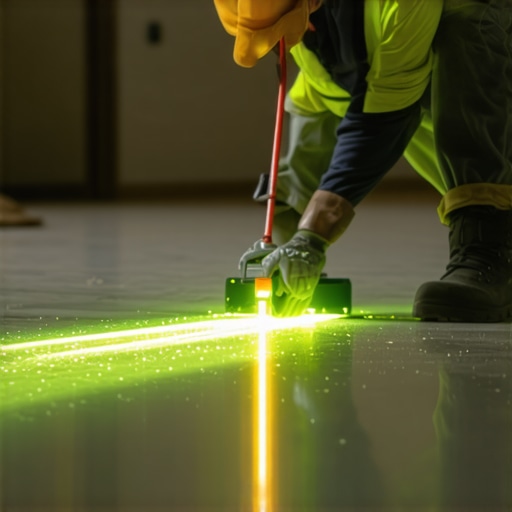
How do I maintain my new flooring for the long haul?
Maintenance starts the moment the last board or tile is set. It’s about prevention. If you’re living in a high-moisture area, you might need to know how to save a water damaged wood floor with a vacuum system if a spill goes unnoticed. I predict that in the next few years, we are going to see smart-home sensors embedded in subfloors that alert your phone the second a moisture barrier is breached or a leak starts under your kitchen island. Until then, you are the sensor. Keep an eye on your humidity levels and invest in high-quality felt pads for every piece of furniture. If you’re ready to take your skills to the next level, I strongly suggest you grab a moisture meter and a laser level before your next project. It’s the single biggest leap you can make from ‘DIY-er’ to ‘Pro.’ Don’t just guess; measure and document everything.
Hard Truths I Paid for in Wasted Bags of Leveler
Through trial, error, and several ruined buckets, I have discovered that the ‘working time’ listed on the bag is more of a suggestion than a rule. If you are working in a room that is over 75 degrees, that 20-minute window disappears in a heartbeat. I have learned to always keep a ‘plan B’ for transitions because sometimes even the best pour needs a little extra help to look perfect. This is why following a step-by-step guide to flooring installation and leveling success is critical. Another lightbulb moment was realizing that drill speed is a silent killer; using a high-RPM mixer whips so much air into the compound that even a spiky roller struggles to keep up. Finally, never underestimate the power of a second set of hands—one person mixes while the other rolls to ensure you never lose your ‘wet edge.’
The Gear I Never Leave the Truck Without
If you want to move beyond basic DIY and achieve a glass-like finish, your toolkit needs an upgrade. I personally trust the TCNA Handbook for every technical specification; it is the industry bible for avoiding the trowel size error that leads to hollow sounding tiles. For equipment, I swear by a high-quality aluminum-frame spiky roller—cheap plastic ones can shed ‘teeth’ into your wet floor, creating a nightmare to fix. I also rely heavily on a 360-degree green beam laser for layout. For a deep dive into how these tools work together, check out the ultimate guide to floor leveling for a perfect finish. These aren’t just gadgets; they are the difference between a floor that looks okay and one that looks flawless.
#IMAGE_PLACEHOLDER_E#
Stop Fearing the Fluid Stone
The first pour is always the scariest, but once you see that liquid stone flatten out into a perfect horizon, you will never go back to the old way of shimming and hoping. Taking the time for mastering floor leveling pro secrets for perfect installations is an investment that pays off every time you walk across your house without hearing a single squeak or seeing a lipped tile. Don’t let the fear of a messy bucket stop you from creating a professional-grade foundation. You have the knowledge and the techniques—now it is time to get to work. Have you ever had a self-leveling project turn into a topographical disaster? Let me know your story in the comments below!