
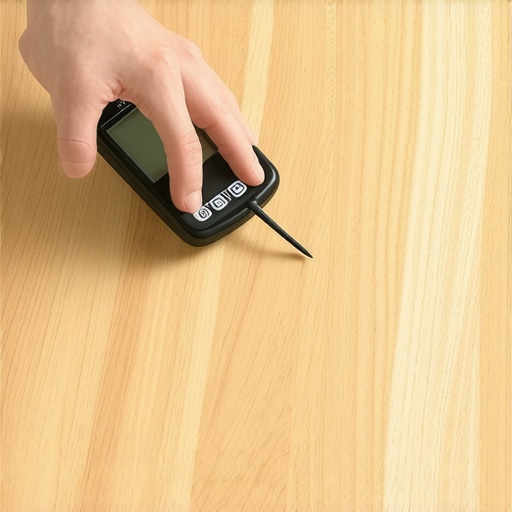
I spent three Saturdays laying down what I thought was a masterpiece of a hardwood floor. Four months later, I walked into my living room and felt a distinct “hill” where a flat surface used to be. The cupping was so bad you could slide a credit card under the edges of the planks. It was a $4,000 disaster that happened because I thought I could tell a concrete slab was “dry enough” just by looking at the color. I learned the hard way that moisture is a silent, invisible wrecking ball. Today, I am going to make sure you don’t repeat my heartbreak. We are going to dive into how to use a moisture meter so your floor stays flat, silent, and beautiful for decades.
The Painful Cost of Ignoring Invisible Water
When I first started out, I was impatient. I thought that if the house felt warm and the subfloor looked dusty, I was good to go. I skipped the professional checks and jumped straight into the fun part. That is one of the most common flooring installation mistakes to avoid if you want results that actually last. Wood and tile are stubborn materials; they react to their environment in ways you can’t always see with the naked eye until it is too late. According to the National Wood Flooring Association (NWFA), moisture imbalance is the single most frequent cause of wood flooring failures, ranging from simple squeaks to full-blown structural rot.
Will a Moisture Meter Actually Save My Project?
I know what you are thinking because I thought it too: is this just another tool the big-box stores want me to buy? The short answer is yes, it is absolutely worth it. Whether you are trying to how to identify water damage before a renovation or checking a new slab, the data doesn’t lie. A moisture meter gives you a number, and that number is your insurance policy. If you are working with concrete, you might even want to pair your meter readings with the bucket test to check your concrete slab for a double layer of certainty. Before you even think about how to fix a squeaky subfloor, you have to ensure the environment isn’t fighting you from underneath. Have you ever noticed your floorboards shifting or making strange noises during the change of seasons? That is the moisture talking. Today, I’ll show you how to listen to it before you hammer in that first nail.
Select Your Weapon Between Pin and Pinless Meters
Think of moisture meters like medical diagnostic tools. A pinless meter is your ultrasound—it scans the surface quickly without leaving a mark. A pin-style meter is more like acupuncture; it uses two metal probes to penetrate the wood and get a deep reading. If you are working with expensive finished materials, start with a pinless meter to avoid “scarring” the wood. However, if you suspect deep-seated issues in the subfloor, those pins are essential for reaching the core of the plywood or joists. I always keep both in my kit because you cannot fix what you cannot measure.
Map Your Floor with Precision
Don’t just walk into the center of the room and take one reading. Moisture is rarely uniform. I once worked on a master bedroom where the center of the room was a perfect 8% moisture content, but the corner near the master bath was at 14%. Had I ignored that corner, the boards would have expanded and crushed into each other within a month. You need to create a grid. Take a reading every two to three feet in both directions. This is as important as performing the 3-foot level test for checking subfloor flatness. You are looking for “hot spots”—areas where the subfloor is significantly wetter than the rest of the room.
Trust the Numbers Over Your Instincts
The biggest mistake I see DIYers make is ignoring a high reading because the wood “feels” dry. Wood is hygroscopic, meaning it is a sponge that breathes in the humidity around it. Before you even open the boxes of your new flooring, you need to know the moisture content of the subfloor and the material itself. If there is more than a 2% to 4% difference between them (depending on the plank width), you aren’t ready to install. This is especially true when you learn how to install wide plank hardwood to minimize future gapping, as wider boards are far more sensitive to environmental shifts. You must learn how to acclimate your hardwood without taking over the whole house to bring those two numbers into alignment.
Concrete Demands Its Own Rules
Concrete is a different beast entirely. It can look bone-dry on top while holding a gallon of water an inch below the surface. If you are laying tile or hardwood over a slab, a standard wood moisture meter won’t give you the full story. You need a meter specifically calibrated for concrete or, better yet, a relative humidity (RH) test. This is why I always recommend pairing your electronic readings with the bucket test to check your concrete slab for excessive moisture. It is a low-tech way to verify what the high-tech sensors are telling you. If the slab is sweating, your adhesive will fail, and your floor leveling efforts will literally peel off the ground.
Why Your New Wood Needs a Baseline
Before you start your project, take a reading of a piece of wood that has lived in your house for years—like an old door frame or a piece of furniture. That is your “equilibrium moisture content.” That is the target your new floor needs to hit. If your house naturally sits at 7%, and your new boards arrive at 11%, you are asking for trouble if you nail them down immediately. This is one of those flooring installation fundamentals that separates a pro job from a weekend fail. When you realize why wide planks need more than just nails to stay flat, you start to respect the science of the moisture meter even more. It is not just about the install; it is about the next twenty years of your home’s life.
Most people think once the meter hits 8%, they are ready to rock. But here is the contrarian truth: a moisture meter is only a snapshot of a moment, not a guarantee of the future. I have seen floors fail with “perfect” readings because the installer didn’t account for the house’s seasonal cycle. If you are installing in a house without a functioning HVAC system, those numbers mean nothing. You are measuring the wood in its current state, not its “equilibrium” state. This is one of the most subtle flooring installation mistakes to avoid. Have you ever fallen into the trap of trusting a tool over your environment? Let me know in the comments below.
Can Your Subfloor Be Dry but Still Unstable for Rigid Tile?
Many advanced DIYers focus so much on moisture that they forget about structural integrity. A subfloor can be bone-dry and still be a disaster for tile. If there is too much vertical movement, your grout will crumble regardless of how dry the plywood is. You absolutely must learn how to check for subfloor flex before you lay rigid tile. If the floor bounces when you walk, that is “deflection.” No amount of thinset or “waterproof” labels will save a floor that moves like a trampoline. According to the Tile Council of North America (TCNA), subfloor deflection should not exceed L/360 for ceramic tile and L/720 for natural stone to prevent structural cracking. Checking for this is as important as achieving precise floor leveling techniques.
#IMAGE_PLACE_HOLDER_C#
The biggest “oops” factor I see is what I call the “Primer Panic.” People rush to pour self-leveler to fix a wavy floor, but they skip the specialized primer. This leads to a nightmare scenario where your self-leveler is peeling off the concrete in sheets. It happens because the dry concrete sucks the moisture out of the leveler too fast, preventing a chemical bond. Always prime concrete before every leveling job to ensure the surface is sealed. This nuance separates a floor that lasts five years from one that lasts fifty. If you miss this step, your flooring installation and leveling success will be short-lived.
Stop Treating Acclimation Like a Waiting Game
Common wisdom says “leave the wood in the room for three days.” In my experience, that is terrible advice. If the boxes are stacked high and wrapped in plastic, the wood in the middle of the stack won’t change its moisture content at all. You need to “rack” the wood—take it out of the boxes and spread it out. If you don’t learn how to acclimate your hardwood without taking over the whole house, you are just performing “acclimation theater.” This is especially vital when you realize why wide planks need more than just nails to stay flat; they have a massive surface area that reacts violently to humidity changes. By taking the time to master floor leveling pro secrets and environmental control, you ensure your masterpiece doesn’t turn into a series of “hills” like my first project did. According to the Forest Products Laboratory, wood reaches an Equilibrium Moisture Content (EMC) based on the relative humidity and temperature of its surroundings, so your HVAC must be running for weeks before you even bring the wood inside.
I learned the hard way that a standard cordless drill is the fastest way to ruin a batch of self-leveler and burn out a motor simultaneously. When you are prepping a large area, you need tools that can handle the torque. I personally swear by a dedicated high-torque mixing station. If you don’t use the best way to mix self-leveler for a perfectly smooth surface, you will end up with ‘islands’ of dry powder that create weak spots in your foundation. It is not just about having a paddle; it is about having a motor that doesn’t bog down and introduce air bubbles into the mix. This is just one of the 7 tools you actually need for a professional diy hardwood install if you want to avoid the pitfalls of a ‘weekend warrior’ finish.
Stop Mixing Leveler with a Standard Drill
The sheer density of leveling compounds and thinsets will destroy a consumer-grade drill in minutes. I use a Collomix or a similar dedicated power mixer because the paddle design is engineered to pull the material from the bottom up, ensuring a truly homogenous blend. When you are aiming for precise floor leveling techniques to achieve flawless surfaces, your material consistency is your destiny. If the mix is too thin, it cracks; too thick, and it won’t flow into the low spots. According to Dr. Eugene Wengert, the legendary ‘Wood Doctor’ and Professor Emeritus at the University of Wisconsin-Madison, the structural integrity of any flooring system is only as good as the chemical bond of its base. Poor mixing prevents that bond from ever fully forming.
The Right Grit Makes or Breaks the Finish
If you decide to refinish your own boards, don’t try to save money by skipping sandpaper grits. I’ve seen people go from 36 grit straight to 80, and the result is always a floor covered in deep, visible scratches once the stain hits. You must follow the best grit sequence for sanding red oak to a mirror finish to ensure each pass removes the marks from the previous one. This methodical approach is what separates a floor that looks ‘home-made’ from one that looks like it belongs in a design magazine. It is the core of mastering hardwood floor refinishing expert tips for 2025.
How do I protect my flooring investment over the long haul?
Maintenance is where most homeowners fail after a successful installation. The absolute biggest enemy of your new floor—aside from moisture—is a steam mop. I cannot stress this enough: why you should never use a steam mop on engineered wood floors is a lesson you don’t want to learn by watching your veneers peel. The high-pressure steam forces water into the seams, causing irreversible swelling. Instead, focus on hardwood floor care secrets to longevity and shine that rely on pH-neutral cleaners and microfiber pads. Keeping your indoor relative humidity between 35% and 55% is the ‘goldilocks zone’ that keeps the wood from shrinking or expanding excessively.
Prepare for the Era of Smart Subfloors
The future of flooring isn’t just better aesthetics; it is embedded technology. We are already seeing the rise of smart moisture sensors that are installed directly into the subfloor, capable of sending an alert to your phone if a pipe leaks under your hardwood. This will revolutionize how we handle how to identify water damage before it becomes a total loss. Imagine a house that tells you it’s too dry for your wide-plank oak before the first gap even appears. For your next project, I challenge you to go beyond the basics: try the pencil trick for scribing wood planks against stone fireplaces to get that seamless, custom-built look that no transition strip can ever match.
What My $4,000 Disaster Taught Me About Patience
If there is one thing I want you to take away from my mistakes, it is that wood does not care about your project schedule; it only cares about the relative humidity in the room. I have learned that the typical three-day acclimation rule is often a myth. Wood is ready when the moisture meter says it is ready, not when the calendar says so. Also, never assume that a waterproof label means you can skip subfloor checks. Why you should not rely on waterproof labels for laminate is a hard lesson for many who find their subfloors rotting underneath a supposedly sealed surface. Finally, remember that your health matters too. While you focus on the wood, learning how to choose flooring that won’t kill your indoor air quality by checking VOC levels is just as vital as checking the moisture content.
#IMAGE_PLACEHOLDER_E#
The Kit That Saves My Back and My Budget
I never walk onto a job site without a few specific tools that I have come to trust over decades of trial and error. First, a high-quality pinless moisture meter is the gold standard for non-destructive testing. Second, I always carry a reliable 6-foot straight edge to verify my progress after mastering floor leveling pro secrets for perfect installations. For tricky transitions, I rely on the National Wood Flooring Association technical manuals. To finish the aesthetic, I always aim for a professional flow. Knowing how to get a seamless look with different flooring types ensures the transition from your moisture-tested hardwood to your perfectly leveled tile is invisible to the eye but structurally sound underneath.
Bring Your Flooring Vision to Life
Taking the extra day to measure, acclimate, and test might feel like it is slowing you down, but it is actually the fastest way to finish correctly. You only want to do this once. By following this step-by-step guide to flooring installation and leveling success, you are moving beyond being a hobbyist and becoming a true craftsman. Your home is your biggest investment, and the floor is the foundation of every room’s style. Do not be afraid of the numbers on the moisture meter; let them guide you to a result you can be proud of for decades. Have you ever found a surprise moisture spot that almost ruined your renovation? Let me know in the comments below!