
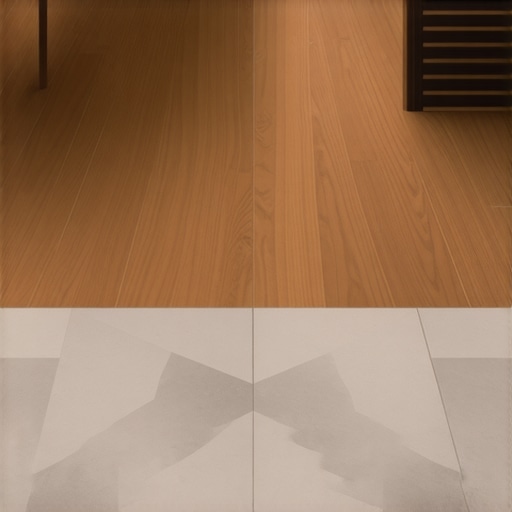
I’ll never forget the sound of my sister-in-law stubbing her toe on the transition between my kitchen and living room back in 2018. It wasn’t just a dull thud; it was the unmistakable crack of wood meeting bone, followed by a very awkward, pained silence. I had spent three weeks picking out the perfect white oak and matching it with some gorgeous slate-look tiles, but I ignored the one thing that actually matters: the subfloor height. I figured a chunky, generic T-molding would hide my lack of planning. I was wrong. It didn’t hide anything; it just looked like I’d glued a speed bump in the middle of my house. If you’ve ever felt that pang of regret looking at a sloppy, uneven seam that ruins the flow of your home, you aren’t alone. Today, I’m going to show you how to move past the ‘good enough’ phase and actually achieve that high-end, flush look where different materials meet without the trip hazards.
Why Your Open-Concept Floor Plan Feels Disjointed
The biggest mistake I made early on—and one I see neighbors make all the time—is assuming that if two flooring materials are roughly the same thickness, they’ll naturally sit at the same height once installed. It sounds logical, right? But once you factor in the underlayment for your hardwood and the thinset mortar for your tile, you’re suddenly dealing with a quarter-inch ‘cliff’ that ruins the visual continuity of your home. To get it right, you have to look at the project from the ground up, quite literally. Before you even buy your materials, you need to master the 3-foot level test for checking subfloor flatness like a pro. If that base isn’t perfect, your ‘seamless’ transition will be anything but. I learned the hard way that tile selection tips for elegant hardwood floors in 2025 aren’t just about color matching; they’re about physical compatibility. When I did my own kitchen, I picked a heavy porcelain that required a much thicker bed of mortar than I anticipated. The result was a step-up that looked accidental rather than intentional. By using precise floor leveling techniques to achieve flawless surfaces, you can actually manipulate the subfloor height in specific zones to ensure that when your tile meets your wood, they are perfectly flush. This is the difference between a DIY project and a professional-grade renovation.
Is a Completely Flush Floor Actually Realistic for a DIYer?
A lot of people ask me if it’s actually worth the extra effort to avoid those metal or wood transition strips. They worry that without them, the floors will shift, buckle, or crack during seasonal changes. The truth is, while some expansion gap is necessary, you can absolutely achieve the secret to seamless flooring transitions between kitchen and living rooms by using color-matched flexible caulk or specialized edge profiles that sit level with the floor surface. However, this only works if your prep work is immaculate. According to the National Wood Flooring Association (NWFA), a subfloor should be flat to within 3/16 of an inch over a 10-foot radius to avoid structural issues and aesthetic failures. If you’re currently staring at a height gap and wondering how to fix it, have you ever tried to hide a height difference with a transition strip, only to have it drive you crazy every time you walk over it? We are going to solve that today by diving into the ultimate guide to floor leveling for a perfect finish. Transitioning between rooms shouldn’t feel like navigating an obstacle course; it should feel like a natural extension of your home’s design.
Stop Trusting Your Eyes and Start Measuring
Think of your subfloor as the foundation of a skyscraper. If it’s tilted even a fraction of an inch at the base, the top floor is going to be a disaster. To avoid that dreaded ‘cliff’ between your kitchen tile and living room oak, you have to start with a literal blank slate. I remember one job where I thought I could just ‘feather’ out a height difference using extra thinset. It was a disaster. By the time I realized my mistake, the tile was already setting, and I had created a literal ‘ski jump’ that tripped everyone who walked through the door. I ended up spending my Saturday morning with a hammer and a prayer. Now, I never skip the the 3-foot level test for checking subfloor flatness like a pro. You’re looking for ‘birdbaths’—those shallow dips that seem harmless until they cause your planks to bounce or your tiles to crack. If you find them, you need to mark them with a pencil immediately.
Why You Must Prime Every Single Time
Most people want to jump straight to the ‘fun’ part of pouring the leveler, but why you must prime concrete before every leveling job is the most important lesson you’ll ever learn. Think of the primer as the glue that keeps your leveling compound from peeling off like a bad sunburn. If you skip this, the porous subfloor will suck the moisture out of your leveler too fast, and you’ll end up wondering why your self-leveling compound is cracking like a dry-lake bed.
Calculate Your Way to a Perfectly Flush Seam
This is where the math happens. You need to measure the total thickness of your tile (including the thinset) and compare it to your hardwood (including the underlayment). If your hardwood setup is 3/4 inch and your tile setup is 5/8 inch, you need exactly 1/8 inch of leveling compound to bridge that gap. 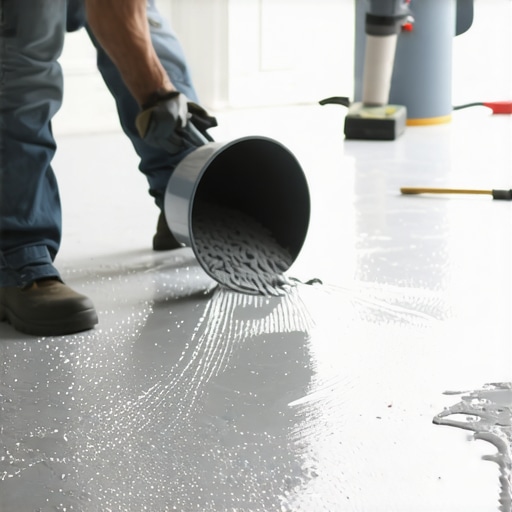
Master the Art of the Perfect Pour
Once you’ve prepped and calculated, it’s time to mix. This is a high-stakes race against the clock because self-leveler sets faster than you’d think. You need to know the best way to mix self-leveler for a perfectly smooth surface, which usually involves a high-torque drill and a specific mixing paddle. If you mix it too thin, it won’t have the structural integrity; too thick, and it won’t flow into the dips. I usually use a spiked roller to help the air bubbles escape, which prevents those tiny craters from forming on the surface. If you’re working on a wood base, you might need to look into how to level a plywood subfloor with shims and plywood scraps before you even think about pouring liquid leveler. It’s all about layering. Following a step-by-step guide to flooring installation and leveling success ensures that by the time you lay that first piece of wood next to your tile, they are shaking hands at the exact same height.Self-leveling compound is one of those products where the name is actually a bit of a marketing lie. I’ve seen so many DIYers—and even some professionals—pour the mix and then just stand back, expecting physics to do 100% of the work. But the reality is that self-leveler has surface tension; it’s more like heavy syrup than water. If you don’t manually help it along, it will settle into ‘islands’ that are actually higher than the rest of your floor. I’ve learned that mastering floor leveling pro secrets for perfect installations starts with using a gauge rake to set the depth and a spiked roller to break the surface tension and release trapped air. Failing to do this is exactly why your self-leveling compound is cracking like a dry-lake bed before you even get the first plank down. 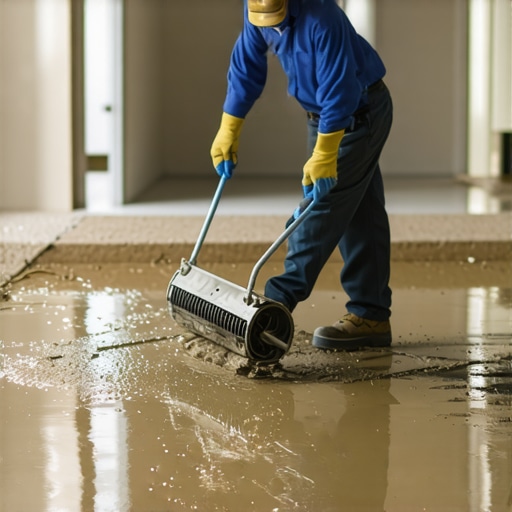
Self-Leveler Still Needs a Human Touch
The most common contrarian view I hold is that you should never trust a ‘flat’ subfloor without checking its structural integrity first. A floor can be as flat as a billiard table, but if it has too much vertical movement, your installation is doomed. This is where you have to look at ‘deflection.’ According to the Tile Council of North America (TCNA), the standard for ceramic and porcelain tile is a deflection limit of L/360. This means for a 10-foot span, the floor should not bend more than a third of an inch under a full load. If you ignore this, you’ll eventually realize why porcelain tiles crack more often than ceramic on wood—it isn’t the tile’s fault; it’s the subfloor’s flex.
How Much Subfloor Flex Can Your New Tile Actually Handle?
If you are worried about your floor’s ‘bounce,’ you need to perform the simple test to see if your subfloor is strong enough for tile. This involves measuring the joist span and the thickness of your subfloor material. I always suggest that homeowners how to check for subfloor flex before you lay rigid tile by using a dial indicator if they want to be truly precise. A rigid floor is a happy floor. If you skip this, no amount of leveling compound will save your grout lines from eventually powdering and popping out.
The Mixing Mistake That Turns Concrete into Chalk
Here is the ‘oops’ factor that ruins more jobs than anything else: over-watering the mix. It is incredibly tempting to add just a half-quart more water to the bucket to make the leveler flow into a tight corner. Don’t do it. Over-watering dilutes the high-performance polymers that allow the leveler to bond to your substrate. When it dries, you won’t have a solid stone surface; you’ll have a dusty, chalky mess that won’t hold adhesive. This is the primary reason for why your self-leveler is peeling off the concrete in sheets. Furthermore, using the wrong amount of water leads to the trowel size error that leads to hollow-sounding tiles because the thinset won’t properly grip the compromised surface. Always stick to the manufacturer’s exact ratios and mix with a high-speed drill to ensure every particle is hydrated. Have you ever fallen into this trap? Let me know in the comments.
Stop Eyeballing Your Heights and Buy a Laser Level
I used to think my trusty 4-foot bubble level was the gold standard, but let me tell you, cumulative error is a real thief. If you are off by even a sixteenth of an inch every four feet, by the time you cross a twenty-foot living room, you have a massive problem. This is why I now swear by a 360-degree green beam laser level. It’s one of those 7 tools you actually need for a professional DIY hardwood install because it provides a constant, unmoving reference point across the entire floor. When I’m trying to match a tile height in the kitchen to a hardwood height in the dining room, I set the laser once and measure down from the beam to the subfloor. If the distance isn’t identical in both zones, I know exactly how much leveler to add. No more guessing, no more ‘close enough.’
How do I make these flush floors last for decades?
The secret isn’t just in the installation; it’s in the ongoing care and the structural planning you do before the first furniture leg touches the surface. Long-term success requires understanding hardwood floor care secrets to longevity and shine. One major tip: throw away your steam mop. I’ve seen beautiful, level transitions ruined because moisture was forced into the seams, causing the wood to swell and lip over the tile. This is exactly why you should never use a steam mop on engineered wood floors. Stick to a slightly damp microfiber pad and pH-neutral cleaners to keep the materials from reacting to each other at the seam.
Why Every Large Floor Needs a Hidden Breathing Room
One thing that even the pros sometimes skip is a proper movement joint. According to the National Tile Contractors Association (NTCA) in their EJ171-24 guidelines, any tiled area exceeding 25 feet in any direction (or 15 feet if exposed to sunlight) requires a dedicated expansion joint. When you have a flush transition between wood and tile, that seam is the natural place for movement. Instead of a hard grout line that will eventually crack, use a color-matched 100% silicone sealant. This allows the floor to ‘breathe’ without creating a trip hazard. If you don’t plan for this, you’ll be looking for how to fix a hollow sounding tile without tearing it up in about two years when the pressure causes the tile to de-bond. 
The Future of Leveling Might Be Smarter Than Us
Looking ahead, I predict we are going to see a massive shift toward smart-leveling compounds that change color when they reach the perfect moisture content for flooring. We are already seeing modular subfloor panels that come pre-leveled and shimmed from the factory. Until that becomes the affordable standard, though, your best bet is mastering the manual techniques like the pencil trick for scribing wood planks against stone fireplaces to ensure every cut is surgical. If you’re ready to stop settling for ‘good enough’ and want that high-end, seamless flow, I challenge you to try the laser-reference method on your next project. It’s the single biggest upgrade you can make to your toolkit. If you have questions about specific room layouts, feel free to reach out via our contact us page.
Hard Lessons from the Subfloor Trenches
Reflecting on a decade of dust and debris, I have realized that the most expensive tool in your kit is the one you didn’t use: the level. I used to think I could ‘feel’ if a floor was flat with my boots, but your eyes and feet will deceive you every time. One of my biggest lightbulb moments was realizing that floor leveling isn’t about making the floor level to the earth, but making it flat to itself. If you ignore this, you’ll spend years tripping over the very floor you paid thousands to install. Another hard-won secret is that the transition point is where your home’s structure breathes; if you choke that seam with hard grout, the house will eventually win and crack it. I have also learned that avoiding floor leveling challenges common mistakes and how to avoid them is 90% preparation and 10% pouring. If you take the time to use the 3-foot level test for checking subfloor flatness like a pro, the actual installation becomes a victory lap rather than a rescue mission.
The Gear That Separates Pros from Amateurs
If you are serious about achieving a high-end look, you need to look beyond the basic hammer and saw. My non-negotiable toolkit includes a 360-degree green beam laser level—it is the only way to ensure your kitchen tile and living room wood are truly on the same plane across a large open-concept space. I also swear by the TCNA Handbook and NWFA Guidelines; these are the ‘bibles’ of the industry that keep you from making costly structural errors. For the physical work, a heavy-duty spiked roller is essential for removing air bubbles in your leveler, which is key to preventing flooring installation mistakes to avoid for lasting results. Finally, don’t forget 100% silicone sealant for those transition seams—it provides the flexibility needed for the expansion joint secret for large tiled living areas that maintains a flush look year-round.
Build a Floor That Stands the Test of Time
At the end of the day, a beautiful home is built on a foundation of patience. It is incredibly tempting to rush through the leveling phase to see those gorgeous hardwood floors or elegant tile patterns come to life, but your future self will thank you for the extra day of prep. When you step onto a floor that is perfectly flush, with no ‘clicks,’ ‘creaks,’ or ‘cliffs,’ you’ll understand why professionals obsess over the subfloor. You now have the roadmap to move beyond basic DIY and into the realm of master-level flooring installation. Take a deep breath, double-check your measurements, and start your project with the confidence that your floors will be as functional as they are beautiful. Have you ever discovered a surprise dip in your subfloor halfway through a project? Let me know how you handled it in the comments below!