
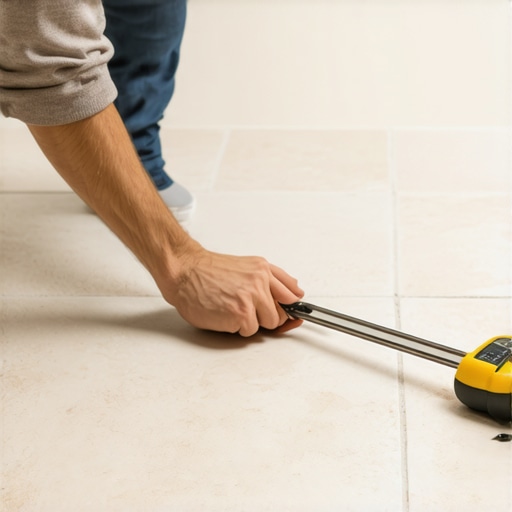
Imagine spending hours laying beautiful, new tiles only to find out later that your subfloor wasn’t up to the task. I learned this lesson the hard way when I spent a weekend installing a stunning marble mosaic only to have it crack underfoot days later. That sinking feeling when you realize the floor wasn’t as solid as you’d hoped is unmistakable. It’s a rookie mistake that can ruin your project and stretch your budget.
The Real Reason Your Tile Might Fail Before You Know It
So, why does this happen? Well, a significant culprit is the strength of your subfloor. If it’s weak, flexible, or uneven, your beautiful new tile job can quickly turn into a nightmare. I found that a simple, straightforward test could have saved me from installing on a compromised surface. By doing this quick check beforehand, you can avoid costly rework and enjoy a durable, lasting finish.
Is the Test Worth the Hype? Here’s What I Didn’t Know at First
Initially, I thought I could just eyeball the subfloor — big mistake. One early misstep I made was ignoring the importance of a proper test for subfloor stability. Experts like those at Tile Trend Shop emphasize that assessing subfloor integrity is crucial for lasting results. A quick test I missed would have revealed areas prone to movement, preventing tile cracking down the line.
If you’ve ever wondered whether your existing floor can handle a tile upgrade, you’re not alone. Many homeowners overlook this step, thinking it’s unnecessary or too complicated. I’ll show you how a simple test can make all the difference and share insights from experienced tile installers so you can rest assured your subfloor is ready for the challenge.
Now, let’s get practical. Here’s exactly how you can perform this easy test at home, and why it sets the foundation for a successful tile project. Ready? Let’s dive in!
Perform a Simple Floor Stability Test
Start by placing a few heavy objects—like a stack of books or a toolbox—on different areas of your floor. Walk around and observe if the objects bounce or shift, indicating movement in the subfloor. This quick step reveals loose or weak spots that could compromise your tile or hardwood installation.
Use a Marble or Ball Bearing
Place a marble or small ball bearing on the floor and give it a gentle push. If it rolls unexpectedly or moves significantly, your subfloor may be flexing too much. This analogy helps visualize uneven or unstable surfaces that need addressing before proceeding.
Check for Floor Flexibility
Apply downward pressure with your body weight on different spots. A firm, unyielding surface is ideal. If your floors bend or produce creaking sounds, it’s a sign the subfloor lacks rigidity. Tackling this early prevents cracks or tiles popping later, saving you time and money.
Tap with a Hammer or Flat Tool
Using a hammer or a flat screwdriver, gently tap the floor in multiple areas. Listen for hollow sounds, which indicate voids beneath. These hidden gaps need filling to establish a solid base. This step is akin to testing the integrity of a canvas before painting—it ensures a stable foundation for your project.
Evaluate the Floor Levelness
For a more precise assessment, use a long straightedge or a level across various sections. The goal is to identify high or low spots exceeding a 1/4-inch difference. Uneven surfaces can be sanded or leveled with self-leveling compounds, but only after confirming the extent of the irregularities. This process is a key step in ensuring a seamless tile or hardwood finish.
Document Problem Areas
Mark any spots that show excessive movement or unevenness with chalk or painter’s tape. Address these before installing your flooring. Remember, skipping this step can lead to costly repairs down the line, as cracked tiles or warped hardwood are often the result of a compromised subfloor.
Share Your Experience
When I first performed this test in my own home, I discovered a few weak spots near the entrance. I used a concrete patch and added a layer of plywood to reinforce the area. The result was a sturdy, flat surface that made my tile install effortless and professional-looking. These simple checks are invaluable, especially for older homes with potential underlying issues.
If you’re unsure about how to proceed or need additional guidance, consult the experts at Tile Trend Shop. Proper preparation is the secret to a durable and beautiful floor that lasts for years.
Many homeowners and even seasoned professionals hold onto certain beliefs about floor leveling and flooring installation that, frankly, are more myth than fact. A prevalent misconception is that a simple visual check suffices to confirm a floor’s flatness. In reality, relying solely on sight or a quick tap can lead to overlooked uneven spots, especially in large spaces where subtle grade differences matter. Advanced leveling requires precise tools and measurement techniques, as outlined in this comprehensive guide. Skipping these steps can result in tiles or hardwood buckling over time, costing plenty in repairs.
Another common mistake focuses on the belief that all subfloors are equally prepared for tile or wood. Many assume that removing old flooring is enough, neglecting subfloor conditions like moisture content, structural integrity, or existing unevenness. Neglecting to perform thorough subfloor assessments and correct deficiencies beforehand is a surefire way to create future headaches. Experts recommend detailed inspections and appropriate corrections, as discussed in this expert resource. Failing to do so often leads to cracked tiles, loose hardwood, or even catastrophic failure.
What advanced mistakes do contractors often make that compromise durability?
One nuanced pitfall is misjudging the right type of leveling compound or underlayment for specific conditions. For instance, using a standard self-leveling underlayment on a damp or highly porous subfloor can cause cracking and delamination. An expert approach involves selecting materials based on subfloor properties and environmental factors, as outlined at this detailed tutorial. Making the wrong choice here can undermine the entire floor’s stability, leading to premature failure and costly repairs.
Furthermore, many overlook the importance of floor expansion gaps and moisture barriers, especially with large-format tiles or engineered wood. Overlooking these essentials can cause buckling or warping over time. Always follow professional standards, like those advised in this essential article, to ensure longevity and performance of your flooring.
Finally, a less obvious but critical nuance involves the proper curing and drying times of adhesives and leveling compounds. Rushing this process increases the risk of shifts and cracks. According to recent studies in flooring technology, patience during curing phases significantly impacts floor integrity (see this authoritative source). Remember, meticulousness in each step isn’t just for aesthetics—it’s vital for durability.
In essence, moving from DIY to expert-level flooring involves understanding these nuanced pitfalls and investing in proper preparation and execution. Have you ever fallen into this trap? Let me know in the comments. For a detailed walkthrough of advanced leveling techniques, check out this resource to elevate your project from good to great.
Keeping It Working: Essential Tools and Maintenance Tips
Once you’ve completed your flooring installation, the journey doesn’t end. Regular maintenance and the right tools ensure your floors remain pristine and durable over the years. From specialized cleaning equipment to inspection devices, having the appropriate gear makes all the difference. Personally, I recommend investing in a high-quality floor scraper, a microfiber mop, and a moisture meter. The scraper helps remove stubborn debris without damaging the surface, while the microfiber mop traps dust effectively. The moisture meter is invaluable for monitoring humidity levels, especially with hardwood floors that are sensitive to moisture fluctuations, as discussed at this resource.
On the software front, I utilize digital leveling tools and laser measures to perform periodic assessments of floor flatness, which is crucial for maintaining a seamless appearance. Advanced laser leveling devices provide real-time feedback and help identify subtle deviations that could cause problems later. As the industry evolves, integrating IoT sensors that monitor environmental factors like humidity and temperature will become standard for preemptive maintenance, signaling a shift towards smarter flooring care.
Predicting the future, I see a trend towards automation—think robotic cleaning systems and AI-driven diagnostics—that will simplify long-term maintenance and enhance flooring longevity. Embracing these innovations now can give you a head start in preserving your investment.
Thinking about proactive upkeep? One effective question to ask yourself is: "How do I maintain my floor’s integrity over time?" Regular inspections for signs of wear, cracks, or moisture intrusion are key. Performing small repairs promptly, such as fixing loose tiles or reapplying sealants, prevents bigger issues down the road.
For instance, I recommend doing a quarterly check using a moisture meter to gauge humidity levels—especially in basements or humid climates—and applying protective treatments when necessary. Additionally, keeping a log of repair dates and conditions helps track the floor’s health and plan future interventions. For hardwoods, proper cleaning with recommended products preserves the finish and prevents scratches, while applying a fresh coat of sealant every few years rejuvenates the surface.
Another tip is to establish a cleaning routine that avoids harsh chemicals, which can damage finishes over time. Gentle cleaners combined with soft mops keep dirt and grime from accumulating, thus extending the life of your flooring. For tiles, sealing grout lines every few years prevents staining and mold growth, maintaining a fresh appearance.
Over the long term, periodic professional assessments can catch issues before they become costly. Expert inspections verify that your subfloor remains stable and that your flooring continues to perform optimally. If you want to ensure your project remains flawless, consider consulting specialists who use laser scanning and advanced diagnostic tools, as outlined in this comprehensive guide.
To put these tips into action, try implementing a moisture monitoring routine combined with gentle cleaning practices. It’s surprising how much preventative care can save you in repairs and replacements down the line. Remember, consistent attention to detail is the best way to keep your floors looking stunning and functioning perfectly for decades.
Lessons That Changed How I Approach Floor Projects
- Always perform a comprehensive subfloor test, even in familiar spaces—what seems solid might hide weaknesses that can cause future disasters.
- Real-world experience beat textbook advice; seeing the effects of neglect firsthand cemented the importance of proper prep work.
- Investing in quality tools and materials might seem costly upfront, but it pays off in the long run with fewer repairs and better results.
- Understanding the nuanced differences between subfloor types and appropriate leveling techniques is essential for durability—don’t settle for a one-size-fits-all approach.
- The most overlooked step isn’t the actual installation but the preparation: ensuring your foundation is flawless sets the stage for a perfect finish.
Tools and Resources That Elevated My Flooring Game
- Ultimate Guide to Floor Leveling: An authoritative resource for understanding when and how to level effectively, tailored for both beginners and pros.
- Consultation with Experts: Personalized advice can pinpoint subtle issues that generic guides might miss, saving time and money.
- Step-by-Step Installation Guide: A detailed roadmap that demystifies the process, ensuring you don’t overlook critical steps.
- Home Revamp Resources: Inspiring ideas and tips that help visualize your project’s potential and avoid common pitfalls.
Your Turn to Elevate Your Flooring Knowledge
Armed with these insights and tools, you’re well on your way to achieving professional-quality flooring. Properly prepared floors not only look stunning but stand the test of time. Remember, every successful project starts with a solid foundation—literally and figuratively. Are you ready to tackle your next flooring upgrade with newfound confidence? Share your experiences or questions below, and let’s build stronger, more durable floors together.
,