
The sun was streaming through my new floor-to-ceiling windows, highlighting the pristine, glassy finish of the 24×48 porcelain tiles I’d just spent a week installing in my living room. I was nursing a coffee, feeling like the king of DIY. Then, I heard it. A sharp, violent crack that sounded like a 22-caliber pistol going off in my house. I looked down, and my heart sank. A hairline fracture was sprinting across the center of the room, cutting through three of my most expensive tiles. I had made the ultimate rookie mistake: I thought the floor was a static object. I was wrong. I didn’t know the expansion joint secret, and it cost me dearly. If you’re planning a big open-concept space, you need to realize your floor is a living, breathing thing that moves with every temperature shift. Today, I’m going to show you how to avoid my $2,000 nightmare.
Large Open Floors Need Room to Breathe
When you are dealing with a massive living area, the sheer volume of material is working against you. Most people assume that if they use the right way to mix thinset for heavy tiles, their floor will stay put forever. But physics doesn’t care about your thinset. According to the Tile Council of North America (TCNA), movement joints are absolutely mandatory for any tile run exceeding 25 feet in any direction. Without them, the tile has nowhere to go when the subfloor expands or the house settles. It eventually buckles under the pressure, leading to those heartbreaking pops and snaps. It’s one of those signs your tile contractor is cutting corners on prep work if they don’t even mention these gaps to you. I learned that the hard way when I realized my subfloor was doing more dancing than I was.
Is an expansion joint actually worth the eyesore?
I get it. You want a seamless, monolithic look that looks like a single slab of stone. You might think an expansion joint is going to stick out like a sore thumb. But here is the secret: when done correctly, they are virtually invisible. I used to be terrified that a movement joint would ruin the aesthetic, but I’ve since found the secret to installing large tiles on a shaky floor often involves these strategic breaks. Have you ever noticed a floor in a mall or an airport? They have them every few yards, and you’ve probably walked over them a thousand times without noticing. In a home, we can use color-matched silicone or specialized profiles that blend right in. Trust me, a thin line of flexible sealant is a thousand times more attractive than a jagged crack running through your grout.
The Mistake That Taught Me Everything
Early in my journey, I figured I could skip the expansion gaps if I just used a really high-quality grout. I was convinced that the grout would be enough to absorb any vibration or movement. This was a total delusion. I ended up seeing why your porcelain tiles are cracking in a perfect straight line firsthand—it’s almost always a lack of movement joints or a telegraphing crack from the slab below. I also ignored the advice regarding why you need a perimeter expansion gap for every room, thinking the baseboards would be enough. They weren’t. Before you even lay your first tile, you have to how to check for subfloor flex before you lay rigid tile to ensure you aren’t fighting a losing battle from day one. Have you ever heard your floor make a strange ‘popping’ sound during a major change in weather? That is your floor screaming for help.
Why Your Subfloor Flatness Is Non-Negotiable
Before you even think about expansion joints, you have to realize that large format tiles are incredibly unforgiving. Think of a 24×48 tile like a sheet of glass; if the floor underneath it has a hummock or a valley, the tile won’t bend to fit—it will just snap. I remember a kitchen remodel where I thought a 1/4-inch dip in the concrete wasn’t a big deal. I tried to ‘fudge’ it with extra mortar. Two weeks later, that tile sounded like a hollow drum every time someone stepped on it. To avoid this, you must perform the 3-foot level test for checking subfloor flatness like a pro. If you find dips, you need to master precise floor leveling techniques to achieve flawless surfaces before the first bit of thinset hits the ground.
The 25-Foot Rule That Saves Your Sanity
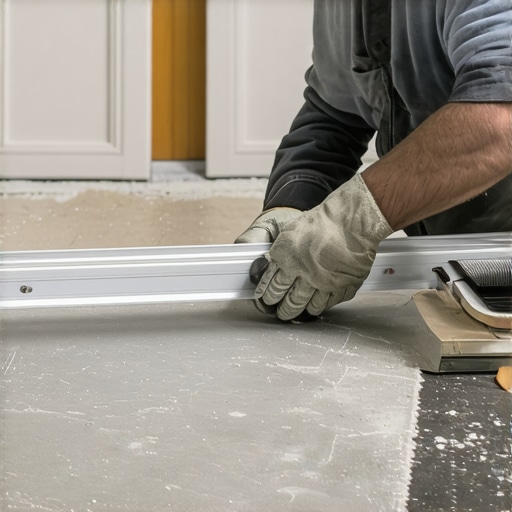
Movement joints are like the expansion gaps on a highway bridge. Without them, the heat makes the structure grow until it buckled. In a home, your flooring does the exact same thing. The industry standard is simple: you need a movement joint every 20 to 25 feet in interior spaces. If the area gets direct sunlight, like a sunroom, that distance drops to every 8 to 12 feet. This isn’t just one of those tile installation pointers that save time and money; it is a structural necessity. When I calculate these gaps, I look for natural transitions, like the line between a kitchen island and the rest of the room, to hide the joint in plain sight.
Don’t Forget the Perimeter Expansion Gap
One of the most common mistakes is tiling right up against the drywall. Your house is essentially a living organism that expands and contracts with the seasons. If the tile is pinned against the wall, it has nowhere to go but up (tenting) or out (cracking). This is why you need a perimeter expansion gap for every room. You should leave at least a 1/4-inch gap between the edge of the tile and the wall. Don’t worry—the baseboard or shoe molding will cover this ‘ugly’ gap completely. It’s also vital to ensure the simple test to see if your subfloor is strong enough for tile has been passed, as a bouncy subfloor will ruin even the best-planned expansion joint.
Ditch the Grout for Flexible Silicone
The biggest ‘pro tip’ I can give you for the actual execution is to never use hard grout in your expansion joint. Grout is rigid; if the floor moves, the grout will just crumble. Instead, use a 100% silicone sealant that matches your grout color. To get that perfectly crisp line that looks like a standard grout joint, use the blue tape secret for cleaner caulking. I apply tape to both sides of the joint, squeeze in the silicone, smooth it with a soapy finger, and peel the tape back immediately. The result is a flexible, waterproof joint that can handle the house’s natural shifting without ever showing a crack. It’s the difference between a floor that lasts five years and one that lasts fifty.
The biggest myth in the flooring world—and I see this on every single forum—is the obsession with the floor being ‘level.’ I’ve watched homeowners spend thousands of dollars trying to make a 100-year-old subfloor perfectly horizontal, only to have their tiles crack six months later anyway. Here is the contrarian truth: your floor doesn’t actually need to be level to be successful; it needs to be flat. You can install a beautiful hardwood or tile floor on a slight pitch, and it will last a lifetime. But if that floor has a ‘birdbath’ (a dip) or a hump, you are headed for a structural disaster. I learned this when I tried to force a luxury vinyl plank over a subfloor that was level but wavy; within weeks, the locking mechanisms snapped like toothpicks because of the vertical deflection.
Stop Obsessing Over Level and Start Measuring Flatness
When you are looking for flooring installation mistakes to avoid for lasting results, the ‘Level vs. Flat’ confusion is at the top of the list. Think of it this way: a ramp is flat, but it certainly isn’t level. As long as your subfloor is a continuous plane, your flooring material can rest on it without stress. The National Wood Flooring Association (NWFA) and the TCNA both emphasize flatness tolerances—typically 1/8 inch over a 10-foot radius—rather than absolute levelness. To get this right, you need to master precise floor leveling techniques to achieve flawless surfaces that focus on removing the peaks and valleys, not fighting the earth’s gravity.
Does a sloping subfloor mean you can’t install large format tiles?
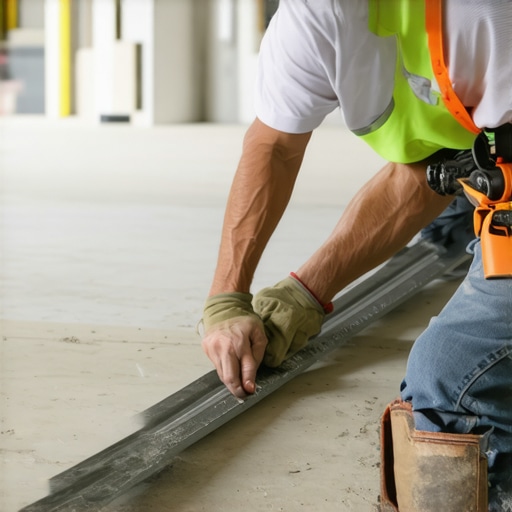
Technically, no. You can absolutely install a 12×24 or even a 24×48 tile on a floor that has a gentle slope, provided you have addressed the flatness. The danger arises when you have a ‘dip’ in that slope. This is where you’ll see why your self-leveling compound is cracking like a dry lake bed if you try to fill a massive hole without the right preparation. If the substrate isn’t flat, the tile will bridge the gap, leaving a hollow space underneath. The first time a heavy piece of furniture sits on that spot, the tile will shatter. This is a common ‘trap’ for those who think the thinset will act as a structural filler—it won’t. Thinset is an adhesive, not a floor leveler.
Why Your Brand New Leveler is Peeling Like a Bad Sunburn
Another nuance that most beginners miss is the ‘primer trap.’ I’ve walked onto jobs where the contractor poured five bags of high-end self-leveler directly onto old concrete. Two days later, you could peel the leveler up in sheets with your bare hands. This usually happens because of ‘outgassing’ or a lack of mechanical bond. Understanding why your self-leveler is peeling off the concrete in sheets is critical. You must use the specific primer recommended by the manufacturer, and you have to let it get ‘tacky’—not dry—before pouring. If you don’t, the dry concrete will suck the moisture out of the leveler too fast, preventing it from ever bonding. It’s one of those mastering floor leveling pro secrets for perfect installations that separates the weekend warriors from the experts.
The Hidden Danger of ‘Flash’ Moisture
The ‘Oops’ factor often comes down to what you can’t see: moisture. I once saw a gorgeous hardwood installation fail because the installer didn’t realize the concrete slab was ‘sweating’ underneath. Before you even think about the the ultimate guide to floor leveling for a perfect finish, you have to perform the bucket test how to check your concrete slab for excessive moisture. If your subfloor is damp, your leveler won’t stick, your glue won’t cure, and your wood will cup. Have you ever fallen into this trap of ignoring the prep work because you were in a rush to see the finished product? Let me know in the comments. It’s a mistake you only make once before you realize that how to achieve flawless floor level before tile laying is 90% preparation and only 10% actually laying the material.
I’ve spent a small fortune on gear over the last decade, but if I had to start my toolkit over from scratch, I’d focus entirely on the mixing station. Most DIYers use a standard cordless drill and a cheap paint paddle for their mortar, but that is a recipe for air bubbles and weak bonds. I personally swear by the Collomix DLX helical mixer. It is designed to shear the material from the bottom up, which is absolutely essential for the best way to mix self-leveler for a perfectly smooth surface. If your mix isn’t perfectly homogeneous, your floor will have invisible soft spots that you won’t discover until a heavy cabinet or chair leg settles in three years later. It is one of those 7 tools you actually need for a professional diy hardwood install if you want to avoid the ‘crunchy’ sound of delaminating material.
How do I maintain my floor finish without ruining it?
The most common question I get in my inbox is about the ‘cloudy’ look that develops after six months. Usually, the culprit is the cleaning method. I’ve seen homeowners destroy a $15,000 installation by using vinegar or high-heat steam. You have to realize why you should never use a steam mop on engineered wood floors; it essentially forces moisture into the micro-joints under high pressure, causing the edges to swell and peel. Instead, stick to a pH-neutral cleaner and a dry microfiber pad. For those with hardwood, hardwood floor care secrets to longevity and shine revolve around one golden rule: keep the grit off the floor. Dirt acts like 80-grit sandpaper under your shoes, slowly grinding away the protective polyurethane layer until you’re left with raw wood that absorbs every spill.
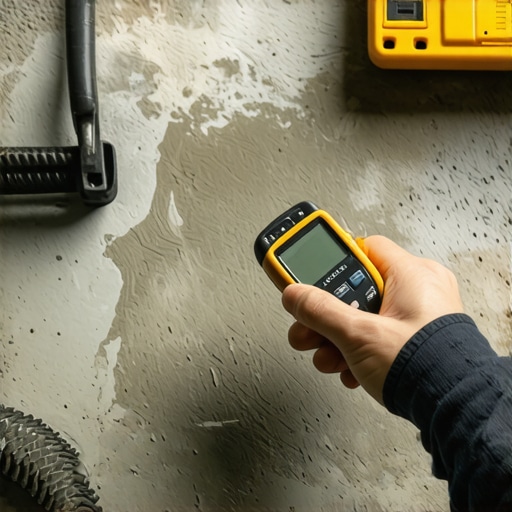
Beyond the surface, you need to think about the ‘health’ of your subfloor long-term. I never start a project without my Wagner Meters Rapid RH sensors. According to the Wagner technical documentation on ASTM F2170 standards, measuring the relative humidity inside the concrete slab is the only way to ensure your floor won’t fail from the bottom up. A surface test is a lie; the moisture is deeper down. I predict that in the next few years, we’ll see ‘smart’ subfloors with embedded moisture sensors that sync to your smart home system, alerting you to a leak before you ever see a buckled plank or a cracked tile. We’re already seeing this in commercial gym settings where why commercial gyms need specific rubber flooring is often dictated by the slab’s moisture-wicking capabilities.
The Long Game of Flooring Success
If you’re moving into the scaling phase of a home renovation, don’t overlook the transitions. I used to think I could ‘eyeball’ the height differences, but now I rely on the secret to seamless flooring transitions between kitchen and living rooms: custom-milled reducers. Using a generic ‘multi-purpose’ transition strip from a big-box store is the quickest way to make a custom job look like a cheap flip. Take the time to master precise floor leveling techniques to achieve flawless surfaces at the doorways so you don’t need those bulky ‘trip-hazard’ strips at all. I challenge you to try the ‘blue tape trick’ on your next caulking joint; it’s a tiny step that makes your expansion joints look like they were installed by a high-end architectural firm.
Hard-Won Truths About Large-Scale Installs
Reflecting on my early mistakes, I realized that a floor’s longevity isn’t about the price of the tile, but the patience in the prep. First, the ‘flat vs. level’ debate is settled: a slight pitch is fine, but a dip is a disaster. Always perform the 3-foot level test for checking subfloor flatness like a pro before you commit. Second, never trust a visual moisture check. A slab might look dry on the surface, but it can still hold enough moisture to ruin your bond. Third, expansion joints are your best friend, not your enemy. I spent years trying to hide them, only to realize that color-matching silicone makes them virtually invisible while saving the floor from structural failure. Finally, don’t rush the primer phase; it’s the invisible glue that holds your entire project together.
Gear That Actually Earns Its Keep
If you want to move beyond basic DIY, you need tools that offer precision. I rely on the Collomix DLX for my mixing station because air bubbles in your thinset or leveler are just hidden cracks waiting to happen. For the subfloor, I never skip the flashlight test for checking floor flatness before glue or mortar—it’s the simplest way to find high spots. I also highly recommend looking into high-quality RH sensors like those from Wagner Meters; they provide peace of mind that no surface test can match. For anyone looking for a comprehensive roadmap, I always point people toward this step-by-step guide to flooring installation and leveling success to ensure they have their bases covered.
The Confidence to Lay That First Tile
You now have the knowledge to avoid the $2,000 nightmares that plague so many renovation projects. Remember, flooring installation is as much about science as it is about art. When you respect the physics of movement and the necessity of a flat substrate, the results will speak for themselves. You aren’t just laying down planks or tiles; you’re building a foundation for your home’s aesthetic. Take your time, master those mastering floor leveling pro secrets for perfect installations, and don’t be afraid to walk away for an hour if a subfloor isn’t behaving. Your future self will thank you for the extra effort today. What’s the biggest challenge you’ve faced with an uneven subfloor or a tricky transition? Let me know in the comments below!