
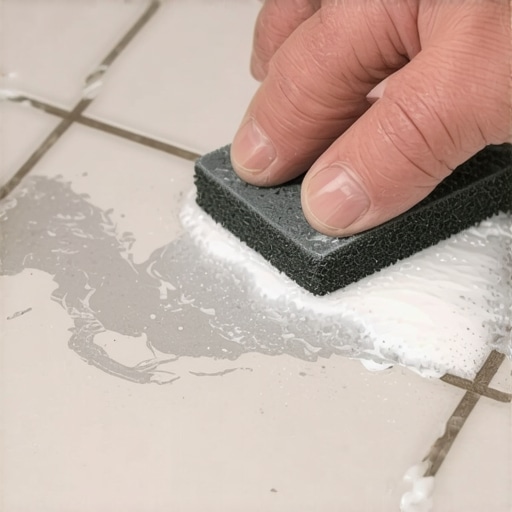
I remember standing in my kitchen at 2 AM, squinting under a work light at my brand-new porcelain floor. The tiles were gorgeous, but they were covered in something that looked like petrified oatmeal. Dried thinset. My heart sank because I knew I’d messed up. I had been so preoccupied with mastering floor leveling that I completely ignored the ‘clean as you go’ rule. It’s a gut-wrenching feeling when you realize your weekend project might be permanently scarred before you even get to walk on it with socks. But here is the good news: I’ve been in those mud-covered boots, and I’ve found the way out. Today, I’m going to show you how to rescue your tile without a single scratch.
Don’t Panic Over Those Concrete-Hard Crusts on Your Tile
Dried thinset is stubborn because it’s literally designed to be a permanent bond. According to the Tile Council of North America (TCNA), most polymer-modified thinsets achieve significant hardness within just a few hours, making them a nightmare for the unprepared DIYer. If you let it sit overnight, you aren’t just dealing with dust; you’re dealing with stone. I once made the amateur mistake of taking a metal paint scraper to a delicate glaze, thinking I could just ‘pop’ the chunks off. I ended up with silver streaks that looked like a toddler had gone wild with a crayon. It was one of many flooring installation mistakes to avoid that I had to learn through trial and error. The secret to success lies in knowing exactly when to use moisture and when to use gentle mechanical force.
Will I end up scratching the finish if I try to scrape it?
That is the biggest fear, isn’t it? You’ve picked out the best tile trends and spent good money, so the last thing you want is a permanent scar. The answer is: not if you use the right tools. The secret isn’t brute force; it’s about chemistry and patience. We’re going to talk about why the wet sponge move is your best friend early on, and what to do when that window has closed. Have you ever looked at a finished row of tile and realized you forgot to wipe the joints? Drop a comment below if you’ve ever felt that ‘oh no’ moment! Before we dive into the tools, remember that how you apply the mud matters too. Often, excess mess comes from why your trowel teeth are ruining your thinset coverage by creating too much squeeze-out. But if the damage is already done, let’s get that surface clean again.
Soak it Down Before You Start Scraping
Thinsets are like concrete; they love to drink water even after they have set. I have found that the best first step is not a hammer, but a warm, wet rag. If you lay a soaking wet towel over the dried chunks for about 20 minutes, the polymer bonds start to give up their grip just enough to be manageable. Think of it like trying to peel a sticker off a glass jar—it is a lot easier after a good soak. I remember a time I was working on a project to how to get a seamless look with different flooring types and I let the thinset dry on a beautiful slate transition. Water was the only thing that saved that stone from a permanent grey crust.
Why a Wood Block is Safer than Metal
Once the thinset is hydrated, avoid the temptation to grab a steel scraper. I learned this the hard way during a project where I used a metal putty knife and left grey metallic streaks all over my porcelain. Instead, use a sharpened piece of hardwood or a stiff plastic scraper. A scrap piece of oak—the kind you would use when you how to acclimate your hardwood without taking over the whole house—is surprisingly effective at shearing off thinset without scratching the glaze. The wood is hard enough to break the bond but soft enough to yield before the tile surface does.#IMAGE_PLACE_HOLDER_B#
The Surgical Strike for Stuck-On Chunks
If the soak did not do the trick, you need a more targeted approach. I remember a time in a tight powder room where I had massive squeeze-out because of a the trowel size error that leads to hollow sounding tiles. The thinset had turned into a mountain in the corner. I had to use a fresh razor blade held at a 45-degree angle. The key is fresh. A dull blade skips and gouges. A sharp one slides under the edge of the thinset like a spatula under a pancake. Hold the blade firmly and push with a steady, slow pressure rather than quick jerks.
Wait for the Satisfying Click Sound
When you are doing this right, you will hear a satisfying click or pop as the bond breaks. If you find yourself pushing hard enough that your knuckles are turning white, stop. You are risking a fracture. If the tile is already installed and you are worried about the integrity of the bond underneath, remember that how to fix a hollow sounding tile without tearing it up is a much harder task than just waiting another 10 minutes for a second soak. I have seen people crack brand new installs because they got impatient with a hammer and chisel.
Cleaning Out the Grout Joints for a Professional Look
Clean grout lines are essential for installing tiles like a pro. If the dried thinset is filling the gaps where grout should go, you cannot just ignore it. I once tried to grout over thinset that was too high in the joint. The result? The grout came out splotchy and eventually cracked because it was too thin. Use a grout saw—very gently—to scrape out the excess. It is like cleaning between your teeth; if there is plaque in the way, the filling won’t stick. This is a common pitfall in flooring installation fundamentals that separates the amateurs from the experts.
Dealing with the Ghost of Thinset Past
Even after the chunks are gone, you will likely see a cloudy haze on the surface. This is not just dust; it is the microscopic residue of the adhesive. This is where most people mess up their hardwood floor care secrets to longevity and shine logic by applying oils or wax. Do not do that. You need a slightly acidic solution, but be careful—this is where the vinegar mistake why it destroys your tile grout comes into play. Use a dedicated haze remover or a very dilute phosphoric acid solution, and always test it in an inconspicuous area first to ensure it does not etch the finish of your innovative tile designs that elevate hardwood flooring style.Let’s dig deeper into why we get into these messes in the first place. Most DIYers think the thinset’s job is to fill in the gaps of an uneven floor. This is a massive trap. Thinset is a bonding agent, not a structural filler. When you try to use it to bridge a deep dip, the material shrinks as it cures, pulling the tile down with it and creating those ‘lips’ that catch your toes. It’s one of the most common flooring installation mistakes to avoid for lasting results. I’ve seen people double-stack thinset thinking it would solve a subfloor issue, only to find the tiles popping up six months later. Have you ever fallen into this trap? Let me know in the comments.
Why Flatness Beats Level Every Single Time
There is a nuance that even some seasoned pros miss: a floor doesn’t actually have to be perfectly level to be successful, but it must be perfectly flat. You could have a floor that slopes slightly toward a drain, and as long as it’s flat, your tile will look like a million bucks. However, if your subfloor has ‘waves,’ you’ll find yourself with thinset oozing out of every joint as you try to beat the tiles into submission. I always recommend performing the 3-foot level test for checking subfloor flatness like a pro before you ever open a bag of mortar. If you find a gap larger than 1/8 of an inch, you need to address it with a sander or a patch, not more mud. This is the foundation of mastering floor leveling pro secrets for perfect installations.
Is your subfloor actually strong enough for this much weight?
This is the ‘oops’ factor that haunts people long after the thinset has dried. According to the National Tile Contractors Association (NTCA), the standard for subfloor deflection is L/360 for ceramic and even stricter for natural stone. If your plywood subfloor has too much ‘bounce’ or flex, the rigid thinset will eventually shear away from the tile. You might spend hours cleaning the surface today, only to have the entire installation fail because of why porcelain tiles crack more often than ceramic on wood. Before you lay a single tile, use the simple test to see if your subfloor is strong enough for tile to ensure your hard work doesn’t end up as a pile of rubble.#IMAGE_PLACE_HOLDER_C#
Stop Blaming the Adhesive for Everything
I often hear people complain that their thinset was ‘defective’ because it dried too fast or stayed soft. Usually, the culprit is the environment. If you are working in a room with high sunlight or a running heater, the moisture evaporates before the chemical bond can form. This leaves you with a chalky residue that is surprisingly hard to clean but offers zero structural strength. I’ve also noticed a recurring issue where why your tile spacers are getting stuck in the grout lines is actually caused by the thinset skinning over and trapping the plastic. If the subfloor isn’t prepped, the wood actually sucks the water out of the thinset from the bottom up. If you don’t catch these nuances, you’ll eventually see why your tile grout is cracking at the room corners because the entire system is under stress. To prevent this, always damp-mop your subfloor (if it’s concrete) or use a primer to keep that moisture where it belongs: in the mix. Use how to check for subfloor flex before you lay rigid tile to make sure your structure is as solid as your cleaning technique.
The Specialized Gear That Keeps My Floors From Failing
I’ve spent years refining my toolkit, and I’ve realized it isn’t about having the most expensive power tools, but the most precise ones. For example, when I am wrapping up a step-by-step guide to flooring installation and leveling success, I never go anywhere without my oscillating multi-tool and a diamond-grit blade. It is the only way to perform a ‘surgical strike’ on dried thinset in a grout joint without vibrating the neighboring tiles loose. Another personal favorite is the hydrophobic polyester sponge; unlike the cheap yellow ones from the big-box store, these don’t trap the tiny abrasive particles that cause microscopic scratches on your glaze. This level of detail is exactly how you achieve precise floor leveling techniques to achieve flawless surfaces that actually look professional once the lights go on. According to the ANSI A108.02 standard, the surface to receive tile should be true within 1/4 inch in 10 feet. If you haven’t hit that metric, your maintenance will always be an uphill battle against lippage and dirt traps.
How do I maintain my tile and hardwood surfaces over time?
Long-term beauty is less about heavy scrubbing and more about chemical intelligence. You need to stop using bleach on your grout before you read this, because high-pH cleaners eventually eat away at the sealers you’ve painstakingly applied. For those of you managing mixed-material spaces, hardwood floor care secrets to longevity and shine usually boil down to moisture control. I always tell my clients that the best way to clean a new hardwood floor for the first time is with a barely-damp microfiber mop—if you see standing water, you are doing it wrong. Proper maintenance ensures that your innovative tile designs that elevate hardwood flooring style stay looking like a magazine spread for decades rather than months.#IMAGE_PLACE_HOLDER_D#
Laser Mapping is the Future of Flawless Layouts
Looking ahead, I predict we are moving away from the bubble level entirely. We are already seeing the rise of LiDAR-enabled smartphone apps that can map the topography of a subfloor and calculate exactly how many bags of compound you need. This tech will make the ultimate guide to floor leveling for a perfect finish accessible to anyone with a phone. It’s an exciting time for DIYers because the ‘guesswork’ of volume and depth is being replaced by digital precision. I challenge you to try this: the next time you have a stubborn bit of thinset in a corner, skip the metal scraper and use the sharpened hardwood block trick I mentioned earlier. You’ll be amazed at how much faster—and safer—it is for your finish. This kind of small, tactical choice is what separates a ‘good’ job from one that adds real value to your home.
Removing dried thinset is only half the battle; the true victory lies in the finishing touches that make your home look like a high-end showroom. I have learned over the years that the difference between a DIY project and a professional masterpiece isn’t just the tools you use, but the respect you show for the process. When you take the time to clean those joints and prep your surface, you aren’t just doing maintenance—you are protecting your investment.
The One Thing I Always Check Twice to Save My Grout
If there is one thing I have learned from late nights in dusty kitchens, it is that your subfloor is the boss. You can have the most expensive tile in the world, but if your foundation is moving, everything else will eventually fail. I always perform a final check to how to check for subfloor flex before you lay rigid tile to ensure those joints won’t pop later. Another lightbulb moment for me was realizing how easily why your tile spacers are getting stuck in the grout lines—it is almost always because of a little bit of excess thinset that wasn’t cleared early. Finally, I’ve found that lighting is your best friend. Use a side-angled work light to find ‘shadows’ that indicate lippage or small bits of mortar you missed during your initial cleaning pass.
The Toolkit That Never Lets Me Down
I don’t believe in buying every gadget on the shelf, but a few specific items are non-negotiable for installing tiles like a pro. First, a high-quality grout saw with a replaceable diamond blade is a lifesaver for those hard-to-reach corners. Second, I swear by the guides on precise floor leveling techniques to achieve flawless surfaces because they take the guesswork out of the chemistry involved in mixing compounds. Lastly, always keep a supply of neutral cleaners on hand; remember to stop using bleach on your grout before you read this, as it can undo all your hard work by weakening the seal. These resources have saved me more time and money than any power tool ever could.
Build a Floor That Tells Your Story
At the end of the day, your home is your sanctuary. Whether you are dealing with a small backsplash or a massive kitchen renovation, every scrape and every soak is a step toward a beautiful result. Don’t let a few dried chunks of mortar discourage you. With patience and the right technique, your flooring installation will look flawless for years to come. You’ve got the knowledge now—go finish that floor with confidence. Have you ever encountered a thinset mess that seemed impossible to clean? Let me know in the comments below!