
I remember the frustration vividly. I had spent hours preparing my living room floor, only to realize after the final layer of paint that my tile was uneven. The uneven surface made everything look off, and I felt like I had wasted time and money. That lightbulb moment taught me a crucial lesson: floor leveling isn’t just a step, it’s the foundation of a beautiful space. If you’re tackling a flooring project and worried about ending up with a lopsided mess, you’re not alone. Many homeowners stumble here because of simple yet costly mistakes. But don’t worry—today, I’ll guide you through the most common pitfalls and how to steer clear of them, saving you time, money, and frustration.
Why Proper Floor Leveling Matters More Than You Think
Start with a thorough assessment of your floor
Before you pick up any tools, inspect your floor carefully. Use a long spirit level, a straightedge, or a laser level to identify high and low spots. Mark these areas with a chalk line or painter’s tape. When I did my first leveling job, I spent extra time mapping out the uneven spots, which saved me from surprises later. This step ensures you understand the scope of work and prevents over- or under-application of leveling compounds.
Clean the surface to ensure proper adhesion
Remove all debris, dust, grease, and loose material. Vacuum and wash the surface if necessary. Think of this as preparing a canvas; a clean surface helps the leveling compound bond properly, preventing future cracks or shifts. I once skipped this step, leading to a patchy finish that required rework. Proper cleaning is simple but critical.
Prime the floor to enhance bonding
Apply a primer suitable for your floor type as per manufacturer instructions. Primer acts like a glue, helping the leveling compound stick better. When I used a primer on my concrete slab, I noticed a much smoother application and fewer cracks. Check out this guide for tips on selecting the right primer.
Mix the leveling compound correctly
Follow the manufacturer’s instructions precisely. Use clean tools and mix in small batches if necessary. Achieving the right consistency—usually like thick pancake batter—is essential for easy application and proper leveling. I once added too much water, which made the compound runny and difficult to control, resulting in a lumpy finish. Practice makes perfect here.
Apply the leveling compound in stages
Start from the highest point and work toward the low spots. Pour or trowel the compound into the uneven areas, spreading it evenly. Use a straightedge or a trowel to feather the edges and ensure a smooth transition. Think of it like spreading butter on bread—you want a thin, even layer. When I applied it carefully, I avoided ridges and dips, making the subsequent flooring install much easier.
Use a screed for a flat surface
Lay a straightedge or a screed board across the area and drag it over the surface to level it. This technique removes excess compound and smooths out high spots. When I first tried this, I found that moving the screed in a consistent, steady motion resulted in a perfectly flat surface. For larger areas, consider a long level or a laser to verify flatness.
Allow sufficient drying time
Follow the manufacturer’s recommended cure time. Rushing this step can cause cracks or uneven settling. I learned this the hard way when I tried to walk on the floor too early, leaving footprints that marred the finish. Patience here is your best friend.
Inspect and sand if necessary
After drying, check for any high or low spots. Lightly sand or apply additional leveling compound if needed. Sometimes, small imperfections remain; smoothing them out ensures a flawless base for your final flooring. I once used a belt sander to correct minor dips, which greatly improved the overall appearance.
Double-check the levelness before proceeding
Use your level or laser to confirm the surface is truly flat. This extra step prevents issues during tile or hardwood installation. Remember, the foundation sets the tone for the entire project, so don’t skip this verification.
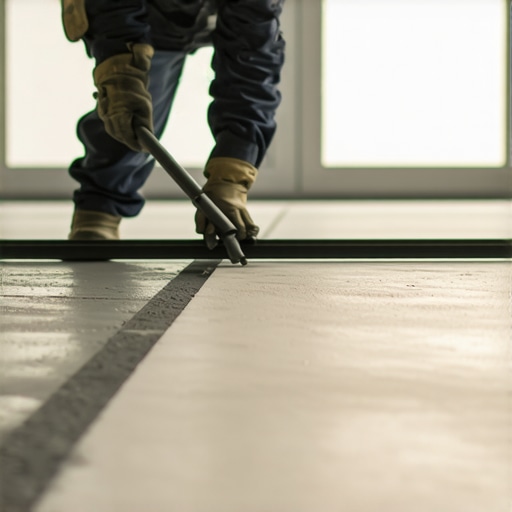 Many homeowners believe that pouring leveling compound is a straightforward task, but in reality, it’s fraught with subtle pitfalls that can compromise your entire flooring project. One common myth is that a quick mix and slapdash application will do the trick. In truth, the nuances of mixing ratios, curing times, and surface preparation are what separate a professional finish from a lumpy disaster. For instance, overmixing or undermixing the compound can lead to inconsistent textures that settle unevenly, causing dips or ridges that are only visible after the floor is installed. Don’t fall into the trap of rushing this process; instead, follow the manufacturer’s instructions meticulously for best results.
Another mistake many make is neglecting the importance of substrate testing before starting. Moisture levels in concrete slabs, for example, can vary significantly and impact adhesion. Skipping this step means you might discover too late that your leveling compound isn’t bonding properly, leading to cracks or shifting down the line. It’s wise to use a moisture meter or consult an expert to assess the surface beforehand.
Furthermore, some assume that once the leveling compound appears dry, the job is done. But curing is a delicate phase where environmental factors like temperature and humidity play a crucial role. Attempting to walk on or install flooring too soon can cause the compound to crack or settle unevenly, ruining your effort. Patience is key—allow ample drying time, and verify the surface’s flatness with a level or laser before proceeding.
Advanced flooring projects often require addressing complex challenges like large dips, multiple high and low spots, or substrates with variable moisture content. In such cases, a deeper understanding of the material science involved is essential. Experts like those referenced in the study by the Flooring Contractors Association emphasize that proper substrate preparation and multi-layer leveling strategies can prevent future issues. For example, using a self-leveling underlayment for deep dips combined with a primer for adhesion can create a more durable, even surface.
Have you ever fallen into this trap? Let me know in the comments. Mastering these nuances ensures your flooring looks flawless and lasts for years to come. For more insights, check out Mastering Floor Leveling and avoid common pitfalls before you start.Investing in the right tools can make all the difference in maintaining a perfectly leveled floor over time. My favorite tool is a high-quality laser level, such as the Bosch GSL 2 Professional, which I personally rely on for its precision and ease of use. Unlike traditional spirit levels, laser levels provide a consistent reference point across larger areas, making it easier to detect and correct any shifts that might occur as the environment changes. I use mine regularly during routine inspections, especially in spaces with fluctuating humidity or temperature, which can cause subtle movements in the substrate. For small touch-ups, I find a digital moisture meter invaluable. It helps me monitor moisture levels in concrete slabs and wood subfloors, ensuring that no hidden moisture causes future issues like warping or cracking. As moisture migration is a common cause of floor unevenness over time, keeping an eye on these levels allows me to address problems before they become costly repairs.
Lessons that Changed How I Approach Floor Leveling
- One of the biggest realizations was that surface preparation is everything. Skipping cleaning or priming can undo hours of work, so I now see these steps as non-negotiable.
- Mixing the leveling compound correctly saved me from future cracks and unevenness. I learned to follow manufacturer instructions meticulously, which made a noticeable difference in the final result.
- Patience during curing is crucial. Rushing to install flooring or walk on the compound too early has always led to issues, so I now plan for ample drying time.
- Using a laser level has been a game changer. It provides a precise reference over large areas, helping me catch subtle dips that might otherwise go unnoticed.
Tools and Resources That Elevate My Flooring Projects
- Bosch GSL 2 Professional Laser Level: Its accuracy and ease of use make it my top choice for ensuring flatness across expansive spaces.
- Moisture Meter: Monitoring moisture levels in concrete slabs prevents future cracking and shifting—something I’ve learned the hard way without it.
- Mastering Floor Leveling guide: This resource offers in-depth tips and tricks that helped me understand the nuances of substrate preparation and compound application.
- Local hardware stores: Their staff often provides personalized advice tailored to your specific project, which can be invaluable.
Take the First Step Toward Flawless Floors
Getting your floor leveling right isn’t just about the tools or techniques—it’s about cultivating patience, attention to detail, and a willingness to learn from each step. When you master these fundamentals, your flooring project transforms from a potential headache into a source of pride. Remember, every successful project starts with a solid foundation—literally. So, gather your tools, plan carefully, and don’t be afraid to take your time. Your perfect, level floor awaits.