
I remember standing in my kitchen with a full glass of water, watching small ripples form every time my dog trotted past the island. It wasn’t just annoying; it was a warning sign. My subfloor had developed a distinct ‘trampoline’ feel that made the whole room feel unstable. I ignored it for six months, thinking it was just the character of an old house, but that was my first big mistake. By the time I finally pulled back a corner of the carpet, the constant movement had started to pull the nails loose, turning a simple bounce into a rhythmic groan. If you are planning on [flooring installation](https://tiletrendshop.com/revamp-your-home-with-expert-flooring-installation-tips), you cannot afford to skip the stabilization phase. Today, I’m going to show you exactly how to firm up that foundation so your house feels like a fortress again, not a bounce house. Have you ever felt that unsettling ‘give’ under your feet when you walk across a room?
Stop the Trampoline Effect in Your Living Room
When a floor bounces, it’s usually because the subfloor has slightly separated from the joists below. This gap, even if it’s only an eighth of an inch, allows the wood to flex downward under your weight. Early in my DIY journey, I thought I could fix this by just piling heavy furniture over the ‘soft’ spots. All that did was create a permanent dip in the plywood. You have to address the mechanical connection. Before you even think about [hardwood floor care](https://tiletrendshop.com/hardwood-floor-care-secrets-to-longevity-and-shine), you must ensure the bones are solid. I once made the mistake of using standard drywall screws for this job. They snapped like toothpicks the moment the house shifted in the winter. Now, I only use high-quality, ribbed subfloor screws that are designed to pull the wood tight and stay there. According to the structural guidelines at the American Wood Council, localized deflection is often more about the fastener’s ‘withdrawal’ than the strength of the joist itself, meaning a few well-placed screws can actually restore the original stiffness of the floor system.
Is This Solution Just Too Simple to Work?
You might be skeptical that a handful of screws can fix a problem that feels structural. I get it. I used to think I needed to sister every joist in the crawlspace to stop the shaking. But the reality is that most ‘bounce’ is simply a lack of contact between layers. By performing [the simple test to see if your subfloor is strong enough](https://tiletrendshop.com/the-simple-test-to-see-if-your-subfloor-is-strong-enough-for-tile), you can identify if your issue is a loose connection or a rotten beam. If it’s just loose, screws are your best friend. It is much easier to [fix a squeaky subfloor](https://tiletrendshop.com/how-to-fix-a-squeaky-subfloor-before-you-lay-your-new-floor) now than it is to tear up a finished floor later because your grout lines started cracking from the movement.
Find the Backbone of Your Floor
Before you can fix the bounce, you have to find exactly where the floor meets the wood skeleton. Think of your subfloor like a drumhead; if it isn’t pinned down tight to the rim, it’s going to vibrate. I always start with the hammer test for finding loose floor joists. You walk the room, tapping the floor with a rubber mallet. A solid ‘thud’ means you’re over a joist; a hollow ‘ring’ means you’re in the air. Once you mark your joists with a chalk line, you can see the battlefield. Most people make the flooring installation mistakes to avoid for lasting results by assuming every nail they see actually hit the wood below. In reality, builders often miss, leaving nails ‘shining’ in the air alongside the joist.
Pull the Layers Together with the Right Fasteners
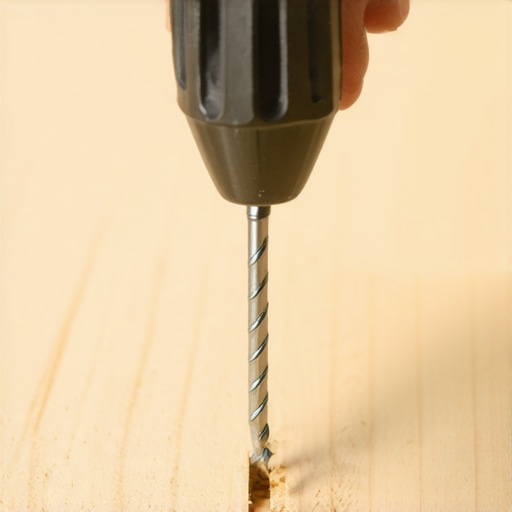
Once the joists are marked, it’s time to drive. You aren’t just putting screws in; you are clamping two separate entities into one rigid unit. I use 2-inch subfloor screws every 6 to 8 inches along every joist. I remember a guest bathroom project where I got lazy and only did the corners. Within a week of laying the tile, I heard a ‘pop’—the subfloor had lifted just enough to break the bond. I had to rip out three tiles just to get back to the wood. Don’t be me. Drive the screws until the head is slightly countersunk, but be careful not to go too deep. Learning how to stop a plywood subfloor from delaminating is crucial here; if you blow through the top veneer, the screw loses its ‘bite’ and the plywood starts to peel. #IMAGE_PLACE_HOLDER_B#
Bridge the Gap with Solid Blocking
If the floor still feels like a diving board even after it’s screwed down, the issue is ‘mid-span’ flex. This happens when the joists themselves are too long or spaced too far apart. The fix is ‘blocking’—cutting short pieces of 2×8 or 2×10 lumber and wedging them perpendicularly between the joists. This forces the joists to work as a team rather than individual springs. It’s like the difference between a single pencil and a bundle tied with a rubber band. While you’re under there, check for any structural damage. If you find a section that’s beyond repair, you’ll need to know how to patch a large hole in your plywood subfloor fast before moving forward.
Check for Flatness Before the Final Layer
Once the floor is stiff, it might not be flat. Stiffness stops the bounce, but flatness ensures your finish looks professional. Use the 3-foot level test for checking subfloor flatness like a pro. If you find valleys, you don’t always need expensive chemicals. You can often use how to level a plywood subfloor with shims and plywood scraps to bring those low spots up to meet the rest of the room. This mechanical leveling is often superior to pourable liquids because it doesn’t add moisture to the wood, which can cause swelling and more movement down the line.
Forget Everything You’ve Heard About Self-Leveling Compounds
Most DIYers—and even some ‘pros’ I’ve worked alongside—treat self-leveling compound like a magical liquid that fixes every sin. They pour it out, walk away, and expect a billiard-table surface. But here is the truth: leveler is one of the most temperamental materials in your toolkit. If you don’t understand the chemistry, you’re just creating a future headache. I learned this the hard way when I ignored the instructions on a high-end renovation. I figured the concrete was ‘clean enough,’ but three weeks later, I heard a hollow crunching sound. The leveler hadn’t bonded; it had basically turned into a giant, brittle potato chip. This is one of the biggest flooring installation mistakes to avoid for lasting results. You cannot skip the mechanical prep.
Are You Trusting a Liquid to Solve a Structural Deflection Problem?
There is a massive difference between a floor being ‘level’ and it being ‘flat.’ A floor can be perfectly flat but tilted at a two-degree angle, and your tile will still look great. But if you try to use self-leveler to fix a bouncy subfloor, you’re asking for trouble. According to the Tile Council of North America (TCNA) Handbook, the substrate must meet specific L/360 deflection standards before you even open a bag of compound. If the joists are moving, the leveler will crack, no matter how much you spend on ‘fiber-reinforced’ formulas. This is why mastering precise floor leveling techniques to achieve flawless surfaces starts with the structure, not the bucket.
The Secret Reason Your Leveler Is Bubbling Like a Pancake
Have you ever poured a beautiful, smooth layer of compound only to see tiny craters start forming ten minutes later? That’s ‘outgassing.’ It happens when air trapped in the porous subfloor escapes through the wet liquid. It looks like a science experiment gone wrong and ruins your finish. The fix isn’t more leveler; it’s the primer. People think primer is just for stickiness, but its primary job is to seal the pores of the wood or concrete. I’ve seen many projects fail because the installer didn’t realize why you must prime concrete before every leveling job or used the wrong dilution ratio. If the primer is too thin, the air gets through. If it’s too thick, the leveler won’t bite. #IMAGE_PLACE_HOLDER_C#
How Fast Are You Actually Mixing That Bucket?
Another nuance that separates the experts from the beginners is the RPM of the drill. If you whip that leveler like a cake batter at high speed, you’re folding air into the mix. That air has to go somewhere, and usually, it ends up as a ‘honeycomb’ texture under your expensive choosing the best tile for your hardwood floor upgrade. Use a low-speed mixing paddle and let the mixture ‘slake’—rest for a minute—to let the chemicals fully activate. If you rush it, you’ll end up with a surface that’s soft in the middle. It’s better to take the time to learn mastering floor leveling pro secrets for perfect installations now than to spend a weekend with a floor grinder later. Have you ever fallen into this trap? Let me know in the comments.
If you’ve successfully leveled the floor and are ready for the fun part, don’t trip at the finish line by using cheap gear. I’ve wasted thousands on ‘budget’ tools that failed mid-job, leaving me with half-set mortar and a broken spirit. One thing I never skip now is checking for humidity. You absolutely need to know how to use a moisture meter to prevent floor failure. If that plywood is holding onto summer humidity and you seal it under tile or hardwood, that moisture has nowhere to go but out through your seams. It’s a structural disaster waiting to happen. For my latest projects, I’ve moved away from the basic 7 tools you actually need for a professional diy hardwood install and started investing in digital calipers and high-end laser levels. They take the guesswork out of the ‘is it flat enough’ debate.
The Handful of Tools I Refuse to Work Without
The National Wood Flooring Association (NWFA) technical manual specifically states that for planks wider than 3 inches, the moisture content differential between the subfloor and the flooring should be within 2 percent. Without a meter, you’re just guessing with your bank account. I’ve seen beautiful oak floors buckle and cup because someone was too impatient to wait for the subfloor to dry after a leveling pour. It’s why I always tell people that revamp your home with expert flooring installation tips isn’t just about the aesthetics; it’s about the physics of wood. If you ignore the moisture, the wood will eventually remind you it’s there. To avoid these flooring installation mistakes to avoid for lasting results, I also recommend a high-quality spiked roller for your leveler. It’s the only way to truly pop those air bubbles we talked about earlier.
How do I maintain my flooring investment over time?
Maintenance starts the second the last board is snapped into place. I used to think a bucket of soapy water and a string mop was fine, but that’s the fastest way to ruin a modern finish. Knowing hardwood floor care secrets to longevity and shine means understanding pH-neutral cleaners and the dangers of standing water. If you’re dealing with a fresh coat of poly, watch out for environmental factors. If your house is too hot or the sun is beating through a window, you’ll find why your hardwood finish is drying too fast and leaving streaks. I always keep a dedicated microfiber kit and a soft-bristle vacuum specifically for the first few months. You need to learn the best way to clean a new hardwood floor for the first time to ensure you aren’t grinding construction dust into the fresh finish before it has fully cured.
#IMAGE_PLACE_HOLDER_D#
Smart Sensors and the Future of Subfloor Tech
Looking ahead, I see the DIY world moving toward augmented reality and integrated sensors. Imagine putting on a pair of glasses and seeing a heat map of your floor’s high and low spots in real-time as you walk. We are already seeing 360-degree rotating lasers that can map a room’s flatness to within a millimeter and upload it to an app. This technology is going to make mastering floor leveling pro secrets for perfect installations accessible to everyone, not just those of us who have spent years crawling around with 6-foot levels. Whether you are choosing the best tile for your hardwood floor upgrade or sticking with traditional planks, the precision of your prep work will always be the deciding factor in how long that floor lasts. My biggest piece of advice? Go buy a pinless moisture meter today. It is the single best insurance policy for your home. You’ll thank me when your floors are still perfectly flat a decade from now.
Hard Truths I Learned While Fixing My Own Bouncy Floors
After years of fixing “pro” mistakes and my own DIY blunders, I’ve realized that the most expensive part of a floor is the part you never see. One massive realization was that self-leveling compound isn’t actually self-leveling; it’s more like a thick soup that needs a guide. If you ignore the prep, you’ll likely end up wondering why your self-leveling compound is cracking like a dry lake bed just a few weeks after the pour. Another lightbulb moment? Mechanical fasteners over adhesive every single time. Glue can fail with seasonal humidity, but a screw into a joist is a lifelong commitment to stability. If you skip the screws, you’ll eventually be searching for how to fix a hollow sounding tile without tearing it up because the subfloor flexed and broke the bond.
Tools That Saved My Sanity and My Wallet
I don’t believe in buying every gadget at the hardware store, but there are four things I never start a project without. First, a dedicated mixing paddle—not a paint stirrer—to ensure the best way to mix self-leveler for a perfectly smooth surface without air pockets. Second, the TCNA Handbook; it’s the industry bible that keeps you from making 10,000-dollar mistakes. Third, a high-quality spiked roller to pop those pesky bubbles. Finally, check my list of 7 tools you actually need for a professional diy hardwood install to see why a pinless moisture meter is the MVP of my toolkit. These tools aren’t just about speed; they are about peace of mind.
Build a Floor That Your Grandkids Will Walk On
It’s easy to feel overwhelmed by the technical specs of joist deflection and moisture ratios, but remember: you are building the foundation of your home’s comfort. A successful flooring installation isn’t defined by how it looks on day one, but by how it feels ten years later when you walk across the room at midnight and don’t hear a single squeak. Take the extra day to let the primer dry. Spend the extra fifty dollars on the better screws. Your future self will thank you for the silence. Have you ever found a structural disaster hiding under your old carpet or linoleum? Let me know in the comments below!