
I remember standing in my kitchen three years ago, staring at a stack of expensive Italian porcelain, and feeling a literal knot in my stomach. I had already cleared the old linoleum, but every time I walked near the island, the floor gave a sickening little “give.” I thought I could just ignore it. I figured the thinset would act like a magical glue and fix everything. Boy, was I wrong. Within six months, I was looking at cracked grout lines and a tile that moved whenever the dog ran past. It was a $1,200 mistake that started because I didn’t check my joists properly.
Your Floor is Only as Good as the Joists Underneath
Most folks think that a level floor is the same thing as a stable floor. It’s not. You can have a surface that looks flat as a pancake under a 3-foot level, but if the joists aren’t pulled tight against the subfloor, you’re building on sand. Today, I’m going to show you a trick that old-school carpenters taught me. It’s called the hammer test. It costs nothing, takes ten minutes, and will save you from the heartbreak of a failing installation. We are going to find those loose spots, mark them, and kill the squeaks for good before you even think about leveling for tile.
Does a cheap tool actually beat a $200 moisture meter or stud finder?
I get it. In an age of laser levels and digital sensors, walking around hitting your floor with a hammer sounds a bit caveman-ish. But here’s the reality: your ears are better at detecting hollow cavities than most mid-range sensors. When a joist has pulled away from the subfloor—even by a fraction of an inch—it creates an air pocket. According to the National Wood Flooring Association, subfloor deflection is the primary cause of structural finish failure in residential homes. No amount of self-leveling compound will fix a structural bounce. Have you ever felt that annoying “hollow” thud under your feet and wondered if your house was falling apart? You aren’t alone, and it’s usually an easy fix if you catch it now.
Early in my DIY days, I made the mistake of thinking I could just “feel” the joists by jumping on them. I missed a three-foot section where the joist had crowned downward, leaving a gap. The result? A floor that felt like a trampoline. Now, I never start a flooring installation without my 16-ounce claw hammer and a roll of painter’s tape. Let’s dive into the exact rhythm and sound you need to look for before the real work begins.
Master the Rhythm of the Hammer Test
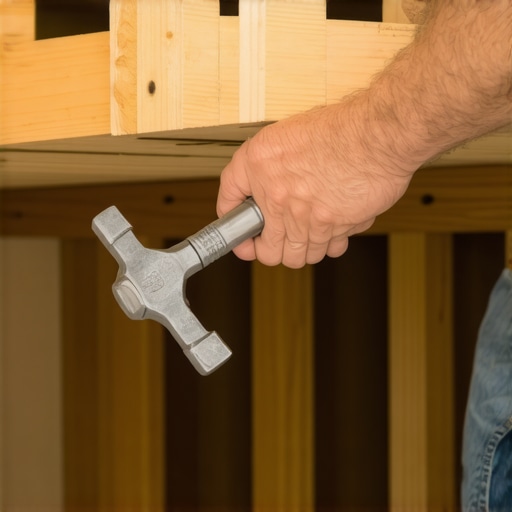
To do this right, you need to think of your subfloor like a drumhead. If the drumhead is tight against the frame, it rings. If it’s loose, it thuds. Grab your hammer and start at one corner of the room. You aren’t trying to drive nails here; you are lightly tapping the plywood every six inches along the path of the joists. A solid connection produces a sharp, high-pitched ‘clack.’ But the moment you hit a spot where the subfloor has delaminated or the joist has shrunk away, the sound turns into a low, hollow ‘thump.’ I call this the ‘death knell’ for your future floor.
#IMAGE_PLACE_HOLDER_B#
Listen for the Thud That Means Trouble
I remember a frantic Saturday morning during a kitchen remodel where I was certain the floor was solid. It didn’t squeak, so I assumed it was ready. But once I started the hammer test, I found a four-foot section near the refrigerator where the subfloor was bouncing just a hair. It sounded like tapping on a cardboard box. If I had ignored that, I would have faced one of those flooring installation mistakes that costs thousands. Instead, I spent $5 on a box of 2-inch deck screws and ten minutes of my time. Before you move on, you must check for subfloor flex manually to ensure that ‘thud’ isn’t actually structural damage.
Lock Down the Plywood Before the Leveler Goes Down
Once you’ve marked those hollow spots with your painter’s tape, it’s time for the fix. Don’t reach for nails. Nails are what caused the squeaks in the first place because they eventually wiggle loose like a bad tooth. You want construction screws with a smooth shank at the top. These pull the subfloor down tight against the joist. This is a critical part of precise floor leveling techniques because if the base moves, your leveler will crack. I usually space my screws every 6 to 8 inches in those trouble zones. You’ll actually hear the wood groan as it’s pulled back into place. It’s a satisfying sound that means your foundation is finally secure.
After the screws are in, walk the floor again. If you still hear a ghost of a squeak, you might need to look at how to fix a squeaky subfloor from underneath if you have crawlspace access. But for 90% of us, the top-down screw method is the winner. Now that the floor is structurally silent, you can finally grab your 3-foot level and see how much actual dip you’re dealing with. We’ve stopped the bounce; now we need to fix the slope.
Now that the structural bounce is gone, we need to talk about the liquid gold: self-leveling compound. Most DIYers think the more you use, the better the result. I actually disagree. In my experience, a thick pour is often a mask for poor prep, and it is one of the most frequent floor leveling challenges you will face. When you pour too deep without considering the internal tension of the product, you are asking for trouble. I have seen half-inch pours pull themselves right off the subfloor because the installer forgot one tiny, crucial step: the primer. Everyone tells you to focus on the ‘level’ part, but the ‘bond’ part is what actually keeps your tiles from popping.
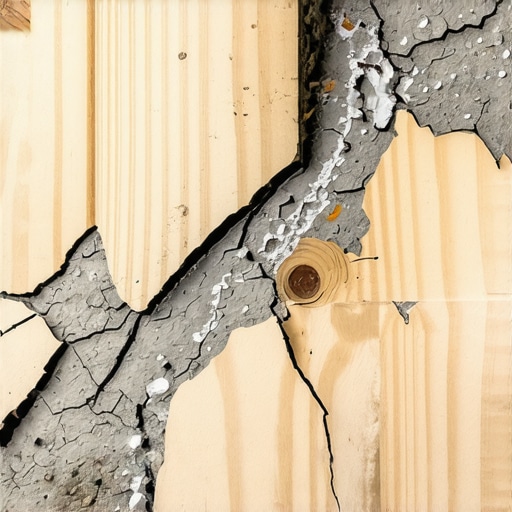
Here is the ‘Oops’ factor nobody talks about: the chemistry of the water. If you add even a cup too much water to your mix, you destroy the polymers. You will end up wondering why your self-leveling compound is cracking like a dry lake bed two days later. The Tile Council of North America (TCNA) warns in their installation handbook that improper water-to-powder ratios are the leading cause of compressive strength failure and shrinkage in underlayments. It is not about making it flow easier; it is about making it stay together. If you see a milky white film floating on top of your wet leveler, you have already lost the battle.
Why is my leveler peeling off the subfloor in giant sheets?
This usually happens because the subfloor was too thirsty. Plywood is like a giant sponge; if you do not use a high-quality primer, the wood sucks the moisture out of the leveler before it can chemically bond. Sometimes, you might find that your floor primer is making the leveler bubbling even worse if it was not allowed to dry completely. You need that tacky finish—it is the bridge between the wood and the stone. If you are working on a slab, you must prime concrete to prevent pinholes and ghosting from the pores in the cement. Skipping this is the fastest way to turn a weekend project into a three-week nightmare.
And do not get me started on the trowel trap. Using the wrong notch size for your thinset later can lead to a hollow sounding tile, even on a perfectly level floor. It is a chain reaction of precision where one lazy choice early on ruins the expensive finish. Have you ever poured a leveler and had it fail on you? Let me know in the comments—I have probably made the same mistake at least once!
If you’re serious about your sanity, stop using a standard cordless drill to mix your bags. I burned through two mid-range drills before I finally bought a dedicated high-torque mud mixer. The difference is night and day. You need a consistent RPM to fully hydrate those polymers without whipping in too much air. I personally swear by the ‘birdcage’ style mixing paddle; it shears the lumps without turning your bucket into a whirlpool of bubbles. This is one of those mastering floor leveling pro secrets that keeps the mixture smooth enough to flow like heavy cream. When you use the right gear, you avoid the grit that leads to a bumpy finish.
The One Tool That Saves Your Warranty
Before you even think about laying a single plank of wood, you need to own a moisture meter. I don’t care if you think the slab is dry. Concrete is a moisture magnet. The National Wood Flooring Association (NWFA) Technical Manual specifically dictates that for strip flooring, the moisture content of the subfloor and the flooring should be within a 4% margin of each other. If you ignore this, you’re looking at cupping or gapping within the first season. I use a pinless meter because I don’t want to poke a thousand holes in my expensive subfloor, and it’s easily among the 7 tools you actually need for a result that doesn’t buckle under pressure. Learning how to use a moisture meter is the difference between a floor that lasts thirty years and one that fails in three.

The Future of Flat Floors
I suspect that in the next few years, we are going to see self-leveling compounds embedded with smart fibers that change color when they reach the perfect moisture level for tiling. We are already seeing high-flow anhydrite screeds becoming more common in residential builds. But until then, the ‘old’ ways of checking and double-checking your work remain the gold standard. Once the floor is down, the game changes from installation to preservation. You’ve spent thousands; don’t ruin it by using the wrong cleaner. I’ve seen beautiful finishes destroyed by steam mops and acidic soaps. Following basic hardwood floor care secrets like using a pH-neutral cleaner and keeping felt pads on every piece of furniture will keep that ‘just installed’ look for a decade.
How do I keep my new floor looking brand new?
Maintenance is mostly about prevention. If you’ve just finished a massive project, you must know how to clean hardwood floors after a major renovation to remove all that microscopic construction dust that acts like sandpaper under your shoes. Also, keep an eye on your humidity levels. A whole-house humidifier is often more important for your floor than the floor’s actual finish. My best advice? Buy a few high-quality microfiber mops and throw away the string mops. Use the ‘mist and wipe’ method rather than the ‘bucket and splash’ method. If you want to take your DIY game to the next level, go grab a pinless moisture meter today and check your subfloor in ten different spots—it’s the single best habit you can develop for your home’s structural health.
The Hard-Earned Wisdom of a Leveling Obsessive
Over the years, I have learned that flooring is essentially 90% psychology and 10% actually laying the material. The psychology part is having the patience to fix what nobody will ever see. First, remember that your subfloor is a living, breathing entity. It reacts to the humidity in your home, which is why I always suggest you learn how to fix a bounce in your plywood subfloor before the first bag of leveler is even opened. Second, do not rush the ‘set’ time. Just because a bag says you can walk on it in four hours does not mean you should start dragging heavy furniture over it. Give the polymers time to reach their full compressive strength. Lastly, never assume ‘flat’ means ‘level.’ In many old houses, a perfectly flat floor that is slightly out of level is better than a level floor that creates a massive trip hazard at the doorway.
#IMAGE_PLACEHOLDER_E#
My Non-Negotiable Kit for a Flat Foundation
If you want to move from amateur to pro, you need to curate your gear. I never step onto a job site without a dedicated high-torque mixer; using a standard drill is one of those 7 mistakes that ruin your luxury vinyl plank installation because it leaves clumps that create high spots. I also highly recommend the TCNA (Tile Council of North America) Handbook. It is the bible for our industry and explains the ‘why’ behind every screw and primer application. For testing, always keep a simple 3-foot level and a pinless moisture meter in your tool kit. These tools do not just help you work; they provide the peace of mind that your warranty will not be voided by a damp slab or a hidden dip.
Your Foundation is Finally Ready for the Finish
There is a specific kind of pride that comes from walking across a floor you have prepped yourself and hearing absolutely nothing—no squeaks, no hollow thuds, just solid silence. By following this step-by-step guide to flooring installation and leveling success, you have already done more work than most cut-rate contractors. You have mitigated the risks, secured the joists, and managed the moisture. Now, the fun part begins. Whether you are laying elegant porcelain or warm oak, your finish material will only look as good as the work you did today. Take a breath, trust your prep, and get ready to transform your home. Have you ever discovered a hidden subfloor disaster halfway through a project? Let me know how you handled it in the comments below!