
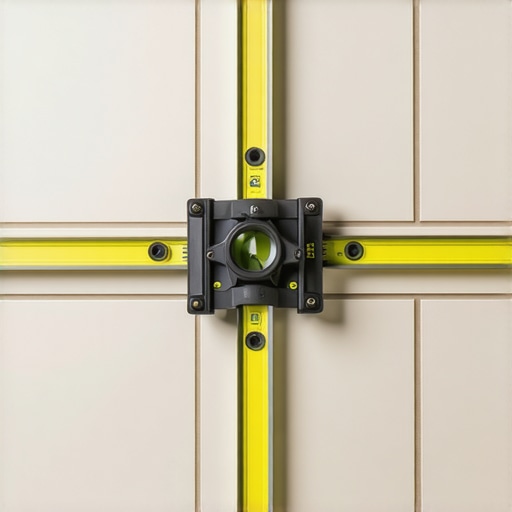
I remember standing in my master bathroom back in 2018, looking down at a stack of gorgeous 24×48 porcelain planks. I’d spent a small fortune on them, and I was convinced I could handle the job. I bought the fancy thinset, used the best spacers, and even had a level that cost more than my work boots. But three days later, when I walked across that floor barefoot, it felt like I was navigating a set of tiny, jagged stairs. Every single edge of those massive tiles caught my toes. I had created a tripping hazard that looked more like a topographical map than a luxury floor. It was a crushing realization: for large format tiles, a floor that looks level to the eye is nowhere near good enough. To save my sanity (and my toes), I had to rip up the entire thing and start over. That painful mistake taught me that the real secret isn’t in the tile itself, but in the brutal honesty of the subfloor underneath. Today, I’m going to share the hard-won techniques I’ve learned to ensure you never have to face that demolition hammer because of poor prep work.
Why Flatness Beats Level Every Single Time
When we talk about flooring, most people reach for a spirit level and call it a day once the bubble stays centered. But here is the reality: large format tiles—anything where one side is longer than 15 inches—do not bend. They are rigid, unforgiving slabs of ceramic or stone. If your subfloor has a dip, the tile will bridge over it, leaving a hollow spot. If there is a hump, the tile will teeter-totter like a playground toy. This is why how to achieve flawless floor leveling before tile laying is more about creating a perfectly flat plane than it is about being perfectly level with the horizon. I once made the classic rookie mistake of thinking I could just ‘build up’ the mortar in low spots to compensate. It failed miserably because mortar shrinks as it cures, pulling the tile down into the dip and creating the very lippage I was trying to avoid. According to the Tile Council of North America (TCNA) handbook, large format tiles require a substrate flatness of 1/8 inch in 10 feet. That is a incredibly tight tolerance that most standard subfloors simply don’t meet without intervention.
Is all this extra prep really worth the effort?
I get it. You want to see the pretty tiles down, not spend another Saturday morning mixing bags of compound and stressing over floor leveling challenges common mistakes and how to avoid them. You might be wondering if you can just ‘cheat’ the system with a thicker bed of thinset. The short answer is no. If you skip the prep, you aren’t just risking aesthetics; you are risking the structural integrity of the installation. Large tiles over uneven surfaces are prone to cracking because they lack support in those hollow areas. If you’ve ever felt that ‘click-clack’ sound or noticed why your lvp floor is clicking when you walk on it, imagine that same stress on a piece of rigid porcelain. It won’t click; it will snap. By taking the time to address why your self leveling pour looks like a topographical map before the first tile touches the floor, you ensure a professional finish that lasts decades. Have you ever finished a flooring project only to realize you can feel every single seam under your feet? I want to hear your DIY horror stories—or your victories—in the comments below. Let’s get into the actual tools you need to find those hidden humps before they ruin your weekend.
Find the Hidden Dips with the Chalk Dust Secret
To stop your tile from teetering, you first have to see where the subfloor is lying to you. Most DIYers just eyeball it, but I’ve learned to use the chalk dust secret for finding low spots in subfloors. I take a 10-foot straight edge, lay it across the floor, and sprinkle a bit of blue carpenter’s chalk along the side. When I slide the straight edge across the room, the chalk stays behind in the low spots, creating a perfect ‘map’ of where I need to fill. Think of your subfloor like a frozen lake; if there are any ruts in that ice, your skates—or in this case, those massive tiles—are going to catch every single time.
Stop Ignoring the Dust and Debris
Before you even think about opening a bag of compound, you have to get the floor surgically clean. I once rushed a project in a basement and ignored a fine layer of drywall dust. It was a disaster. The self-leveler bonded to the dust instead of the slab, and a week later, it started crunching under my feet. I had to peel up the whole mess, which came off in sheets like a bad sunburn. Now, I always follow the best way to prep a dusty concrete floor for adhesive by vacuuming twice and using a damp microfiber mop. If you are working on an old garage or a basement, don’t overlook the concrete etching step you shouldnt skip before leveling to ensure the chemical bond is strong enough to hold the weight of porcelain. 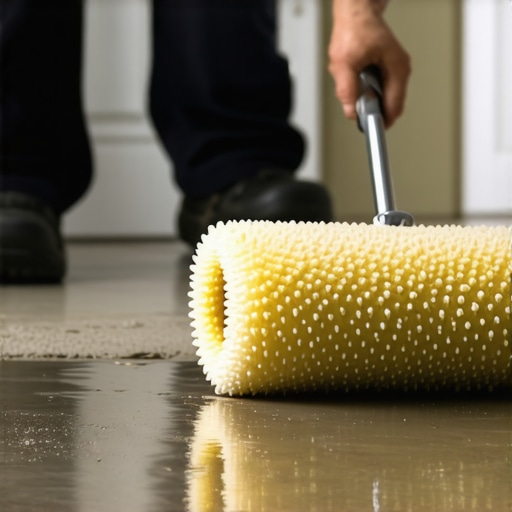
Mix Like a Chemist to Avoid the Bubble Trap
Mixing is where most people ruin their prep work before it even hits the floor. It is tempting to use a high-speed drill to get it done fast, but the mixing paddle speed that ruins your leveling compound is usually anything over 650 RPM. High speeds whip air into the mixture, creating thousands of tiny bubbles. When those bubbles pop as the floor dries, you’re left with a surface that looks like the moon’s craters. I once spent four hours hand-sanding down ‘pockmarks’ because I used a standard mud mixer on a high-speed setting. Now, I keep it slow and steady, ensuring the mix is creamy and consistent, almost like a thick pancake batter.
Master the Pour with the Spiky Roller Secret
Once the mix is on the floor, you have a very limited window to move it before it begins to ‘skin over.’ This is where the spiky roller secret for a mirror smooth pour comes into play. You aren’t just spreading the liquid; you are breaking the surface tension and releasing trapped air. Using the roller selection that prevents air bubbles in leveler is the difference between a floor you have to grind down later and one that is ready for tile immediately. While the leveler is still wet, I use a gauge rake to set the depth and then follow up with the spiky roller in a north-south, east-west pattern. This ensures the material settles into every low spot without leaving those frustrating ridges that cause the secret to installing large format tile without lippage to become your next obsession. If you’re transitioning to another room, pay close attention to how to fix a transition between tile and uneven concrete so you don’t create a new tripping hazard while fixing the old one.
The ‘Self-Leveling’ Label is a Dangerous Marketing Trap
Everyone tells you that self-leveling compound is a ‘set it and forget it’ solution, but in my years on the job, I’ve found this to be the biggest lie in the flooring industry. These products are actually ‘self-smoothing,’ not self-leveling. If you pour a bucket of material and walk away, the surface tension alone will keep it from reaching the corners or truly finding a perfect level. You have to guide it. This is where flooring installation mistakes to avoid for lasting results often start—by trusting the chemistry more than your own eyes. If your substrate has a significant slope, the leveler will simply follow the gravity and pool at the bottom, leaving your high side as bare as before. I’ve seen dozens of DIYers end up with why your lvp floor is showing telegraphing from the subfloor because they assumed the liquid would magically fix a structural lean. 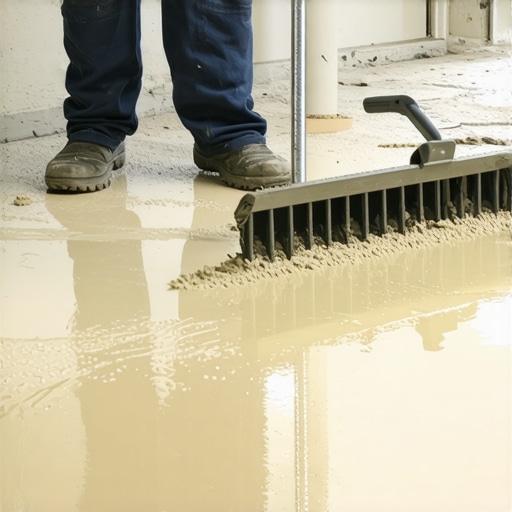
Do you know if your moisture test is actually measuring the slab core?
This is the advanced nuance most installers miss. You might use the painters plastic trick for testing concrete moisture and see no condensation, but that only tells you what is happening at the surface. According to the National Wood Flooring Association (NWFA) standards, a calcium chloride test or a simple plastic sheet test can be misleading if the ambient humidity is low. The real danger is the moisture trapped deep within the concrete. For a truly professional install, especially for glue-down applications, you need an in-situ relative humidity probe (ASTM F2170). If you skip this, you risk the ‘Oops’ factor of floor failure six months down the line when that trapped moisture finally migrates upward, causing why your engineered wood planks are bowing at the ends.
Thinset is an Adhesive, Not a Structural Filler
Another common myth I constantly battle is the idea that you can just ‘butter it heavy’ to fix a dip. Using thinset as a filler is a recipe for disaster. Thinset is designed to be a thin bonding layer; when it is applied too thick, it shrinks unevenly. This leads to the dreaded ‘lippage’ where one tile corner sits higher than its neighbor. If you find yourself trying to use a half-inch of mortar to level a spot, stop immediately. You are inviting the plywood mistake that causes grout cracks in troy bathroom remodels to happen in your own home. Instead, go back to the prep phase and use a dedicated patching compound or more leveler.
Why the expansion gap is your floor’s best friend
I once watched a beautiful luxury vinyl tile (LVT) floor buckle in the middle of a living room like a miniature mountain range. The culprit? The installer didn’t respect why your floor-to-wall gap is the most important part of lvp. People assume that because tile or vinyl is ‘waterproof,’ it doesn’t move. But everything moves with temperature changes. Without that 1/4 inch gap around the perimeter, the floor has nowhere to go but up. Have you ever fallen into this trap of skipping the ‘invisible’ details to get to the finishing work faster? Let me know in the comments. By focusing on these hidden nuances, from how to prevent ghosting marks on your self leveling finish to precise moisture testing, you transition from a weekend warrior to a master of the craft.The hardest part of any flooring job isn’t the heavy lifting; it’s the discipline to keep it looking like a showroom months after the dust has settled. I’ve seen beautiful installations ruined by simple cleaning errors that slowly degrade the surface finish. You absolutely have to understand hardwood floor care secrets to longevity and shine to protect your investment. One of the biggest ‘sins’ I see is people grabbing whatever is under the sink. Please, stop using vinegar on your hardwood floors immediately. The acidity slowly eats away at the polyurethane seal, eventually exposing the raw wood to moisture and grime. According to the National Wood Flooring Association (NWFA) technical manuals, even the most expensive finish cannot withstand the abrasive nature of tracked-in grit, let alone harsh chemicals. Similarly, why you should never mop your floors with dish soap comes down to the film it leaves behind—a sticky residue that actually attracts more dirt.
How do I maintain my new flooring over time?
Maintenance isn’t about deep scrubbing once a month; it’s about consistent, gentle care. I recommend a dedicated microfiber dusting system and a pH-neutral cleaner specifically formulated for your floor type. If you have tile, don’t let the grout lines become a catch-all for dirty mop water; always change your water frequently during the process. For those tricky spots where the floor meets another room, you might eventually need to know how to fix a transition strip that wont stay glued down, as these high-traffic points take the most abuse and are usually the first thing to wiggle loose.
The Gear That Separates Pros from Amateurs
If I had to rebuild my toolkit from scratch today, the first thing I’d buy is a 360-degree self-leveling laser level. It takes the guesswork out of layout and ensures your lines are dead-on across multiple rooms, which is vital for flooring installation fundamentals leveling for a seamless look. I also swear by an oscillating multi-tool for undercutting door jambs—it’s the only way to get a professional, flush fit without leaving gaps. These are the kind of tile installation pointers that save time and money because they eliminate the need for clumsy trim work later. Looking forward, I expect we will see more ‘smart’ underlayments that can actually alert homeowners to subfloor moisture spikes via an app before the planks start to warp or the tile fails. 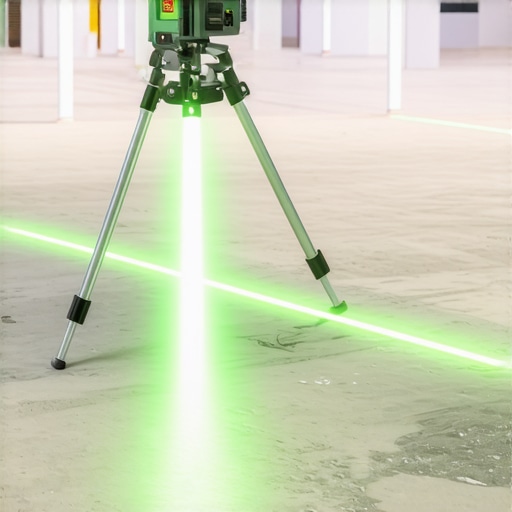 For now, stick to the basics of high-quality tools and meticulous cleaning. My one advanced tip for you this week: Invest in a high-quality vacuum with a ‘hard floor’ setting that turns off the beater bar—it’s the single best way to prevent micro-scratches on your finish. Try switching to a dedicated floor cleaner this month and see if that ‘cloudy’ look disappears.
The High Cost of Being Just ‘Close Enough’ With Your Subfloor
After years of hands-on experience, I’ve realized that the most expensive tool you’ll ever use is the demolition hammer you have to rent because you rushed the prep. One major lesson I’ve learned is that flatness is non-negotiable; if you can’t slide a nickel under your 10-foot straight edge, you’re not ready for mastering floor leveling pro secrets for perfect installations. I also discovered that your ears are just as important as your eyes—if a subfloor squeaks now, it will scream once you put heavy tile over it, so I always check for loose nails before the pour. Finally, never underestimate the power of a primer. It’s the ‘glue’ that keeps your hard work from peeling up like a cheap sticker.
The Gear That Rescued My Projects from Disaster
If you want to move from guesswork to precision, there are a few items I swear by. First, a 360-degree laser level is your best friend for seeing the ‘invisible’ slopes in a room. I also highly recommend looking into precise floor leveling techniques to achieve flawless surfaces by using a dedicated gauge rake rather than just a hand trowel. For those moving into the final stages of their project, having a reliable source for step by step guide to flooring installation and leveling success can save you hours of trial and error on YouTube. These tools don’t just save time; they save your sanity when the clock is ticking on a wet pour.
#IMAGE_PLACE_HOLDER_E#
Transform Your Home One Flat Surface at a Time
Taking on a major flooring installation project can feel overwhelming, but remember that every pro started with a single, messy bucket of thinset. The beauty of doing it yourself is the pride you feel every time you walk across a floor that is perfectly smooth and silent. Don’t be afraid of the learning curve; even the mistakes are just lessons that make your next room even better. By following the ultimate guide to floor leveling for a perfect finish, you are setting yourself up for a home transformation that will last for decades. You’ve got the knowledge and the tools—now it’s time to get that subfloor right. Have you ever poured a self-leveler only to watch it disappear into a hidden hole in the floor? Let me know your funniest (or most frustrating) flooring stories in the comments below!