
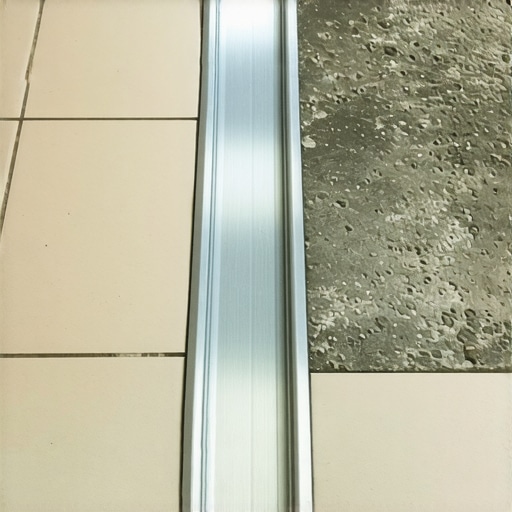
I’ll never forget the night I nearly took a header into my refrigerator because of a half-inch height difference I’d ignored between my hallway and the kitchen. The tile looked gorgeous, but that sudden drop to the raw concrete felt like stepping off a curb in the dark. It’s a classic DIY trap: you get so focused on the pretty surface that you forget the skeleton underneath has some serious scoliosis. If you are staring at a jagged gap where your beautiful porcelain meets a sloping or pitted slab, take a breath. We are going to turn that trip hazard into a smooth, professional walk-way that doesn’t scream ‘I did this myself on a Saturday afternoon.’
Years ago, I made the mistake of thinking I could just ‘glob’ extra mortar under the edge of my tiles to create a ramp. Spoiler alert: it didn’t work. The mortar shrunk, the tile eventually cracked, and I ended up having to fix a hollow sound that haunted my footsteps for months. Today, we are focusing on doing it the right way by addressing the subfloor before the first tile even touches the thinset. According to the National Floor Safety Institute, falls are the leading cause of hospital emergency room visits, and an uneven floor transition is a primary culprit in residential settings. We aren’t just making it look good; we’re making it safe.
Stop Tripping Over Your Own Hard Work
The secret to a flawless finish isn’t in your hands; it’s in your preparation. Most people rush into the fun part—picking out patterns—without realizing that flooring installation and leveling success starts with a flat, predictable surface. When your concrete slab resembles a mountain range, you have to bridge that gap with a calculated approach. I’ve spent way too much time in my life repairing cracked concrete slabs before tiling because I didn’t respect the physics of the transition. If your concrete is lower than your finished tile height, you’ll need a plan to ramp it up or level it out before the two surfaces meet.
Can I actually make this look professional without a bulky metal strip?
This is the question I get asked more than any other. People hate those ugly, silver ‘T-moldings’ that look like they belong in a commercial office building. The answer is yes, but it requires patience. You need to master the art of the ‘feather-finish’ or use a high-quality leveling agent. However, you have to be careful; I’ve seen many projects ruined when self-leveling compounds bubbled over the subfloor because the concrete wasn’t properly primed or cleaned first. It’s a mess that’s much harder to fix once it’s dry. Have you ever tried to hide a height difference and ended up with a bump that’s even worse than the original gap? It’s a frustrating cycle, but one we can break by using the right tools and a little bit of neighborly advice. We’ll start by looking at how precise floor leveling techniques can save your shins and your sanity.
The first step in any successful transition isn’t even about the tile; it’s about the physics of the slope. Grab a six-foot straight edge or a long, perfectly straight 2×4. Lay it across the gap where your tile meets the concrete. If you can slide a stack of three quarters under that straight edge, you have a dip that will cause ‘lippage’—that annoying edge where one tile sits higher than the next. I’ve found that the chalk dust secret for finding low spots in subfloors is the easiest way to visualize the work ahead. I literally shake a chalk line over the floor and see where the dust settles in the valleys. It’s like a topographical map of your future headache, and it shows you exactly where your leveling compound needs to live.
Clean Your Slab Like Your Deposit Depends on It
You cannot pour leveling compound over a dusty or oily slab and expect it to stay put. I learned this the hard way during a bathroom remodel in a 1970s ranch house. I thought a quick sweep was enough, but the concrete was covered in a thin, invisible layer of old carpet adhesive. Two days after my pour, the leveler started cracking and curling up at the edges. I had to spend a grueling weekend learning how to remove old mastic without damaging the slab. It was a dusty nightmare that could have been avoided with a simple scraper and a vacuum. If your concrete is smooth or power-troweled, it’s too slick for the leveler to ‘bite.’ This is the concrete etching step you shouldn’t skip before leveling. Think of it like sanding a piece of wood before painting; you are creating ‘tooth’ so the bond is permanent.
Stop the Bubbles Before They Start
Once your floor is clean and primed, you’re ready to pour. But wait—if you mix that compound too fast, you’re going to introduce air. This is a common pitfall where the mixing paddle speed that ruins your leveling compound turns your smooth floor into a moonscape of tiny craters. Keep your drill on a low setting. Once you pour, use the spiky roller secret for a mirror smooth pour to pop any remaining bubbles and help the material settle into those chalk-marked low spots. If you are working in a space where you’re blending tile into an existing room, remember that how to achieve flawless floor leveling before tile laying is all about the ‘feather edge.’ You want the compound to taper down to almost nothing as it moves away from the transition point.
The Secret of the Gentle Ramp
If the height difference between your hardwood and your new tile is significant, you aren’t looking for a flat floor—you’re looking for a subtle ramp. You can actually create a slope over several feet that the human eye (and foot) won’t even notice. I usually aim for a 1/8-inch rise over every 12 inches of run. This is where the leveling secret for installing plank flooring over tiles comes in handy, even if you’re doing the reverse. By using a high-strength feathering patch, you can ‘cream’ the edge so the transition is invisible. It feels like icing a cake, but the stakes are much higher. If you rush this, you’ll end up with a ‘hump’ instead of a ‘ramp,’ and that’s just as dangerous as a drop-off. Taking the time to double-check your slope with a level ensures that flooring installation fundamentals are respected, giving you a professional result that stands up to heavy foot traffic without cracking the grout lines later.
I’m going to let you in on a secret that most hardware store associates won’t tell you: ‘self-leveling’ is a marketing lie. Most DIYers pour that expensive bag of compound and expect it to behave like water in a bathtub, perfectly finding its own level. In reality, it behaves more like cold maple syrup. If you just pour it and walk away, you’ll end up with what I call the ‘puddle effect’—a thick center with edges that don’t quite reach the corners. I’ve seen countless floor leveling challenges arise simply because someone trusted the label more than their own eyes. To get it right, you have to actively manage the pour, pushing the material into the low spots and pulling it toward your transition points.
Don’t Believe the Marketing Behind Self-Leveling Compounds
The biggest ‘oops’ I see in the field isn’t the pour itself; it’s the lack of mechanical bond. People often try to level over old paint, sealed concrete, or even residues of linoleum glue. This is exactly why most floor levelers fail on top of painted concrete. Without a porous surface to ‘bite’ into, that beautiful level floor you just poured will eventually delaminate and crack. If you can’t see the pores of the concrete, you need to grind it or use a specialized primer. This is where mastering floor leveling pro secrets becomes the difference between a floor that lasts twenty years and one that fails in two. Have you ever fallen into this trap and had to chip up dried leveler? Let me know in the comments, because it’s a rite of passage I’d love to help you avoid next time.
How much bounce is too much for your subfloor?
This is the question that separates the pros from the weekend warriors. You can have a floor that is perfectly level but still doomed to fail because it’s too ‘bouncy.’ This is known as deflection. If your joists are spaced too far apart or your plywood is too thin, the floor will flex when you walk on it, causing your grout lines to crumble. According to the Tile Council of North America (TCNA), standard ceramic tile requires a deflection limit of L/360, but if you’re moving into the realm of tile selection for elegant hardwood floors and choosing natural stone, you need a much stiffer L/720 rating. I always recommend the hammer test for finding loose floor joists before you even think about the leveler. If you hear a thud instead of a sharp ring, you’ve got air gaps that need screws before you proceed.
Why Stiffness Matters More Than Flatness
Many homeowners obsess over a 1/8-inch dip but ignore a subfloor that sags under their weight. If you are working with a wooden subfloor, checking the plywood grade you need for a stable tile underlayment is non-negotiable. Using a standard CDX plywood can lead to catastrophic failures because the internal voids allow for too much movement. You want an exposure-1 rated underlayment at the very least. When you combine the right materials with flooring installation mistakes to avoid, like skipping the perimeter expansion gap, you ensure your floor can handle the seasonal shifts in humidity. If you’re blending different materials, remember that expert hardwood floor and tile combinations succeed or fail based on how they handle that meeting point. It’s not just about height; it’s about ensuring both surfaces are anchored so they don’t ‘fight’ each other as the house settles.
I’ve spent thousands on tools over the years that now sit in a dusty bucket in my garage, but the one thing I never step onto a job site without is a high-end moisture meter. You might think you can ‘feel’ if a slab is dry, but science doesn’t care about your intuition. According to the National Wood Flooring Association (NWFA), the moisture content between your wood flooring and the subfloor should typically be within 2 to 4 percent of each other to prevent cupping or gapping. This is why I always tell people that learning how to use a moisture meter to prevent floor failure is more important than knowing how to swing a hammer. If you ignore this, even the most precise floor leveling techniques won’t save you from a floor that breathes, groans, and eventually fails.
Gear That Actually Saves Your Back
When it comes to the actual installation, I’ve moved away from the old-school string lines. I now rely exclusively on a 360-degree green beam laser level. It’s a game-changer for layout. Using the laser level move for perfectly straight hallways allows you to see the high and low spots across the entire room simultaneously. It’s also the only way I can confidently tackle installing tiles like a pro with step-by-step strategies for 2025. Combine that with a high-quality notched trowel—honestly, don’t buy the $5 one—and you’ll find that your thinset coverage is more consistent, which prevents those dreaded hollow spots.
How do I stop my floors from aging prematurely?
Maintenance is where most homeowners drop the ball. You’ve spent a week leveling and tiling, so don’t ruin it by using the wrong cleaners. I’ve seen beautiful finishes stripped away because someone thought they could use a steam mop on LVP or vinegar on oak. Please, stop using vinegar on your hardwood floors immediately; the acid breaks down the polyurethane over time. Instead, stick to pH-neutral cleaners and focus on hardwood floor care secrets to longevity and shine. For your tile areas, remember that grout is porous. If you aren’t sealing it once a year, you’re just inviting deep-set stains that no amount of scrubbing will fix. This is especially true if you are trying to revamp your home with expert flooring installation tips that include light-colored grout lines.
The High-Tech Future of Flat Floors
I predict that in the next few years, we are going to see a massive shift toward ‘smart’ subflooring sensors that alert homeowners to moisture spikes before the wood starts to warp. Until then, we rely on prep. If you are working on a large-scale project, the ultimate guide to floor leveling for a perfect finish remains your best resource. We are also seeing more people move toward expert hardwood floor and tile combinations that use hidden expansion joints instead of bulky metal strips. It’s an exciting time to be a DIYer because the materials are getting smarter, even if the physics of a level floor remains the same. My challenge to you: before your next pour, try the spiky roller secret for a mirror smooth pour. It’s one small tool that makes a massive difference in the final texture of your subfloor.
The One Mistake That Still Haunts My First Bathroom Reno
If I could go back in time, I’d tell myself that ‘flat enough’ is the most dangerous phrase in the DIY dictionary. I once rushed a transition because I was tired of the dust, and for three years, every time I stepped from the hall into the bath, I heard a tiny click-clack of the tile flexing. I’ve since learned that the biggest floor leveling challenges aren’t about the product, but the patience. You have to wait for the primer to be tacky, not wet, and you have to trust your straight-edge more than your eyes. I also realized that the secret to installing large format tile without lippage starts weeks before you open a box of tile; it starts when you are grinding down that high spot on the concrete slab. These days, I don’t consider a floor ready until I can slide a marble across it and it doesn’t veer off course. It’s about the peace of mind that comes from knowing your grout won’t crack in six months because the floor beneath it is rock solid.
The Only Tools You Actually Need to Get This Right
You don’t need a truck full of equipment, but you do need three specific things to move from amateur to expert. First, stop guessing about the subfloor’s thirst. I swear by how to use a moisture meter to prevent floor failure because if that slab is holding onto water, your leveler will pop off like a scab. Second, ditch the string lines and invest in the laser level move for perfectly straight hallways; it’s the only way to see the ‘big picture’ of your floor’s topography in real-time. Finally, always use a spiky roller. It’s a specialized tool that sounds overkill, but the spiky roller secret for a mirror smooth pour is the only way to get those tiny air bubbles out of your leveler so it doesn’t look like aero-chocolate when it dries. I trust these tools because they remove the variables that cause 90% of flooring failures.
Stop Waiting and Start Leveling Your Future
A perfectly level floor is more than just a surface; it’s a foundation for the rest of your home’s aesthetic. When you take the time to revamp your home with expert flooring installation tips, you aren’t just following a guide—you are creating a space that feels intentional and high-end. Whether you are browsing the best tile trends for complementing hardwood floors this year or just trying to fix a trip hazard, remember that the prep work is the true craft. It’s hard, dusty, and often invisible, but the first time you walk across that seamless transition without looking down, you’ll know it was worth every second of effort. Have you ever found a low spot that seemed to swallow a whole bag of leveler unexpectedly? Let me know your story in the comments below!