
I’ll never forget the first time I finished a full room of Luxury Vinyl Plank in my basement. I sat back, cracked a cold soda, and felt like a total pro. Then I stood up to put my tools away and heard it. Thud. Echo. Clack. Every step I took sounded like I was walking across a giant, empty drum. It didn’t matter that the planks looked like expensive, hand-scraped oak; they sounded like cheap plastic. It’s a gut-punching feeling when you spend your hard-earned money on materials only for the final result to feel, well, a little bit ‘hollow.’ If you are currently tip-toeing around your living room wondering why your floor sounds like a stage production, I’ve been in those exact shoes. Honestly, it’s one of those mistakes that ruin your luxury vinyl plank installation more often than we care to admit. But here is the good news: you aren’t stuck with it. Today, I am going to show you how to quiet those floors down and share the exact techniques I used to fix my own mistakes without tearing the whole room apart.
Stop Living With That Annoying Drum Sound Under Your Feet
When we talk about that ‘hollow’ sound, we are usually dealing with vertical movement. There is a tiny gap between the bottom of your vinyl and the top of your subfloor, and every time you step, the plank hits that air pocket. I used to think a thick rug would solve it, but that’s just a Band-Aid on a broken bone. The real culprit is usually subfloor preparation—or a lack thereof. I learned the hard way that if you skip the prep, the floor will tell on you later. In my early days, I ignored a slight 1/8-inch dip because I was tired and wanted to finish the job. I learned quickly that the ultimate guide to floor leveling isn’t just a suggestion; it’s the law of the land if you want a silent house.
Can You Really Fix This Without Ripping Everything Up?
This is the question I get more than any other. People are terrified that the only solution is to dismantle their baseboards and pull up every single plank. While that is sometimes necessary for massive failures, there are clever ways to address ‘localized’ hollow spots. I’ve had success using specialized injection kits that fill the void with a pressure-sensitive adhesive. It’s a technique very similar to how to fix a hollow sounding tile, but with materials designed to stay flexible under vinyl. Do you have one specific spot in your hallway that echoes every time the dog runs over it, or is the whole room a drum set? Let me know in the comments, because the fix depends on the scale of the problem.
Why Your Subfloor Is Playing Tricks On You
To understand the fix, you have to understand the ‘why.’ Most people don’t realize that luxury vinyl is incredibly thin compared to hardwood. According to the National Wood Flooring Association (NWFA), a subfloor must be flat within 3/16-inch in a 10-foot radius. If you have even a tiny low spot, the floating floor will bridge over it like a tiny suspension bridge. When you step on that bridge, it flexes. If you chose a low-quality padding, you are basically amplifying that sound. I actually wrote a piece on why cheap vinyl underlayment makes your floor sound hollow because I see people buy expensive planks and then go for the cheapest foam they can find. It’s a recipe for a noisy home. By the time we’re done here, you’ll know how to identify these gaps and exactly which materials will finally give you that solid, high-end feel you were looking for.
Find the Ghost in Your Floor with the Tap Test
Before you start buying supplies, you need to map out the ‘dead zones.’ I use a simple tap test—either with a knuckle or a rubber mallet. Walk the room and tap every square foot. A solid floor sounds like a dull thud, but a hollow spot sounds like a snare drum. These air pockets are essentially tiny echo chambers. I once tried to fix a client’s kitchen where the floor felt like a trampoline near the fridge. I thought I could just weigh it down with a heavy crate for a week to ‘train’ the vinyl. Total disaster—the planks just unclicked elsewhere. I eventually had to pull three rows back and apply precise floor leveling techniques to achieve flawless surfaces to get it right. If you have a wood subfloor, the issue might even be deeper; sometimes you need to learn how to fix a bouncy floor with a few well-placed screws into the joists before the vinyl even goes down.
Fix Small Spots Without Moving Furniture
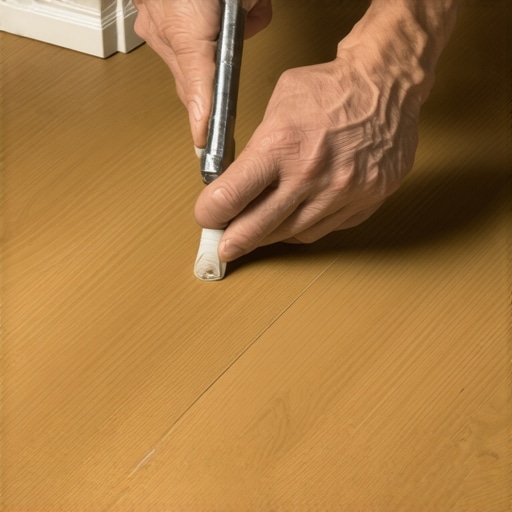
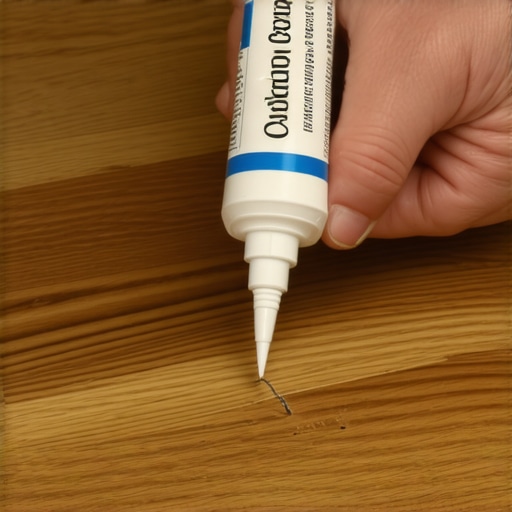
If your hollow sound is isolated to one or two planks, you can use the ‘drill and fill’ method. This involves drilling a tiny, 1/16-inch hole in a non-conspicuous part of the plank—usually in the grain pattern where it’s easily hidden. You then use a syringe to inject a specialized, flexible floor adhesive into the void. Think of it like a doctor giving a shot to a joint; the glue fills the ‘canyon’ between the plank and the subfloor. Once the adhesive is in, place a heavy weight on the spot for 24 hours. This is remarkably similar to how to fix a hollow sounding tile, but you must use a glue that remains slightly elastic. LVP expands and contracts with temperature, so a brittle glue will just snap and the sound will return in six months.
Leveling Is the Only Way to Kill the Echo
When the hollow sound is everywhere, the ‘bridge’ analogy becomes your reality. Your floor is spanning across low spots in the slab or plywood. To fix this permanently, you have to address the topography of the room. If you are working on a second story, you might need to know how to level a plywood subfloor without adding weight to avoid structural strain. Using a self-leveling compound is the gold standard here. It flows like thick pancake batter and fills in the dips perfectly. I spent years trying to ‘shim’ floors with extra layers of underlayment, but that just creates a squishy, unstable mess. I finally committed to mastering floor leveling pro secrets for perfect installations, and the difference in sound quality was night and day. A flat floor is a quiet floor.
Give Your Floor Room to Breathe
Sometimes the hollow sound isn’t from a dip, but from tension. If your planks are pinned against a wall or a door frame, they can ‘buckle’ slightly upward, creating a gap underneath. This is why the right way to undercut baseboards for a clean flooring finish is so vital. If the floor has at least a 1/4-inch expansion gap all around the perimeter, it can lay flat against the subfloor. Without that gap, the floor is like a rug that’s too big for the room—it has nowhere to go but up. Check your edges; if the plank is tight against the drywall, grab a multi-tool and trim it back. You’ll often hear the floor ‘sigh’ as it finally settles into place, instantly muting that annoying drum effect.
A lot of folks assume that if a floor is loud, the answer is to throw the thickest, squishiest underlayment they can find at it. In my experience, this is the quickest way to kill your floor. This is a common flooring installation mistake to avoid for lasting results. When you use a high-loft padding under LVP, you aren’t silencing it; you’re creating a trampoline. That extra ‘give’ puts immense pressure on the thin locking tongues of your planks. Eventually, those tongues snap, and suddenly you aren’t just dealing with a hollow sound—you’re dealing with why your lvp floor is clicking when you walk on it. The hidden nuance here is that rigidness is actually your friend. You want a high-density, low-profile underlayment that provides support rather than cushion.
Is Your Subfloor Rigid Enough for Modern Tile Trends?
If you’re transitioning from vinyl to a bathroom reno, don’t assume the same rules apply. I see people try to lay heavy porcelain over a subfloor that has way too much flex. According to the Tile Council of North America (TCNA), the deflection limit for ceramic tile is typically L/360, but for natural stone, it doubles to L/720. If your joists are too far apart or your plywood is too thin, no amount of leveling compound will save you from why your porcelain tiles are cracking in a perfect straight line. You have to stiffen the structure first. I usually recommend a layer of exterior-grade plywood or a cement backer board, but you have to know how to level a plywood subfloor without adding weight if you’re worried about the structural load of an older home.
The Priming Trap That Ruins Even the Best Self-Leveler
Here is the ‘oops’ factor that separates the pros from the weekend warriors: skipping the primer. I’ve watched guys pour five-dollar bags of compound directly onto a dry concrete slab, only to see it look like a desert floor a week later. I wrote about why your self-leveling compound is cracking like a dry-lake bed specifically because of this. Concrete is porous; if you don’t seal those pores, the slab will literally drink the water out of your leveler before it has a chance to cure. This results in a brittle, dusty mess that won’t bond. You must understand why you must prime concrete before every leveling job to ensure the chemical bond is stronger than the floor itself. 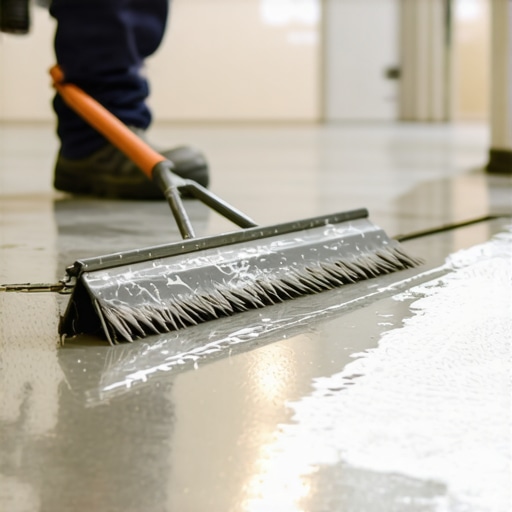
Mastering the Nuance of Moisture Management
Finally, let’s talk about the mistake that ruins hardwood and high-end LVP alike: rushing the acclimation. Most people think ‘acclimation’ just means leaving the boxes in the room for a day. In reality, you need to open the boxes and sometimes even cross-stack the planks to let the air circulate. If you ignore this, you’ll end up with why your vinyl floor is tent-peaking in the middle as the material expands into a space it hasn’t adjusted to. Professionals don’t guess; they use tools. Learning how to use a moisture meter to prevent floor failure is the difference between a floor that lasts twenty years and one that fails in twenty months. Have you ever fallen into this trap where you thought a ‘quick’ install was good enough? Let me know in the comments, because we’ve all been there at least once.
Once you’ve conquered the sound of a hollow floor, the focus shifts to ensuring that silence lasts a lifetime. I’ve seen too many people put in the sweat equity only to watch their floors degrade because they treated them like an afterthought once the last plank was clicked. The secret to a floor that stays tight and quiet isn’t just in the glue or the leveler; it’s in the precision of the tools you use during the home stretch. I used to think a tape measure and a steady eye were enough, but honestly, there are 7 tools you actually need for a professional diy hardwood install that most weekend warriors ignore. For instance, why you should use a dead blow hammer for floor capping isn’t just about force—it’s about the dead-drop impact that seats the material without that damaging ‘bounce back’ that can loosen your leveling compound over time.
How do I keep these floors looking brand new for years?
Maintenance is where the average homeowner loses the battle. If you’ve installed LVP, don’t think you’re off the hook because it’s ‘waterproof.’ Dirt is the sandpaper of the flooring world. I always keep a specific kit on hand and have learned how to remove scuff marks from your new luxury vinyl floors without stripping the wear layer. If you’ve gone the hardwood route, you need to be even more disciplined. I’ve gathered quite a few hardwood floor care secrets to longevity and shine over the years, and the biggest one is controlling your indoor humidity. According to the Mapei Technical Data Sheet for Novoplan 2, even the best self-levelers and adhesives are subject to the movement of the subfloor above them. If your house swings from 20% to 80% humidity, that floor is going to move, and movement eventually leads to noise.
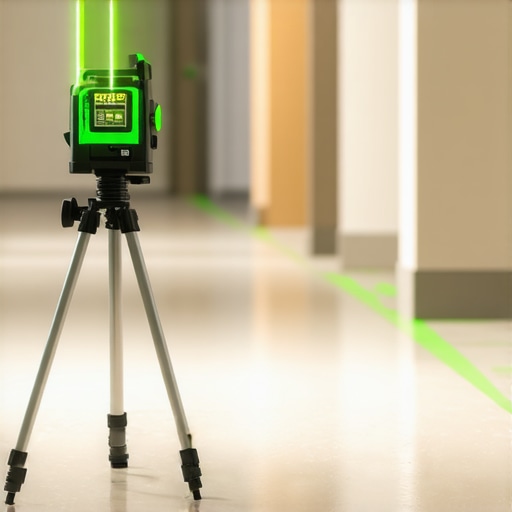
When you are scaling up from a single room to a whole house, you have to stop thinking in inches and start thinking in fractions. This is where the laser level move for perfectly straight hallways becomes your best friend. A laser doesn’t lie, and it doesn’t sag like a chalk line can over thirty feet. If you find your lines are drifting, you are inviting flooring installation mistakes to avoid for lasting results right into your living room. I predict that in the next five years, we will see even more ‘smart’ leveling systems—perhaps even augmented reality apps that map your subfloor’s high and low spots in real-time. But for now, we rely on the physics of a good spirit level and a high-quality primer. If you really want to step up your game and ensure your floor never makes a peep, I strongly encourage you to try the laser level method on your next project. It’s the single biggest ‘aha’ moment I’ve ever had on a job site, and it will change how you view every square foot of your home. Stay tuned, because next, we are going to wrap this all up with the final touches that make a DIY job look like a five-figure professional renovation.
The Brutal Reality of Subfloor Gaps I Had to Face
After years of installing and repairing these floors, I’ve realized that the most common mistake isn’t the clicking of the planks—it’s what you don’t see beneath them. Here are a few lightbulb moments that changed my approach to every job:
- The 3/16-inch rule is non-negotiable: I once thought a slight dip wouldn’t matter once the furniture was in. It mattered. Every single step in that corner echoed. Now, I never start without a 10-foot straight edge to ensure my floor leveling is spot on.
- Primer is the bond for your success: If you are pouring self-leveler, you absolutely must understand why you must prime concrete before every leveling job. Without it, the leveler just flakes away, leaving you with the same hollow sound six months later.
- Sound travels through tension: Sometimes the noise isn’t a hole; it’s a tight edge. A floor that can’t breathe will always be noisy because it’s slightly bowed off the ground.
The Gear I Never Walk onto a Job Site Without
You don’t need a truck full of industrial machinery, but you do need precision. These are the three tools I personally trust to achieve a silent, high-end finish:
- A High-Quality Moisture Meter: Before you even think about the vinyl, check the subfloor. I’ve learned how to use a moisture meter to prevent floor failure because hidden dampness can cause the subfloor to swell and create those air pockets that echo when you walk.
- The Laser Level: Forget the chalk line for long runs. Using the laser level move for perfectly straight hallways ensures your planks aren’t under weird diagonal stress that pulls them off the subfloor.
- A Dead Blow Hammer: It’s a game-changer for final adjustments. I explain why you should use a dead blow hammer for floor capping to every DIYer I mentor; it provides the force needed to seat the planks without the ‘bounce-back’ that ruins the leveling compound bond.
Take the First Step Toward a Professional Finish
Repairing a hollow floor might seem daunting, but it is one of the most rewarding DIY wins you can achieve. Once you hear that solid thud under your feet instead of a plastic clack, you’ll know the effort was worth it. Don’t let a minor echo ruin your investment. By following a step-by-step guide to flooring installation and leveling success, you can transform a cheap-sounding room into a high-end sanctuary. Keep practicing your floor leveling techniques, and remember: the prep work is the actual floor; the vinyl is just the jewelry on top. Have you ever discovered a hollow spot in your floor after you thought the job was finished? Let me know in the comments how you handled it!