
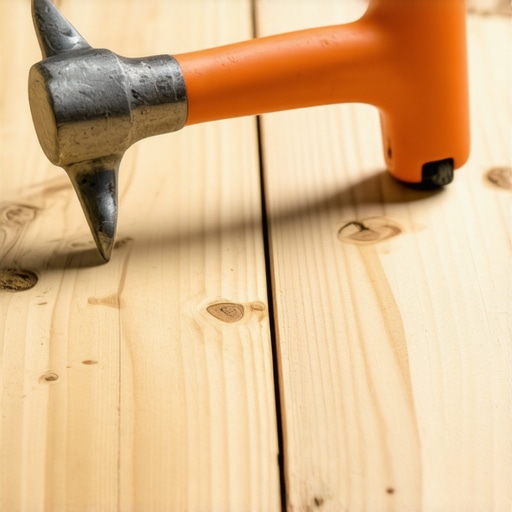
I still remember the sinking feeling in my chest when that standard rubber mallet bounced off the tapping block and left a nasty crescent moon dent right in the middle of a $12-per-square-foot wide-plank walnut board. It was my third day on a big renovation, and I thought I was doing everything right. I had my spacers, my level, and what I thought was the right tool. But every time I swung, that mallet acted like a bouncy ball. I had to hit twice as hard just to get the plank to seat, and that’s when the disaster happened. That one mistake cost me a full hour of prying up boards and a whole lot of pride. Since then, I’ve never stepped onto a job site without a dead-blow hammer by my side. Today, I’m going to show you why this one simple tool swap will change how you approach every professional DIY hardwood install and save you from the expensive headaches I faced early on.
Your Flooring Deserves More Than a Bouncing Mallet
When you are trying to seat a stubborn plank during wide plank hardwood installation, the physics of your strike matter more than your muscle. A standard hammer or even a basic rubber mallet has a nasty habit of recoiling. That ‘bounce’ is wasted energy. Worse, it’s energy that can cause your hand to slip or the block to shift, leading to damaged tongues and marred surfaces. A dead-blow hammer is filled with steel shot or sand that moves forward during the strike, effectively killing the rebound and transferring all that force directly into the floor. This means you aren’t fighting the tool; you’re letting the tool do the heavy lifting. This is especially critical when you’re working on flooring installation fundamentals where precision is the difference between a floor that lasts and one that squeaks by next summer. Have you ever accidentally ruined a brand-new plank because your mallet didn’t behave the way you expected?
Wait, is a dead-blow hammer actually worth the hype?
You might be thinking that a regular hammer is fine as long as you use a scrap piece of wood as a tapping block. I used to think the same thing until I realized how much fatigue plays a role in errors. According to engineering principles documented by The Physics Classroom, the conservation of momentum in a dead-blow tool ensures that the impact duration is slightly longer and the peak force is managed, which prevents the ‘shock’ from traveling back into your wrist and elbow. This isn’t just about protecting the wood; it’s about protecting your body over an eight-hour shift. If you are serious about mastering hardwood flooring, you need to stop using tools that work against you. Using a dead-blow ensures that every strike is intentional and controlled, which is exactly what you need when capping off a row near a wall where space is tight and your patience is wearing thin.
Master the Controlled Strike
When you’re standing over that first row, your instinct is to swing for the fences. Don’t. A dead-blow hammer thrives on short, deliberate movements. I once spent three hours trying to wrestle a slightly bowed hickory board into place using a standard rubber mallet. Every time I hit it, the mallet bounced back, and the board didn’t move an inch. I was sweating and cursing the manufacturer. Then, I grabbed my 2-lb dead-blow. With one solid, ‘dead’ thud against the tapping block, the tongue slid into the groove like it belonged there. The difference was the internal shot; it stayed against the striking face, providing a secondary ‘push’ that kept the energy moving forward rather than up.
Get Your First Row Perfectly Straight
Before you even start swinging, you need a solid baseline. If you don’t know how to get a perfectly straight first row of flooring every time, the dead-blow won’t save you from a crooked layout later. Secure your starter row with face nails or wedges. Once that anchor is set, position your tapping block squarely against the tongue of the next board. Hold the dead-blow hammer handle loosely—don’t choke it like a baseball bat. Let the weight of the shot do the work.#IMAGE_PLACE_HOLDER_B#
Save Your Back in Tight Corners
The real magic of the dead-blow happens when you reach the walls. Most people struggle with the last row because there isn’t enough room to swing. This is where you combine the hammer with a heavy-duty pull bar. Because the dead-blow doesn’t recoil, you can give the pull bar a sharp tap even in a 4-inch gap, and it will seat the board without the hammer flying back into the drywall. This is especially useful when you need the right way to undercut baseboards for a clean flooring finish, ensuring the board slides underneath the trim without marring the finish.
Fixing the Hidden Squeaks
If you find that your boards are still moving despite a solid strike, the issue might be below your feet. No amount of force can compensate for a subfloor that has too much give. I learned this the hard way on a farmhouse renovation where the floor felt like a trampoline. Before you lay your first plank, perform the 3-foot level test for checking subfloor flatness like a pro. If the subfloor is dipping, the dead-blow energy will be absorbed by the air gap instead of seating the joint. If you find a soft spot, you must learn how to fix a bounce in your plywood subfloor before proceeding. A solid strike requires a solid foundation.
Why a Tapping Block is Non-Negotiable
Even with a dead-blow, never hit the wood directly. Even a soft-faced hammer can compress the wood fibers of the tongue, making it impossible for the next board to lock in. This is a common pitfall in revamp your home with expert flooring installation tips. Always use a high-density polyethylene (HDPE) tapping block. It distributes the force of the dead-blow across the entire edge of the board, preventing those ‘crescent moon’ dents. If you are working with alternative materials, knowing why you should always use a tapping block with vinyl becomes even more critical, as the locking mechanisms are significantly more fragile than solid wood.
If you have spent any time in the trades, you have heard it a thousand times: “Make sure it is level.” But here is the contrarian truth that separates the pros from the weekend warriors: level is often optional, but flat is absolutely mandatory. I have seen homeowners spend thousands on self-leveling compound to fix a floor that was perfectly fine for hardwood, simply because they did not understand the difference. If your subfloor is on a slight one-degree tilt but is smooth as glass, your wide-plank walnut will look incredible. However, if it is perfectly level but has a hidden hump or valley, those planks will eventually gap or squeak. This is why wide planks need more than just nails to stay flat; they need a subfloor that will not fight back. According to the National Wood Flooring Association (NWFA), the industry standard for flatness is a deviation of no more than 3/16-inch in a 10-foot radius. If you miss this, you are setting yourself up for failure. Have you ever fallen into this trap? Let me know in the comments.
Stop Chasing the Spirit Level
One of the biggest traps I see is the “pour and pray” method with self-leveling underlayment. People think the liquid is magic and will find its own way perfectly. It will not. If you do not address floor leveling challenges and common mistakes before the pour, you are just creating an expensive mess. The most common error is skipping the primer or using the wrong one. I have seen entire jobs where the self-leveler is peeling off the concrete in sheets because the installer did not realize the concrete was too porous or contaminated. The concrete literally sucks the moisture out of the leveler before it can bond, leaving you with a brittle, dusty mess that sounds like walking on potato chips once the hardwood goes down.
Is your floor level enough for large format tile?
For tile, the stakes are even higher than for wood. If you are planning on how to achieve flawless floor leveling before tile laying, you must account for “lippage.” A subfloor that is not flat leads directly to the trowel size error that leads to hollow-sounding tiles. When the floor is not flat, your thinset coverage becomes dangerously inconsistent. You will have 100% coverage on the high spots and 20% on the low spots. Eventually, those hollow spots crack under the weight of a heavy refrigerator or high foot traffic. This is why I always perform the 3-foot level test for checking subfloor flatness like a pro before I even open a bag of mortar. #IMAGE_PLACE_HOLDER_C#
Identify a Compromised Subfloor Before the Pour
Before you commit to a leveling strategy, check the structural integrity of what is beneath you. A common mistake is applying leveler over a subfloor that has too much vertical deflection. If the joists are bouncing, your rigid leveling compound will crack like a dry lake bed within months. Advanced installers know that prep work accounts for 70% of the job’s success. Always check for moisture and bond-breaking contaminants. If you rush the prep, no amount of dead-blow hammer precision during the plank install will save the final product. Mastery in flooring is not about how hard you hit the wood; it is about how much time you spend staring at the bare subfloor with a straightedge in your hand.
If the dead-blow hammer was your best friend during the install, the pinless moisture meter is your insurance policy for the next decade. I personally use the Wagner Orion 950 because it tracks ‘Equilibrium Moisture Content’ (EMC). Most people think the moisture test you must do before gluing down wood is just a one-time step, but I check my floors every season. Wood is a living material; it breathes. If you do not monitor the relative humidity in your home, even the best elevate your space choosing the right hardwood floors for your home selection will eventually fail. I have seen $15,000 installs ruined because the homeowner turned off the AC for a week in July, causing the planks to cup.
How do I maintain hardwood floors after the dust settles?
The first 48 hours are critical. You need to know how to clean hardwood floors after a major renovation without using abrasive chemicals that eat through the fresh polyurethane. I always tell my clients to throw away their steam mops. It is the fastest way to delaminate an expensive floor, and I have written extensively on why you should never use a steam mop on engineered wood floors. Instead, stick to a microfiber mop and a pH-neutral cleaner specifically designed for wood. If you are balancing a home with mixed materials, look into best tile trends for complementing hardwood floors this year to ensure your cleaning routine for the tile does not bleed over and damage the wood edges.
The One Tool That Keeps Your Floor From Shrinking
Beyond the hammer and the level, you need a high-quality hygrometer in the room. The National Wood Flooring Association (NWFA) states in their Technical Manual C200 that hardwood should ideally be kept between 30% and 50% relative humidity. If you drop below that, you will start searching for how to hide gaps in your vinyl plank flooring or wood planks as they shrink. I personally keep a sensor tucked behind my bookshelf; it is a low-tech solution to a high-stakes problem. #IMAGE_PLACE_HOLDER_D#
Smart Sensors and the Future of Flooring
I predict that within the next five years, we will not be guessing about subfloor moisture. We are already seeing ‘smart’ underlayments being developed with embedded sensors that alert your smartphone if a pipe leaks under the floor. This will be a game-changer for revamp your home with expert flooring installation tips, preventing mold before it starts. Until then, rely on hardwood floor care secrets to longevity and shine to keep your investment looking like the day it was laid. My challenge to you: buy a $20 hygrometer today and place it in your main living area. You will be shocked at how much your environment fluctuates and how it affects your floors.
Hard Truths from a Decade of Creaky Planks
After years of fixing my own errors and those of others, I have realized that the biggest lightbulb moment in flooring is understanding that the wood is constantly trying to move. I used to think of a plank as a static piece of building material, but it is more like a living sponge. If you force it into place without checking the subfloor’s health, you are just building a ticking time bomb. I once ignored a slightly chalky surface, only to find later that why your concrete subfloor is dusting and how to stop it was the key to preventing my entire layout from shifting. Another hard lesson? Listen to the hammer. A dead-blow hammer provides a distinct, heavy ‘thud’ when the joint is fully seated. If you hear a sharp ‘clack,’ something is blocking the groove—stop hitting and investigate before you break the tongue.
The Gear That Actually Makes a Difference
You do not need a truck full of gadgets, but you do need these three essentials that I personally swear by. First, a 28-ounce dead-blow hammer with replaceable nylon faces; it provides the mass needed for wide planks without the rebound that causes fatigue. Second, a high-quality straightedge for a step-by-step guide to flooring installation and leveling success—if you can see light under the edge, your floor will squeak. Finally, I never start a job without the NWFA Technical Manual. It is the gold standard for the industry and has saved me from countless flooring installation mistakes to avoid for lasting results by providing clear data on acclimation times and humidity levels.
Take the Leap and Transform Your Space
It is easy to get overwhelmed by the physics of subfloors and the chemistry of levelers, but remember that every master installer started with a single row. The dead-blow hammer is not just a tool; it is your partner in ensuring that your hard work stays beautiful for decades. Take your time, trust your measurements, and use these revamp your home with expert flooring installation tips to build a foundation you can be proud of. Your dream floor is only a few controlled strikes away. #IMAGE_PLACE_HOLDER_E# Have you ever dealt with a stubborn plank that refused to seat, or a subfloor surprise that nearly ruined your project? Let me know your stories in the comments below!