
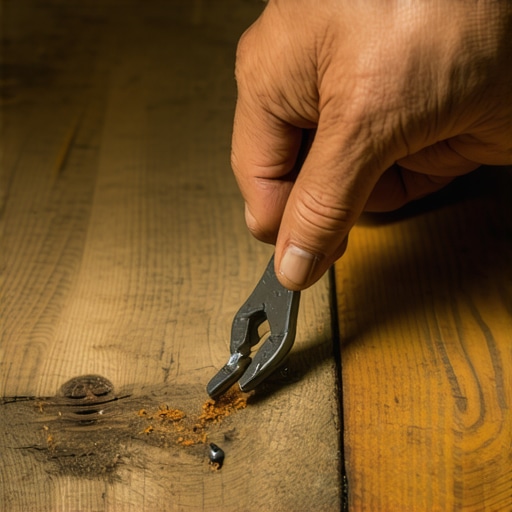
I remember kneeling on that subfloor back in 2018, my hands shaking from the vibration of a flathead screwdriver that kept slipping every three seconds. My knees were screaming, my lower back felt like it was tied in a knot, and I’d only cleared about four square feet of a two-hundred-square-foot room. It was supposed to be a quick weekend project to get the room ready for a hardwood floor upgrade, but instead, I was contemplating if I could just live with the subfloor and call it ‘industrial chic.’ If you’ve ever spent hours staring at ten thousand tiny metal teeth biting into your plywood, you know exactly the despair I’m talking about. Today, I’m going to share the hard-won secrets that will save your spine and your sanity, turning a grueling multi-day torture session into a quick afternoon task that won’t leave you reaching for the ibuprofen. [IMAGE_PLACEHOLDER]
Stop Kneeling and Start Using Your Leverage
Ripping up the old carpet is the easy part—the ‘fun’ part. But then you look down and see the wreckage: a million staples left behind like tiny landmines. My biggest mistake early on was thinking I could just power through it with a pair of needle-nose pliers and sheer stubbornness. I ended up snapping half the staples off at the crown, leaving jagged metal shrapnel that made mastering floor leveling a total nightmare during the next phase of the renovation. You can’t just ignore them either; those little guys will telegraph through any thin vinyl or cause clicking sounds under your LVP flooring. According to the Centers for Disease Control and Prevention, prolonged kneeling and repetitive gripping are major contributors to musculoskeletal disorders, so it’s not just about being ‘tough’—it’s about being smart so you can actually enjoy your new floors.
Is it really possible to skip the back pain?
Absolutely, but it requires ditching the ‘pliers and prayer’ method. I found that using a long-handled floor scraper or a dedicated staple puller with a rolling fulcrum changed everything. It’s about getting your body off the ground and letting the tool do the heavy lifting. Have you ever felt like a simple home improvement project was actually a personal vendetta by the previous homeowners? Trust me, we’ve all been there. Once you realize that the hammer test for finding loose subfloor nails also helps you identify those hidden staples, you’ll never go back to your old ways. We’re going to look at the exact kit you need to clear a room in record time without feeling like you’ve aged a decade in a single afternoon.
Swap the Pliers for a Long-Handled Scraper
I once spent six grueling hours on my knees in a drafty master bedroom, fighting a thousand staples with nothing but a pair of vice grips. By the time I finished that single room, my palms were bruised and I could barely close my hands to hold a coffee mug the next morning. It was a classic rookie mistake. Since then, I’ve learned that the secret isn’t more effort; it’s more leverage. You need a heavy-duty floor scraper with a four-inch replaceable steel blade. Think of it like a snow shovel for metal debris. Instead of surgical precision on every single staple, you glide the blade across the plywood at a shallow angle. The edge catches the ‘crown’ of the staple and pops it right out. It’s significantly faster and keeps your spine in a neutral position, which is the first rule of any step-by-step guide to flooring installation and leveling success. If a staple is particularly stubborn and shears off, don’t leave the legs behind. Use a small pry bar with a rolling fulcrum to pluck them out. If you leave even a tiny bit of metal protruding, you’re practically inviting disaster, as these imperfections are exactly why your lvp floor is showing telegraphing from the subfloor once the light hits it at the right angle. 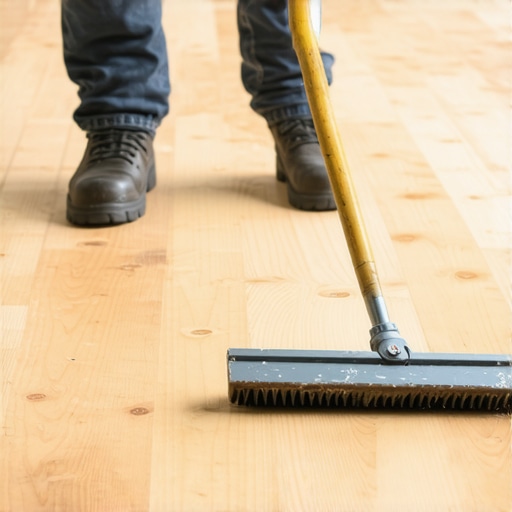
Find Every Single Staple with the Sweep Technique
Once you think the floor is clear, it almost certainly isn’t. Metal staples have a nasty habit of hiding in plain sight or blending into the wood grain. To find the stragglers, I use a ‘sweep and sound’ method. Take a flat-headed shovel or the back of a metal garden rake and drag it firmly across the entire surface of the room. The sound of metal hitting metal is unmistakable—it’ll click or ‘ping’ the moment you hit a leftover staple. It’s like using a metal detector without the expensive electronics. This is also the perfect time to perform the hammer test for finding loose subfloor nails. As you move across the room, tap the subfloor. A solid ‘thud’ is what you want; a hollow ‘clack’ means the plywood has pulled away from the joist. Fixing these minor issues now is the only way to ensure flooring installation fundamentals: leveling for a seamless look are met before the expensive materials come out of the boxes.
Stop the Squeak While the Subfloor is Naked
There is nothing more frustrating than finishing a beautiful floor only to hear a rhythmic ‘creak-crunch’ every time you walk to the bathroom at 2:00 AM. While you have the carpet and padding removed, you have a golden opportunity that you will never have again without a full tear-out. Walk the floor slowly. When you find a squeak, don’t just drive a nail into it—nails pull back out over time. Use three-inch deck screws to pull that subfloor tight against the floor joists. This simple step is the pro’s way how to fix a squeak in a second-story subfloor permanently. After the floor is silent and the staples are gone, you need to check for flatness. Use a long level or a straightedge to find any ‘dips’ or ‘humps.’ If you are planning on high-end finishes, knowing the secret to getting a flat floor for large format tiles starts with this very moment. A flat subfloor is the canvas for your masterpiece; if the canvas is warped, the painting will never look right no matter how much you paid for the paint.
Most homeowners, and even plenty of seasoned weekend warriors, focus on the wrong metric when they prepare a room. They spend hours with a bubble level making sure the room doesn’t slope, but levelness isn’t what prevents your floor from failing—flatness is. You can have a floor that is perfectly level with the horizon, yet if it has a 1/4-inch dip every three feet, your new planks will eventually pull apart at the seams. This is precisely why your lvp floor is clicking when you walk on it only months after installation. The click isn’t just an annoying sound; it’s the sound of the locking mechanism slowly fatiguing until it snaps.
Levelness is a Lie Without Flatness
In my experience, people treat ‘level’ and ‘flat’ as synonyms, but they are worlds apart in the flooring industry. A subfloor can be sloped like a ramp and still be perfectly ‘flat’ enough to receive a step-by-step guide to flooring installation and leveling success. However, the moment you introduce ‘birdbaths’—those shallow depressions—you’ve created a void. According to the National Wood Flooring Association (NWFA), a subfloor needs to be flat to within 3/16 of an inch over a 10-foot radius. If you miss this tolerance, you are essentially asking your flooring to act as a bridge over a canyon. Spoilers: it isn’t designed for that. This is especially critical for modern materials, as achieving total flatness is the secret to getting a flat floor for large format tiles that won’t crack or ‘lip’ at the edges.
Can You Really Spot a 3/16-Inch Dip by Eye?
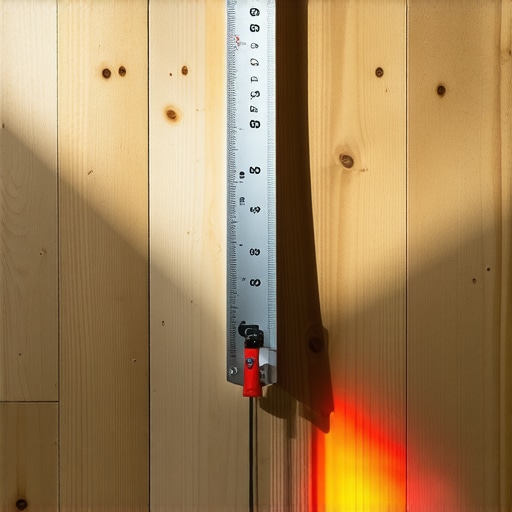
The short answer is no. This is where most people fall into the trap of ‘good enough.’ To truly verify your surface, you need to use the chalk dust secret for finding low spots in subfloors. By dragging a straightedge across the floor and seeing where the dust remains, you reveal the ‘topographical map’ of your room. It’s a humbling experience to realize that the floor you thought was perfect actually looks like the surface of the moon. This nuance is what separates a DIY job that lasts five years from a professional-grade installation that lasts fifty. Have you ever fallen into this trap? Let me know in the comments.
Don’t Kill Your Compound with Too Much Water
When you finally decide to fix those low spots, do not succumb to the ‘pancake batter’ myth. Many people think that adding an extra quart of water to their self-leveling compound will help it flow better into the corners. This is a catastrophic ‘oops’ factor. Over-watering causes the aggregate to sink to the bottom and the polymers to float to the top, resulting in a chalky, weak surface that will flake off under your new floor. Furthermore, using the mixing paddle speed that ruins your leveling compound—usually by going too fast and whipping air into the mix—will leave you with pinholes and bubbles. This lack of precision is why your self-leveling pour looks like a topographical map instead of a mirror-smooth finish. Respect the chemistry of the product, or the product will fail you when you least expect it.
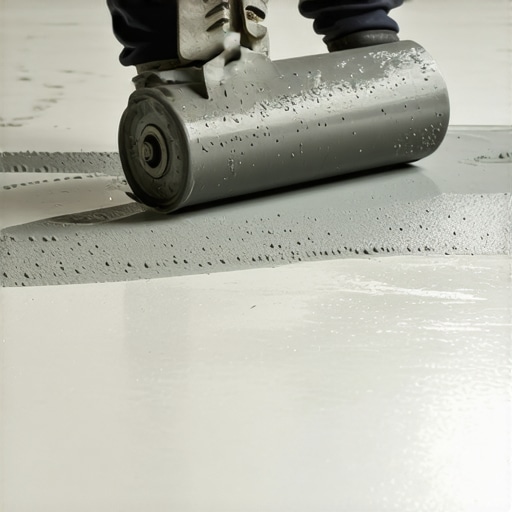
I’ve learned the hard way that the best prep work in the world can be ruined by a single air bubble. That’s why I never pour leveler without my spiked roller in hand. This isn’t just a fancy accessory; the spiky roller secret for a mirror smooth pour is how professionals ensure the surface stays perfectly flat while degassing. If you skip this step, you’ll end up with tiny craters that mess with your adhesive bonding and the structural integrity of your floor. Picking the right tool is vital, as the roller selection that prevents air bubbles in leveler depends heavily on the specific thickness of your pour and the viscosity of the product you choose. According to the Tile Council of North America (TCNA) Handbook, specifically the standards for substrate preparation, maintaining a surface free of voids is a non-negotiable requirement for modern installations. This level of precision is exactly the secret to installing large format tile without lippage, ensuring your socks never snag on the edge of a tile again.
How do I maintain my floors over the long haul?
Once you’ve put in the sweat equity to get everything flat and beautiful, you have to protect that investment. I see so many homeowners ruin their hard work within the first six months by cleaning with the wrong chemicals. Please, for the sake of your wood, stop using vinegar on your hardwood floors immediately. The acetic acid eats through the protective finish over time, leading to a dull, cloudy look that even the best hardwood floor care secrets to longevity and shine can’t easily fix. Similarly, understanding why you should never use a steam mop on luxury vinyl is a lesson usually learned only after the planks start to buckle or the adhesive fails from the intense heat. Stick to pH-neutral cleaners and soft microfibers. It sounds boring, but that simple consistency is what makes a floor look brand new even a decade after the initial installation.
Fast-Set Tech is the Future
Looking ahead, I suspect we are moving toward a future where “smart” leveling compounds will actually change color when they reach the perfect moisture content for tiling. We are already seeing incredible jumps in chemistry that allow for ultra-fast turnarounds. For those of us who don’t want to wait days to finish a project, the fast-set mortar trick for same-day tile-grouting is already a game-changer. It allows you to move from prep to grout in a single shift, provided your subfloor was cleared and leveled correctly. If you want to take your DIY skills to a professional level, I challenge you to try the spiked roller technique on your next small patch. The sheer difference in the smoothness of the finish will blow your mind and make the actual flooring installation feel like a breeze. You’ve done the heavy lifting—now make sure the details stand the test of time.
The Mental Trap That Nearly Ruined My Master Bedroom
Reflecting on my early DIY years, I realized that the biggest hurdle wasn’t the physical labor; it was my own impatience. I used to think that ‘close enough’ was acceptable when it came to subfloor prep. I was wrong. If you don’t treat the foundation with the same respect as the finish, your high-end materials will never look their best. One lightbulb moment for me was realizing that every hour spent pulling staples or grinding down high spots saves three hours of frustration during the actual layout. It’s also vital to acknowledge that flooring installation mistakes to avoid for lasting results almost always start at the subfloor level. Don’t be the person who tries to hide a dip with extra padding; it never works in the long run and will only lead to premature failure of your beautiful new surfaces.
My Must-Have Kit for Flawless Results
If you want to move beyond basic results, you need the right reinforcements. I personally rely on these three essentials for every project: First, a high-quality 6-foot aluminum straightedge. This is the only way to truly gauge flatness and catch those 3/16-inch dips that hide from the naked eye. Second, a heavy-duty mixing drill—not a standard cordless drill—to ensure your compound is homogenous without burning out a motor or introducing too much air. Finally, never start a pour without a spiked roller nearby. Using the spiky roller secret for a mirror smooth pour is the literal difference between a DIY project and a professional finish. These tools aren’t just ‘extras’; they are the safety net for your flooring investment.
Your Foundation Is Ready for Its Close-Up
Taking the time to master these prep steps transforms flooring installation from a stressful chore into a rewarding craft. You now have the blueprint to handle staples, squeaks, and uneven surfaces like a seasoned pro. By focusing on flatness over simple levelness, you are ensuring that your home remains beautiful and quiet for decades to come. Don’t let the fear of a few hidden staples stop you from starting your revamp your home with expert flooring installation tips. You’ve got the tools and the strategy—now it’s time to get to work and build something that lasts. Have you ever discovered a hidden subfloor nightmare after pulling up old carpet? Let me know in the comments below!