
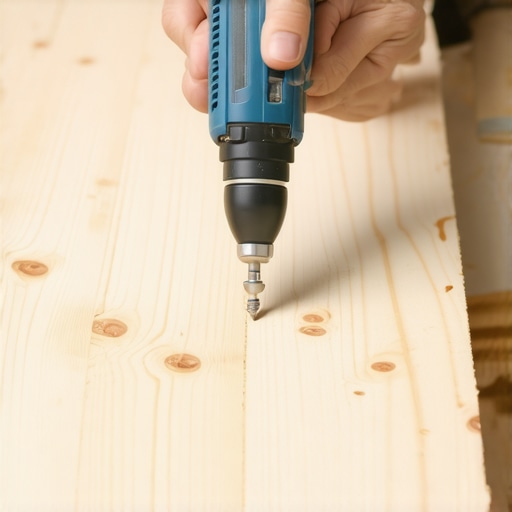
It happened at 2:14 AM. I was trying to be a ghost, sneaking past my daughter’s room to grab a late-night snack, when suddenly, a floorboard let out a groan so loud I thought the house was settling into a sinkhole. It wasn’t a sinkhole; it was just a loose nail rubbing against a joist, but in the silence of the night, it felt like a betrayal. I’ve spent years perfecting flooring installation and leveling success, yet here I was, defeated by a single squeak. If you’ve ever felt that spike of adrenaline because your floor decided to narrate your every move, you’re in the right place. Today, I’m showing you how to reclaim your silence without losing your mind or your security deposit.
Why Your Floor Screams Every Time You Step
Most people think a squeak means the house is falling apart. In reality, it’s usually just a bit of friction. When a subfloor isn’t fastened tightly, the wood moves against the nail or the joist. According to research from the USDA Forest Service’s Forest Products Laboratory, these noises are often the result of wood shrinkage or improper fastening during the initial build. I learned this the hard way after a failed attempt at how to fix a bouncy floor with a few well-placed screws where I missed the joist entirely. It was embarrassing, but it taught me that precision is everything. You might even find that the hidden reason your floor squeaks near the heat vents is actually related to temperature fluctuations expanding the metal ducts against the wood.
Is this DIY project actually worth the headache?
You might be wondering if you should just live with the noise or throw a rug over it. Trust me, I tried the rug method; all it did was muffle the sound slightly while the movement underneath slowly loosened more nails. If you’re planning on mastering hardwood floor refinishing or laying down new tile, ignoring these squeaks now is a recipe for disaster later. Have you ever spent an entire afternoon chasing a squeak only for it to move six inches to the left as soon as you think you’ve got it? Let me know—I need to know I’m not the only one who has been driven slightly mad by a piece of plywood.
Locate the Culprit Before You Grab the Drill
You can’t fix what you haven’t found. My biggest rookie mistake was blindly driving screws into the carpet, hoping to hit something solid. I ended up with a floor that looked like a pincushion and still squeaked. Now, I use the hammer test for finding loose floor joists to map out exactly where the subfloor has lifted. Before we dive into the heavy-duty fixes, we need to ensure we are working with a solid foundation, which might mean learning how to level a plywood subfloor without adding weight if things have really shifted over the years.
Stop the Wood-on-Wood Friction Once and for All
To kill a squeak, you have to understand that your floor is basically a giant instrument, and the joists are the frame. If there is even a millimeter of play between the subfloor and the joist, you’re going to get noise. I start by driving 2.5-inch screws through the subfloor directly into the center of the joist. This pulls the two surfaces together like a vice. If you’re working over carpet, use breakaway screws that snap off below the surface so you don’t ruin the aesthetics. I once spent six hours in a cramped crawlspace in a 1920s bungalow trying to apply adhesive to every single gap. I thought more was better, but I ended up with a bead of glue the size of a bratwurst that didn’t just stop the squeak—it bonded my favorite flannel shirt to a joist forever. The real secret isn’t more glue; it’s ensuring you use precise floor leveling techniques to achieve flawless surfaces by checking for gaps before you fasten everything down.
The Surgeon’s Approach to Subfloor Screws
When you’re dealing with hardwood, you can’t just go in guns blazing with a drill. You need to pre-drill pilot holes to prevent the wood from splitting. Think of it like surgery; you want the smallest incision possible for the maximum result. If the squeak is coming from two pieces of subfloor rubbing together, try a bit of powdered graphite or talcum powder in the joint first. If that fails, it’s time to utilize flooring installation fundamentals leveling for a seamless look. This usually involves a shim driven between the joist and the subfloor from below. Use the the shimming hack for leveling subfloors under cabinets if the noise is coming from a high-pressure area where the weight of the kitchen is causing the floor to groan.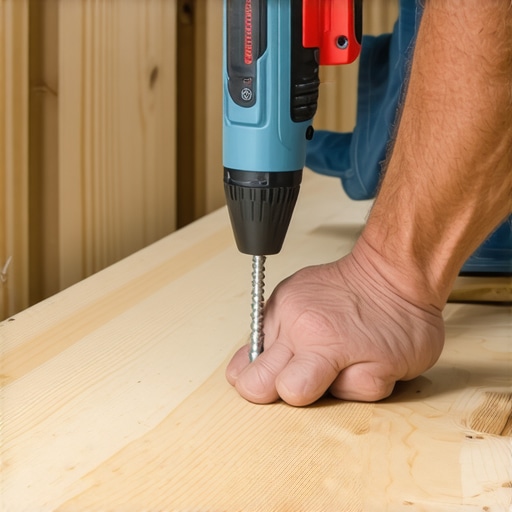
Level the Playing Field Before the Final Layer
Once the noise is gone, you’re often left with the reality of a wavy floor. You might think a little dip doesn’t matter, but if you’re installing tiles like a pro-step-by-step-strategies-for-2025, that dip will cause your tiles to crack or sound hollow. I learned this when I ignored a 1/8-inch slope in a bathroom. Three months later, the grout looked like a spiderweb. This is usually caused by the trowel size error that leads to hollow-sounding tiles combined with an uneven base. To fix this, you need a high-quality self-leveling underlayment.
Don’t Skip the Prep Work on Slabs
If you are working on a concrete base, why you must prime concrete before every leveling job becomes the most important question in your workflow. Without primer, the concrete sucks the moisture out of the leveler too fast, leaving you with a brittle, dusty mess that won’t bond. I treat the primer like a coat of paint—even coverage is key. When you pour the leveler, start at the lowest point and use a spiked roller to release air bubbles. This prevents the ‘topographical map’ effect where you have random ridges all over your room. If you do it right, the surface should look like a still pond of water before it sets.
Self-Leveling Compounds Are Not Magic Potions
Most DIYers think self-leveling means you just pour it and go watch TV. In my experience, that’s how you end up with a topographical map instead of a flat surface. The industry secret is that these compounds are actually self-smoothing, not self-leveling. You still need to manually guide the material with a gauge rake or a flat trowel to ensure it reaches the corners. If you’re not careful, you’ll run into flooring installation mistakes to avoid for lasting results, specifically the hump that forms where the pour ends. The National Wood Flooring Association (NWFA) provides strict guidelines here: a subfloor should be flat within 1/8 inch in a 6-foot radius. If you miss this mark, you aren’t just looking at an ugly floor; you’re looking at eventual structural failure for your finish material.
Why do larger tiles actually need a flatter floor than the small ones?
If you’re working with those beautiful 12×24 inch or larger porcelain planks, your margin for error effectively disappears. While small mosaic tiles can roll over slight dips, a large format tile is like a stiff board. If the floor isn’t perfectly flat, you’ll get lippage, where one tile edge sits higher than the next. This isn’t just a trip hazard; it’s the primary cause of the trowel size error that leads to hollow-sounding tiles. I once saw a gorgeous marble install ruined because the contractor tried to use extra thinset to build up the low spots. All it did was create shrinkage cracks as the mortar cured.#IMAGE_PLACE_HOLDER_C#
The Expansion Gap Trap You Cannot Ignore
The most sophisticated mistake I see professionals make is ignoring movement joints when the room spans more than 20 feet. Wood and tile expand at different rates, and if you don’t utilize the expansion joint secret for large tiled living areas, the pressure will eventually pop a tile or buckle a plank. This is especially true if you have subfloor issues, as why your subfloor patching compound is cracking under pressure often comes down to the subfloor moving while the patch stays rigid.
Stop Drowning Your Leveler in Excess Water
There is a massive temptation to add just a little more water to the mix to make it flow better. Don’t do it. Over-watering breaks down the polymers, leading to a chalky surface that won’t bond. This is a huge factor in why your floor leveler is cracking over radiant heat pipes—the heat stresses a weakened bond until it snaps. Have you ever fallen into this trap and had to scrape up a whole bag of wet dust? Let me know in the comments.If you’re tired of the guess-and-check method with a standard 4-foot bubble level, it’s time to upgrade to the gear that actually makes a difference in your workflow. I never start a layout anymore without my 360-degree green beam laser level. Unlike the red ones that disappear the moment a sunbeam hits the room, a green laser lets me execute the laser level move for perfectly straight hallways with surgical precision. It’s the difference between a floor that looks okay and one that looks like it was installed by a machine. I also swear by my pinless moisture meter. Before I even think about mastering floor leveling pro secrets for perfect installations, I’m checking the slab and the subfloor for hidden dampness. I have seen ten-thousand-dollar installations ruined because someone didn’t know how to use a moisture meter to prevent floor failure.
How do I keep my floor from failing years after installation?
Maintenance isn’t just about the occasional mop; it’s about rigorous environmental control. Wood and tile are living components of your home structure. To ensure your hardwood floor care secrets to longevity and shine actually pay off, you must maintain a consistent indoor humidity level between 30 and 50 percent. The Tile Council of North America (TCNA) Handbook specifically warns in its technical guidelines that excessive substrate moisture is a primary driver of adhesive bond failure and grout efflorescence. If you notice a squeak returning or a tile sounding tinny, you might need to look at how to fix a hollow sounding tile without tearing it up before the movement causes a structural crack. For daily cleaning, I always stick to a pH-neutral solution; whatever you do, stop using vinegar on your hardwood floors immediately because the acetic acid will eat through the protective finish faster than you can say remodel.
The future of flooring technology and automation
We are moving toward a world where eyeballing it is a relic of the past. I’m already seeing LiDAR technology being integrated into smartphone apps that can map the topographical flatness of a subfloor to within a thousandth of an inch. This means precise floor leveling techniques to achieve flawless surfaces will soon be semi-automated, with software telling you exactly where the low spots are and how many bags of leveler you need to buy. It’s an exciting time for the industry, but for now, the physical fundamentals still rule the day. My best advice? Go buy a quality moisture meter before your next project; it is the single most important insurance policy you can have for your home’s value.
The Hardest Lesson I Learned While Chasing a Level Subfloor
I used to think speed was a badge of honor, but I quickly realized that rushing the prep leads to heartbreak. If you skip the small stuff, you’ll end up learning how to fix a hollow sound under your luxury vinyl months after you thought the job was done. One technique I swear by now is the chalk dust secret for finding low spots in subfloors—it’s simple, low-tech, and foolproof. Finally, never trust your eyes alone; the wood has a memory of how it was grown, and it will try to return to that shape if you don’t secure it properly.
The Gear That Separates Amateurs From Pros
You don’t need a warehouse full of tools, but you do need the right ones. Before you buy your materials, learn how to spot high-quality engineered wood before you buy to ensure you aren’t fighting bad manufacturing from the start. A quality moisture meter is non-negotiable, and when it comes to the final look, I often recommend considering why matte finish hides scratches better than high gloss if you want a floor that actually stays looking new. If you ever feel stuck, don’t hesitate to contact us for advice on specific layouts.
The Quiet Confidence of a Solid Foundation
There is a specific kind of peace that comes from walking across a room in total silence. It’s the proof of your hard work and the literal foundation of your home’s value. You can transform your living area with elegant tile designs or stunning hardwoods, but the beauty only lasts as long as the subfloor stays still. Take your time with your flooring installation, and remember that the silence is your reward. Which part of your floor is giving you the biggest headache right now? Is it a persistent squeak or a dip that won’t go away? Let me know in the comments below!