
I remember standing by my bedroom window on a freezing January morning, coffee in hand, trying to catch the first blast of warm air from the floor register. Creak. I shifted my weight. Squeak-pop. It sounded like the floor was actually complaining about the heat. For years, I just assumed it was that ‘old house charm’ everyone talks about, but after one too many midnight trips to the kitchen that woke up the entire household, I realized it was a mechanical failure, not a personality trait of my home. Today, I’m going to show you exactly why those specific spots near your vents scream when you step on them and how we can finally silence those wood-on-metal ghosts for good.
Your HVAC System Is Secretly Fighting Your Floor
In my early DIY days, I made the classic mistake of thinking a few extra finish nails driven through the top of the plank would solve everything. I ended up with a floor that still squeaked and a set of ugly holes to fill. What I didn’t realize then is that heat vents are essentially localized desert zones. When your furnace kicks on, it blasts dry, hot air directly against the edges of your flooring. According to the National Wood Flooring Association (NWFA), wood is a hygroscopic material that constantly expands and contracts based on the moisture in the air. Because the wood near your vents dries out faster than the rest of the room, it shrinks, creating tiny gaps between the floorboards and the subfloor or the vent duct itself. This movement is what causes that high-pitched rubbing sound. If you are planning a new project, it is vital to know how to fix a squeaky subfloor before you lay your new floor to prevent this from happening later. Have you ever noticed that your floor only seems to ‘scream’ during the winter months when the heater is running full tilt?
Is This Going to Cost Me Thousands in Repairs?
It is easy to spiral into a panic thinking you need a total hardwood floor refinishing or a full replacement just because of a few noisy boards. The good news is that most vent-related squeaks are ‘site-specific’ issues rather than a sign of structural failure. Often, the culprit is a lack of proper spacing around radiators or vents, or even the ductwork itself rubbing against the wood framing. Before you call a contractor, we need to look at whether the subfloor is flexing or if the wood has simply pulled away from its fasteners due to that constant heat-cycling. In many cases, a simple fix involving shims or specialized lubricants can do the trick without you having to tear up a single plank of your beautiful flooring. We are looking for a permanent solution, not just a temporary bandage, so let’s dive into the physics of why that wood is moving in the first place.
Kill the Friction with Lubrication
Think of your floorboards as a set of dry hinges. When the furnace turns the air into a desert, those boards rub together like sandpaper. My first line of defense is always powdered graphite. I learned this the hard way after spraying a ‘quick-fix’ oil lubricant into a vent seam and spending the next month trying to get the greasy footprints off my rugs. Now, I puff a bit of dry graphite directly into the gaps where the wood meets the vent’s metal rim. You don’t need much. Walk back and forth over the spot to work the powder into the microscopic crevices. This usually silences the ‘high-pitched’ squeak immediately. 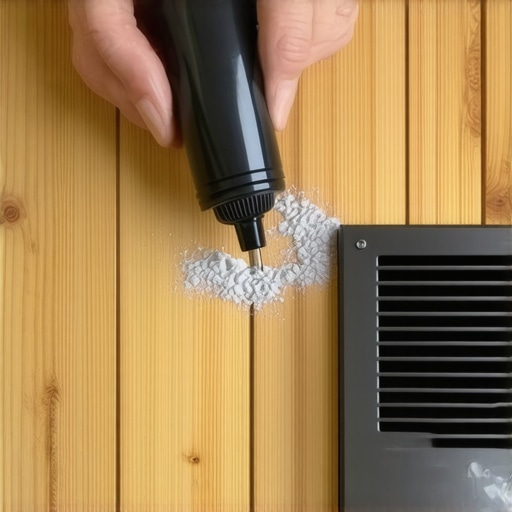
Why Graphite Beats Household Oils
Unlike oils that can soak into the wood and cause permanent staining or attract dust, dry lubricants sit on the surface and provide a slippery barrier. If the squeak is more of a deep ‘thud’ or a loud ‘pop,’ you are likely dealing with a structural gap rather than just surface friction. This is why it is common for homeowners to wonder why your radiant heat system is making the floor pop—it’s that same expansion-contraction cycle on a larger scale.
Bridging the Gap from Below
If you have access to the floor joists from a basement or crawlspace, you’ve hit the jackpot. Most vent-side squeaks happen because the subfloor has pulled away from the joist by a fraction of an inch. I once spent an entire afternoon in my kitchen trying to fix a squeak from above, only to go downstairs and see a 1/16th-inch gap that was easily solved with a single shim. To fix this, have someone stand on the squeaky spot while you are below. Watch for the movement. When you see the subfloor flex, apply a bead of wood glue to a thin cedar shim and gently tap it into the space. You are essentially ‘filling the void’ rather than lifting the floor. If you over-drive that shim, you’ll end up needing the 3-foot level test for checking subfloor flatness like a pro because you’ve created a hump.
When the Ductwork is the Real Culprit
Sometimes the ‘squeak’ isn’t wood at all; it’s the metal HVAC boot rubbing against the wooden frame of the floor opening. As the metal expands from the heat, it creates a ‘ticking’ or ‘rubbing’ sound. I solved a particularly stubborn bedroom noise by wedging a small piece of high-density foam or a bead of high-heat silicone between the metal duct and the wood. This absorbs the expansion movement without the metal grinding against the wood grain. If the floor itself feels soft, you might actually need to learn how to fix a bounce in your plywood subfloor to provide a more rigid foundation. Using how to level a plywood subfloor with shims and plywood scraps is often the most cost-effective way to stabilize these areas without a full tear-out.
Securing the Planks from the Top
If you don’t have basement access, you’ll have to perform ‘keyhole surgery’ from the finished side. Using a specialized squeak-repair kit is the only way to do this without leaving huge holes. These kits use a tripod tool and a screw with a pre-notched neck. You drive the screw through the hardwood and into the joist, and the tool snaps the head off about an eighth of an inch below the wood surface. I used this method in my upstairs hallway where the noise was driving my kids crazy. It’s much more effective than the ‘nail and pray’ method. This is basically the standard approach for the best way to fix a squeak in an upstairs hallway because it provides a permanent mechanical bond that simple nails can’t match.In my decades of renovation, I have found that most people believe acclimation is just a ‘waiting game’ where you leave the wood in the room for three days and hope for the best. I disagree completely. True professional-grade results require reaching the Equilibrium Moisture Content (EMC). If you simply stack the boxes without opening them, you are inviting those winter squeaks to return the moment the furnace kicks on. You need to know how to acclimate your hardwood without taking over the whole house by ensuring air actually circulates around each plank. According to the NWFA, wood flooring should be within 2-4% of the subfloor’s moisture level before a single nail is driven. If you skip the moisture test you must do before gluing down wood, you are essentially gambling with the structural integrity of your floor.
Acclimation is not just a waiting game
The ‘Oops’ factor often happens when homeowners confuse a level floor with a flat floor. You can have a floor that is perfectly level (parallel to the horizon) but still has dips and valleys that cause planks to rub against HVAC boots. When I am mastering floor leveling pro secrets for perfect installations, I focus on the ‘flatness’ over the ‘levelness.’ A floor that isn’t flat will always have movement, and movement is the father of the squeak. I have seen too many DIYers fall into the trap of using self-leveler to fix a structural bounce, only to find that the flooring installation mistakes to avoid for lasting results often stem from adding weight to a weak subfloor instead of bracing it from below. 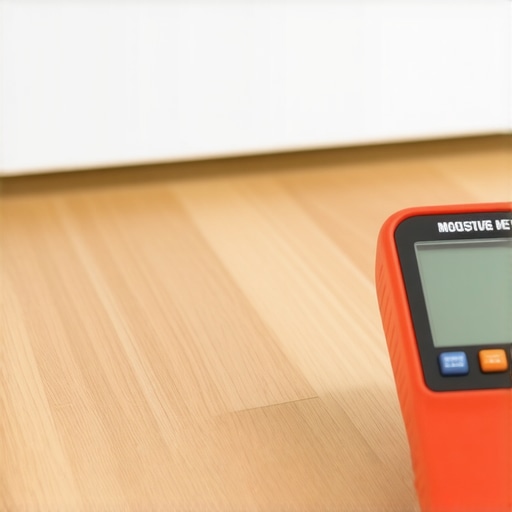
Why even a perfectly level floor can still sound like a haunted house?
Advanced installers know that the sound isn’t always coming from where you think it is. Often, it is ‘ghosting’ from a loose joist hanger three feet away. This is where the the 3-foot level test for checking subfloor flatness like a pro becomes your best friend. If you find a gap, don’t just fill it with caulk and call it a day. You need to address the mechanical friction. The National Tile Contractors Association (NTCA) emphasizes that substrate preparation is 90% of the job, and this applies to hardwood just as much as it does to tile. If the subfloor has even a 1/8-inch deflection, the friction against a metal vent will eventually create a noise that no amount of graphite can fix. Have you ever fallen into this trap where you fixed a squeak only to have it pop up a few inches away? Let me know in the comments.In my tool trailer, there is one piece of equipment that never gets buried under a pile of scrap: my pinless moisture meter. I have seen too many DIYers rely on the ‘smell’ of the wood or the ‘feel’ of the air, but that is how you end up with buckled planks or massive gaps three months later. If you want to avoid the most common flooring installation mistakes to avoid for lasting results, you need to know exactly what is happening inside the grain. I personally use a Wagner Orion meter because it does not leave holes in my expensive white oak. Before you even think about firing up your nailer, you should review the 7 tools you actually need for a professional DIY hardwood install. It is not just about the hammer and the saw; it is about having the data to back up your installation decisions. According to the Wood Flooring Manufacturers Association (NOFMA) Technical Manual, maintaining a consistent relative humidity between 35% and 55% is non-negotiable for long-term floor stability and silence. 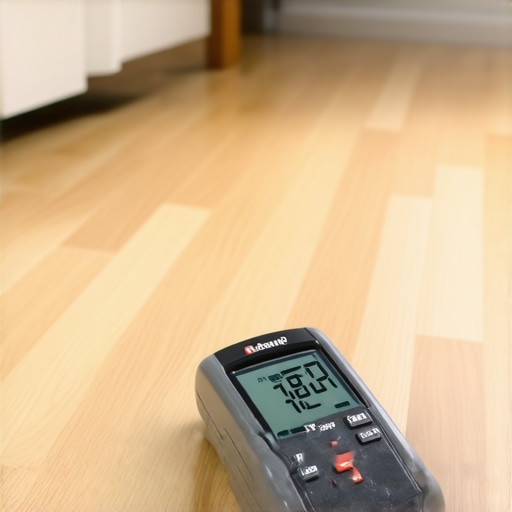
How Can I Keep My Floors Quiet as the Seasons Change?
The secret to a silent home is not a spray-on polish or a hidden screw; it is consistent environmental control. If you let your home’s humidity drop below 30% in the winter, no amount of shimming or graphite will stop the wood from shrinking and eventually squeaking. To protect your investment, you should follow these hardwood floor care secrets to longevity and shine. Many people reach for a steam mop or a bucket of water, but moisture is the enemy of a quiet floor. I always tell my clients to learn the best way to clean a new hardwood floor for the first time using pH-neutral cleaners and a barely-damp microfiber pad. Excessive water seeps into the seams, causing the wood to swell and rub against the fasteners, which is the primary cause of those annoying pops. If you are working in a bathroom or kitchen, installing tiles like a pro step-by-step strategies for 2025 suggests that using the best adhesive for large format porcelain tiles can provide enough flexibility to handle the expansion and contraction of adjacent wood rooms.
The Future of Smart Climate Flooring
I predict we are moving toward a ‘smart floor’ era where embedded sensors will communicate directly with your HVAC system. We are already seeing professional loggers that track the moisture history of a floor from the factory to the home. In a few years, your thermostat might automatically kick on a humidifier because the sensor under your floorboards detected a 2% drop in moisture content. This level of precision is currently reserved for high-end museums, but it is trickling down to residential renovations. Until then, you must be your own sensor. Always perform the moisture test you must do before gluing down wood to ensure you aren’t sealing in a problem that will haunt you next winter. I encourage you to try the ‘Graphite Puff’ method today on that one annoying squeak by your vent—it is the easiest win you will have all week.
What My Most Stubborn Floor Repair Taught Me
Over the years, I’ve learned that a squeak is rarely just a sound; it is a conversation your house is trying to have with you. My biggest ‘lightbulb moment’ came when I realized that humidity control is just as important as the nails you use. I once spent three days chasing a sound in a living room, only to realize the homeowner’s humidifier had broken, causing the wood to shrink and rub against the HVAC boot. Another hard lesson? Never over-shim. If you force a shim too far into a gap, you will create a high spot that requires you to go back and use the 3-foot level test for checking subfloor flatness like a pro to fix the hump you just made. Finally, remember that wood has a memory. If it has been stressed by heat for a decade, it might take a few weeks of proper climate control before it truly settles into its new, silent position.
#IMAGE_PLACEHOLDER_E#
The Resources That Never Leave My Tool Belt
I don’t go into any repair job without a few specific items that have earned my trust through trial and error. First, a pinless moisture meter is non-negotiable for anyone serious about mastering hardwood floor refinishing expert tips for 2025. It allows you to see the invisible moisture levels that cause these squeaks in the first place. I also highly recommend checking out the 7 tools you actually need for a professional DIY hardwood install to make sure you aren’t missing the mechanical basics. For long-term maintenance, I always point people toward hardwood floor care secrets to longevity and shine because keeping the finish healthy prevents moisture from seeping into the grain. I trust the NWFA technical manuals for data, but for the actual ‘feel’ of the wood, nothing beats a well-calibrated hygrometer in your hallway.
Silence Is Within Your Reach
It is easy to feel overwhelmed by a noisy house, but remember that most of these issues are solvable with patience and the right approach. You don’t need a massive budget to fix a localized squeak; you just need to understand the physics of how your wood interacts with your heater. By addressing the root cause—whether it is friction, subfloor gaps, or simple lack of humidity—you are protecting your investment for decades to come. Your flooring installation is a living part of your home, and with these techniques, you can ensure it stays as quiet and beautiful as the day it was first laid. Don’t be afraid to get under the floor or use that graphite puff; the peace and quiet are worth the effort. Have you ever tried the graphite trick on your floors, or did you find a different culprit hiding under your vents? Let me know in the comments below.