
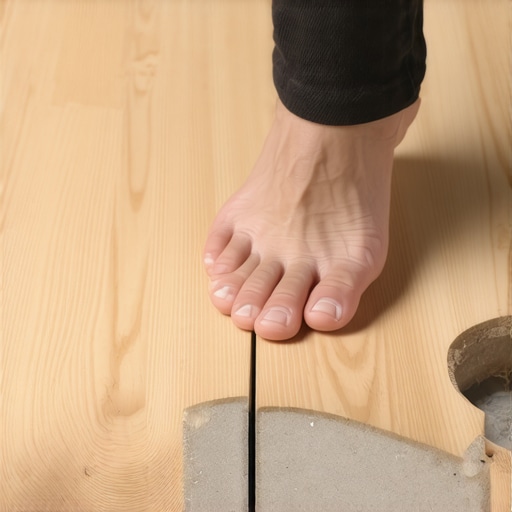
I’ll never forget the sinking feeling in my gut when I took those first ten steps across my freshly finished living room. The flooring looked like a million bucks—warm oak tones, perfect seams, and not a scratch in sight. But the sound? It was a disaster. Every footfall echoed with a tinny, hollow “thwack” that screamed “cheap DIY project.” I had spent three days on my knees, thinking I was doing everything right, only to end up with a floor that sounded like it was hovering three inches off the ground. If you’ve ever felt that same frustration, you aren’t alone. That “click-clack” noise is the single biggest reason people regret their flooring choice. Today, we’re going to peel back the layers and figure out exactly why your floor is talking back to you. I’m going to show you how to silence the echo and get that solid, high-end feel you actually paid for.
The Real Reason Your New Floor Echoes
When I first started out, I made the classic rookie mistake: I assumed a thick underlayment would hide a bumpy subfloor. I was wrong. Dead wrong. Floating floors are designed to stay in place via their own weight and locking mechanisms, but they aren’t magic. If there is even a tiny gap between your planks and the subfloor, that space acts like an acoustic chamber. According to the National Wood Flooring Association, subfloor flatness is the most critical factor in a successful installation, yet it’s the one we most often rush. If your floor isn’t perfectly flat, the planks will flex and trap air, creating that annoying drum effect. You might even notice that your LVP floor is clicking when you walk on it, which is a sure sign that the locking joints are under too much stress from vertical movement.
Is a Solid Sounding Floor Actually Worth the Extra Prep?
I get it. You want to be done. You’ve already moved the furniture out and the kids are complaining. But trust me, skipping the prep is a recipe for long-term headache. I once tried to save a few bucks by using the “bargain bin” padding, and I regretted it for three years until I finally ripped it up. You have to understand that why cheap vinyl underlayment makes your floor sound hollow is often down to density; thin foam just doesn’t absorb impact. We need to talk about floor leveling challenges because if you don’t kill the hollow sound now, you’ll be reminded of it with every single step you take to the kitchen. Have you ever finished a project only to realize the “hidden” prep work was actually the most important part? Let me know, because I’ve definitely been there. If you’re currently dealing with this, don’t panic—there are ways to fix a hollow sound under your luxury vinyl without starting from scratch.
Map Out Your Subfloor Before You Buy a Single Plank
To get that solid, high-end feel, you have to treat your subfloor like a canvas. If the canvas is warped, the painting will be too. I start every job with a 6-foot aluminum straightedge. I lay it across the floor and look for any gap larger than 3/16 of an inch. If you can slide a nickel under your straightedge, you’ve got a problem that no underlayment will fix. I used to think I could just ‘float’ over these dips, but that’s exactly how you end up with a floor that feels like a trampoline. One of the best ways to visualize these valleys is by using the chalk dust secret for finding low spots in subfloors. By scribbling chalk across the surface and lightly running your straightedge over it, the low spots stay colored while the high spots get wiped clean. It’s a low-tech solution that provides high-tech accuracy.
Never Skip the Primer on Bare Concrete
I learned this the hard way during a humid July install in a basement. I was in a rush and poured my leveling compound directly onto the old slab without a second thought. Big mistake. Within twenty minutes, the concrete had sucked all the moisture out of the leveler, causing it to crack and flake like a dry biscuit. This is why you must prime concrete before every leveling job. Primer acts as a glue and a moisture barrier, ensuring the leveling compound bonds to the floor rather than just sitting on top of it. If you don’t prime, you’re basically building your new floor on a foundation of sand.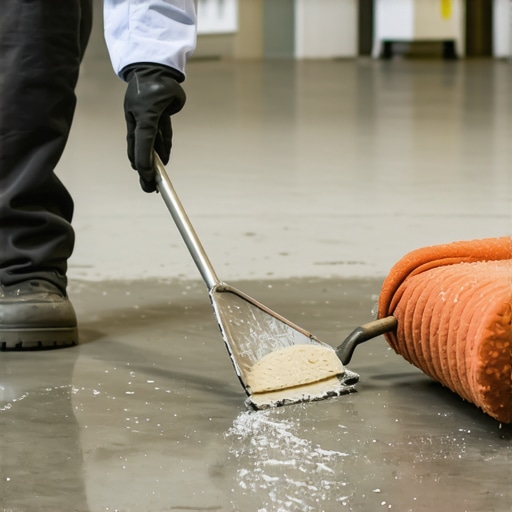
Executing a Flawless Leveling Pour
Mixing the compound is where most people panic. It’s like baking a giant, expensive cake that sets in fifteen minutes. You need two people—one to mix and one to pour. If you’re doing it solo, you’re asking for ‘cold joints,’ which are those ugly ridges where one bucket of leveler partially dried before you poured the next. To avoid this, focus on how to achieve flawless floor leveling before tile laying by prepping your buckets in advance. I always use a specific mixing speed to prevent air bubbles; if you go too fast, you’ll whip air into the mix, leading to a Swiss-cheese finish. Once it’s down, don’t just walk away. Using the spiky-roller secret for a mirror smooth pour helps release trapped air and knits the different pours together into one seamless, glass-like surface.
Isolate the Clicks and Clacks
If you’ve already laid your floor and you’re hearing that dreaded clicking, don’t lose hope. Sometimes the sound isn’t the whole floor, but just a few loose joints. I’ve spent hours on my hands and knees with a stethoscope (yes, really) trying to find the exact plank that was moving. Often, flooring installation mistakes to avoid for lasting results include not leaving enough of an expansion gap at the walls, which causes the floor to bind and lift. By trimming back a tight edge, you can sometimes let the floor settle back down against the subfloor, instantly killing the hollow echo. If the dip is too deep, you might need to use a specialized injection resin to fill the void without pulling up the planks.Most people think ‘self-leveling’ is a literal promise, assuming gravity will do 100% of the heavy lifting. In my experience, that’s the fastest way to waste five hundred dollars. The industry’s biggest secret is that self-leveling compound is actually ‘self-smoothing,’ not a magic wand that ignores physics. If you don’t manually help the product find the low spots, you’ll end up wondering why your self-leveling pour looks like a topographical map instead of a pool table. According to the Tile Council of North America (TCNA) Handbook, the installer must still use a gauge rake and a smoother to ensure the material reaches the required depth across the entire plane. Gravity is lazy; it won’t push thick liquid into a far corner just because you want it to.
Why Did Your Leveler Bubble Even After You Primed?
This is the advanced nuance that separates the pros from the weekend warriors. You can prime the floor perfectly, but if the room’s temperature is rising during the pour, the concrete will off-gas. As the slab warms up, air expands out of the pores, pushing through your wet leveler and creating tiny craters. To avoid this, I always pour in the evening when the slab is cooling down. This ‘downward’ pressure helps the leveler settle rather than fight rising air. If you ignore this, you’ll be desperately searching for how to prevent ghosting marks on your self-leveling finish once the bubbles pop and leave permanent shadows. 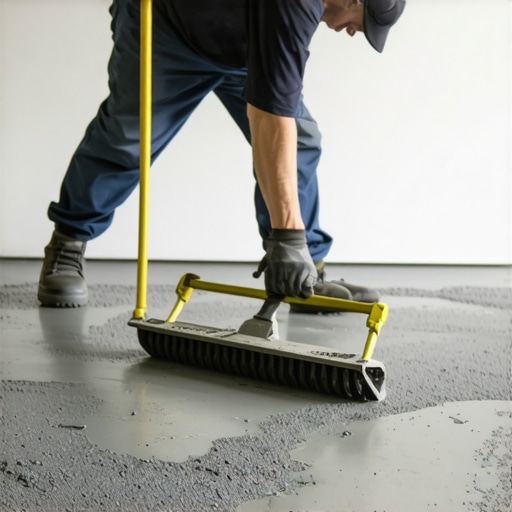
The Agitation Trap That Ruins Your Mix
Another mistake I see constantly is over-mixing. We’ve all been there, wanting to make sure there are no clumps, but the mixing paddle speed that ruins your leveling compound is usually anything over 650 RPM. High-speed mixing whips air into the polymer chains, which compromises the structural integrity of the floor. You want a creamy, pancake-batter consistency, not a frothy latte. If you see foam on top of your bucket, you’ve already lost. This is where precise floor leveling techniques to achieve flawless surfaces become about patience rather than power.
Can You Safely Level Over Old Adhesive Residue?
The short answer is: rarely without a fight. Many DIYers try to pour over old ‘black jack’ mastic, but that old glue is often chemically incompatible with modern cementitious levelers. I’ve seen entire floors peel up like a giant scab because the installer didn’t know how to remove old mastic without damaging the slab first. You either need to mechanicaly grind it off or use a specialized ‘all-surface’ primer that acts as a bridge. Before you even think about the leveler, you must know the concrete etching step you shouldnt skip before leveling to ensure the surface is porous enough to bond. Finally, always check your moisture levels. Using a tool to understand how to use a moisture meter to prevent floor failure is non-negotiable, especially for hardwood or LVP. Avoiding these flooring installation mistakes to avoid for lasting results is what keeps your home quiet and your floors solid for decades. Have you ever fallen into this ‘self-leveling’ trap only to find a bigger mess than when you started? Let me know in the comments!
The Tools That Stopped My Clicks and Pops
After blowing through three different cheap bubble levels that were actually warped from the factory, I finally invested in a professional-grade Stabila box level. If you are serious about avoiding floor leveling challenges, you need a tool that doesn’t lie to you. For larger rooms, I now swear by the laser level move for perfectly straight hallways to establish a global benchmark height. I use a rotary laser to project a 360-degree line across the entire subfloor, which allows me to measure down to the millimeter. This isn’t just about being a perfectionist; it’s about technical compliance. The Tile Council of North America (TCNA) Handbook, specifically the EJ171 standard, mandates specific tolerances for subfloor flatness that are nearly impossible to hit with a standard 4-foot level from a big-box store. Using a gauge rake with adjustable pins is another game-changer. It allows you to set the exact depth of your pour so you aren’t just ‘eyeballing’ it and hoping the compound flows where it needs to.
How do I keep my floor sounding solid for the long haul?
Once the floor is down and that hollow sound is gone, the real work is in the maintenance. I have seen beautiful, solid-sounding floors turn into creaky nightmares in less than two years because of humidity swings. To protect your investment, you need to understand hardwood floor care secrets to longevity and shine. Most people reach for the mop far too often. Water is the enemy of any installation, whether it’s LVP or engineered oak. If you have a spill, you should know how to save a water-damaged wood floor with a vacuum by using a wet-vac to pull moisture out of the seams before it can swell the core. Swelling leads to ‘cupping,’ which lifts the edges of the planks and re-introduces that dreaded hollow air pocket underneath.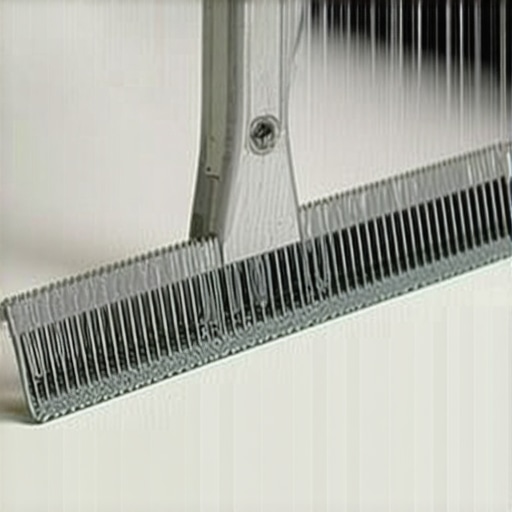
Ditch the Vinegar Before It Eats Your Finish
There is a massive myth circulating in DIY circles that white vinegar is a ‘natural’ and safe cleaner for floors. Please, stop using vinegar on your hardwood floors immediately. The acetic acid in vinegar slowly eats away at the polyurethane or wax finish, leaving the wood or vinyl vulnerable to scratching and moisture penetration. Once that finish is compromised, you’ll be looking into mastering hardwood floor refinishing expert tips for 2025 much sooner than you anticipated. I recommend a pH-neutral cleaner specifically formulated for your floor type. This keeps the protective layer intact, ensuring the planks stay tightly bonded and silent. Looking forward, I predict we will soon see digital subfloor mapping apps that use your phone’s LiDAR sensor to create a 3D ‘heat map’ of your floor’s low spots, making the prep work even more precise for the average homeowner. Until then, grab a straightedge and do the manual work. I challenge you to find just one low spot in your room today and mark it with chalk—it’s the first step toward a floor that finally stays quiet.I’ll never forget the sinking feeling in my gut when I took those first ten steps across my freshly finished living room. The flooring looked like a million bucks—warm oak tones, perfect seams, and not a scratch in sight. But the sound? It was a disaster. Every footfall echoed with a tinny, hollow “thwack” that screamed “cheap DIY project.” I had spent three days on my knees, thinking I was doing everything right, only to end up with a floor that sounded like it was hovering three inches off the ground. If you’ve ever felt that same frustration, you aren’t alone. That “click-clack” noise is the single biggest reason people regret their flooring choice. Today, we’re going to peel back the layers and figure out exactly why your floor is talking back to you. I’m going to show you how to silence the echo and get that solid, high-end feel you actually paid for.
The Real Reason Your New Floor Echoes
When I first started out, I made the classic rookie mistake: I assumed a thick underlayment would hide a bumpy subfloor. I was wrong. Dead wrong. Floating floors are designed to stay in place via their own weight and locking mechanisms, but they aren’t magic. If there is even a tiny gap between your planks and the subfloor, that space acts like an acoustic chamber. According to the National Wood Flooring Association, subfloor flatness is the most critical factor in a successful installation, yet it’s the one we most often rush. If your floor isn’t perfectly flat, the planks will flex and trap air, creating that annoying drum effect. You might even notice that your LVP floor is clicking when you walk on it, which is a sure sign that the locking joints are under too much stress from vertical movement.
Is a Solid Sounding Floor Actually Worth the Extra Prep?
I get it. You want to be done. You’ve already moved the furniture out and the kids are complaining. But trust me, skipping the prep is a recipe for long-term headache. I once tried to save a few bucks by using the “bargain bin” padding, and I regretted it for three years until I finally ripped it up. You have to understand that why cheap vinyl underlayment makes your floor sound hollow is often down to density; thin foam just doesn’t absorb impact. We need to talk about floor leveling challenges because if you don’t kill the hollow sound now, you’ll be reminded of it with every single step you take to the kitchen. Have you ever finished a project only to realize the “hidden” prep work was actually the most important part? Let me know, because I’ve definitely been there. If you’re currently dealing with this, don’t panic—there are ways to fix a hollow sound under your luxury vinyl without starting from scratch.
Map Out Your Subfloor Before You Buy a Single Plank
To get that solid, high-end feel, you have to treat your subfloor like a canvas. If the canvas is warped, the painting will be too. I start every job with a 6-foot aluminum straightedge. I lay it across the floor and look for any gap larger than 3/16 of an inch. If you can slide a nickel under your straightedge, you’ve got a problem that no underlayment will fix. I used to think I could just ‘float’ over these dips, but that’s exactly how you end up with a floor that feels like a trampoline. One of the best ways to visualize these valleys is by using the chalk dust secret for finding low spots in subfloors. By scribbling chalk across the surface and lightly running your straightedge over it, the low spots stay colored while the high spots get wiped clean. It’s a low-tech solution that provides high-tech accuracy.
Never Skip the Primer on Bare Concrete
I learned this the hard way during a humid July install in a basement. I was in a rush and poured my leveling compound directly onto the old slab without a second thought. Big mistake. Within twenty minutes, the concrete had sucked all the moisture out of the leveler, causing it to crack and flake like a dry biscuit. This is why you must prime concrete before every leveling job. Primer acts as a glue and a moisture barrier, ensuring the leveling compound bonds to the floor rather than just sitting on top of it. If you don’t prime, you’re basically building your new floor on a foundation of sand.
Executing a Flawless Leveling Pour
Mixing the compound is where most people panic. It’s like baking a giant, expensive cake that sets in fifteen minutes. You need two people—one to mix and one to pour. If you’re doing it solo, you’re asking for ‘cold joints,’ which are those ugly ridges where one bucket of leveler partially dried before you poured the next. To avoid this, focus on how to achieve flawless floor leveling before tile laying by prepping your buckets in advance. I always use a specific mixing speed to prevent air bubbles; if you go too fast, you’ll whip air into the mix, leading to a Swiss-cheese finish. Once it’s down, don’t just walk away. Using the spiky-roller secret for a mirror smooth pour helps release trapped air and knits the different pours together into one seamless, glass-like surface.
Isolate the Clicks and Clacks
If you’ve already laid your floor and you’re hearing that dreaded clicking, don’t lose hope. Sometimes the sound isn’t the whole floor, but just a few loose joints. I’ve spent hours on my hands and knees with a stethoscope (yes, really) trying to find the exact plank that was moving. Often, flooring installation mistakes to avoid for lasting results include not leaving enough of an expansion gap at the walls, which causes the floor to bind and lift. By trimming back a tight edge, you can sometimes let the floor settle back down against the subfloor, instantly killing the hollow echo. If the dip is too deep, you might need to use a specialized injection resin to fill the void without pulling up the planks.Most people think ‘self-leveling’ is a literal promise, assuming gravity will do 100% of the heavy lifting. In my experience, that’s the fastest way to waste five hundred dollars. The industry’s biggest secret is that self-leveling compound is actually ‘self-smoothing,’ not a magic wand that ignores physics. If you don’t manually help the product find the low spots, you’ll end up wondering why your self-leveling pour looks like a topographical map instead of a pool table. According to the Tile Council of North America (TCNA) Handbook, the installer must still use a gauge rake and a smoother to ensure the material reaches the required depth across the entire plane. Gravity is lazy; it won’t push thick liquid into a far corner just because you want it to.
Why Did Your Leveler Bubble Even After You Primed?
This is the advanced nuance that separates the pros from the weekend warriors. You can prime the floor perfectly, but if the room’s temperature is rising during the pour, the concrete will off-gas. As the slab warms up, air expands out of the pores, pushing through your wet leveler and creating tiny craters. To avoid this, I always pour in the evening when the slab is cooling down. This ‘downward’ pressure helps the leveler settle rather than fight rising air. If you ignore this, you’ll be desperately searching for how to prevent ghosting marks on your self-leveling finish once the bubbles pop and leave permanent shadows.
The Agitation Trap That Ruins Your Mix
Another mistake I see constantly is over-mixing. We’ve all been there, wanting to make sure there are no clumps, but the mixing paddle speed that ruins your leveling compound is usually anything over 650 RPM. High-speed mixing whips air into the polymer chains, which compromises the structural integrity of the floor. You want a creamy, pancake-batter consistency, not a frothy latte. If you see foam on top of your bucket, you’ve already lost. This is where precise floor leveling techniques to achieve flawless surfaces become about patience rather than power.
Can You Safely Level Over Old Adhesive Residue?
The short answer is: rarely without a fight. Many DIYers try to pour over old ‘black jack’ mastic, but that old glue is often chemically incompatible with modern cementitious levelers. I’ve seen entire floors peel up like a giant scab because the installer didn’t know how to remove old mastic without damaging the slab first. You either need to mechanicaly grind it off or use a specialized ‘all-surface’ primer that acts as a bridge. Before you even think about the leveler, you must know the concrete etching step you shouldnt skip before leveling to ensure the surface is porous enough to bond. Finally, always check your moisture levels. Using a tool to understand how to use a moisture meter to prevent floor failure is non-negotiable, especially for hardwood or LVP. Avoiding these flooring installation mistakes to avoid for lasting results is what keeps your home quiet and your floors solid for decades. Have you ever fallen into this ‘self-leveling’ trap only to find a bigger mess than when you started? Let me know in the comments!
The Tools That Stopped My Clicks and Pops
After blowing through three different cheap bubble levels that were actually warped from the factory, I finally invested in a professional-grade Stabila box level. If you are serious about avoiding floor leveling challenges, you need a tool that doesn’t lie to you. For larger rooms, I now swear by the laser level move for perfectly straight hallways to establish a global benchmark height. I use a rotary laser to project a 360-degree line across the entire subfloor, which allows me to measure down to the millimeter. This isn’t just about being a perfectionist; it’s about technical compliance. The Tile Council of North America (TCNA) Handbook, specifically the EJ171 standard, mandates specific tolerances for subfloor flatness that are nearly impossible to hit with a standard 4-foot level from a big-box store. Using a gauge rake with adjustable pins is another game-changer. It allows you to set the exact depth of your pour so you aren’t just ‘eyeballing’ it and hoping the compound flows where it needs to.
How do I keep my floor sounding solid for the long haul?
Once the floor is down and that hollow sound is gone, the real work is in the maintenance. I have seen beautiful, solid-sounding floors turn into creaky nightmares in less than two years because of humidity swings. To protect your investment, you need to understand hardwood floor care secrets to longevity and shine. Most people reach for the mop far too often. Water is the enemy of any installation, whether it’s LVP or engineered oak. If you have a spill, you should know how to save a water-damaged wood floor with a vacuum by using a wet-vac to pull moisture out of the seams before it can swell the core. Swelling leads to ‘cupping,’ which lifts the edges of the planks and re-introduces that dreaded hollow air pocket underneath.
Ditch the Vinegar Before It Eats Your Finish
There is a massive myth circulating in DIY circles that white vinegar is a ‘natural’ and safe cleaner for floors. Please, stop using vinegar on your hardwood floors immediately. The acetic acid in vinegar slowly eats away at the polyurethane or wax finish, leaving the wood or vinyl vulnerable to scratching and moisture penetration. Once that finish is compromised, you’ll be looking into mastering hardwood floor refinishing expert tips for 2025 much sooner than you anticipated. I recommend a pH-neutral cleaner specifically formulated for your floor type. This keeps the protective layer intact, ensuring the planks stay tightly bonded and silent. Looking forward, I predict we will soon see digital subfloor mapping apps that use your phone’s LiDAR sensor to create a 3D ‘heat map’ of your floor’s low spots, making the prep work even more precise for the average homeowner. Until then, grab a straightedge and do the manual work. I challenge you to find just one low spot in your room today and mark it with chalk—it’s the first step toward a floor that finally stays quiet.
What I Learned While Panicking Over a Flash-Drying Subfloor
Looking back at my early mistakes, I realized that floor leveling is 90% psychology and 10% chemistry. One lightbulb moment for me was discovering that if you don’t keep a wet edge, you’re basically creating speed bumps for your future floor. I also learned that you can’t always hide structural issues; sometimes you must fix a bouncy floor with a few well-placed screws before the leveler even touches the concrete. My biggest takeaway? Slow is smooth, and smooth is fast. Don’t rush the flooring installation fundamentals because they are the only things standing between you and a lifetime of annoying squeaks.
My Trusty Toolbag for a Silent Professional Finish
If you want to move beyond DIY guesswork, I highly recommend checking out the TCNA Handbook. It is the gold standard for industry tolerances. For physical tools, I never step onto a job site without a rotary laser and a high-quality gauge rake. These aren’t just for pros; they are the ‘equalizers’ for homeowners who want to follow a step-by-step guide to flooring installation and leveling success. I also suggest keeping a dedicated moisture meter in your kit to ensure your slab is ready for a bond that won’t fail six months later.
Take the Leap Toward a Truly Solid Home
Installing a floor that feels as good as it looks is one of the most rewarding home improvements you can tackle. It transforms the very ‘vibe’ of your house from temporary to permanent. By following the ultimate guide to floor leveling for a perfect finish, you are investing in peace of mind—and peace of quiet. Don’t be intimidated by the prep work; see it as the foundation of your family’s comfort. #IMAGE_PLACEHOLDER_E# Have you ever struggled with a floor that sounded like a drum after you finished? Let me know below.