
I remember the day I finally finished my dream garage gym. I’d spent weeks revamping my home with expert tips and getting everything perfectly aligned. I rolled out those heavy, beautiful rubber mats, feeling like an absolute champion. But by noon, the crisp “new floor” scent had transformed into a heavy, suffocating cloud that smelled like a burning tire factory. My eyes were watering, my wife was complaining from two rooms away, and I seriously questioned if I was poisoning my family with every breath. It was visceral. It was embarrassing. It was a complete disaster. [image_placeholder]
Why Your Home Gym Smells Like a Tire Fire
It is not just a standard “new car smell.” It is a process called off-gassing. Most high-density rubber gym floors are manufactured from recycled tires, and the sulfur-based compounds used to vulcanize that rubber are constantly looking for an escape route into your air. I made the classic rookie mistake of thinking a few hours of an open window would do the trick. Spoiler: It did not. I eventually had to learn how to choose flooring that won’t kill your indoor air quality the hard way after my first failed attempt. If you happen to be dealing with a moisture barrier need in a basement gym, that dampness can actually trap and amplify the odor, making the air feel thick and oily. We are going to fix this today, but we have to be realistic about the timeline.
Will This Stink Ever Actually Go Away?
That is the big fear, isn’t it? You have invested hundreds of dollars into a surface that makes you want to avoid the room entirely. I have been there, staring at those black mats, wondering if I should have just spent the extra money on commercial vinyl for my home gym instead. The good news is that while the smell is a massive nuisance, it is not permanent—provided you handle the ventilation correctly from day one. According to the Environmental Protection Agency (EPA), Volatile Organic Compounds (VOCs) are most concentrated in products immediately after manufacturing and naturally dissipate through consistent air exchange. I once tried to “mask” the smell by using a heavy floral floor cleaner. All I did was create a gym that smelled like a toxic lavender field and a surface that was dangerously slippery. Have you ever felt like you needed a gas mask just to do a set of squats? You aren’t alone, and you don’t have to live with it. Let’s look at the actual steps to neutralize these odors for good.
Scrub the Factory Grime Away Early
The very first thing you need to do—and most people skip this—is a deep mechanical scrub. When those mats come off the pallet, they are often coated in a thin layer of release agent and leftover manufacturing oils. If you just lay them down, you are essentially sealing those oils into your room. Grab a bucket of warm water and a neutral pH cleaner. You must remember why you should never mop your floors with dish soap, as it can leave a sticky residue that actually traps the smell and attracts more dirt. I once spent four hours scrubbing twenty mats with a stiff nylon brush, and the water turned a murky charcoal color. That sludge was the primary source of the stench. By breaking that surface tension, you allow the deeper sulfur compounds to escape much faster than they would if they were trapped under a layer of factory wax.
Create a Wind Tunnel in Your Workout Space
Ventilation is not just about opening a crack in the window; it is about forcing a complete air exchange. Think of moving air like a conveyor belt for molecules. If the belt is stagnant, the odor particles simply pile up until the air is saturated and cannot hold any more. You need to create a cross-breeze. Place one high-velocity fan in the window blowing *out* and another on the opposite side of the room blowing *in*. If you are working in a subterranean space, you should also be checking how to use a moisture meter to prevent floor failure, because high humidity acts as an anchor for VOCs, making them feel heavier and more pungent. I learned this the hard way in my first basement gym; the air was so thick with rubber smell it felt like I was breathing in a tire. It wasn’t until I lowered the humidity and increased the CFM of my fans that the air finally cleared. 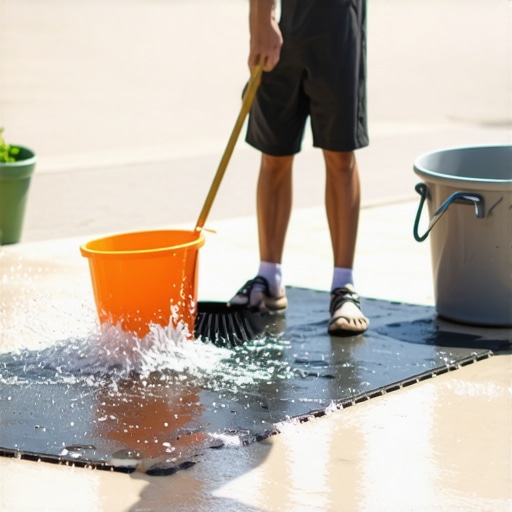
Let the Sun Bake Out the VOCs
The absolute best free tool you have is the sun. UV rays help accelerate the breakdown of the chemical bonds on the surface of the rubber. I once took a set of particularly foul-smelling mats and lined them up on my driveway like a row of giant dominoes. I let them bake in the 90-degree July sun for two full days, flipping them every four hours. Be careful not to leave them out for weeks, as excessive heat can eventually cause some low-quality recycled rubbers to warp, but a 48-hour sun bath is usually the magic number. If your gym is in a cellar, ensure you understand why your basement floor needs a moisture barrier even if it feels dry before you bring those sun-cured mats back inside, as any rising vapor from the slab will just re-activate the ‘wet tire’ smell.
When the Odor Demands a Different Floor
Sometimes, despite your best efforts, the quality of the recycled rubber is just too low to ever be fully odorless. In these cases, you have to look at the foundation. If you are putting these mats over a raw slab, you should know how to prep a concrete slab for glue-down hardwood or other materials even if you are just using rubber, because a clean, sealed subfloor won’t absorb and hold onto the rubber scents. If the smell makes the room unusable for more than a month, it is time to reconsider your material choice. This is often why commercial vinyl is worth the extra cost for home gyms; it provides the durability of rubber without the volatile organic compounds that turn a morning workout into a chemical endurance test.Let’s dig deeper into why so many of these “pro” installations go south before the first plank is even laid. Most people assume that if you buy a bag of self-leveling compound, the product does the work for you. That is a dangerous myth. I have learned through painful (and expensive) experience that self-leveler is one of the most temperamental materials in the flooring world. If you treat it like standard concrete, you are setting yourself up for a nightmare of hollow spots and hairline fractures.
Why does your self-leveler crack even when the slab looks solid?
It usually comes down to one of two things: air or thirst. If you don’t prime your subfloor, that dry concrete or plywood is “thirsty”—it will suck the moisture out of the leveler before it can properly bond and cure. This is why you must prime concrete before every leveling job without exception. Secondly, people over-mix. According to the Tile Council of North America (TCNA), substrate prep is the single most common point of failure for floor systems. If you use a high-RPM drill, you are entraining air into the mix. Those micro-bubbles create a fragile structure that can’t handle the load of your treadmill or heavy gym equipment. I always tell people to watch the mixing paddle speed that ruins your leveling compound because a slow, steady mix is the only way to ensure structural integrity. 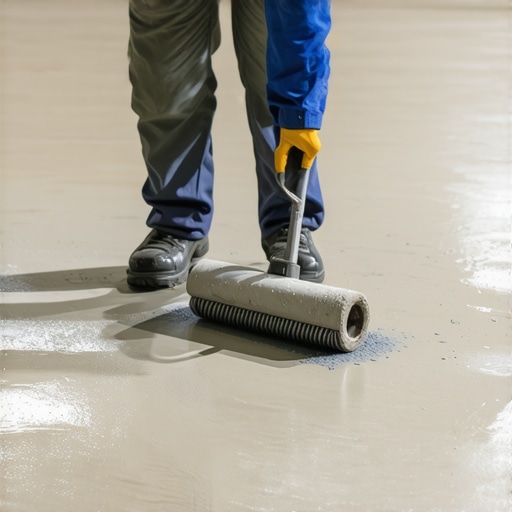 Another trap is the “good enough” approach to low spots. I’ve seen guys try to eyeball a 1/4-inch dip in a 20-foot room. You can’t do it. Without a proper survey, why your self-leveling pour looks like a topographical map becomes very obvious the second you try to snap your luxury planks together and it starts clicking or bouncing. This isn’t just about aesthetics; it’s about the mechanical life of the floor. When you have a void under your flooring, every step creates a tiny amount of friction on the tongue-and-groove joint. Eventually, that joint will snap, and you’ll be tearing up your beautiful new floor to fix a mistake that cost $20 in leveler to prevent. If you are aiming for a professional finish, you need to be mastering floor leveling pro secrets like using a gauge rake and a spiky roller. These aren’t just gadgets; they are the difference between a wavy mess and a mirror finish. I once skipped the spiky roller secret for a mirror smooth pour on a small laundry room, thinking it didn’t matter. Within a year, the vinyl tiles began to telegraph every tiny ridge I’d left behind. It’s these hidden nuances that separate a DIY weekend project from a floor that lasts thirty years. Have you ever fallen into this trap and ended up with a bouncy floor? Let me know in the comments.
Grab a Real Moisture Meter Before You Regret It
If you really want to graduate from a weekend warrior to a pro, you need to stop guessing. I used to think my knuckles were a good enough tool for testing a slab, but that is how I ended up with four thousand dollars worth of cupping hardwood. Now, I never start a job without a pinless meter. Knowing how to use a moisture meter to prevent floor failure is the literal difference between a floor that stays flat and one that pops like a snack chip. The National Wood Flooring Association (NWFA) specifies in Technical Guidelines Section 1, Chapter 2 that for solid strip flooring, the moisture content between the subfloor and the finish flooring should not exceed 4 percent. If you are installing wide-plank, that margin drops to a razor-thin 2 percent. Ignoring these numbers is basically asking for a massive headache from your future self.
How do I keep these floors looking brand new for years?
The secret isn’t in a magic spray; it is in what you do not do. I see people all the time trying to treat their high-end wood like a kitchen tile. You have to stop using vinegar on your hardwood floors immediately. The acetic acid slowly eats away at the protective finish, turning your expensive glow into a dull, cloudy mess. Instead, focus on the grit. Micro-scratches from dust are the death by a thousand cuts for flooring. I have found that hardwood floor care secrets to longevity and shine usually boil down to a high-quality microfiber dust mop and a vacuum with a dedicated hard-floor setting. 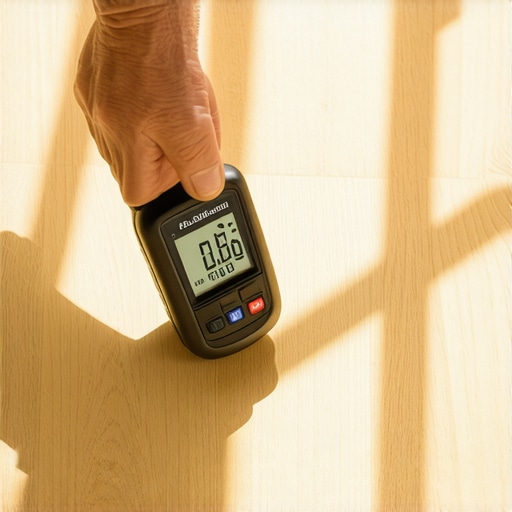
Why My Vacuum is More Important Than My Mop
I know it sounds counterintuitive, but water is rarely your friend. Even if you have a spill, you can actually learn how to save a water-damaged wood floor with a vacuum by creating a makeshift suction seal. This has saved my skin more than once when a radiator leaked. When it comes to everyday maintenance, we often debate the natural oil vs polyurethane debate for busy homes, but regardless of the finish, moisture is the enemy. I also suggest avoiding steam mops like the plague. If you want to know why you should never use a steam mop on luxury vinyl, it is because that high-pressure vapor can force its way into the click-locks and swell the core from the inside out. You also need to swap that standard rubber mallet for a dead-blow hammer during installation. Understanding why you should use a dead blow hammer for floor capping is a small detail that saves hours of frustration by preventing tongue breakage.
The Future is Hidden Under Your Feet
Looking ahead, the flooring world is moving toward smart substrates. We are starting to see underlayments with integrated sensors that can alert your phone the second a pipe leaks behind a wall, long before you see a stain on the wood. It is an exciting time to be a builder. I predict that within the next decade, the standard for luxury homes will not just be the species of wood, but the intelligence of the subfloor. We are talking about real-time data on humidity and load-bearing shifts. But for now, stick to the fundamentals. My best advice? Grab a professional-grade moisture meter today and test your subfloor tonight, even if you think it is dry. It is the cheapest insurance policy you will ever buy for your home. You will thank me when your neighbors are tearing out their miracle floors while yours are still shining.
The Hidden Cost of Speed in Every DIY Project
Looking back at that tire-fire gym disaster, I realized my biggest enemy wasn’t the rubber smell; it was my own impatience. If you want a result that lasts thirty years instead of thirty days, you have to embrace the slow burn of proper preparation. Here are the three non-negotiable truths I’ve picked up from the front lines of home renovation:
- Your eyes will lie to you, but a straightedge won’t. I used to think I could spot a dip in a slab from five feet away. I was wrong every single time. Now, I never start a pour without using the chalk dust secret for finding low spots in subfloors. It is a five-minute check that prevents a lifetime of floor squeaks.
- Lighting is your most important tool. Pros use side-lighting (placing a powerful LED flat on the floor) to reveal every ridge and bump. If you can’t see the imperfections during the step-by-step guide to flooring installation and leveling success, you will certainly feel them under your feet later.
- Environment is everything. You can have the world’s best materials, but if you don’t control the climate, the floor will fail. This is why the ultimate guide to floor leveling for a perfect finish always emphasizes acclimation and moisture control before a single drop of adhesive hits the ground.
Gear That Transformed My Workflow from Amateur to Pro
I stopped buying the cheapest tools at the big-box store and started investing in pieces that actually solved problems. If you are serious about your home gym or living room renovation, these are the items I personally trust in my own home. First, get a high-quality pinless moisture meter; it is the only way to be certain your slab is ready. Second, stop using a standard level for long runs and switch to the laser level move for perfectly straight hallways to ensure your layout doesn’t drift. Finally, invest in a pair of professional flooring knee pads—the kind with the hard plastic shells. Your joints will thank you when you’re twelve hours into a complex tile pattern. I’ve found that many common flooring installation mistakes to avoid for lasting results simply come down to fatigue and using the wrong equipment for the job.
Step onto Your New Foundation with Confidence
At the end of the day, a floor is more than just a surface to walk on—it is the thermal and acoustic heart of your home. Whether you are clearing out that rubber smell or elevate your space choosing the right hardwood floors for your home, the effort you put into the subfloor today determines the peace of mind you have tomorrow. Don’t let the fear of a technical process stop you from starting. Take it one square foot at a time, trust your moisture meter, and never rush the cure. Your dream home is literally right under your feet, waiting to be uncovered. Have you ever had to deal with a persistent ‘new floor’ smell that just wouldn’t quit? Let me know your best tips in the comments below.