
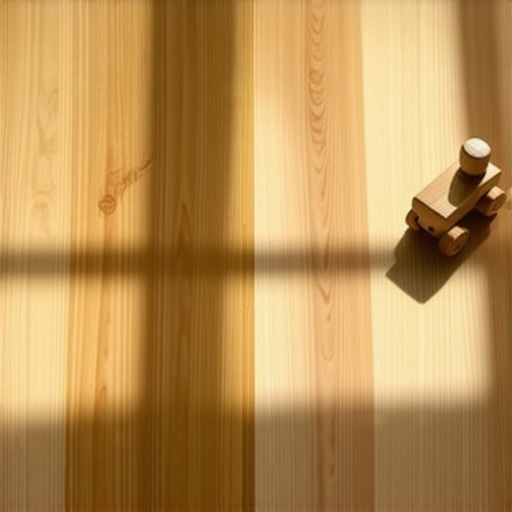
I will never forget the afternoon my toddler decided to use a stray Lego as a makeshift chisel on my pristine, polyurethane-coated hallway. That long, jagged white line didn’t just scratch the wood; it fractured the plastic-like finish, leaving a ghostly streak that mocked me every time the sun hit it. If you have ever stared at a blemish on your floor and realized you would have to sand the entire room just to fix one square inch, you know my pain. We are often told that polyurethane is the gold standard for busy homes because it creates a hard shell, but for those of us with actual lives happening on our floors, that shell can quickly become a liability. Today, I am going to help you decide which side of the natural oil versus polyurethane debate fits your lifestyle so you can stop living in fear of your own living room.
Stop Treating Your Floors Like They Are Made of Glass
When I first started obsessing over flooring installation, I fell into the trap of thinking harder is always better. I wanted a finish that could withstand a stampede. But here is the secret I learned the hard way: a hard finish often just means a more visible scratch. Polyurethane sits on top of the wood like a shield, while natural oil penetrates the fibers. This means when a natural oil floor gets dinged, you can often rub a little more oil into that specific spot and the damage virtually disappears. You simply cannot do that with poly without it looking like a splotchy, uneven mess. Learning expert refinishing tips taught me that the easiest finish isn’t the one that is most durable on day one, but the one that is the easiest to live with on day one thousand.
Is natural oil actually worth the extra maintenance hype?
The biggest skepticism I hear from neighbors is that oil is too high maintenance. They worry they will be on their hands and knees every weekend with a polishing rag. To be honest, I made the mistake of using the wrong cleaning products early on, which stripped the oil and made the wood look parched and dull. However, once you understand the secrets to longevity and shine, you realize that oil ages gracefully with a rich patina, whereas polyurethane just collects scratches until it needs a full sand-down. A surprising fact supported by the National Wood Flooring Association (NWFA) is that matte oil finishes can actually offer better slip resistance than high-gloss topcoats, making them a sneaky-smart choice for homes with aging pets or frantic morning scrambles. Have you ever felt like a slave to your floor’s finish, terrified of every new scuff? I want to show you how to choose a path that lets you actually enjoy your hardwood floors again without the constant anxiety of the next dropped glass.
Get the Subfloor Right Before You Even Open the Oil
Before you even think about cracking open a can of finish, you need to treat your subfloor like the foundation of a skyscraper. I once rushed a project in a guest bedroom, ignoring a slight dip near the door. I figured the wood would just ‘bridge’ it. Instead, every time someone walked in, the planks flexed, eventually causing the finish to crack prematurely. You have to learn how to achieve flawless floor leveling before the first plank goes down. Grab a straightedge and perform the 3-foot level test. If you see light under that level, you have got work to do. A flat subfloor is the difference between a floor that feels solid and one that sounds like a haunted house.
Don’t Skip the Sanding Sequence
If you choose natural oil, the sanding has to be perfect. Polyurethane is like a thick coat of paint; it can hide a multitude of sins. Oil, however, is a highlighter. If you leave a swirl mark from the sander, the oil will find it and make it scream. I recommend checking out the 7 tools you actually need for a professional DIY hardwood install to ensure your sanding passes are consistent. When I did my own dining room, I got impatient and skipped from 60-grit straight to 120-grit. The result? A floor that looked like it had been scratched by a very angry cat once the oil hit the wood. You need that middle step—the 80-grit—to bridge the gap and smooth out the aggressive scratches of the lower grits.
#IMAGE_PLACE_HOLDER_B#
Master the Pour-and-Buff Technique to Avoid Sticky Situations
Applying natural oil is less about ‘painting’ and more about ‘massaging’ the wood fibers. Think of it like applying lotion to dry skin; if you leave a thick puddle on top, it is just going to be a greasy, useless mess. My first attempt at oiling was a total disaster because I treated it like poly. I poured a big puddle and spread it with a roller, then walked away to have lunch. Two hours later, the floor was a tacky, gummy nightmare that required a full re-sand. The trick is to apply it in sections, let it penetrate for about 10 to 15 minutes, and then buff away every single drop of excess. If the wood does not drink it up, it should not be on the surface.
How to Prevent That Dreaded Blotchy Look
One of the biggest complaints with both stains and oils is unevenness. You might notice why your wood stain looks blotchy on certain species like maple or cherry. These woods are dense and ‘closed-grain,’ meaning they do not absorb liquids uniformly. To combat this, some pros swear by ‘water popping’—lightly misting the floor with water to open the grain before oiling. Just be careful; too much water can lead to grain raising that feels like sandpaper under your feet. When you finally move into the maintenance phase, sticking to the secrets to longevity and shine will keep that oil finish from looking thirsty over time. Remember, with oil, you are maintaining the wood itself, not just a plastic layer on top of it. Use a clean white rag or a specialized buffer pad for the final pass. You should be able to sit on the floor in your socks immediately after the final buffing pass without getting oil on them. If it feels wet, keep buffing. This labor-intensive step is exactly why some people run back to polyurethane, but the payoff is a floor that you can repair in five minutes if your dog decides to do a burnout in the hallway later that week.
Flat Beats Level Every Single Day
Everyone assumes that ‘level’ is the ultimate goal when they start a renovation. I used to be that guy, spending hours with a laser level trying to get my subfloor perfectly horizontal. But here is the contrarian truth: Your floor does not actually need to be level; it needs to be flat. You can have a floor that slopes slightly toward the door, and as long as it is flat, your tile won’t crack and your hardwood won’t bounce. However, if your floor is perfectly level but has a 1/4-inch dip every few feet, you are headed for disaster. According to the Tile Council of North America (TCNA), the standard for large-format tiles is a maximum variation of 1/8 inch over 10 feet. If you ignore this and try to fix it with extra thinset, you will likely end up with the trowel size error that leads to hollow-sounding tiles. Extra thinset shrinks as it cures, pulling the tile down and creating a void underneath. Have you ever fallen into the trap of thinking more thinset would fix a bumpy floor? Let me know in the comments.
Stop Blaming the Thinset for Your Hollow Tiles
I have seen it a thousand times: a homeowner buys the most expensive porcelain, but they skip the crucial step of checking the subfloor for movement. If you have even a tiny bit of vertical movement, no amount of glue or high-end mortar will save you. You must learn how to check for subfloor flex before you lay rigid tile. If that plywood gives even a millimeter when you step on it, your grout lines will eventually crumble. I once watched a ‘pro’ try to bridge a flexy joist with extra-large tiles, and within six months, the floor sounded like a xylophone. This is one of those flooring installation mistakes to avoid for lasting results. Using precise floor leveling techniques to achieve flawless surfaces is not just about aesthetics; it is about structural integrity.
Why does my self-leveling compound look like a dried-up lake bed?
The biggest ‘oops’ I see is skipping the primer. People think they can just pour self-leveling compound directly onto a dusty concrete slab. But concrete is incredibly thirsty. It will suck the moisture out of your leveler so fast that the compound won’t have time to chemically bond or settle. This results in a floor that looks like a desert floor and eventually starts peeling off the concrete in sheets. I learned the hard way that you must understand why you must prime concrete before every leveling job. If you see bubbles forming in your leveler, it is usually because the air in the concrete is escaping and the primer failed to seal the ‘pores.’ It is one of the most common signs your tile contractor is cutting corners on prep work.
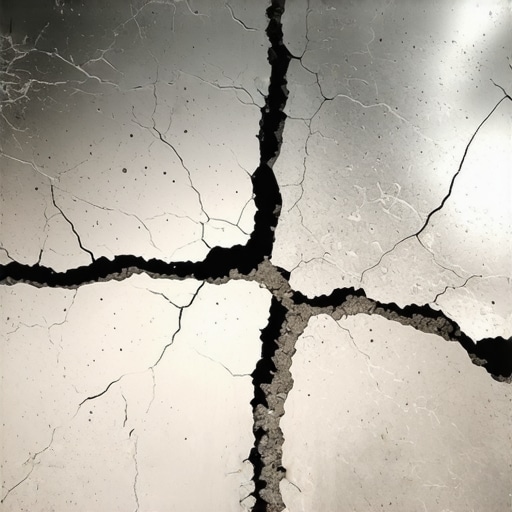
Beyond the primer, there is the issue of moisture from below. Even if the surface looks dry, hydrostatic pressure can push moisture through the slab and pop your leveler right off. This is why your self-leveling compound is cracking like a dry lake bed. If you are working on a basement slab, never skip a moisture test. You can use a professional meter, or at the very least, use the plastic sheet method to see if condensation forms. Getting the prep right takes three times as long as the actual installation, but it is the only way to ensure your floor stays beautiful for the next thirty years.
Turn Your New Floor into a Fortress
Once the last coat of oil or polyurethane is dry, the real work begins: protecting your investment. I have seen homeowners spend five figures on wide-plank white oak only to let a refrigerator delivery crew gouge it on day one. I always keep a roll of Ram Board or a heavy-duty cardboard shield for protecting new floors during paint and appliance moves. Even if you are just moving furniture back in, these protective layers are non-negotiable. If you have just finished a renovation, you need to know how to clean hardwood floors after a major renovation correctly. The fine drywall dust is abrasive; if you start mopping before vacuuming with a HEPA filter, you are essentially rubbing sandpaper into your new finish.
The Tiny Tool That Saves Thousands
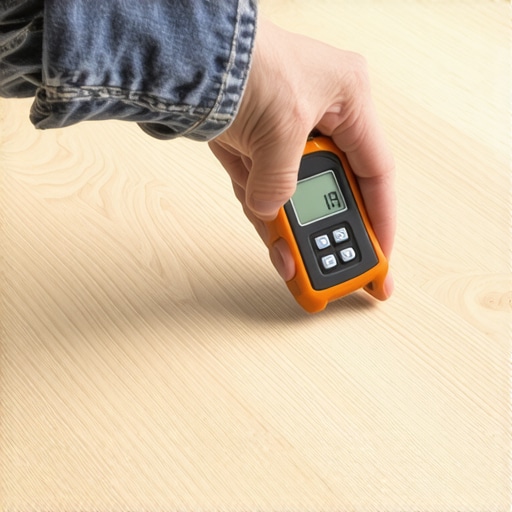
If I could only bring one gadget to a job site, it wouldn’t be a fancy saw. It would be my pinless moisture meter. When looking at the 7 tools you actually need for a professional DIY hardwood install, people often skip the meter because it costs more than a box of nails. That is a mistake. I use it to check the subfloor, the planks, and even the ambient humidity. Knowing how to use a moisture meter to prevent floor failure is the difference between a floor that stays flat and one that cups like a Pringles chip. According to the National Wood Flooring Association’s Technical Publication No. C100, moisture imbalance is the leading cause of finish delamination and wood instability. Don’t guess; measure.
How do I maintain that fresh oil look for the long haul?
The beauty of a natural oil finish is that it ages with the home, but you have to feed it. You cannot just use any grocery store cleaner. You need to follow the hardwood floor care secrets to longevity and shine, which involves using soaps specifically designed for oiled wood. These soaps actually leave behind a tiny amount of soy or coconut fats that keep the wood supple. Also, for the love of your wood, why you should never use a steam mop on engineered wood floors or oiled floors is simple: the heat and moisture force their way into the grain, breaking down the bond of the finish. For your very first cleanup, stick to the best way to clean a new hardwood floor for the first time: a soft microfiber mop and a pH-neutral cleaner. If you notice a high-traffic path looking dull, just buff in a small amount of maintenance oil. It beats a full sand-and-refinish every time.
Look Forward to Maintenance-Free Hardwood
The flooring industry is moving toward ‘self-healing’ finishes and integrated smart sensors. I predict that within the next decade, we will see subfloors with built-in sensors that alert your smartphone the moment a pipe leaks or humidity spikes too high. We are also seeing a massive shift toward low-VOC, plant-based oils that are as durable as the old toxic varnishes. The trend is clearly moving away from the ‘plastic-wrapped’ look of high-gloss poly and toward the raw, tactile feel of real timber. Try this today: Pick up a professional-grade moisture meter before you start your next flooring project. It is the single most authoritative step you can take to ensure your floor stays as flat and beautiful as the day you laid it.
The Hardest Lessons I Learned While Staring at Wet Wood
After years of experimenting, I have realized that the best finish is the one that accounts for your daily life, not just your aesthetic dreams. Natural oil won me over because I am a klutz; I need a floor I can spot-repair without calling in a specialized crew. If you are working with reclaimed wood, do not forget the magnet hack for finding hidden nails; it will save your expensive sanding belts and your sanity. Also, remember that the finish is only as good as the prep—using the sanding secret for old heart pine floors ensures that even the most difficult wood accepts the oil evenly without blotchiness. The biggest lightbulb moment for me was realizing that a floor that flexes will eventually fail any finish, so I always fix a squeaky subfloor before the first plank is even unboxed.
The Tools That Saved My Sanity and My Wallet
I do not believe in buying every gadget in the aisle, but a few are non-negotiable for anyone serious about hardwood floors. I personally swear by a pinless moisture meter and a high-quality pH-neutral soap specifically formulated for oiled wood to keep that rich patina. If you want a result that looks professional, following a step-by-step guide to flooring installation and leveling success is better than any random social media clip. I also recommend keeping pro secrets for perfect installations in your back pocket, especially when dealing with tricky transitions or self-leveling compounds that seem to have a mind of their own during the pour.
#IMAGE_PLACEHOLDER_E#
Your Home Is Not a Museum—Build It to Be Lived In
At the end of the day, your hardwood floors are the stage where your life plays out. Whether you choose the hard-shell protection of polyurethane or the organic, repairable glow of natural oil, the goal is to stop worrying about the wood and start enjoying your space. Take the extra time to get the foundation right, choose the finish that fits your specific level of maintenance commitment, and do not be afraid to make your floors truly your own through the choices you make today. Have you ever regretted choosing a high-gloss finish because of how much it showed every single pet hair and scratch? Let me know in the comments below!