
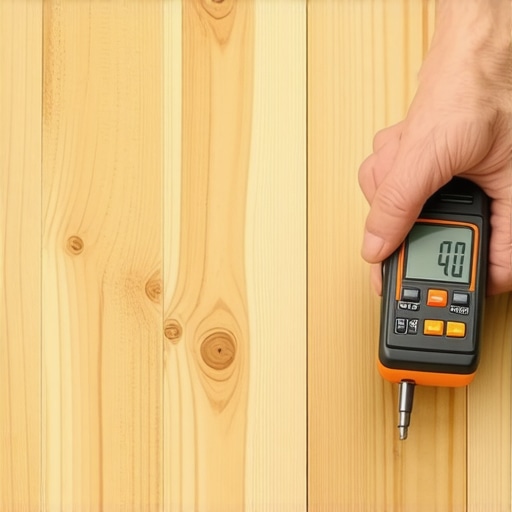
I remember the exact moment my ‘perfect’ DIY project turned into a nightmare. It was 2:00 AM when I heard a loud ‘pop’—the sound of wood under immense pressure. By morning, my beautiful white oak boards had peaked like a miniature mountain range right in the middle of the hallway. I had skipped the moisture check because the subfloor ‘looked’ dry to the eye and felt fine to the touch. That single oversight cost me three weeks of back-breaking labor and a few thousand dollars in ruined materials. Now, I never even think about [flooring installation](https://tiletrendshop.com/revamp-your-home-with-expert-flooring-installation-tips) without my trusty meter in hand. Today, I am going to show you exactly how to use this tool so you never have to feel that pit in your stomach like I did. Have you ever had a floor fail on you because you rushed the prep work?
Your Hands Aren’t Good Enough for This Job
Wood is essentially a giant, rigid sponge. Even if it looks bone-dry, it is constantly breathing in the humidity of your home and the moisture trapped in the subfloor. I learned the hard way that [flooring installation mistakes to avoid](https://tiletrendshop.com/flooring-installation-mistakes-to-avoid-for-lasting-results) usually start weeks before the first plank is laid. If your subfloor is holding onto dampness, that water will eventually migrate into your new planks, causing them to swell, cup, or crown. This is especially true if you are working in a basement; [why your basement floor needs a moisture barrier](https://tiletrendshop.com/why-your-basement-floor-needs-a-moisture-barrier-even-if-it-feels-dry) is a lesson in physics that your wallet doesn’t want to learn twice.
Is a Professional Meter Actually Worth the Cash?
You might be looking at the price of a high-quality pinless meter and wondering if you can just wing it with a cheap twenty-dollar version from a big-box store. The answer is a firm no. According to the National Wood Flooring Association (NWFA), moisture-related issues are the primary cause of flooring failures in North America, often because of inaccurate readings. Investing in a reliable tool now prevents a total teardown later. When I was starting out, I bought the cheapest gear available and ended up with inconsistent numbers that led to a wavy floor in my first rental property.
Grab the Right Tool for Your Specific Subfloor
Not all meters are created equal. You have pin-style meters that poke small holes into the wood and pinless versions that use electromagnetic signals to scan deeper. If you are worried about [hardwood floor care](https://tiletrendshop.com/hardwood-floor-care-secrets-to-longevity-and-shine) and aesthetics, pinless is the way to go because it leaves no marks. Before you even open your boxes of wood, you need to test at least twenty different spots per 1,000 square feet. You are looking for a ‘sweet spot’ where the moisture content of your flooring is within 2% to 4% of the subfloor’s moisture level. If those numbers don’t align, your floor is going to move, and not in a good way. If you find your subfloor is wildly uneven or damp, you might need to look into [precise floor leveling techniques](https://tiletrendshop.com/precise-floor-leveling-techniques-to-achieve-flawless-surfaces) before proceeding.
Map Your Way to a Stable Floor
Before you even think about swinging a mallet, you need to create a moisture map of your room. Think of your subfloor like a weather system; some areas will be naturally ‘drier’ while others, especially near exterior walls or plumbing, might be ‘humid.’ I start by drawing a rough grid on the floor with chalk and taking a reading in every single square. This isn’t just busy work. I once worked on a kitchen remodel where I thought the slab was ready because it looked light grey and felt dusty. I skipped [the painters plastic trick for testing concrete moisture](https://tiletrendshop.com/the-painters-plastic-trick-for-testing-concrete-moisture) and poured a self-leveler anyway. Within forty-eight hours, the whole thing looked like a dried-up lakebed because the moisture from the slab fought its way out through the fresh compound. It was a four-hundred-dollar mistake in materials alone. You want to see consistent numbers across the entire map. If one corner is 15% and the rest is 10%, you have a localized drainage or insulation issue that must be fixed before you proceed with your [revamp-your-home-with-expert-flooring-installation-tips](https://tiletrendshop.com/revamp-your-home-with-expert-flooring-installation-tips).
Stop Trusting That Dry Concrete
Concrete is basically a hard sponge that never truly stops moving water. Even if a slab is thirty years old, it can still pull ground moisture up through capillary action. If you are working on a basement project, [the moisture barrier rule for basement vinyl floors](https://tiletrendshop.com/the-moisture-barrier-rule-for-basement-vinyl-floors) is your absolute insurance policy. I recommend the ‘Calcium Chloride’ test for a scientific reading, but at the very least, tape down a few two-foot squares of clear plastic for 48 hours. If there is condensation under the plastic or the concrete is darker when you peel it up, you are not ready to lay floor. This is a critical part of [mastering floor leveling pro secrets for perfect installations](https://tiletrendshop.com/mastering-floor-leveling-pro-secrets-for-perfect-installations). Laying wood or tile over a ‘sweating’ slab is a recipe for mold and adhesive failure. 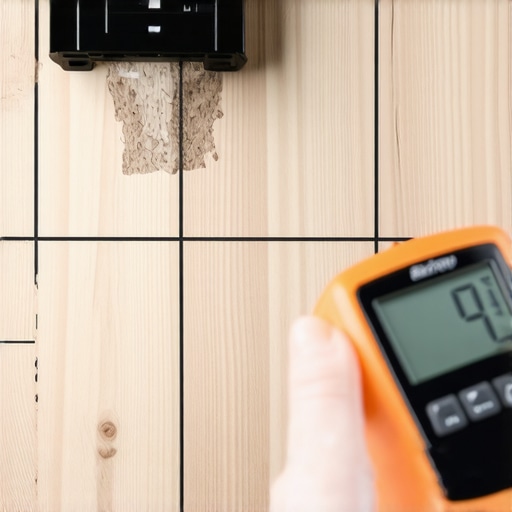
Level It Right the First Time
Once your moisture is in check, you have to tackle the ‘waves.’ A flat floor isn’t the same as a level floor, but for [flooring installation](https://tiletrendshop.com/revamp-your-home-with-expert-flooring-installation-tips), flatness is actually more important. Use a 10-foot straight edge to find any dips deeper than 3/16 of an inch. If you find a valley, don’t just dump self-leveler and hope for the best. You need to use [the spiky roller secret for a mirror smooth pour](https://tiletrendshop.com/the-spiky-roller-secret-for-a-mirror-smooth-pour) to release air bubbles and ensure the compound settles perfectly. I remember a job where I didn’t use a roller, and I ended up with tiny craters that looked like the moon. I had to grind the whole surface down, which created enough dust to coat every surface in the house. If you are dealing with a wooden subfloor that has a ‘crown’ or a high spot, you might need to sand it down or use [precise floor leveling techniques](https://tiletrendshop.com/precise-floor-leveling-techniques-to-achieve-flawless-surfaces) to build up the surrounding areas.
Why the Acclimation Phase is Non-Negotiable
This is the part where most DIYers get impatient. You have the wood, the subfloor is dry, and the room is level. Now, you must wait. You need to stack your flooring in the room where it will be installed for at least three to seven days. This allows the wood fibers to reach ‘equilibrium moisture content’ with your home’s specific environment. If you skip this, even the most [elevate your space choosing the right hardwood floors for your home](https://tiletrendshop.com/elevate-your-space-choosing-the-right-hardwood-floors-for-your-home) project will fail when the boards shrink or expand a month later. Cross-stack the boxes (log cabin style) to allow airflow around every single plank. Your moisture meter should confirm that the wood has stopped changing before the first nail goes in.Most pros won’t tell you this, but ‘self-leveling’ is one of the most misleading terms in the entire flooring industry. Homeowners often assume they can just dump a bucket of compound, walk away, and return to a pool-table-flat surface. In reality, these products are self-smoothing, not self-leveling. If you don’t actively help the material along, you’ll end up with ‘waves’ and high spots that make [revamp-your-home-with-expert-flooring-installation-tips](https://tiletrendshop.com/revamp-your-home-with-expert-flooring-installation-tips) nearly impossible. I have seen countless DIY projects turn into a nightmare because the installer didn’t realize they needed to break the surface tension. To get that glass-like finish, you must use [the spiky roller secret for a mirror smooth pour](https://tiletrendshop.com/the-spiky-roller-secret-for-a-mirror-smooth-pour). Without it, air bubbles stay trapped, and the compound ‘piles up’ instead of flowing into the low spots.
How Much Subfloor Deflection Can Your Tile Really Handle?
This is where the real experts separate themselves from the beginners. You might have a subfloor that is perfectly dry and visually flat, but if it has too much ‘bounce’ or deflection, your tile will crack within months. The Tile Council of North America (TCNA) specifies that for natural stone installations, the deflection under a concentrated load must not exceed L/720 of the span. This means if you are using [the plywood grade you need for a stable tile underlayment](https://tiletrendshop.com/the-plywood-grade-you-need-for-a-stable-tile-underlayment), you have to verify that your joist spacing and subfloor thickness can actually support the weight without flexing. I once consulted on a luxury bathroom where the homeowner chose massive marble slabs but ignored the subfloor’s structural ‘give’; the grout lines shattered within a week because the floor flexed every time someone walked past the vanity.
High Drill Speeds Kill Your Mortar Strength
Another common trap I see is the ‘more power is better’ mentality during the mixing phase. I often catch people using high-speed heavy-duty drills to mix their thinset or leveler, thinking it saves time. This is a massive mistake for the longevity of your floor. High speeds pull excessive air into the mixture, creating microscopic bubbles that compromise the chemical bond and lead to [the mixing paddle speed that ruins your leveling compound](https://tiletrendshop.com/the-mixing-paddle-speed-that-ruins-your-leveling-compound). When those air pockets pop, they leave behind a pinholed, fragile surface that cannot properly support [how-to-achieve-flawless-floor-leveling-before-tile-laying](https://tiletrendshop.com/how-to-achieve-flawless-floor-leveling-before-tile-laying). Always keep your drill below 300 RPM. It feels agonizingly slow, but it is the only way to ensure the polymers and binders actually do their job. If you have ever wondered [the reason your grout color looks splotchy and uneven](https://tiletrendshop.com/the-reason-your-grout-color-looks-splotchy-and-uneven), it often traces back to these early mixing errors or using too much water during cleanup, which leaches the pigment right out of the joints. Have you ever fallen into this trap or had a ‘self-leveling’ disaster? Let me know in the comments.
It’s not just about the speed of your drill; it’s about the precision of your layout tools. If you want to move from ‘weekend warrior’ to ‘pro-grade results,’ you have to stop relying on a bubble level and a prayer. I personally swear by a 360-degree green beam laser. Why? Because red beams often disappear in a sunlit room, and a 360-degree line allows me to check the height of my subfloor in every corner of the room simultaneously. This is how you implement precise floor leveling techniques to achieve flawless surfaces without losing your mind. I once spent four hours chasing a ‘high spot’ with a 4-foot level, only to realize the entire room was sloping toward the door. A laser would have shown me that in ten seconds.
Get a 360-Degree Laser Level to Solve Layout Nightmares
Regarding the future, I’m seeing a massive shift toward ‘smart’ subfloor sensors. High-end installers are already pushing data-logging technology that stays embedded under your floor to alert you of leaks or humidity spikes before the wood starts to cup. It’s an absolute game-changer for complex flooring installation projects where the environment is hard to control. For now, focus on the fundamentals. If you are working with large format tile, you must ensure your subfloor is rigid enough. Many homeowners ignore the joist span, but you can avoid heartbreak by verifying the plywood grade you need for a stable tile underlayment before you buy a single bag of mortar.
How can I make my floor last forever without a full refinish?
The secret to longevity isn’t a magic chemical; it’s knowing what to avoid in your daily routine. I constantly see people ruining their finish by being too aggressive with cleaning. You should stop using vinegar on your hardwood floors immediately because the acid slowly eats away at the polyurethane. Instead, stick to pH-neutral cleaners specifically designed for wood. Also, why you should never mop your floors with dish soap comes down to the film it leaves behind—it’s a magnet for dirt that eventually acts like sandpaper under your feet. For long-term protection, especially if you have underfloor heating, always respect the expansion gap rule for radiant heated wood floors. If the wood can’t breathe, it will eventually buckle.
Protect Your Investment with the Right Maintenance Habits
According to the National Wood Flooring Association (NWFA) Technical Manual, the stability of your finish is 100% dependent on the environment and the rigidity of what’s underneath. If you are dealing with a pre-existing floor that has seen better days, you might need to look into mastering hardwood floor refinishing expert tips for 2025 to bring that glow back. My advanced tip for you today: before your next project, go buy a high-quality suction-cup vibration tool for setting large format tiles. It ensures 100% mortar coverage and removes air pockets that manual beat-in blocks just can’t reach. Give it a try on your next bathroom remodel; the solid sound when you tap the tile later is incredibly satisfying.
Hard Truths from the Job Site
One of the biggest realizations I had early on was that subfloor moisture is an invisible enemy. You can’t smell it or see it, but if you do not test for it, it will destroy your work. Another lightbulb moment? Realizing that self-leveling is a misnomer; if you do not use the spiky roller secret for a mirror smooth pour, you are just trading one set of bumps for another. Finally, never underestimate the power of a proper moisture barrier; it is the difference between a floor that lasts decades and one that buckles in a year. For more core concepts, check out my guide on flooring installation fundamentals leveling for a seamless look to ensure your base is ready.
#IMAGE_PLACEHOLDER_FINAL#
The Tools I Never Step on Site Without
If you are serious about your results, stop guessing. I personally rely on a 360-degree green beam laser level to ensure my layout is consistent across every room. A high-quality pinless moisture meter is non-negotiable—I recommend brands like Wagner for their accuracy on both wood and concrete. Also, keep a suction-cup vibration tool handy for large format tiles; it ensures you get 100% thinset coverage without the back-breaking effort of manual beating. If you are still in the planning phase, make sure you understand the plywood grade you need for a stable tile underlayment to prevent grout cracking later on.
Build a Floor That Stands the Test of Time
Taking the time to prep your subfloor might feel like a chore when you are excited to see those new planks or tiles down, but I promise you, the peace of mind is worth every extra hour. You now have the knowledge to avoid the most common flooring installation mistakes to avoid for lasting results. Trust the process, trust your tools, and soon you will have a surface that is as durable as it is beautiful. Every great room starts from the ground up, and you are already ahead of the curve. Have you ever encountered a mystery bubble or a dip in your subfloor that drove you crazy? Let me know in the comments below!