
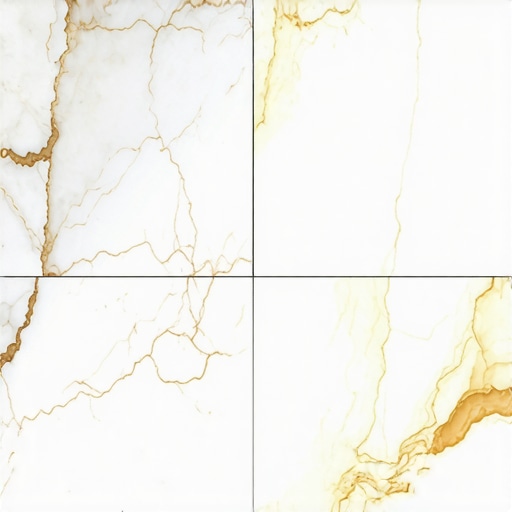
I’ll never forget the morning I walked into my newly renovated master bathroom, coffee in hand, ready to admire my handiwork, only to see it—a faint, sickly yellow stain creeping up from the edge of my pristine Carrara marble. My heart didn’t just sink; it felt like it hit the basement floor. I’d spent months researching the best tile trends for complementing hardwood floors this year and settled on what I thought was the gold standard of elegance. But there it was, looking like a tea stain that simply wouldn’t budge. I did what most panicked homeowners do: I grabbed the harshest bleach spray I had and started scrubbing. That was my first big mistake. I even remember kneeling on the cold floor, trying to convince myself it was just the lighting—I actually went out and bought cooler-toned lightbulbs just to hide it! But the truth is that marble doesn’t just “get dirty”—it’s a living stone that reacts to everything around it. Today, I’m going to pull back the curtain on why your beautiful floor is turning butter-yellow from the bottom up and, more importantly, how we can stop the damage before it’s too late.
The Day My White Marble Betrayed Me
When those yellow spots first appeared, I convinced myself it was just a bit of tracked-in mud. I scrubbed until my shoulders ached, but the discoloration stayed stubbornly beneath the surface. It was visceral; it felt like my floor was bruised from the inside. This is a common heartbreak for those of us who love natural stone but might have missed a few tile installation pointers that save time and money. My early mistake was a classic: I focused entirely on the aesthetics and completely ignored the moisture levels of my subfloor. I was so busy mastering hardwood floor refinishing in the adjacent hallway that I rushed the bathroom prep. I didn’t realize that marble is essentially a sponge for whatever is underneath it. According to the Natural Stone Institute, one of the leading causes of yellowing in white marble is iron oxidation. This happens when the iron naturally present in the stone is exposed to water, essentially rusting the marble from the inside out. If your installer used a low-quality thinset or didn’t ensure the concrete etching step you shouldn’t skip was handled correctly, you’re basically inviting moisture to sit and cook against the bottom of your tiles.
Is This Just a Natural Part of Owning Stone?
I get this question a lot: “Isn’t stone supposed to have a patina?” While a bit of wear and tear adds character, a vibrant yellow stain spreading from the grout lines inward is not a “vintage look”—it’s a chemical SOS. Many people fear that once the yellowing starts, the entire floor is a lost cause. I certainly did. I even looked into the secret to getting a flat floor for large format tiles because I was convinced I’d have to rip it all out and start over. But before you call the demolition crew, have you noticed if the yellowing is concentrated near your shower or an exterior wall? I’m curious—have any of you dealt with this “creeping yellow” mystery before, or are you just now noticing your first few spots? Knowing where it starts is the first step to figuring out which “invisible” culprit is ruining your view.
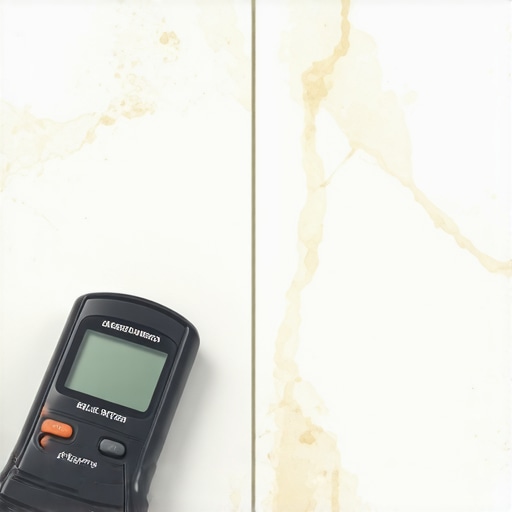
To catch that culprit, you have to think like a plumber, not a decorator. The first thing I did when my bathroom floor started turning was buy a high-quality moisture meter. I’d learned my lesson the hard way while mastering hardwood floor refinishing: you can’t guess what’s happening inside the material. Marble is essentially a porous filter. If there is water beneath it, that water will travel upward, carrying minerals and iron with it. If you suspect moisture, you should learn how to use a moisture meter before you lay wood floors or any natural stone to verify the subfloor’s health. I once spent three days drying out a subfloor with heavy-duty fans after discovering a tiny pinhole leak in a supply line that was literally ‘feeding’ the marble’s yellowing.
Stop the Wicking at the Source
If you want to fix the stain, you have to cut off the supply line. Think of your marble like a piece of white bread sitting on a wet counter—it doesn’t matter how much you scrub the top of the bread; the bottom is still soaking up the mess. If you’re working over concrete, you need to verify that the slab isn’t breathing out moisture. I always recommend the painters plastic trick for testing concrete moisture. You tape a square of plastic to the floor for 24 hours; if beads of water appear, your slab is the enemy. This is often where the concrete etching step you shouldn’t skip before leveling comes into play. If the concrete is too smooth or contaminated, your sealer or thinset won’t bond, creating a pocket for water to sit and rot.
Trust the Tools, Not Your Eyes
Don’t just look for puddles. Moisture can be ‘invisible’ and still cause a chemical reaction. When I was younger and more arrogant, I skipped the subfloor prep on a small laundry room project because the concrete ‘felt dry.’ Within six months, the white tiles looked like they had a coffee addiction. It was a classic case of moisture wicking through the thinset. You might even find that your stone is reacting to the plywood underneath. Using the wrong grade of wood can lead to tannins bleeding through, much like why white oak cabinets look orange next to the wrong floor stain. Always ensure you are using the plywood grade you need for a stable tile underlayment to prevent these chemical crossovers.
Why Your Thinset Becomes a Rust Factory
White marble contains naturally occurring iron. When water sits in the thinset or the mortar bed, it activates that iron. It’s exactly like leaving a nail in a bucket of water—eventually, it’s going to rust. The yellow you see is literally rust. If your subfloor wasn’t leveled correctly, you might have used extra-thick layers of thinset to compensate, which takes forever to dry. This is why knowing the leveling secret for installing plank flooring over tiles or stone is vital—you need a perfectly flat base so you can use the minimum amount of moisture-carrying mortar. I once saw a DIYer use a massive notched trowel to hide a 1/2-inch dip in the subfloor. That thick ‘mud’ stayed wet for weeks, and by the time it dried, the marble was ruined.
While most pros will tell you to seal marble immediately, there’s a nuance they often miss: sealing a damp stone is like putting plastic wrap over a wet sponge. It traps the moisture, which then accelerates the oxidation of iron within the tile. The Tile Council of North America (TCNA) warns in their handbook that excessive moisture vapor emission can lead to various bond failures and deep-set discoloration that no surface cleaner can reach. If you’ve noticed that your stone looks dull or hazy, you might be tempted to just buff it, but you should really investigate why your marble floor is losing its shine in high traffic spots before reaching for the wax. Often, the ‘dullness’ is actually moisture-trapping residue from the bottom up.
Why Flat Beats Level Every Single Time
There is a common obsession in the DIY community with making a floor perfectly ‘level,’ but in the world of large-format tile, ‘flatness’ is actually your true north. You can have a floor that is slightly out of level relative to the horizon but perfectly flat, and your tile will lay beautifully without lippage. However, a perfectly level floor with a subtle 1/8-inch hump in the middle will cause your tiles to rock, leaving you with uneven edges and future cracks. This is a sophisticated nuance often missed in a standard how to achieve flawless floor leveling before tile laying guide. If you don’t focus on the flatness of the plane, you’re just pouring expensive compound down the drain. This misunderstanding of flooring installation fundamentals and leveling for a seamless look is why many high-end projects fail within the first year.
The Mixing Mistake That Destroys Your Subfloor
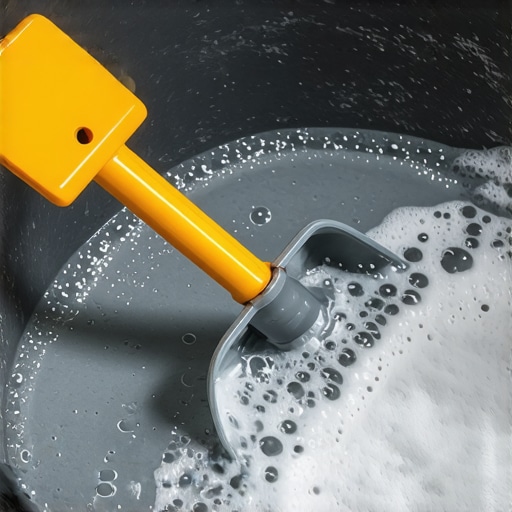
One of the biggest traps I see involves the mixing phase of the subfloor prep. Using a standard high-speed drill to mix your self-leveler isn’t ‘efficient’; it’s actually destructive. High speeds whip air into the mixture, creating tiny bubbles that turn into a sea of pinholes once the floor dries. I learned about the mixing paddle speed that ruins your leveling compound the hard way during a high-stakes kitchen remodel where the leveler ended up looking like a piece of Swiss cheese. When your base is compromised by air pockets, following a step-by-step guide to flooring installation and leveling success becomes impossible because the structural integrity of the pour is gone.
Is Your Floor Leveler Actually Safe for Radiant Heat?
If you’re working with heated floors, you can’t just grab a generic bag of leveler and hope for the best. Heat causes thermal expansion, and if your leveler isn’t specifically engineered with polymers to handle that movement, it will crack and eventually delaminate your expensive tile. You must know how to choose a floor leveler that won’t crack over radiant heat to protect the heating elements and the stone above. I’ve seen entire master suites ruined because the leveler acted like a brittle eggshell over the heating coils rather than a flexible thermal bridge. Achieving precise floor leveling techniques to achieve flawless surfaces is as much about chemistry as it is about using a straightedge. Have you ever fallen into this trap or noticed ‘ghosting’ lines over your heating wires? Let me know in the comments.
I didn’t just wake up knowing how to pour a perfect floor; I ruined a few first. The gear that finally stopped my leveling nightmares wasn’t a fancy laser—it was a simple, plastic spiked tool. If you aren’t using the spiky roller secret for a mirror smooth pour, you are effectively trapping air inside your investment. I use a 20-inch spiky roller on every single self-leveling job because it breaks the surface tension and releases those tiny bubbles that eventually become craters. It’s the difference between a floor that looks like the moon and one that looks like glass. Pair this with the roller selection that prevents air bubbles in leveler for your primer, and you’ve already outpaced 90% of DIYers. 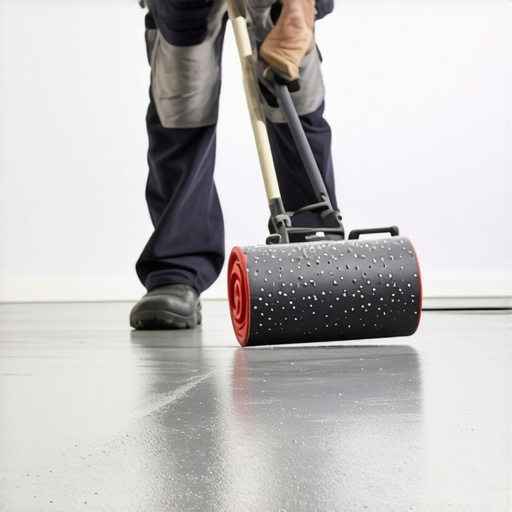
How can I keep these surfaces looking new for a decade?
Maintenance is where most people lose the battle I fought so hard to win. I’ve seen homeowners spend five figures on Carrara marble only to destroy it with a ‘natural’ cleaning solution. You need to stop using vinegar on your hardwood floors immediately and the same goes for your stone. The acid eats the sealer and then moves on to the calcium in the stone. For long-term results, I stick to PH-neutral cleaners and a microfiber mop that is barely damp. If you’re wondering why your hardwood floor turned cloudy after cleaning, it’s likely a buildup of wax-based ‘restorers’ that actually trap dirt. Instead, look into hardwood floor care secrets to longevity and shine that focus on protecting the existing finish rather than adding layers of gunk. According to the TCNA (Tile Council of North America) Handbook, the selection of the correct grout sealer is just as vital as the tile itself for preventing the ‘wicking’ issues we discussed earlier. I predict that in the next five years, we will see the rise of ‘smart subfloors’ with embedded moisture sensors that alert your phone before a leak becomes a yellow stain. Until then, we rely on prep. If you are transitioning between materials, make sure you understand how to fix a transition between tile and uneven concrete to prevent tripping hazards as the house settles. Don’t let your hard work fade—go grab a high-quality moisture meter today and verify your subfloor health before your next big move.
Why My First DIY Disaster Was Actually a Gift
Looking back at that yellowed Carrara marble today, I realize I learned more from that failure than from ten successful jobs. First, never assume a subfloor is dry just because it looks grey; moisture is a phantom that haunts your stone from beneath. Second, white marble is a luxury for a reason—it demands a pristine, controlled environment to stay beautiful. Finally, if you skip the prep, you aren’t saving time; you’re just scheduling a demolition for two years down the road. I’ve since learned that mastering floor leveling pro secrets for perfect installations is the only way to sleep soundly at night after a project is finished.
My Bare-Minimum Toolkit for Success
If you’re serious about avoiding the heartbreak of oxidized stone, there are three things you need before you open a single box of tile. I swear by a high-quality moisture meter to check the slab, a digital copy of the TCNA Handbook for industry-standard mortar specs, and a high-quality spiked roller to ensure your leveler is actually flat. Following the ultimate guide to floor leveling for a perfect finish will save you more money in the long run than any coupon or discount tile shop ever could. I also recommend keeping a log of your own flooring installation mistakes to avoid for lasting results in the future.
Take the First Step Toward a Flawless Floor
It’s easy to get overwhelmed by the chemistry of iron oxidation and subfloor prep, but remember that every master installer started with a single, likely crooked, tile. By focusing on the hidden layers and respecting the materials, you’re already ahead of most contractors. Your vision of a perfect, elegant home is entirely possible if you commit to installing tiles like a pro with step-by-step strategies for 2025. Don’t let the fear of a little rust keep you from the timeless beauty of natural stone—just be the homeowner who does the prep work the right way. Have you ever noticed a strange yellow stain appearing on your tile months after the project was finished? Let me know in the comments below!