
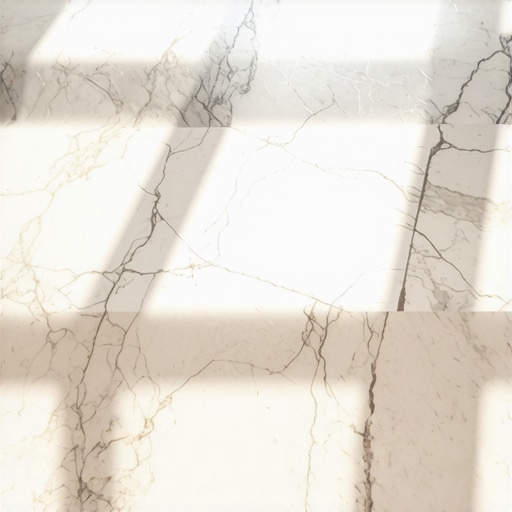
I’ll never forget the morning the sun hit my foyer just right—or rather, just wrong. What used to be a mirror-like expanse of Carrara marble looked more like a foggy windshield on a November morning. Right there, in the path from the front door to the kitchen, the “glow” was gone. I felt that sinking feeling in my gut. Had I ruined my biggest home investment? I spent the next three hours scrubbing with a bucket of soapy water, only to realize I was making it worse. Every stroke of the mop seemed to pull more of the life out of the stone. [IMAGE_PLACEHOLDER]
The Real Reason Your Grand Entrance Looks Like a Dusty Road
Most of us treat our marble like it’s as tough as a sidewalk, but it’s actually a soft, porous rock that is surprisingly sensitive. When we walk across those high-traffic spots, we’re essentially sanding the floor down with microscopic bits of grit. It’s a process called mechanical abrasion. I made the classic rookie mistake of thinking I could just “clean” the shine back into existence. In reality, I was probably contributing to the dullness because I didn’t know that you should never mop your floors with dish soap. The residue from those “gentle” soaps builds up a film that attracts even more dirt, acting like a magnet for the very grime you’re trying to banish. If you’re seeing those cloudy patches where everyone walks, don’t panic. You haven’t failed as a homeowner. Today, I’m going to show you why those “traffic ghosts” appear and how we can bring back that factory-finish gloss without spending thousands on a professional restoration team. We can start by learning hardwood floor care secrets to longevity and shine, as many of those protective principles actually overlap with natural stone.
Is my marble actually ruined forever?
That’s the fear, isn’t it? You look at that grey, matte patch and think the stone is dead. I’ve been there. Early in my DIY journey, I actually tried to “fix” a dull spot with white vinegar because I heard it was a “natural” cleaner. Big mistake. Marble is primarily calcium carbonate, which makes it highly reactive. According to the Natural Stone Institute, marble only ranks about a 3 on the Mohs hardness scale, making it significantly softer than granite or even some glass. When I applied that vinegar, I caused a chemical reaction called “etching” that literally ate a tiny layer off the surface. I basically gave my floor a chemical burn. You also need to stop using bleach on your natural stone floors immediately, as it can weaken the structure and discolor the veins. But here is the good news: unless you’ve got deep cracks or heavy chipping, most of what you’re seeing is just surface-level wear that we can definitely manage. We just need to stop the cycle of damage first. Have you noticed your marble losing its luster specifically in the doorway or right in front of the sink? Let me know in the comments if you’ve faced this frustration. If the maintenance of natural stone is becoming too much, you might eventually consider why porcelain tiles are better for high traffic sunrooms and other busy areas, but let’s get your current floors back to their former glory first.
Clean the Slate Without the Sting
Before we talk about polishing, we have to talk about decontaminating. You cannot buff a floor that is covered in microscopic grit. I learned this the hard way in my first apartment when I tried to shine up a marble threshold without vacuuming first; I essentially turned my buffing pad into a piece of 60-grit sandpaper. The result was a scratched mess that took twice as long to fix. Start by using a high-quality microfiber dust mop to lift the dry debris. Avoid using a vacuum with a beater bar, as the plastic wheels can leave tiny tracks on the stone surface. Once the dry dirt is gone, you need a pH-neutral stone cleaner. Think of this like a specialized skincare routine; you would not wash your face with industrial degreaser, so do not do it to your marble. Just as you should stop using vinegar on your hardwood floors immediately, you must keep any acidic or citrus-based cleaners away from your stone. These acids eat the calcium in the marble, creating more of those dull spots you are trying to fix.
Bring Back the Glow with Polishing Powders
Once the floor is surgically clean, it is time to address the actual surface texture. For those traffic ghosts that are not deep scratches, a high-quality marble polishing powder containing tin oxide is your best friend. This is not a wax that sits on top; it is a fine abrasive that works with water to smooth out the microscopic peaks and valleys of the stone. I remember my first time using a buffing machine on a Saturday morning—I was so nervous I would burn the stone that I used way too much water, turning the powder into a milky slurry that splashed all over my baseboards. The secret is to work in small, two-foot by two-foot sections. Apply a teaspoon of powder, mist it with water until it is the consistency of toothpaste, and use a white polishing pad. 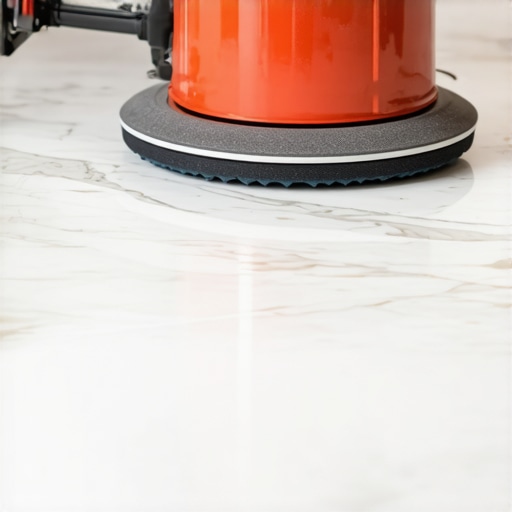
Seal the Deal to Prevent Future Ghosts
After you have achieved that mirror-like finish, the stone is effectively naked and vulnerable. Marble is like a sponge with millions of tiny pores. If you do not seal it, that spilled glass of red wine or even simple muddy footprints will soak deep into the grain. I always use the spray bottle hack for testing floor sealer coverage to ensure I have applied enough. Simply spray a few beads of water on the surface; if they sit there like diamonds on a ring, you are protected. If the water vanishes into the stone, you need another coat of impregnating sealer. If you are currently installing tiles like a pro step-by-step in a new area, remember that sealing the stone before grouting can save you hours of cleanup.
Choosing Your Battles with Finish Types
If you find that the maintenance of high-gloss marble is becoming a burden, you might want to consider a different aesthetic for your next renovation. Many homeowners are discovering why matte finish hides scratches better than high gloss, especially in homes with pets or heavy foot traffic. A honed finish provides a soft, satin look that does not show the wear nearly as quickly as a polished surface. If you are dealing with a floor that is too far gone for simple powder polishing, you might need to look into mastering hardwood floor refinishing techniques for mixed-material spaces or potentially mechanical diamond grinding for the stone. Regardless of the path you choose, the key is consistency and using the right chemistry for the rock under your feet.
Beyond the surface polish, I’ve seen homeowners lose sleep over a sloping floor, thinking they need to level the entire house to save their marble or hardwood. Here is the contrarian truth: Your floor doesn’t actually need to be level—it needs to be flat. In my early years, I spent a fortune trying to make a 1920s foyer perfectly level, only to realize I was creating massive, dangerous height transitions at the doorways. If you are focused on flooring installation fundamentals leveling for a seamless look, remember that a floor can be sloped two degrees and still be structurally sound, as long as there are no peaks and valleys that stress the joints of your stone or wood.
Stop Obsessing Over Level and Start Focusing on Flat
Most beginners believe that a bubble in the middle of a spirit level is the ultimate goal, but the ultimate guide to floor leveling for a perfect finish teaches us that continuity is king. If you ignore the chalk dust secret for finding low spots in subfloors, you are just guessing where the problems lie. I once saw a professional crew pour twenty bags of self-leveler to level a kitchen, only to find the dishwasher no longer fit under the counter. The goal should be a plane that allows the flooring to lay without air pockets, not a perfectly horizontal surface that ignores the architectural reality of your home.
The High-Speed Mixing Trap That Ruins Your Substrate
The biggest “oops” factor I see involves the whisk effect. When prepping for a stone or tile install, many people treat self-leveling compound like cake batter. They crank their drill to maximum speed. This is a massive mistake. The mixing paddle speed that ruins your leveling compound matters because high-speed mixing traps air, creating tiny pinholes that weaken the bond and structural integrity of the substrate. According to the National Wood Flooring Association (NWFA), subfloor flatness should generally be within 3/16 of an inch over a 10-foot radius. Anything more, and you’re looking at future failure. If you have ever seen why your self-leveling pour looks like a topographical map, you know that rushing the chemistry always leads to more sanding later.
Why does my brand-new floor click every time I walk to the kitchen?
This is a question I get constantly, and the answer is usually lippage or subfloor deflection. Even when installing tiles like a pro step-by-step, a slightly bouncy subfloor will cause tiles to rub against the thinset or planks to flex. For those with luxury vinyl or wood, why your lvp floor is clicking when you walk on it is often a sign that you ignored the the expansion gap rule for radiant heated wood floors. Without that breathing room at the edges, the planks have nowhere to go but up, creating a hollow bridge over the low spots of your subfloor.  Have you ever fallen into this trap where a small prep error turned into a loud, clicking nightmare? Let me know in the comments—I have likely faced the same issue and can help you troubleshoot. If you are currently stuck in the middle of a project, feel free to contact us for some expert perspective. I’ve learned that the perfect installation happens in the prep work, not the final coat of sealer. Consistency in your subfloor is the only way to ensure that the glow we worked so hard to restore actually lasts for the next decade.
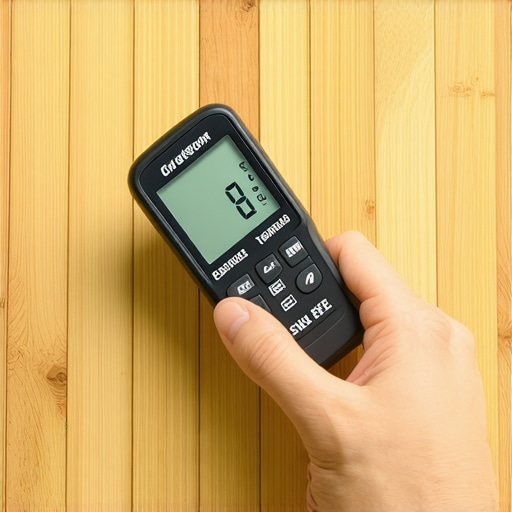
I learned the hard way that the most important tool in my kit isn’t a hammer or a trowel—it’s a digital moisture meter. For years, I just assumed the wood was ready because it had sat in the house for a week, but after a disastrous buckling incident in a client’s library, I realized that guessing is for amateurs. Now, I never start a job without checking the subfloor and the planks. I personally use the Wagner Meters Orion series because it uses electromagnetic wave technology to scan the wood without leaving those ugly pinholes. According to technical documentation from Wagner Meters, non-destructive moisture meters are essential because they can scan deep into the wood’s density without damaging the finish you just spent days perfecting. If you want to avoid a massive headache, you really need to learn how to use a moisture meter to prevent floor failure before you lay down a single board.
Stop Guessing and Start Measuring With the Right Tech
Maintenance isn’t just about cleaning; it is about monitoring the environment that your floor lives in. I tell everyone that a humid summer can do more damage to your hardwood than a muddy dog. If you are debating between different finishes for your home, understanding the natural oil vs polyurethane debate for busy homes is crucial because each one handles moisture and wear differently. Polyurethane creates a plastic-like shield, while oil penetrates the grain, allowing the wood to breathe but requiring more frequent touch-ups. I’ve started installing small, discreet humidity sensors in the baseboards of my higher-end projects. Looking ahead, I predict we will soon see ‘smart floors’ with integrated sensors that alert your smartphone if the subfloor moisture levels spike. This is the next frontier of hardwood floor care secrets to longevity and shine, moving from reactive cleaning to proactive environmental management.
How do I keep my floors looking brand new for decades?
The secret is actually quite boring: consistency. It is about catching the small problems before they require you to look into mastering hardwood floor refinishing expert tips for 2025. I suggest a deep-cleaning schedule that involves a pH-neutral cleaner every two weeks and a dry microfiber dust every single day. If you have tile transitions, keep an eye on the grout lines. If you see tiny cracks, you might be dealing with the plywood mistake that causes grout cracks, which usually means there is too much flex in your subfloor. Address those structural issues now, and the finish will take care of itself. For those of you currently in the thick of a renovation, I challenge you to go out and buy a moisture meter today. It is the single best investment you can make to ensure your hard work doesn’t literally warp away. If you’ve run into a weird moisture issue or a ‘mystery squeak’ that won’t go away, contact us and let’s figure out a strategy to save your investment.
I’ll never forget the morning the sun hit my foyer just right—or rather, just wrong. What used to be a mirror-like expanse of Carrara marble looked more like a foggy windshield on a November morning. Right there, in the path from the front door to the kitchen, the “glow” was gone. I felt that sinking feeling in my gut. Had I ruined my biggest home investment? I spent the next three hours scrubbing with a bucket of soapy water, only to realize I was making it worse. Every stroke of the mop seemed to pull more of the life out of the stone. [IMAGE_PLACEHOLDER]
The Real Reason Your Grand Entrance Looks Like a Dusty Road
Most of us treat our marble like it’s as tough as a sidewalk, but it’s actually a soft, porous rock that is surprisingly sensitive. When we walk across those high-traffic spots, we’re essentially sanding the floor down with microscopic bits of grit. It’s a process called mechanical abrasion. I made the classic rookie mistake of thinking I could just “clean” the shine back into existence. In reality, I was probably contributing to the dullness because I didn’t know that you should never mop your floors with dish soap. The residue from those “gentle” soaps builds up a film that attracts even more dirt, acting like a magnet for the very grime you’re trying to banish. If you’re seeing those cloudy patches where everyone walks, don’t panic. You haven’t failed as a homeowner. Today, I’m going to show you why those “traffic ghosts” appear and how we can bring back that factory-finish gloss without spending thousands on a professional restoration team. We can start by learning hardwood floor care secrets to longevity and shine, as many of those protective principles actually overlap with natural stone.
Is my marble actually ruined forever?
That’s the fear, isn’t it? You look at that grey, matte patch and think the stone is dead. I’ve been there. Early in my DIY journey, I actually tried to “fix” a dull spot with white vinegar because I heard it was a “natural” cleaner. Big mistake. Marble is primarily calcium carbonate, which makes it highly reactive. According to the Natural Stone Institute, marble only ranks about a 3 on the Mohs hardness scale, making it significantly softer than granite or even some glass. When I applied that vinegar, I caused a chemical reaction called “etching” that literally ate a tiny layer off the surface. I basically gave my floor a chemical burn. You also need to stop using bleach on your natural stone floors immediately, as it can weaken the structure and discolor the veins. But here is the good news: unless you’ve got deep cracks or heavy chipping, most of what you’re seeing is just surface-level wear that we can definitely manage. We just need to stop the cycle of damage first. Have you noticed your marble losing its luster specifically in the doorway or right in front of the sink? Let me know in the comments if you’ve faced this frustration. If the maintenance of natural stone is becoming too much, you might eventually consider why porcelain tiles are better for high traffic sunrooms and other busy areas, but let’s get your current floors back to their former glory first.
Clean the Slate Without the Sting
Before we talk about polishing, we have to talk about decontaminating. You cannot buff a floor that is covered in microscopic grit. I learned this the hard way in my first apartment when I tried to shine up a marble threshold without vacuuming first; I essentially turned my buffing pad into a piece of 60-grit sandpaper. The result was a scratched mess that took twice as long to fix. Start by using a high-quality microfiber dust mop to lift the dry debris. Avoid using a vacuum with a beater bar, as the plastic wheels can leave tiny tracks on the stone surface. Once the dry dirt is gone, you need a pH-neutral stone cleaner. Think of this like a specialized skincare routine; you would not wash your face with industrial degreaser, so do not do it to your marble. Just as you should stop using vinegar on your hardwood floors immediately, you must keep any acidic or citrus-based cleaners away from your stone. These acids eat the calcium in the marble, creating more of those dull spots you are trying to fix.
Bring Back the Glow with Polishing Powders
Once the floor is surgically clean, it is time to address the actual surface texture. For those traffic ghosts that are not deep scratches, a high-quality marble polishing powder containing tin oxide is your best friend. This is not a wax that sits on top; it is a fine abrasive that works with water to smooth out the microscopic peaks and valleys of the stone. I remember my first time using a buffing machine on a Saturday morning—I was so nervous I would burn the stone that I used way too much water, turning the powder into a milky slurry that splashed all over my baseboards. The secret is to work in small, two-foot by two-foot sections. Apply a teaspoon of powder, mist it with water until it is the consistency of toothpaste, and use a white polishing pad.
Seal the Deal to Prevent Future Ghosts
After you have achieved that mirror-like finish, the stone is effectively naked and vulnerable. Marble is like a sponge with millions of tiny pores. If you do not seal it, that spilled glass of red wine or even simple muddy footprints will soak deep into the grain. I always use the spray bottle hack for testing floor sealer coverage to ensure I have applied enough. Simply spray a few beads of water on the surface; if they sit there like diamonds on a ring, you are protected. If the water vanishes into the stone, you need another coat of impregnating sealer. If you are currently installing tiles like a pro step-by-step in a new area, remember that sealing the stone before grouting can save you hours of cleanup.
Choosing Your Battles with Finish Types
If you find that the maintenance of high-gloss marble is becoming a burden, you might want to consider a different aesthetic for your next renovation. Many homeowners are discovering why matte finish hides scratches better than high gloss, especially in homes with pets or heavy foot traffic. A honed finish provides a soft, satin look that does not show the wear nearly as quickly as a polished surface. If you are dealing with a floor that is too far gone for simple powder polishing, you might need to look into mastering hardwood floor refinishing techniques for mixed-material spaces or potentially mechanical diamond grinding for the stone. Regardless of the path you choose, the key is consistency and using the right chemistry for the rock under your feet.
Beyond the surface polish, I’ve seen homeowners lose sleep over a sloping floor, thinking they need to level the entire house to save their marble or hardwood. Here is the contrarian truth: Your floor doesn’t actually need to be level—it needs to be flat. In my early years, I spent a fortune trying to make a 1920s foyer perfectly level, only to realize I was creating massive, dangerous height transitions at the doorways. If you are focused on flooring installation fundamentals leveling for a seamless look, remember that a floor can be sloped two degrees and still be structurally sound, as long as there are no peaks and valleys that stress the joints of your stone or wood.
Stop Obsessing Over Level and Start Focusing on Flat
Most beginners believe that a bubble in the middle of a spirit level is the ultimate goal, but the ultimate guide to floor leveling for a perfect finish teaches us that continuity is king. If you ignore the chalk dust secret for finding low spots in subfloors, you are just guessing where the problems lie. I once saw a professional crew pour twenty bags of self-leveler to level a kitchen, only to find the dishwasher no longer fit under the counter. The goal should be a plane that allows the flooring to lay without air pockets, not a perfectly horizontal surface that ignores the architectural reality of your home.
The High-Speed Mixing Trap That Ruins Your Substrate
The biggest “oops” factor I see involves the whisk effect. When prepping for a stone or tile install, many people treat self-leveling compound like cake batter. They crank their drill to maximum speed. This is a massive mistake. The mixing paddle speed that ruins your leveling compound matters because high-speed mixing traps air, creating tiny pinholes that weaken the bond and structural integrity of the substrate. According to the National Wood Flooring Association (NWFA), subfloor flatness should generally be within 3/16 of an inch over a 10-foot radius. Anything more, and you’re looking at future failure. If you have ever seen why your self-leveling pour looks like a topographical map, you know that rushing the chemistry always leads to more sanding later.
Why does my brand-new floor click every time I walk to the kitchen?
This is a question I get constantly, and the answer is usually lippage or subfloor deflection. Even when installing tiles like a pro step-by-step, a slightly bouncy subfloor will cause tiles to rub against the thinset or planks to flex. For those with luxury vinyl or wood, why your lvp floor is clicking when you walk on it is often a sign that you ignored the the expansion gap rule for radiant heated wood floors. Without that breathing room at the edges, the planks have nowhere to go but up, creating a hollow bridge over the low spots of your subfloor. Have you ever fallen into this trap where a small prep error turned into a loud, clicking nightmare? Let me know in the comments—I have likely faced the same issue and can help you troubleshoot. If you are currently stuck in the middle of a project, feel free to contact us for some expert perspective. I’ve learned that the perfect installation happens in the prep work, not the final coat of sealer. Consistency in your subfloor is the only way to ensure that the glow we worked so hard to restore actually lasts for the next decade.
I learned the hard way that the most important tool in my kit isn’t a hammer or a trowel—it’s a digital moisture meter. For years, I just assumed the wood was ready because it had sat in the house for a week, but after a disastrous buckling incident in a client’s library, I realized that guessing is for amateurs. Now, I never start a job without checking the subfloor and the planks. I personally use the Wagner Meters Orion series because it uses electromagnetic wave technology to scan the wood without leaving those ugly pinholes. According to technical documentation from Wagner Meters, non-destructive moisture meters are essential because they can scan deep into the wood’s density without damaging the finish you just spent days perfecting. If you want to avoid a massive headache, you really need to learn how to use a moisture meter to prevent floor failure before you lay down a single board.
Stop Guessing and Start Measuring With the Right Tech
Maintenance isn’t just about cleaning; it is about monitoring the environment that your floor lives in. I tell everyone that a humid summer can do more damage to your hardwood than a muddy dog. If you are debating between different finishes for your home, understanding the natural oil vs polyurethane debate for busy homes is crucial because each one handles moisture and wear differently. Polyurethane creates a plastic-like shield, while oil penetrates the grain, allowing the wood to breathe but requiring more frequent touch-ups. I’ve started installing small, discreet humidity sensors in the baseboards of my higher-end projects. Looking ahead, I predict we will soon see ‘smart floors’ with integrated sensors that alert your smartphone if the subfloor moisture levels spike. This is the next frontier of hardwood floor care secrets to longevity and shine, moving from reactive cleaning to proactive environmental management.
How do I keep my floors looking brand new for decades?
The secret is actually quite boring: consistency. It is about catching the small problems before they require you to look into mastering hardwood floor refinishing expert tips for 2025. I suggest a deep-cleaning schedule that involves a pH-neutral cleaner every two weeks and a dry microfiber dust every single day. If you have tile transitions, keep an eye on the grout lines. If you see tiny cracks, you might be dealing with the plywood mistake that causes grout cracks, which usually means there is too much flex in your subfloor. Address those structural issues now, and the finish will take care of itself. For those of you currently in the thick of a renovation, I challenge you to go out and buy a moisture meter today. It is the single best investment you can make to ensure your hard work doesn’t literally warp away. If you’ve run into a weird moisture issue or a ‘mystery squeak’ that won’t go away, contact us and let’s figure out a strategy to save your investment.
The Hardest Lessons From My Own Restoration Nightmares
I used to think restoration was about muscle, but it is actually about restraint. My biggest ‘aha’ moment came when I realized that most flooring installation mistakes to avoid for lasting results stem from simple impatience. If I had waited for the moisture to leave the concrete slab or used a proper stone-safe cleaner from day one, I would have saved myself thousands. Another lightbulb went off when I stopped trying to force a 100-year-old home to be perfectly level and focused on making the surface flat; it saved my joints and my stone. Patience truly is the most expensive tool you have—don’t waste it by rushing the cure times.
The Only Gear You Actually Need for Professional Results
If you are serious about maintaining that mirror shine, stop buying the supermarket ‘stone glow’ bottles. I trust a specific toolkit: a Wagner Orion moisture meter for the prep, a high-quality impregnating sealer for protection, and the blue tape secret for perfectly straight grout lines to keep my material transitions sharp. For the best outcome, always follow a step-by-step guide to flooring installation and leveling success before you even think about the final polish. These tools act as your insurance policy against future cracks and dullness. [IMAGE_PLACEHOLDER_E]
Take the First Step Toward a Flawless Finish
Your home is a living space, not a museum, but that doesn’t mean you can’t have floors that belong in a gallery. By applying these hardwood floor care secrets to longevity and shine and respecting the unique chemistry of your stone, you are preserving more than just a surface—you are protecting your home’s legacy. Don’t let the fear of a few dull spots stop you from starting the restoration process. Start in a small corner, learn the rhythm of the buffer, and watch that glow return. Have you ever accidentally ‘etched’ your stone with a household cleaner? Let me know your story below so we can troubleshoot it together!