
I was on my hands and knees, squinting at the afternoon sunlight hitting my newly laid travertine, convinced that every square inch was protected. I had followed the flooring installation fundamentals to a T, and the final step—the sealer—was supposed to be the victory lap. I applied it, waited, and assumed I was good. But assuming is the fastest way to ruin an expensive project. A few days later, a simple splash of water from the kitchen sink didn’t bead up; it turned the stone dark. I’d missed a patch the size of a dinner plate. It was a classic rookie mistake that could have been avoided with a tool that costs exactly ninety-nine cents at the grocery store. It doesn’t matter if you are mastering hardwood floor refinishing or sealing porous grout; you need a way to see the invisible.
Stop Guessing Whether Your Floor is Actually Protected
The frustration with high-quality sealers is that they are designed to be invisible. They soak in and vanish. You’re essentially trying to paint a clear liquid on a thirsty surface and hoping your coverage is 100%. Early in my career, I relied on my expert eyes, but I quickly learned that lighting can be incredibly deceptive. I once left a massive dry spot in a dark hallway simply because the overhead light created a glare that looked like wet sealer. Since then, I’ve sworn by the spray-bottle hack. It’s the only way to get a fail-safe confirmation that your barrier is solid. Whether you are dealing with a complex herringbone pattern or a simple slab, the physics of surface tension don’t lie. If you have ever felt that sinking feeling of seeing a spill soak into your brand-new floor, you know exactly why I’m obsessed with this. Have you ever finished a job only to realize later that a spill went right through your protective layer?
Is a little water really enough to test a pro-grade sealer?
You might be skeptical. You’ve spent money on breathable or penetrating sealers, so shouldn’t they just work? According to technical data from the Tile Council of North America (TCNA), most stone and grout failures occur not because the product was bad, but because of improper application—specifically, insufficient coverage on porous surfaces. The spray bottle isn’t just a gimmick; it’s a physical stress test. If the water beads like a freshly waxed car, you’re safe. If it sits flat or starts to darken the surface, you have a hole in your armor. Even the best hardwood floor care secrets won’t save you if the initial barrier is broken. I’m going to walk you through exactly how to perform this check without making a mess of your new home.To get started, you need a clean spray bottle—the kind you’d use for misting plants or cleaning windows. Fill it with plain, room-temperature water. This isn’t about drenching the floor; it’s about surface tension. I remember a job in a massive kitchen where I thought the sealant had bonded perfectly. I was exhausted and ready to pack up, but I forced myself to do the check. I misted the area near the island and watched in horror as the water disappeared into the grout. It turned out the grout was thirstier than the tile itself, a common issue when people forget tile installation pointers that save time and money during the initial prep. I had to re-apply a second coat to the grout lines specifically to prevent future staining.
Execute the Verification Mist Properly
You can’t just spray immediately after the last wipe. Most sealers require a ‘cure’ period, usually anywhere from 2 to 24 hours depending on the brand and humidity levels. If you spray too early, you might actually displace the sealer while it’s still trying to bond.
Wait for the Chemical Bond to Set
Check the manufacturer’s label, but a safe rule of thumb is to wait at least four hours. If you are working on a project involving hardwood floor care secrets, you know that rushing the drying process is the enemy of a durable finish. The same applies to stone and grout. Once the surface is dry to the touch, set your spray bottle to the finest mist setting possible. You want tiny droplets, not a stream. Think of it like a light morning dew rather than a rainstorm.
Look for the Mercury Bead Effect
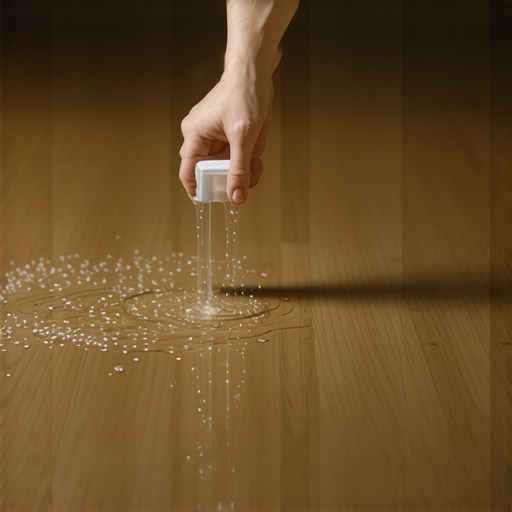
When you spray, the water should instantly form tight, round spheres. It should look like liquid mercury rolling across a glass table. If the water spreads out or flattens, your barrier is weak. If the stone underneath starts to change color, the sealer hasn’t penetrated or layered enough. This is why learning how to use a moisture meter to prevent floor failure is often a great companion skill; it helps you understand the baseline saturation of your slab before you even start.#IMAGE_PLACE_HOLDER_B#
Target the Vulnerable Grout Lines
Don’t just test the middle of the tiles. The real danger zone is where the tile meets the grout. If you notice the grout darkening, that’s an invitation for mold and deep-set stains. This often happens if the subfloor wasn’t prepped correctly, leading to issues like why your tile grout is cracking at the room corners. A solid seal acts as a shock absorber for spills, but it only works if the coverage is uniform across both the dense tile and the porous grout.
Common wisdom suggests that if one coat of sealer is good, three coats must be invincible. But in my experience, the ‘more is better’ philosophy is a recipe for a sticky, dirt-attracting nightmare. Most homeowners think they are adding protection, but they are actually just building up a surface residue that never cures. If the stone can’t breathe, the moisture trapped underneath will eventually cause the sealer to cloud or peel. This is why you must master the nuance of saturation versus pooling. I have seen countless projects fail because someone didn’t know how to achieve flawless floor leveling before tile laying, only to try and ‘fix’ the resulting puddles with extra sealant later.
Why does your high-end sealer still leave a white haze?
This is the question that haunts DIYers and pros alike. That white haze, often called efflorescence or flashing, usually occurs when the sealer reacts with moisture in the substrate or when it’s applied to a surface that is too hot. If you’ve ever dealt with why your epoxy grout is hazy and hard to clean, you know the struggle of removing a chemical bond that has gone wrong. The trap here is skipping the primer or the moisture test. According to the National Wood Flooring Association (NWFA), failing to verify the subfloor’s moisture content is the primary reason for long-term finish failure. It’s not just about the top layer; it’s about the chemistry happening underneath.
#IMAGE_PLACE_HOLDER_C#
Another massive ‘oops’ factor is the assumption that self-leveling compound is literally ‘self-leveling.’ It’s a bit of a misnomer. Without the right prep, it’s just expensive mud. You need to understand why you must prime concrete before every leveling job or you’ll end up with pinholes and cracks. These tiny craters are formed when air escapes from the porous concrete and gets trapped in the drying compound. It’s a technical hurdle that mastering floor leveling pro secrets for perfect installations can help you overcome. If you don’t prime, the substrate drinks the water out of the leveler too fast, leading to a situation where your self-leveling compound is cracking like a dry lake bed.
Before you commit to your next project, remember that your tools are only as good as your data. I always keep a sensor handy because knowing how to use a moisture meter to prevent floor failure is what separates a five-year floor from a fifty-year floor. Have you ever fallen into the trap of over-sealing or rushing the leveler? Let me know in the comments below.
Stop trusting your eyes and start trusting the laser
I used to think my four-foot spirit level was my best friend. I’d lay it across the subfloor, see the bubble center, and call it a day. But when you are aiming for precise floor leveling techniques, a bubble is a guess; a laser is a fact. Transitioning to a 360-degree green beam laser changed the way I work. I set it up in the center of the room, and suddenly, every high spot and valley is illuminated in high-definition against the walls. It’s particularly vital when you’re executing the laser level move to ensure your layout doesn’t drift an inch over a thirty-foot span. If you are still relying on a manual level, you are essentially working blind to the cumulative errors that lead to clicking joints or cracked grout years later.
How can I protect my new floors for decades?
Maintenance isn’t a seasonal chore; it’s a chemical and environmental management strategy. For hardwood, the biggest threat isn’t foot traffic—it’s the air. According to Bona’s technical guidelines, a finish only achieves its peak chemical resistance after a full 7-day cure, but the long-term enemy is fluctuating humidity. I personally use a digital hygrometer in every room I floor. If the humidity drops below 30%, your wood will shrink, leading to gaps; if it climbs above 50%, it expands and potentially cups. Following hardwood floor care secrets means more than just using the right mop; it means managing the very atmosphere of your home. If you want to avoid the headache of mastering hardwood floor refinishing every few years, keep your home’s climate as stable as a museum.
The one tool that prevents thousand-dollar repairs
If I could only take one tool to a job site to guarantee success, it would be my pinless moisture meter. I’ve seen beautiful installs destroyed because someone assumed the concrete was dry. You have to know how to use a moisture meter properly—scanning multiple points across the slab, not just the center. For wood subfloors, I always perform the hammer test first to find loose joists, then follow up with the meter to ensure the plywood isn’t holding onto hidden plumbing leaks. This isn’t just about the initial install; it’s about baseline data. I record these numbers in my project logs so that if a floor starts acting up two years later, I can prove whether the issue is a new leak or an installation error.
#IMAGE_PLACE_HOLDER_D#
Looking ahead, I predict we are moving toward ‘smart subfloors.’ Within the next decade, integrated sensors embedded in the underlayment will likely alert homeowners via an app the second moisture levels spike near a dishwasher or water heater. We are already seeing the beginnings of this with high-end commercial leak detection systems. For now, the best tech we have is our own vigilance and a few high-quality sensors. I challenge you to buy a pinless moisture meter before you start your next project; it is the single most important insurance policy you will ever own for your home.
The Hardest Lessons I Learned While Chasing a Flawless Floor
Over the years, I’ve realized that the difference between a DIY project and a professional-grade installation isn’t just about the materials—it’s about the patience to verify every step. One of the biggest flooring installation mistakes to avoid is treating the sealer like a secondary thought. It is your floor’s first and only line of defense. I’ve learned that grout is significantly more porous than stone; if you aren’t performing that spray bottle test on the joints, you’re leaving the most vulnerable part of your floor exposed. Another lightbulb moment was realizing that ‘dry’ doesn’t mean ‘ready.’ Even if a slab feels bone-dry to the touch, deep-seated moisture can still ruin your bond. Lastly, remember that light is your best friend and your worst enemy; always check your work with a handheld flashlight held at a low angle to spot uneven sealer or missed spots that overhead lights hide.
The Only Gear You’ll Ever Need for a Pro-Level Finish
If you want to move beyond guessing, you need a curated toolkit that prioritizes data over intuition. First, I never start a job without checking 7 tools you actually need for a professional DIY hardwood install, which includes a high-quality pinless moisture meter. I also highly recommend the TCNA (Tile Council of North America) Handbook; it’s the ‘bible’ of the industry and provides the technical specs that keep you from making costly errors. For the physical work, I’ve found that why you should use a dead blow hammer for floor capping becomes obvious once you see how it sets materials without the damaging rebound of a standard mallet. These aren’t just gadgets; they are the insurance policy for your labor.
Build a Floor That Outlasts the Trends
Flooring is more than just a surface to walk on; it’s the foundation of your home’s character. When you take the time to follow a step-by-step guide to flooring installation and leveling success, you aren’t just doing chores—you’re crafting something that will serve your family for decades. Don’t be intimidated by the technical side. Every pro started exactly where you are, likely with a spray bottle and a few nervous questions. Trust the process, trust the tools, and most importantly, trust the physical tests over your own eyes. Your future self will thank you when that first red wine spill beads up perfectly on your pristine stone. Have you ever skipped a verification step and ended up with a surprise ‘leak’ or a dull spot? Let me know your stories in the comments below.