
It was a Tuesday evening when my heavy cast-iron skillet decided to introduce itself to my kitchen floor. The sound was a sickening crack that I felt in my teeth. When I looked down, there it was—a jagged white crater in the middle of a beautiful slate-colored tile. I felt that instant wave of regret. If you’ve ever looked at a damaged floor and thought your only option was a sledgehammer, I’m here to tell you to put the tools down. I’ve been there, and I even made the rookie mistake of trying to fill a chip with standard wood filler once—yeah, that didn’t end well. Today, I’m showing you a better way. We are going to make that chip disappear using simple epoxy techniques that actually last.
Fixing a Chip Beats Tearing Out the Floor Every Single Time
Most homeowners panic and think a chip means the whole floor is compromised. It’s not. In fact, unless you’re dealing with porcelain tile cracking in a straight line, a chip is usually just a cosmetic battle. Tearing out a single tile is a nightmare. You risk chipping the neighbors, and you’ll likely end up with grout color that looks splotchy and uneven when you try to patch it back in. According to the Tile Council of North America, the bond strength of modern thinsets is so high that removing one tile often damages the subfloor. Why invite that kind of drama into your life? A high-quality epoxy repair is faster, cleaner, and virtually invisible if you do it right.
Is a DIY Patch Actually Going to Hold Up?
I get the skepticism. You’re worried the patch will pop out the first time you mop or that it will look like a cheap sticker. I thought the same until I realized that avoiding common installation mistakes includes knowing when to repair versus when to replace. If you prep the surface correctly, that epoxy becomes part of the tile. It’s tough, it’s waterproof, and it handles foot traffic like a champ. Have you ever tried to hide a floor scratch with a permanent marker, only to have it look even worse? I want to hear your DIY horror stories! Let’s get into the nitty-gritty of how we’re going to save your floor and your sanity.
Clean the Crater Like Your Life Depends on It
The biggest reason these patches fail isn’t the glue; it’s the invisible layer of dust and oils living in the chip. Think of it like trying to put a band-aid on a muddy knee—it’s just going to slide right off. I use a stiff nylon brush and a bit of isopropyl alcohol to scrub the area thoroughly. This is the same principle as the best way to prep a dusty concrete floor for adhesive. If you don’t remove the grime, you’re just bonding the epoxy to the dirt, not the tile itself. Let it dry completely before proceeding. Moisture is the enemy here, much like the moisture barrier rule for basement vinyl floors dictates that wetness ruins a good bond.
Get the Perfect Mix Every Single Time
Mixing two-part epoxy is pure chemistry, not a suggestion. I once tried to ‘eyeball’ the ratio on a slate repair and the patch stayed tacky for three days. It was like walking on a piece of gum. Use a scrap piece of cardboard and a toothpick to ensure a true 1:1 ratio. Mix it slowly to avoid introducing air bubbles, which can make the finished repair look like a piece of Swiss cheese.
Blending Color Without Losing Your Mind
This is where most people panic. You need to mix your pigment into the epoxy before you add the hardener if you’re using powders, or very quickly after if using gels. I remember a kitchen repair in 2019 where I tried to match a ‘cool grey’ tile and ended up with something that looked like dirty dishwater because I added too much black. Start with a tiny, pinhead-sized amount of color. You can always go darker, but you can’t go back. This level of precision is why avoiding common installation mistakes is so crucial for a professional look. 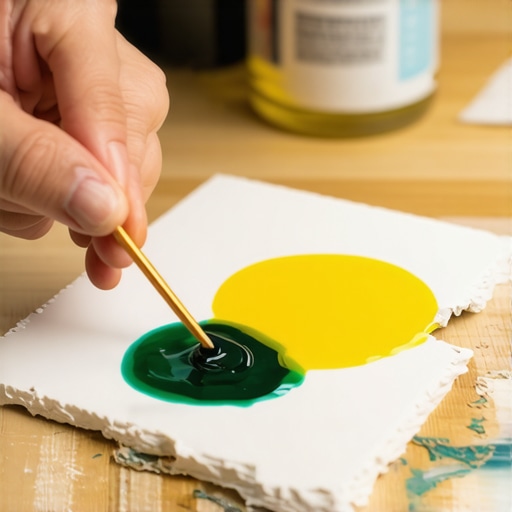
Level the Patch for a Seamless Feel
Once the color is set and the hardener is in, overfill the chip slightly. It’s going to shrink just a hair as it cures. Use a flat-edge razor blade to scrape the excess away while it’s still in the ‘gel’ stage—usually about 10 to 15 minutes after mixing. If you wait until it’s rock hard, you’ll be sanding for hours. Achieving a flush surface here is just as vital as using precise floor leveling techniques to achieve flawless surfaces before you even lay your first tile. If the patch is too high, you’ll feel it every time you walk by; if it’s too low, it’ll collect dirt and turn into a black speck within a month. Think of it like the secret to getting a flat floor for large format tiles: it’s all about the plane. If the epoxy feels slightly dull after it cures, a tiny dab of clear nail polish or a buff with a microfiber cloth can bring back that factory sheen. This technique works equally well when you need to fix a deep gouge in a pre-finished wood plank without calling in a flooring contractor for an expensive board replacement.
The Self-Leveling Myth That Ruins Modern Floors
But here is where the ‘simple’ fix gets complicated. Everyone tells you that self-leveling compound is a magic bucket solution—just mix it, dump it, and the floor becomes perfect, right? In my experience, that’s the fastest way to waste hundreds of dollars and a full weekend. The term ‘self-leveling’ is actually a bit of a misnomer. Gravity does some work, but if you don’t use precise floor leveling techniques to achieve flawless surfaces, you’ll end up with humps and valleys that no amount of epoxy patch can hide. According to the National Wood Flooring Association (NWFA), a subfloor needs to be flat within 3/16 of an inch over a 10-foot radius for a successful installation. Flatness is the absolute law. I’ve seen homeowners obsess over a bubble level while ignoring a massive hump in the plywood that causes brand-new wide-plank flooring to creak like a haunted house.
Why High Speed Mixing is Your Worst Enemy
A specific trap I see even pros fall into is using a high-torque drill at full blast to mix the compound. It’s tempting when your self-leveler is drying faster than you can pour it, but you’re actually whipping air into the slurry. This creates thousands of tiny pinholes that weaken the structural integrity of the floor. You must watch the mixing paddle speed that ruins your leveling compound—keep it low, around 300 RPM. Using the spiky roller secret for a mirror smooth pour is the only way to effectively release that trapped air before the compound sets. If you miss this step, you’ll end up with a self-leveling pour that looks like a topographical map rather than the glass-smooth surface you need. 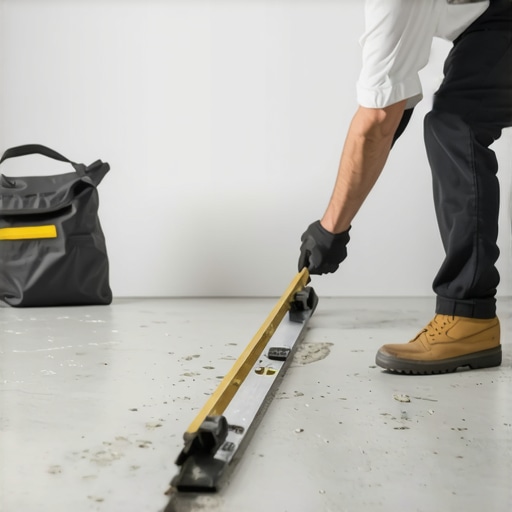
Why Does Your New Floor Still Feel Bouncy?
If you patched a chip and the floor still feels spongy or hollow when you walk on it, you likely skipped the primer or chose the wrong material for the environment. This is a nuance most beginners ignore. Wood subfloors are incredibly thirsty. If you don’t prime them, they’ll suck the moisture right out of your leveling mix before it can cure, leading to a brittle bond. This is exactly why your self-leveler didn’t bond to the wood subfloor in the first place. I’ve also seen people insist on solid wood in high-humidity areas because they believe ‘solid’ always equals ‘quality.’ That’s a dangerous misconception. For example, solid oak flooring is a poor choice for lake houses because the constant moisture causes massive expansion and buckling. In those cases, a high-quality engineered plank or a perfectly repaired porcelain tile floor is the true expert’s choice. Have you ever fallen into this trap of choosing the ‘premium’ material only for it to fail because of the environment? Let me know in the comments!
I’ve spent enough years on my knees with a trowel to know that the difference between a floor that lasts twenty years and one that fails in two often comes down to the gear you use before the first plank even touches the ground. If you’re serious about your home, you need to stop guessing and start measuring. I never start a project without my Wagner Meters Orion 950; it’s a specific moisture meter that prevents the nightmare of why your engineered wood planks are bowing at the ends before it even starts. Knowing how to use a moisture meter before you lay wood floors is the single most important skill you can develop. It’s not just about the wood; it’s about ensuring the subfloor isn’t hiding a reservoir of moisture that will eventually destroy your hard work.
The Gear That Separates Amateurs From Pros
Beyond moisture detection, the most transformative tool in my kit is the spiked roller. People laugh when they see it, but it is the only way to avoid the tiny craters and bubbles that plague amateur leveling jobs. Using the spiky roller secret for a mirror smooth pour ensures that the air is released, giving you a surface that is truly ready for high-end finishes. According to the ASTM F710-22 (Standard Practice for Preparing Concrete Floors to Receive Resilient Flooring), the surface must be free of any substances that could inhibit bond, and a spiked roller helps maintain that structural integrity by creating a uniform density. This is how you achieve precise floor leveling techniques to achieve flawless surfaces without having to sand down high spots later. 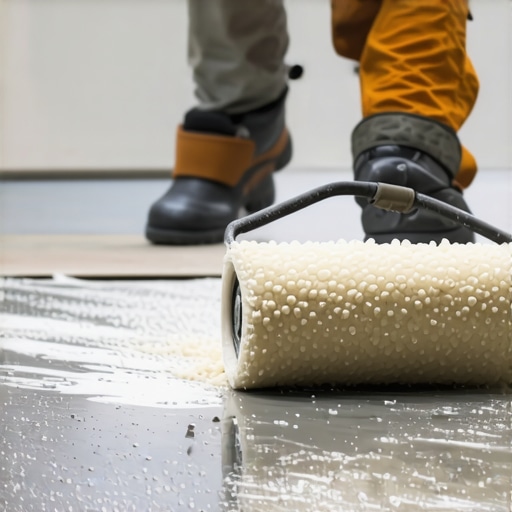
How do I keep my hardwood looking like day one?
Maintenance is where most people lose the battle. I see homeowners spend thousands on a floor only to destroy it with a cheap steam mop. I’m begging you: stop using vinegar on your hardwood floors immediately. The acid eats through the protective finish, leading to that dreaded cloudy look. Instead, stick to a pH-neutral cleaner and a dry microfiber mop. These hardwood floor care secrets to longevity and shine aren’t just suggestions; they are the difference between a floor that glows and one that needs mastering hardwood floor refinishing five years too early.
Smart Sensors are the Future of Flooring
Looking ahead, I predict we are going to see a massive shift toward ‘smart’ subfloors. We are already seeing the integration of embedded sensors that can alert your smartphone to a pipe leak under the tile before you ever see a water spot. This technology will turn flooring from a static surface into a proactive home health monitor. For now, the best way to revamp your home with expert flooring installation tips is to focus on the foundation. I challenge you to go out and rent a professional-grade moisture meter for your next project—don’t just trust the ‘touch test.’ Your future self will thank you when those planks stay perfectly flat for decades.
Hard Truths I Learned from My Biggest Floor Repair Fails
After years of repairing everything from cracked ceramics to buckling planks, I’ve realized that the most expensive tool is the one you didn’t use. I once ignored a slight hump in a subfloor, thinking the underlayment would hide it. Three months later, the floor sounded like a drum set. That’s why mastering floor leveling is the real secret to a quiet, stable home. Patience is your best friend during the color-matching phase. If you rush the pigment, you’ll be staring at that off-color spot for the next decade. Finally, never assume your subfloor is dry just because it feels dry to the touch. Always verify with tools to avoid floor leveling challenges that can ruin a perfect finish overnight.
Gear That Makes You Look Like a Master Installer
If you want to move beyond “good enough” to “truly professional,” there are three things I keep in my truck at all times. First, a high-quality moisture meter is non-negotiable. It’s the only way to avoid the nightmare of engineered wood planks bowing at the ends due to hidden humidity. Second, a notched trowel set that matches your tile size perfectly ensures even coverage and prevents lippage. Third, I always recommend pH-neutral cleaners to maintain the finish. You have to master hardwood floor care if you want that “day one” glow to last for twenty years. These tools aren’t just for show; they are your insurance policy against a failed project.
Your Home Deserves a Foundation That Lasts
Flooring is more than just something you walk on; it’s the stage where your life happens. Whether you are patching a tiny chip or tackling a full flooring installation, the care you put into the prep work will always pay dividends. Don’t be afraid to take your time and get it right. You have the power to transform a damaged room into a masterpiece with just a little patience and the right technique. Have you ever tried to color-match an epoxy repair and ended up with a neon mistake? I’d love to hear about your DIY triumphs or disasters in the comments below!