
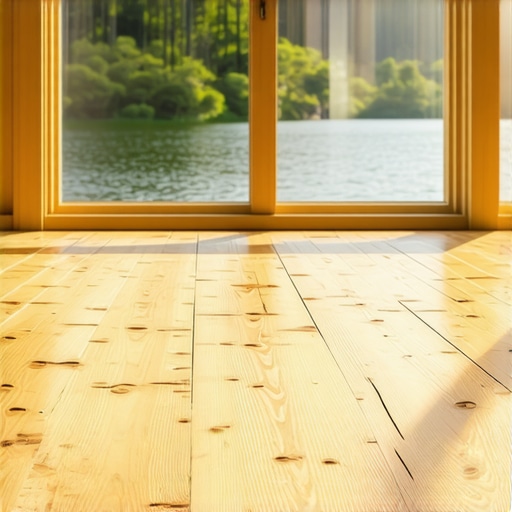
I still remember the first morning I woke up at the cottage, coffee in hand, ready to watch the sun hit those beautiful wide-plank white oak floors. Instead, I heard a sickening creak. Then I felt it—a literal mountain range under the area rug. My ‘dream floor’ was cupping so badly it looked like a Pringles chip. I had spent months on the flooring installation, thinking I was building a legacy. Instead, I was watching three months’ salary buckle under the weight of lakefront humidity. It was a visceral lesson in why solid wood and water views are a recipe for heartbreak. Today, I am going to share exactly why that ‘premium’ choice can fail you and how to avoid the expensive mistakes I made.
Lake Air and Solid Oak Just Do Not Mix
The hard truth is that solid oak is a living, breathing sponge. When you live by the water, the relative humidity swings are wilder than a summer storm. I made the classic rookie mistake of thinking that more expensive meant better. I did not realize that solid planks expand across their entire width with no place to go but up. If I had known how to use a moisture meter back then, I would have seen the disaster coming before the first nail was driven. We are going to look at why that ‘natural’ choice is often a maintenance nightmare and how you can get the look without the warping.
Is that premium wood actually worth the headache?
You might be thinking, ‘But I will just run a dehumidifier!’ Trust me, I tried that. Even with a commercial-grade unit, the sheer volume of moisture near a lake is relentless. According to the National Wood Flooring Association (NWFA), solid wood typically requires a strictly controlled environment between 35% and 55% humidity to remain stable. In a lake house where windows are often open to catch the breeze, maintaining that range is an expensive fantasy. I eventually had to learn how to save a water-damaged wood floor the hard way, but by then, the structural damage was done and the boards were permanently stressed.
The Secret Life of Engineered Alternatives
If I could go back in time, I would have looked closer at how to spot high-quality engineered wood instead of insisting on ‘solid.’ Engineered wood is built in layers that fight each other, preventing that nasty cupping. Have you ever walked across your floor and felt those raised edges after a particularly humid week? Tell me about your lake house floor horror stories—I promise I will not judge, because I have been there. Before you commit to a material, you need to understand that the flooring installation fundamentals change completely when there is a massive body of water in your backyard. We need to focus on stability over tradition.
Stop the Bounce Before You Lay a Single Plank
Before you even think about opening those boxes of engineered planks, you have to look at what is underneath. I once ignored a 1/8 inch dip in my guest room, convinced the padded underlayment would act like a cosmic shock absorber. It did not. Within a month, every step sounded like I was walking on an empty Pringles can because the tongue-and-groove joints were rubbing against each other in the void. To avoid this, you must master precise floor leveling techniques to achieve flawless surfaces. I started using the chalk dust secret for finding low spots in subfloors—you simply drag a straight board across the floor with chalk on the edge, and the low spots reveal themselves instantly. It is like an X-ray for your subfloor. If you find a valley, do not just pour leveler and hope; ensure you know how to level a plywood subfloor without adding weight if you are working on a second story.#IMAGE_PLACE_HOLDER_B#
Give Your Floor Some Room to Breathe
Think of your new floor like an athlete. If you put them in a suit that is two sizes too small, something is going to rip the moment they move. In the world of flooring installation, that ‘rip’ is your floor buckling because it has no place to expand. You need to be militant about the perimeter. I used to think a quarter-inch gap was plenty until a particularly humid July in Michigan proved me wrong. Now, I follow why your floor-to-wall gap is the most important part of lvp and engineered wood alike. Even if you are working with heat, remember the expansion gap rule for radiant heated wood floors. This gap is your insurance policy against the ‘mountain range’ effect I experienced at the cottage. Use spacers, and do not remove them until the very last row is locked in.
Combine Wood and Tile for the Ultimate Humidity Defense
One of the smartest moves I ever made was stopping the wood at the high-traffic ‘wet zones.’ By using best tile trends for complementing hardwood floors this year, I created a moisture-proof barrier at the entryways and kitchen. This is not just about aesthetics; it is about strategic defense. When you transform your space with expert hardwood floor tile combinations, you are placing stable, non-porous materials in the areas most likely to see wet boots or spilled drinks. The trick is the transition. To make it look intentional rather than accidental, check out how to get a seamless look with different flooring types. I once tried to ‘eyeball’ a tile-to-wood transition in a hallway and ended up with a trip hazard that looked like a DIY disaster. Now, I always use a laser level to ensure both surfaces sit flush before the first drop of thinset hits the ground. If you are worried about the height difference, look into the shimming hack for leveling subfloors to bring your wood up to the level of the tile.
Stop Trusting the 48-Hour Acclimation Myth
Let’s dig deeper into the stuff the big-box store guys won’t tell you. Everyone says you should acclimate your wood for 48 to 72 hours and call it a day. In my experience, that is a dangerous oversimplification that leads to major flooring installation mistakes. Wood is hygroscopic; it is constantly trying to reach a state of balance with the air around it. According to the National Wood Flooring Association (NWFA), wood is only truly ‘ready’ when its moisture content (MC) is within 2% to 4% of the subfloor’s moisture level. If you just trust a clock instead of a moisture meter, you are gambling with hardwood floor care secrets to longevity and shine before the boards are even nailed down. I have seen ‘acclimated’ floors buckle in a month because the house was still drying out from fresh drywall work. Don’t be that person.
Bubbles are the Enemy of a Flat Subfloor
Then there is the ‘leveler trap.’ Most DIYers—and even some pros—whip their self-leveling compound like they are making a meringue. Stop right there. Using a high-speed drill creates a vortex that sucks air into the mix, and that is exactly why self-leveling compounds bubbled over your subfloor. When those bubbles pop as the product sets, they leave behind tiny craters and a brittle surface. To get a glass-like finish, you need to be mindful of the mixing paddle speed that ruins your leveling compound. I always recommend using a specialized tool to finish the job; the spiky roller secret for a mirror smooth pour is the only way to ensure those trapped gases escape before the material reaches its initial set.#IMAGE_PLACE_HOLDER_C#
Why does your floor leveler keep cracking under pressure?
It is a common advanced mistake: you pour a beautiful, flat floor, and two weeks later, it looks like a spiderweb. This often happens because people ignore the physics of the house. For instance, why your floor leveler is cracking over radiant heat pipes usually comes down to the lack of a proper thermal break or using a compound that isn’t rated for high-flex environments. If you are working over old concrete, you must also address the ‘suction’ factor. If the slab is too dry, it will suck the water right out of your leveler before it can chemically bond, leading to a powdery, weak finish. This is why you must prime concrete before every leveling job—it seals the pores and ensures the leveler cures from the inside out, not the other way around.
The Trowel Size Error That Ruins Your Tile
When you finally move from wood to those beautiful porcelain accents, do not fall into the ‘more glue is better’ mindset. One of the most expensive ‘oops’ factors I see is the trowel size error that leads to hollow sounding tiles. If your notches are too small for the tile size, you won’t get the collapse needed for 95% coverage, leaving air pockets that will eventually crack under a heavy appliance. If you are planning a renovation in the coming year, keep mastering hardwood floor refinishing expert tips for 2025 in mind to ensure your transitions are flush and professional. Have you ever fallen into the ‘it looks flat enough’ trap? Let me know in the comments below, and let’s troubleshoot your flooring installation mistakes together.Once I finally got the levels right and the planks down, I realized that the real work was just beginning. You cannot just walk away from a floor and expect it to stay perfect without the right arsenal of tools and a strict maintenance schedule. After the ‘Pringles chip’ disaster at the cottage, I became a bit of a fanatic about the gear I use. For instance, I stopped using a standard rubber mallet for seating planks. I found that the bounce-back often led to micro-gaps that grew over time. Now, I recommend everyone learn why you should use a dead-blow hammer for floor capping. The shot-filled head absorbs the shock, driving the board home without that annoying rebound that can damage delicate tongue-and-groove joints. #IMAGE_PLACE_HOLDER_D#
Stop Treating Your Hardwood Like a Dirty Kitchen Counter
One of the most heartbreaking things I see is a homeowner spending five figures on a floor only to strip the finish off in six months with ‘natural’ cleaners. Please, for the sake of your warranty, stop using vinegar on your hardwood floors immediately. The acid in vinegar slowly eats away at the polyurethane, leaving your floor looking dull and lifeless. The same goes for the ‘blue soap’ myth; you need to understand why you should never mop your floors with dish soap. It leaves a film that attracts dirt like a magnet. To truly protect your investment, you have to follow hardwood floor care secrets to longevity and shine that focus on pH-neutral cleaners and microfiber dusting.
How do I maintain my flooring investment over the long haul?
Maintenance is not just about cleaning; it is about prevention. I always keep a few old rugs handy for the the scrap carpet trick for heavy furniture moves. It sounds simple, but sliding a heavy oak dresser on bare wood is a recipe for a gouge that no amount of polish can fix. Looking ahead to 2025, we are seeing a shift toward ‘smart’ maintenance—think integrated moisture sensors in subfloors that alert your phone if the humidity hits the danger zone. While we wait for those to become standard, your best bet is mastering hardwood floor refinishing expert tips for 2025 to ensure you know when it is time for a buff-and-coat versus a full sand. According to the ANSI A108.5 technical specifications, even the best mortar or adhesive cannot compensate for poor surface preparation or improper tool choice. If you want a floor that lasts, you have to be as precise with your maintenance as you were with your laser level. I want you to try this: go check your cleaning cabinet right now. If you see a bottle of vinegar or dish soap near your wood cleaner, toss it out. Your floors will thank you in ten years.
Hard-Won Truths from the Pringles Chip Disaster
After years of fixing my own mistakes, I’ve realized that flooring installation is 90% preparation and 10% actually laying the boards. First, wood has a ‘memory.’ If you force a buckled board down without addressing the humidity, it will eventually find its way back up. Second, silence is golden. If you hear a click or a squeak during the dry-fit, it will only get louder once the furniture is in. Finally, never underestimate the power of a clean subfloor; even a tiny pebble can feel like a mountain under luxury vinyl. Success isn’t about how fast you can nail; it’s about how well you can wait for the environment to stabilize.
The Gear That Separates Pros from Amateurs
If you are serious about a DIY job, do not skimp on the diagnostic tools. I always keep a high-end moisture meter in my pocket—it is the only way to how to use a moisture meter to prevent floor failure effectively. I also swear by my laser level for layout; the laser level move for perfectly straight hallways is the difference between a floor that looks ‘home-made’ and one that looks ‘architect-designed.’ Lastly, ditch the standard rubber mallet for a dead-blow hammer. Knowing why you should use a dead-blow hammer for floor capping will save your tongue-and-groove joints from invisible fractures that cause squeaks later on.
Build a Legacy Under Your Feet
Installing your own hardwood floors is more than just a home improvement project; it is an investment in the comfort of your family for years to come. By following a step-by-step guide to flooring installation and leveling success, you are avoiding the expensive heartbreak I faced at the lake house. Take your time, measure twice, and do not forget the hardwood floor care secrets to longevity and shine to keep that ‘day one’ look forever. You have the knowledge now to turn a potentially warped nightmare into a flawless surface. #IMAGE_PLACE_HOLDER_E#
Which part of the subfloor prep are you dreading the most—the leveling or the moisture testing? Drop a comment below and let us troubleshoot your project together!