
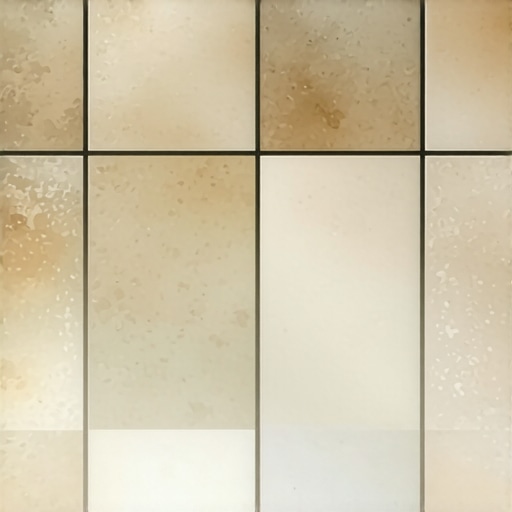
I stood in my kitchen with a fresh cup of coffee, ready to admire my weekend’s hard work, but what I saw made me want to pour that coffee right onto the floor. The day before, I had finished installing tiles like a pro, or so I thought. The grout was a perfect, uniform charcoal when it was wet. But as the morning sun hit the tiles, the reality was a nightmare. Some areas were dark, others were a dusty light grey, and some spots looked almost white. It looked like a camouflage pattern had been vomited across my floor. I felt defeated. I had followed the instructions on the bag, yet my floor looked like a DIY disaster. If you are looking at your own patchy, uneven grout right now, don’t panic. I’ve been in those muddy boots, and I’m going to show you exactly why this happened and how we can fix it without you having to rip everything out and start over.
The Water in Your Bucket is Probably the Real Villain
When I first started tiling, I thought ‘more water means easier spreading.’ I was wrong. Dead wrong. Most splotchiness isn’t caused by a ‘bad batch’ of product, although you should always learn how to spot a bad batch of grout before you apply it just in case. The primary culprit is almost always excess moisture. If you add too much water to the mix, you’re diluting the pigments. Even worse, if you use a soaking wet sponge during the cleanup, you’re essentially washing the color right out of the joints. This leads to a common phenomenon where your new tile grout turns white and chalky instead of staying the vibrant shade you picked out in the showroom.
Is expensive high-performance grout actually worth the extra money?
You might be wondering if you just bought the cheap stuff and that’s why it failed. The truth is, even the most expensive high-performance grouts can look terrible if the mixing and cleaning process is sloppy. According to the Tile Council of North America (TCNA), the ratio of water to powder is critical for color consistency; even a slight deviation can cause significant shade variations across a single room. I learned the hard way that a measuring cup is the most important tool in my kit—not my ‘gut feeling’ about the texture. I once ruined a bathroom floor because I was too lazy to walk to the sink to get more water, so I just guessed the pour. That mistake cost me three days of scrubbing with a toothbrush. Have you ever felt like you followed the directions perfectly only to have the results look like a complete mess?
Why Your Subfloor Might Be Stealing Your Color
Sometimes the problem isn’t what you did on top, but what is happening underneath. If your thinset wasn’t fully dry, that moisture can migrate up through the grout, bringing minerals with it that cause ‘efflorescence’—that white, salty-looking crust. I’ve seen people rush to grout because they want the job done, but getting thinset off tiles after it dries is much easier than fixing ruined grout lines later. We are going to dive into the specific techniques to even out that color and get your floor looking uniform again.
Scrub Your Way to the Truth Before Ripping Anything Out
Before you buy a jackhammer or start searching for a new contractor, try a targeted deep clean. Sometimes what looks like ‘patchy’ color is actually just grout haze—a fine film of cement and polymer—or construction dust trapped in the texture of the joint. I remember my first big kitchen renovation; I was convinced the grout was dying, but it was just residue from my sloppy cleanup. I grabbed a stiff nylon brush and a professional-grade pH-neutral cleaner.
Stop Using Dish Soap and Vinegar Immediately
You might be tempted to use whatever is under the sink, but you should never mop your floors with dish soap or acidic pantry items like vinegar. These are grout killers. Vinegar is an acid that can eat into the cementitious structure of the grout, causing it to weaken and change color permanently. If a gentle scrub with a neutral cleaner doesn’t bring the color back to its intended shade, you aren’t dealing with dirt; you’re dealing with a pigment issue.
The One Tool That Actually Rescues a Splotchy Floor
If the scrub fails, grout colorant is your new best friend. This isn’t just a gimmick; it’s an epoxy-based coating designed specifically for porous joints. It bonds with the grout, sealing it while providing a perfectly uniform color. I once spent eight hours on my hands and knees in a half-bath because I’d messed up the water-to-powder ratio so badly the charcoal looked like camo. It was tedious work with a tiny paintbrush, but the result was a floor that looked like a professional showroom. This is one of those tile installation pointers that save time and money because you avoid the nightmare of scraping out old grout. #IMAGE_PLACE_HOLDER_B#
Low and Slow Is the Only Way to Mix
If you are starting a new section or a new room, you must change your mixing habits. Think of grout like a delicate cake batter; if you whip it too fast, you introduce air bubbles that rise to the surface as the grout cures, leaving little pinholes and light spots. Much like the mixing paddle speed that ruins your leveling compound, high-speed drilling is the enemy of consistency. I once used a high-RPM drill because I was in a rush, and my dark grout ended up looking like a grey, frothy milkshake. Use a low-speed drill or mix by hand. Also, respect the ‘slake’ time—let the grout sit for ten minutes after the initial mix to let the chemicals fully react, then stir it one last time by hand.
The Damp Sponge Dilemma
Finally, let’s talk about the cleanup. When you are wiping away the excess, your sponge should be damp, not dripping. If you can squeeze a single drop of water out of that sponge, it is too wet. Excess water on the surface of a fresh joint will pull the pigment out, leading to that chalky look. If you’re working with large tiles, keep in mind that the secret to getting a flat floor for large format tiles is a consistent bed of mortar, but that consistency must carry through to the grout. A sloppy, wet cleanup undermines the structural integrity of the entire installation.
Don’t Trust the Bag When It Says Self-Leveling
Everyone treats self-leveling compound like a magic ‘undo’ button for a wavy subfloor, but that is the first mistake that leads to a structural nightmare. In my years of troubleshooting, I have found that the term ‘self-leveling’ is a bit of a marketing lie. It doesn’t just find level on its own like water in a lake; it is a highly reactive chemical soup that requires mechanical help to reach its potential. If you just pour it and walk away, you will likely end up with a surface that looks like a frozen pond in a windstorm. This is usually why your self-leveling pour looks like a topographical map instead of a flat plane. To get that glass-like finish, you need to be aggressive with the material, using tools to move the mass before the ‘open time’ expires.
The Invisible Trap of Substrate Porosity
Here is a nuance that most weekend warriors miss: your concrete slab is a giant, thirsty sponge. If you don’t seal that sponge before you pour your leveler, the concrete will literally suck the water out of the leveling mix from the bottom up. This causes the mix to dry prematurely, leading to ‘pinholes’ or ‘volcanoes’ where air is forced out through the curing surface. It is one of the most common flooring installation mistakes to avoid for lasting results. I always tell people that the prep work—specifically the priming—is actually more important than the pour itself. Without proper priming, you’ll find that self-leveling compounds bubble over your subfloor, ruining the bond and leaving you with a brittle, crumbly mess. #IMAGE_PLACE_HOLDER_C#
Does the ambient humidity actually change how your mix cures?
Absolutely. The National Wood Flooring Association (NWFA) emphasizes that site conditions—specifically temperature and humidity—must be stabilized for at least 48 hours before, during, and after any leveling or flooring installation. High humidity slows the evaporation of water in your grout or leveler, which can actually be a good thing for strength, but if it’s too dry, the material ‘flashes’ or dries too fast, leading to cracks. I’ve seen pros lose entire floors because they didn’t realize the HVAC system was sucking the moisture out of the air. If you are dealing with a particularly stubborn surface, remember the concrete etching step you shouldn’t skip before leveling. Etching creates a ‘profile’ for the chemicals to grab onto, ensuring that your expensive leveling compound doesn’t just peel off like a sunburn in six months.
Stop Ignoring the Telegraphing Effect
Even if your floor looks flat to the naked eye, the smallest pebble or ridge will eventually show through your finish. This is called ‘telegraphing,’ and it is the bane of Luxury Vinyl Plank (LVP) and thin tile. If you leave a 1/16th-inch ridge in your patch work, I guarantee you will see a faint line in your floor six months later as the material settles and wears. It’s why your LVP floor is showing telegraphing from the subfloor and looking ‘cheap’ despite the high price tag of the planks. Use the spiky roller secret for a mirror-smooth pour to release trapped air and flatten those ridges while the material is still wet. Have you ever fallen into the trap of thinking ‘the underlayment will hide it’ only to be disappointed later? Let me know in the comments, and let’s figure out how to smooth it over together.
Ditch the Cheap Trowels and Get a Spiky Roller
I’ve spent years experimenting with every ‘shortcut’ tool in the aisle, but if there is one thing I’ve learned, it’s that your results are only as good as your gear. Beyond the spiky roller, which I consider mandatory for any self-leveling pour, you need to look at your trowel selection. Most people grab the cheapest notch trowel they can find, but professionals use stainless steel precision-milled trowels that don’t flex under pressure. When you are installing tiles like a pro, the depth of your ridges determines the bond strength. If your trowel is worn down, your ‘large format’ tiles will eventually pop or crack because they don’t have the 95% coverage required by the International Concrete Repair Institute (ICRI) for high-performance surfaces. I personally recommend keeping a dedicated set of tools that never touch anything but floor prep—once a trowel gets a nick in the metal, it’s a liability that will create air pockets in your mortar bed. #IMAGE_PLACE_HOLDER_D#
How do I keep my new floors looking fresh for a decade?
Maintenance is the part of the job that never really ends. If you’ve just finished a project, the biggest mistake you can make is assuming ‘water and a mop’ is enough. You need to understand hardwood floor care secrets to longevity and shine, which starts with PH-neutral cleaners. If you have pets, you must take active steps to stop your pets claws from ruining your vinyl planks by using runners in high-traffic hallways. I’ve seen beautiful oak floors destroyed in six months because the owner used a steam mop—a tool that literally injects moisture into the wood fibers, causing them to swell and buckle. Instead, focus on microfiber dust mops and professional-grade buffers if you ever need to perform mastering hardwood floor refinishing expert tips for 2025.
The Future is LiDAR and Real-Time Floor Scanning
Looking ahead to where this industry is going, we are moving away from the ‘bubble level’ and toward digital precision. I’ve already started using phone-based LiDAR apps to scan my subfloors before I even buy a single bag of leveler. These apps generate a ‘heat map’ of your floor, showing you exactly where the low spots are down to the millimeter. This prevents you from over-buying material and helps you target only the areas that need a pour. In the next few years, I expect we will see self-leveling compounds that change color to indicate they are fully cured and ready for traffic, much like modern wall patch. If you are serious about your craft, start familiarizing yourself with these digital mapping tools now; they take the guesswork out of flooring installation fundamentals.
Don’t Ignore the Signs of Aging Surfaces
Even the best installation eventually needs a touch-up. If you notice your wood floors looking a bit dull, don’t jump straight to a full sand and finish. Sometimes, all you need is the sanding secret for restoring greyed out teak floors or a simple ‘screen and recoat’ to bring back the luster. The key is to catch the wear before it reaches the bare wood. Once the finish is gone, you’re dealing with structural damage rather than aesthetic maintenance. I want you to try this: tomorrow morning, go to the sunniest spot on your floor and look at it at a low angle. If you see a ‘cloudy’ appearance, your cleaner is leaving a residue, and it’s time to switch to a professional-grade solution before it builds up. Grab a high-quality pH-neutral cleaner today and see the difference it makes in your floor’s clarity.
Secrets That Pros Only Whisper in the Tool Aisle
Over years of making every mistake in the book, I’ve realized that the difference between a DIY project and a professional result usually comes down to what happens when no one is looking. First, always trust your measuring cup over your eyes; water ratios are the single most common reason projects fail. Second, the ‘slake’ time isn’t a suggestion—it’s a chemical necessity that ensures your grout or mortar achieves its full strength. Lastly, never underestimate a subfloor’s ability to ‘telegraph’ its imperfections through your expensive new finish. If you want a step-by-step guide to flooring installation and leveling success, you have to embrace the slow, tedious prep work that happens before the first tile touches the floor.
The Gear That Rescued My Projects
I don’t believe in buying every gadget, but three items are non-negotiable in my kit. I always have a stainless steel precision-milled trowel; cheap ones flex and leave air pockets that lead to cracked tiles later. I also rely heavily on a spiky roller to ensure my self-leveling pours are mirror-smooth and free of trapped air bubbles. For those who want to know how to achieve flawless floor leveling before tile laying, this roller is your secret weapon. Finally, I keep a gallon of pH-neutral cleaner on hand to protect the finish from day one, because avoiding acidic cleaners is the top of my hardwood floor care secrets to longevity and shine list. #IMAGE_PLACE_HOLDER_E#
The Future of Your Floors Starts Today
Don’t let the fear of a patchy grout line or a wavy subfloor keep you from transforming your home. Every professional was once a beginner staring at a bucket of mix, wondering if they were about to ruin their house. With the right tools and a commitment to precision, your next flooring installation can be the one that looks like a high-end showroom. Take it one bag at a time, respect the chemistry of your materials, and you’ll be walking on a masterpiece in no time.
Have you ever dealt with a leveling pour that turned into a topographical map? Let me know your biggest flooring disaster in the comments below!