
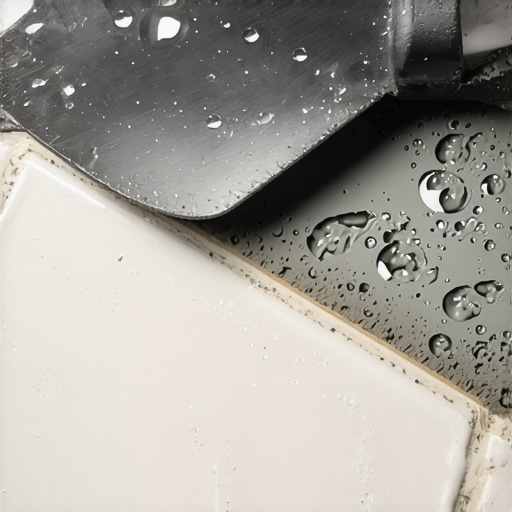
I was standing there, coffee in hand, staring at what was supposed to be my masterpiece. Instead, my brand-new porcelain looked like a grey, crusty nightmare. I’d spent fourteen hours the day before installing tiles like a pro—or so I thought—only to realize that my “I’ll clean it in the morning” attitude had backfired spectacularly. Dried thinset doesn’t care about your feelings. It’s essentially rock. I remember trying to pick a piece off with my fingernail, which was a joke, and then considered using a flathead screwdriver before I realized I’d likely crack the glaze. It was a moment of pure flooring despair that every DIYer eventually faces.
Don’t Reach for the Hammer Just Yet
Most people assume that once that mortar cures, it’s a permanent part of the decor. I’m here to tell you that’s a lie. You don’t need to rip up the floor, and you definitely shouldn’t start hacking away with a chisel. Over the years, I’ve learned that tile installation pointers that save time and money usually involve a little patience and the right chemistry, not brute force. We’re going to get those tiles looking pristine again without a single scratch.
Does This Stuff Actually Come Off?
I know what you’re thinking. You’ve scrubbed until your knuckles are raw and that grey smudge hasn’t moved an inch. You’re skeptical. You’re worried you’ve ruined a multi-thousand-dollar renovation. Take a breath. It happens to the best of us. Have you ever walked into your project the next day and realized you missed an entire section of grout lines?
My First Big Mess Taught Me Everything
Years ago, during a kitchen remodel, I made the classic rookie error of using too much water to clean up, which led to a haze that hardened into a shell. According to the Tile Council of North America (TCNA), the chemical bond in Portland cement-based thinset is specifically designed to be permanent once it reaches full cure, which is great for the subfloor but terrible for the tile surface. I tried every “magic” trick on the internet until I found the secret to getting dried thinset off your new tiles. The trick isn’t more muscle; it’s about breaking down that bond safely. We are going to walk through the exact steps to liquefy that stubborn residue and peel it away like it was never there.
Soak It Until It Gives Up
Think of dried thinset as a high-strength adhesive that has lost its moisture; you cannot fight it effectively while it is thirsty. To win this battle, you have to reintroduce hydration without flooding your subfloor. I have found that the most effective way to handle a grey, crusty nightmare is a 50/50 mix of warm water and white vinegar. The mild acidity of the vinegar reacts with the lime in the Portland cement, effectively loosening the chemical grip it has on your glaze. I learned this the hard way during a laundry room flip years ago. I had let the mortar sit for three days while I was out of town. When I came back, it was like stone. I spent hours saturating those spots with sponges, but once that water soaked in, the thinset turned from a rock into something more like wet clay. If you are worried about damaging your finish, remember that the secret to getting dried thinset off your new tiles is patience, not brute force.
Plastic Over Metal Every Single Time
This is where most DIYers go wrong. You reach for your steel putty knife or a flathead screwdriver, and within seconds, you have left a permanent silver scratch across your brand-new porcelain. In my early days, I ruined a gorgeous marble entryway by being too impatient with a metal chisel. Now, I only use heavy-duty plastic scrapers or even a scrap piece of oak. Hardwood is surprisingly effective because it is softer than the tile but firmer than the softened mortar. #IMAGE_PLACE_HOLDER_B#
The 15-Minute Rule for Stubborn Spots
After you apply your vinegar solution, you have to let it sit. If you start scraping immediately, you are just wasting energy. Give it a solid fifteen minutes to penetrate. This is especially true if you did not follow how to achieve flawless floor leveling before tile laying and ended up with thick puddles of mortar in the corners. Thick deposits require multiple hits of the solution. If the thinset starts to look white and chalky, it is drying out—hit it again with the spray bottle.
Watch Out for the Grout Lines
While you are attacking the surface mess, be careful not to gouge the material sitting inside your joints. If you haven’t grouted yet, you need those channels clean. I always keep a stiff nylon brush—think of a heavy-duty toothbrush—to scrub the edges. This prevents flooring installation mistakes to avoid for lasting results, like having grey thinset peeking through your expensive white grout later. It is much like how you have to be careful with moisture when dealing with hardwood floor care secrets to longevity and shine; too much water in the wrong place causes more problems than it solves. Just keep the moisture focused on the tile face, and keep your scrapers at a low angle to the floor to avoid prying up the tile itself.Most people think that once the thinset is gone, the hard part of the renovation is over. But here is where the intermediate DIYer usually hits a wall. Everyone tells you to buy a 4-foot level and call it a day, but in my experience, a floor can be perfectly level—meaning it aligns with the horizon—and still be a total disaster because it isn’t flat. If you have a hump in the middle of the room, your planks will bounce or your large-format tiles will suffer from extreme lippage. This is one of those floor leveling challenges common mistakes and how to avoid them that costs people thousands in wasted material.
Stop Treating Self-Leveling Compound Like a Magic Eraser
There is a massive myth that self-leveling compound does all the work for you while you sit back and watch. It doesn’t. If you don’t prep the substrate properly, you end up with a mess that looks like a topographical map. I’ve seen countless projects where the homeowner skipped the primer, only to have the compound delaminate from the concrete three weeks later. This is exactly why you must prime concrete before every leveling job. Without that bond, the moisture from the wet compound gets sucked into the dry slab too fast, causing it to shrink, bubble, and crack before it even cures. #IMAGE_PLACE_HOLDER_C#
Why do my grout lines keep cracking despite a solid subfloor?
This is the question that haunts people who feel they did everything by the book. Usually, it’s a failure to understand movement joints. People think that filling every corner and transition with rigid grout looks cleaner, and it does—for about a month. Then the house breathes, the subfloor shifts, and why your tile grout is cracking at the room corners becomes painfully obvious. The Tile Council of North America (TCNA) Handbook, Method EJ171, is very clear: movement joints are mandatory in any tile installation exceeding 25 feet in any direction. You need to use a flexible 100% silicone sealant in those change-of-plane areas rather than rigid mortar. If you have a massive open-concept space, you need the expansion joint secret for large tiled living areas to prevent buckling.
The Expansion Gap Trap You Are Probably Ignoring
Another common mistake is the assumption that waterproof flooring doesn’t need an expansion gap at the walls. I once helped a friend fix a floor where the planks were literally tenting in the middle of the kitchen, forming a small mountain. He had tucked the LVP tight against the baseboards because he thought the ‘waterproof’ label meant the material was inert. Even waterproof materials expand and contract with temperature changes. Knowing why your hybrid flooring still needs an expansion gap is the difference between a floor that lasts twenty years and one that fails in a single season. Have you ever fallen into this trap? Let me know in the comments.I’ve learned that the difference between a floor that lasts five years and one that lasts fifty often comes down to what you can’t see. For me, that means never starting a job without my Wagner Orion pinless moisture meter. Most people think their subfloor is dry because it ‘looks’ fine, but moisture is a silent killer. According to the National Wood Flooring Association (NWFA) standards, solid strip flooring should be within 4% of the subfloor’s moisture content before you even think about nailing down the first plank. If you ignore this, you’re just waiting for your boards to cup and buckle. Knowing how to use a moisture meter to prevent floor failure is the most professional move you can make for your home’s longevity. #IMAGE_PLACE_HOLDER_D#
The One Tool That Saves Every Hardwood Project I Touch
Another tool I swear by is the notched trowel, but you have to be precise. I’ve seen countless DIYers pick up a 1/4-inch trowel for 12×24 tiles because it was the cheapest one at the hardware store, which is a guaranteed recipe for disaster. That is the trowel size error that leads to hollow sounding tiles and eventual cracking. I personally use a 1/2-inch x 1/2-inch square notch for large format porcelain to ensure at least 95% mortar coverage. If you hear a ‘clack’ or a hollow thud when you walk on your tile, you’ve already lost the battle. For those aiming for a gallery-quality finish, following a step-by-step guide to flooring installation and leveling success means double-checking that your thinset ridges are all running in the same direction to allow air to escape.
How do I keep my high-traffic floors looking brand new for a decade?
Maintenance is where most homeowners drop the ball. You spent all that time installing tiles like a pro, so don’t ruin them with harsh ammonia-based chemicals or abrasive pads. For hardwood, stop using those ‘shine-enhancing’ sprays that just build up a cloudy wax residue over time. Instead, stick to hardwood floor care secrets to longevity and shine like using a dedicated microfiber mop and a pH-neutral cleaner. If you have natural stone or porous porcelain, use the spray bottle hack for testing floor sealer coverage to see if your surface is still properly protected. If the water doesn’t bead up within seconds, it is time to deep clean and reseal the surface.
What the Future Holds for Your Home’s Foundation
Looking ahead to 2026 and beyond, I predict a massive shift toward ‘active’ underlayments. We are already seeing new materials that can wick away minor condensation before it ever hits the wood core. If you want a floor that stands the test of time, you need to stay updated on mastering hardwood floor refinishing expert tips for 2025. The technology is moving fast, especially with hybrid cores that resist heat and UV expansion better than old-school vinyl. My final piece of advice? Go out and buy a pinless moisture meter today. It is the single best investment you can make to ensure your hard work doesn’t literally buckle under pressure.
What Most Pros Won’t Admit About Perfect Floor Prep
I’ve learned the hard way that a beautiful floor isn’t actually made during the installation; it’s made during the long hours of preparation. Here are the lightbulb moments that changed my entire approach to the craft:
- Lighting is Your Best Friend: I never start a job without a high-powered work light positioned low to the ground. This side-lighting reveals every hump and dip that a standard ceiling light hides, helping you achieve precise floor leveling techniques to achieve flawless surfaces before the first plank is ever laid.
- The ‘Dry-Run’ is Non-Negotiable: I used to think I could eye-ball a layout, but the dry-fit rule for complex herringbone patterns saved me from several expensive miscuts. Always lay out at least two full rows to check your alignment.
- Patience Outperforms Chemicals: When things go wrong, like getting mortar on your finish, remember that the secret to getting dried thinset off your new tiles isn’t about using the harshest acid you can find; it’s about hydration and steady, low-angle scraping with a plastic tool.
The Reliable Gear That Always Saves My Back
You don’t need a thousand gadgets, but you do need the right ones. If I were starting my kit from scratch tomorrow, these are the items I’d buy first:
First, get a high-quality pinless moisture meter. I’ve seen more flooring installation mistakes to avoid for lasting results caused by hidden moisture than by poor technique combined. Second, invest in a laser level for your layouts; the laser level move for perfectly straight hallways will make your transitions look like they were done by a high-end contractor. Third, keep a dead blow hammer in your bag; it provides the force needed to lock joints without the vibration that ruins tongue-and-groove edges. Finally, always have the Tile Council of North America (TCNA) handbook bookmarked. It is the industry bible for everything from mastering floor leveler pro secrets for perfect installations to complex waterproofing.
Go Build a Foundation That Actually Lasts
The first time I laid a floor, I was terrified of making a mistake that would haunt the house forever. But here is the truth: every pro you see was once a beginner with a pile of ruined planks and a bucket of dried-up mortar. Success in flooring installation comes down to the willingness to slow down and check your work at every step. Whether you want to revamp your home with expert flooring installation tips or you are just fixing a single cracked tile, the pride you feel when that last piece of trim goes in is worth every drop of sweat. Don’t be afraid to get your hands dirty and start your project today. #IMAGE_PLACE_HOLDER_E#
Have you ever run into a subfloor issue that seemed impossible to level out? Let me know in the comments below!