
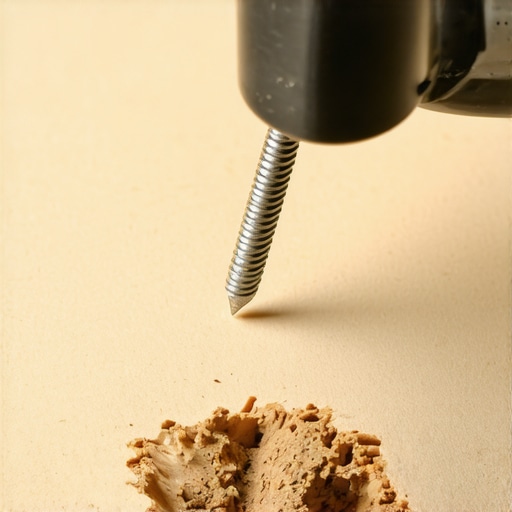
I was creeping toward the kitchen at 2:00 AM, trying to be a ghost, when CRAAAK. It sounded like a gunshot in a library. My toddler woke up, the dog started barking, and I stood there wondering why I’d spent so much time on hardwood floor care only to have it betray me every night. Squeaky floors aren’t just a minor annoyance; they feel like a personal failure of my home. I used to think the only way to fix it was to rip everything out and start over. I even tried that old-school “talcum powder in the cracks” trick—huge mistake. All I got was a slippery mess and a floor that still chirped like a cricket on caffeine. We’re going to fix that today, and we’re going to do it without a massive renovation bill or a messy workspace.[image]
Stop Chasing Ghosts and Fix the Real Friction
The real culprit behind that noise is usually a tiny, annoying gap between your subfloor and the floor joist. When you walk across the room, the subfloor moves up and down on a loose nail, creating that high-pitched, friction-filled screech that follows you everywhere. You might have already tried the hammer test for finding loose subfloor nails, but banging more nails into the floor is like putting a band-aid on a broken leg; it’s a temporary fix that often causes more damage or even splits the wood. According to experts at the National Wood Flooring Association (NWFA), most structural squeaks are the result of seasonal wood movement or poor initial fastening during the initial flooring installation. I made the mistake of ignoring a small squeak in my first home, only for it to turn into a full-blown “musical” hallway that drove my family crazy. Today, I’m showing you the “surgical strike” method. We’re talking about a specialized screw designed to snap off below the wood surface, pulling the subfloor tight to the joist without leaving an ugly hole behind. It’s significantly easier than trying to fix a squeak in a second-story subfloor from the room below.
Can a Single Screw Really Be Better Than a Professional Repair?
I know what you’re thinking. “One screw? Against my entire subfloor?” It sounds too simple to be true, and I was just as skeptical the first time I saw the tool. But here’s the thing: most of the time, the noise is coming from one very specific point of contact where the wood is rubbing against a fastener. By using a breakaway screw kit, you create a permanent bridge that stops that vertical movement. Have you ever had a squeak that felt like it was literally following you around the room, no matter where you stepped? If you’re ready to stop the madness and finally get a silent floor, let’s look at the simple prep work that ensures your one screw hits the mark every time.
Find the Joists Without Turning Your Floor into Swiss Cheese
You cannot just drive screws into your floor and hope for the best; that is a recipe for a ruined finish and a floor that still squeaks. The first step is locating the floor joist—the heavy-duty timber frame that supports your entire room. I remember my first attempt at this in my old fixer-upper. I didn’t have a joist finder, so I just kept drilling small pilot holes in a straight line. By the time I found the wood, the hallway looked like a woodpecker had gone on a bender. It was a mess that required significant hardwood floor refinishing to hide my mistakes. Instead of guessing, use a high-quality stud finder or the ‘tap and listen’ method. You are looking for a dull thud rather than a hollow ring. If you are dealing with an older home, learning how to match new hardwood to a century-old subfloor can help you understand where those structural supports are likely hiding.
Secure the Subfloor Using the Tripod Method
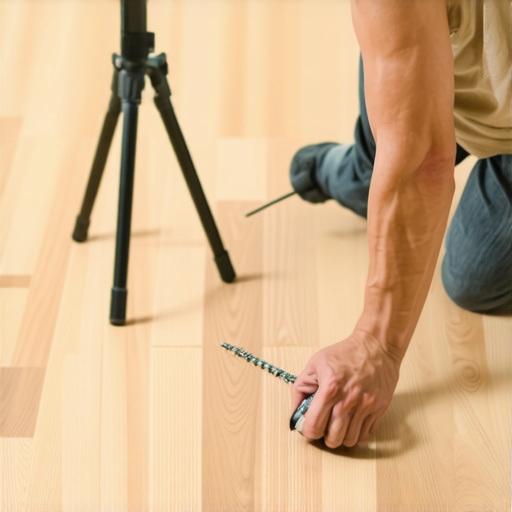
Once you’ve found the joist, you need to use a specialized breakaway screw kit. These kits usually come with a tripod-style guide tool that controls the depth of the screw. This is critical because if the screw goes too deep, it won’t grab the joist; too shallow, and the head stays above the wood. Think of the tripod as a surgical guide that ensures the screw hits the sweet spot every single time. When I finally started using this tool, the difference was night and day. In my latest project, I had a stubborn plank that refused to settle. By following a step-by-step guide to flooring installation and leveling success, I realized the subfloor had actually warped slightly. The breakaway screw pulled that warped wood back down into alignment, silencing a squeak that had been there for five years. This method is much more effective than simply trying to stop hardwood floors from gapping in the hallway with surface-level fillers.
Snap the Screw Head for a Seamless Hidden Repair
This is the part that feels like magic. These screws are designed with a weak point just below the head. After you’ve driven the screw through the hardwood and into the joist using the tripod guide, the head will be sitting just above the surface. You then use the side of the tripod tool to snap the head off. It breaks away cleanly about an eighth of an inch below the surface of the wood. You’re left with a tiny hole that is easily disguised with a bit of color-matched wood putty. It’s a far cry from the nightmare of trying to find the best way to fix a squeaky floor under existing carpet, where you’re often working blind. I once tried to use standard finishing nails instead of these screws because I was too cheap to buy the kit. Within three months, the nails had backed out, and my toddler tripped on one. Save yourself the headache and use the right hardware from the start.
Seal the Tiny Holes to Protect Your Finish
After the squeak is gone, you’ll have a few tiny holes to fill. This isn’t just about aesthetics; it’s about long-term hardwood floor care. Leaving holes open allows moisture to seep into the wood grain, which can cause the planks to swell or discolor over time. Use a wax-based filler stick that matches your floor’s stain. Rub it over the hole, buff it with a soft cloth, and the repair becomes virtually invisible. I’ve done this in high-traffic areas where guests never even noticed a repair had been made. It’s about precision and patience, transforming your home from a creaky haunted house back into the quiet sanctuary it’s supposed to be.
Let’s peel back another layer. Most homeowners—and even some general contractors—confuse ‘flat’ with ‘level.’ You can have a perfectly flat floor that still slopes half an inch toward the corner. For hardwood, that’s a minor annoyance; for large format tile, it’s a death sentence for your grout lines. I’ve seen people spend thousands on the best tile trends for complementing hardwood floors this year only to have the transition look like a jagged mountain range because they skipped the precision check. The ultimate guide to floor leveling for a perfect finish emphasizes that flat is the goal for the tile’s integrity, but level is what keeps your cabinets from looking crooked. We need to look beyond the surface aesthetics.
Stop Mixing Flat with Level If You Want Tile That Lasts
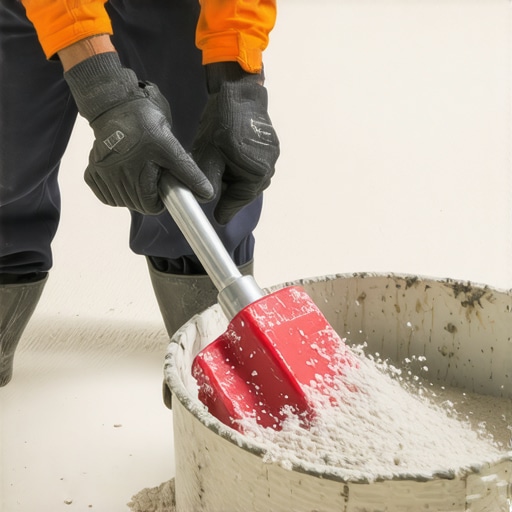
The real ‘oops’ factor that ruins modern installs is the speed of your drill during prep. If you are mixing your compound like you’re whipping a meringue, you are inviting disaster. High-speed mixing traps air, leading to pinholes that compromise the entire surface. According to research from the Tile Council of North America (TCNA), air entrainment in underlayments can significantly reduce compressive strength, sometimes by up to 20%. You need to understand the mixing paddle speed that ruins your leveling compound to ensure your base doesn’t crumble under the weight of heavy furniture or appliances. It is a common mistake that leads to expensive crack repairs down the road.
Why does your self-leveler peel off like a bad sunburn?
I get this question from DIYers constantly. You primed the floor, you poured the expensive stuff, and yet, a month later, it sounds hollow when you walk on it. The hidden nuance is often ‘laitance’ on concrete or skipping the concrete etching step you shouldnt skip before leveling. If you don’t mechanically prep the surface to open the pores of the concrete, the leveler just sits on top like a sticker rather than becoming part of the slab. It’s one of those floor leveling challenges that separates the weekend warriors from the true craftsmen.
The Water Ratio Trap That Weakens Your Bond
Another common trap is the ‘over-watering’ habit. Adding just a splash more water to make the leveler flow easier is a gamble you will almost certainly lose. Excessive water causes the sand to sink to the bottom and the polymers to float to the top, leaving a chalky, weak surface that won’t hold a bond to your thinset. I learned this the hard way on a kitchen remodel where I had to install tiles like a pro twice because the first layer of leveler turned into dust. Always use a moisture meter as part of your hardwood floor care and prep routine to ensure the environment is ready for the chemical bond. Have you ever fallen into this trap where a ‘simple’ prep step turned into a total redo? Let me know in the comments. Whether you are trying to achieve flawless floor leveling before tile laying or restoring an old room, the secret is always in the technical details you can’t see once the job is finished.
The Spiky Roller Is My Secret Weapon for Smooth Floors
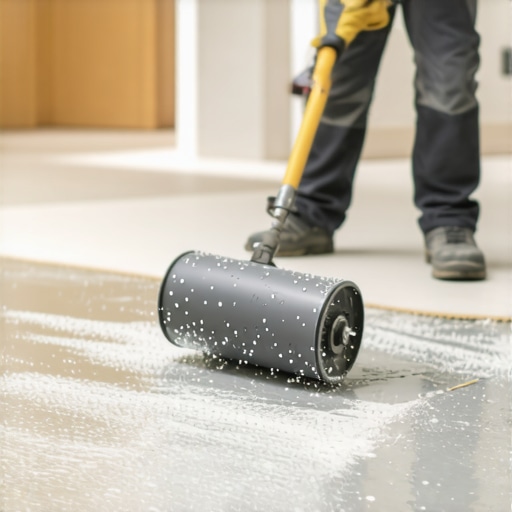
I learned the hard way that pouring a self-leveler is only half the battle. If you just pour it and walk away, you’re almost guaranteed to find tiny air bubbles or ‘pinholes’ the next morning. These are more than just ugly; they are structural weak points that can cause your tile to crack later. Now, I never start a pour without my 18-inch spiky roller. This tool isn’t just for show; the plastic spikes break the surface tension of the wet compound, allowing trapped air to escape and helping the material flow into a perfectly flat plane. It is the core of the spiky roller secret for a mirror-smooth pour that I swear by for every kitchen and bathroom remodel. Using it feels like painting with a heavy-duty texture brush, but the results are glass-smooth surfaces that make precise floor leveling techniques to achieve flawless surfaces look easy even for a novice.
Stop Guessing and Use a Real Moisture Meter
Before you ever lay down a single plank of oak or maple, you need to know what’s happening inside your subfloor. Wood is a living, breathing material that reacts to the environment. I used to trust the ‘eye test’ or the ‘touch test’ until I had a project in a basement where the boards started cupping within three weeks. Now, I use a pinless moisture meter on every single job. This tool allows me to check the moisture content of the subfloor and the new hardwood without poking holes in the finish. Knowing how to use a moisture meter before you lay wood floors is the only way to ensure your floor doesn’t buckle when the seasons change. As noted in the MAPEI Technical Bulletin No. 1, the integrity of a self-leveling underlayment or wood adhesive depends entirely on the substrate’s moisture vapor emission rate (MVER). If those numbers are off, your expensive floor is on a timer.
How do I maintain these high-end results over time?
The biggest threat to your floor’s longevity isn’t foot traffic; it’s the way you clean it. I see people spend five figures on a custom install only to ruin it with a steam mop or harsh chemicals. You have to stop using vinegar on your hardwood floors immediately because the acid eats through the protective polyurethane layer, leaving the wood vulnerable to water damage and staining. For long-term hardwood floor care, stick to pH-neutral cleaners specifically formulated for wood. If you’ve followed my mastering floor leveling pro secrets for perfect installations, you’ve already done the hard work of creating a stable base. Keeping it that way just requires a bit of discipline and the right microfiber mop. Looking forward, I predict we will see more digital leveling sensors integrated into subfloor systems that can alert homeowners to moisture spikes via their smartphones before the damage even starts. For now, grab a high-quality moisture meter and start testing your subfloor today—it’s the best $100 you’ll ever spend on your home.
The Hard Truth About My Early Install Blunders
Looking back at my first few years as a homeowner, I realize I treated flooring installation like a race. I thought if I could just get the boards down, the ‘character’ of the house would hide the flaws. I was wrong. Here are the lightbulb moments that changed everything for me:
- Silence is built, not bought. A squeak isn’t just a noise; it’s a sign of movement. If you don’t address the subfloor friction now, no amount of luxury wood will fix it later.
- Temperature matters more than you think. Letting your wood acclimate to your home’s humidity isn’t a suggestion—it’s a requirement to prevent buckling.
- Subfloor prep is 90% of the job. Once I started spending three days on prep and only one on the install, my results went from ‘DIY-decent’ to ‘professional-grade.’
The Toolkit I Trust for a Lifetime of Quiet Floors
I don’t get fancy with my gear, but I never compromise on the essentials. If you are serious about avoiding flooring installation mistakes to avoid for lasting results, you need these three things in your corner. First, a dedicated breakaway screw kit for those midnight squeaks; it is the only way to fix a squeak in a second-story subfloor without tearing up the ceiling below. Second, a high-quality moisture meter. I personally trust Lignomat because their sensors are calibrated for various wood species, which is vital before you commit to a full install. Finally, I always keep a copy of the NWFA Technical Manuals bookmarked on my phone. When in doubt, I go back to the industry standards for hardwood floor care secrets to longevity and shine to ensure my warranty stays intact.
[image]
Take Back the Peace of Your Own Home
There is a specific kind of pride that comes with walking through your house in total silence. You shouldn’t have to map out a ‘quiet path’ just to get a glass of water at night. By mastering precise floor leveling techniques to achieve flawless surfaces and checking your levels before the first plank goes down, you are investing in the long-term tranquility of your space. It might feel tedious to spend hours with a level and a moisture meter before you lay wood floors, but that diligence is what separates a temporary floor from a legacy one. You’ve got the tools and the knowledge—now it’s time to make your home the quiet sanctuary it was meant to be. Have you ever had a squeak that felt impossible to find, or did you discover a hidden trick that finally silenced your floors? Let me know in the comments below!