
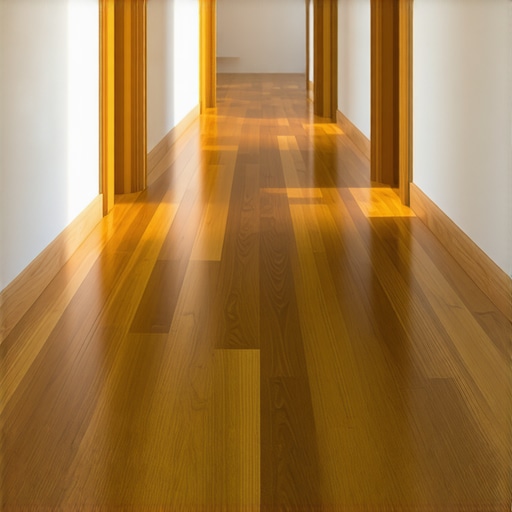
I was sneaking toward the kitchen at 2 AM for a midnight snack when I felt that unmistakable, sharp pinch on my heel. I looked down in the dim light and saw it: my once-flawless oak planks had retreated from one another, leaving a jagged, dark gap that seemed to grow every time the furnace kicked on. It’s frustrating, isn’t it? You spend all that time and money on a beautiful floor, only to have it look like a series of loose teeth within a year. Today, I’m going to share exactly how I stopped my hallway floors from shifting and how you can reclaim that seamless look without calling in a $200-an-hour contractor.
Why Your Hallway Is the Worst Place for Wood Gaps
Hallways are the “freeways” of our homes, taking more foot traffic and air movement than any other room. When I first started DIYing, I thought a few nails were enough to hold everything in place. I was wrong. I completely overlooked the flooring installation mistakes to avoid for lasting results and paid for it with a floor that clicked and groaned every winter. The truth is, wood is a living material. According to the National Wood Flooring Association (NWFA), wood is hygroscopic, meaning it acts like a sponge, expanding and contracting based on the moisture in your air. In a narrow hallway, this movement is concentrated, making gaps much more obvious. Whether you are dealing with solid timber or [why your engineered wood planks are bowing at the ends](https://tiletrendshop.com/why-your-engineered-wood-planks-are-bowing-at-the-ends), the core problem is usually a lack of stable environment or poor fastening.
Is This Just a Cosmetic Issue I Can Ignore?
You might be tempted to just throw a rug over it and call it a day, but those gaps are actually warning signs. Left unchecked, they collect dirt and grit that act like sandpaper, grinding down the edges of your boards. I once let a gap in my own hallway go for three years, and by the time I tried to fix it, the tongue-and-groove joints were so worn they wouldn’t stay locked. If you’re seeing gaps, you might also be dealing with why your hardwood floor feels cold despite new insulation. Have you noticed the gaps in your hallway getting significantly wider when the heater is running? Let me know—I’ve likely been in your exact shoes. This doesn’t mean your floor is failing, but it does mean we need to address the root cause before the boards start splitting permanently.
Close the Gaps Without Tearing Out the Baseboards
The easiest way to fix a floor that has migrated is to pull it back together using friction. I used to think I needed to pry up the quarter-round molding and use a crowbar, but that is a recipe for scratched paint and broken trim. Instead, I use high-tack double-sided tape and a scrap piece of 2×4. I stick the block to the board that has shifted and give it a firm, controlled hit with a mallet. But be careful; the rubber mallet mistake that ruins tongue-and-groove joints is hitting the wood directly or with too much force, which can mushroom the edges and make the gap impossible to close later. By hitting the sacrificial block instead, you distribute the force and pull the board toward you without damaging the finish.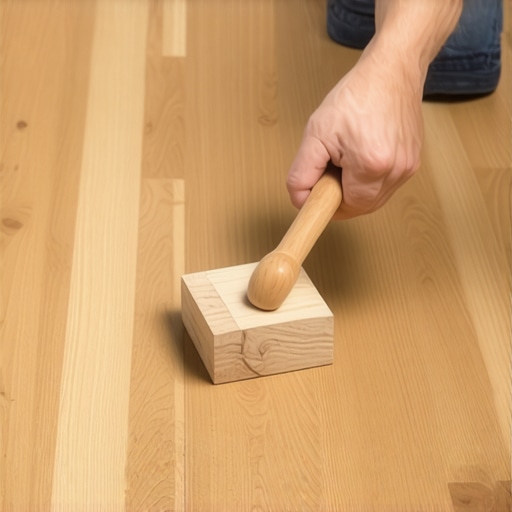
Clean the Channels Before You Pull
I learned this the hard way during a renovation in my first house. I was banging away at a gap for ten minutes, but the boards refused to meet. When I finally peeked into the gap with a flashlight, I saw a tiny pebble—likely tracked in from the driveway—wedged deep inside the groove. No amount of force was going to crush that rock. Before you try to close any gap, take a thin putty knife or a vacuum with a crevice tool and clear out every speck of dust. If you leave debris inside, you are essentially trying to compress a solid object into your wood joints, which will eventually cause the wood to split.
Lock the Planks in Place with Hidden Support
Once you have tapped the boards back into their proper alignment, the real challenge is making sure they do not just slide back the next time someone runs down the hall. I remember helping a neighbor with a floating floor that had shifted so far the tongue was completely visible at the doorway. It was like a slow-motion race where the floor was winning. To stop it, we applied a tiny drop of wood glue into the groove before tapping it home. If you are working with a floating floor, sometimes the issue is actually the subfloor underneath. I have found that how to fix a squeak in a second-story subfloor often involves the same stabilizing logic: if the base moves, the top moves, so ensuring your subfloor is screwed down tight prevents the micro-vibrations that shake boards loose.
Verify Your Alignment Before the Final Fix
Before you commit to glue or permanent fasteners, you need to know if the hallway was straight to begin with. I once spent four hours closing gaps only to realize the entire run was slightly diagonal, which meant new gaps would just open up elsewhere. Now, I always use the string line method for perfectly straight hallway wood to ensure I am not just chasing a curve. If your floor feels bouncy while you are working on it, you might be dealing with a leveling issue. Learning the step-by-step guide to flooring installation and leveling success taught me that a flat subfloor is the only way to prevent boards from unzipping themselves over time.
Apply the Weight Trick for Stubborn Doorway Gaps
Sometimes a board is just stubborn, especially near doorways where the air is driest and the foot traffic is heaviest. During a particularly cold February, I had a transition strip that kept popping loose because the flooring underneath was shifting. I borrowed a technique from the pros: the weight plate trick for bonding stubborn vinyl corners works just as well for hardwood. I applied my adhesive, tapped the board into place, and then stacked 40 pounds of gym weights on it overnight. It forced the bond to set while the wood was in the exact position I wanted. To keep that look long-term, you will need to master hardwood floor care secrets to longevity and shine so you are not introducing excess moisture that could swell the joints and break your new bond.
While the friction-block and mallet method I just described works for a quick fix, we need to talk about why those gaps keep coming back. Most people blame humidity alone, but after years of troubleshooting, I have realized that humidity is often just the scapegoat for a bigger problem: subfloor deflection. If your subfloor isn’t perfectly stable, every step you take creates a tiny vertical bounce that slowly ‘unzips’ the tongue-and-groove joints of your planks. It is one of the most overlooked flooring installation mistakes to avoid for lasting results. If you find yourself closing the same gap every six months, your wood is not just breathing—it is migrating because the base is not solid.
Does Your Subfloor Need to Be Level or Just Flat?
This is where even seasoned DIYers get tripped up. There is a massive difference between a floor being ‘level’ (parallel to the horizon) and being ‘flat’ (no peaks or valleys). According to the National Wood Flooring Association (NWFA), a subfloor must be flat within 1/8 inch over a 6-foot radius. If you have a dip in the hallway, your boards will span over that valley like a bridge. When you walk on that ‘bridge,’ the wood flexes, the joint rubs, and eventually, the boards slide apart. I have seen people spend thousands on choosing the right hardwood floors for your home only to have them fail because they ignored a 1/4-inch dip in the plywood. If you are prepping for a new floor, you must master precise floor leveling techniques to achieve flawless surfaces before the first plank even touches the ground.
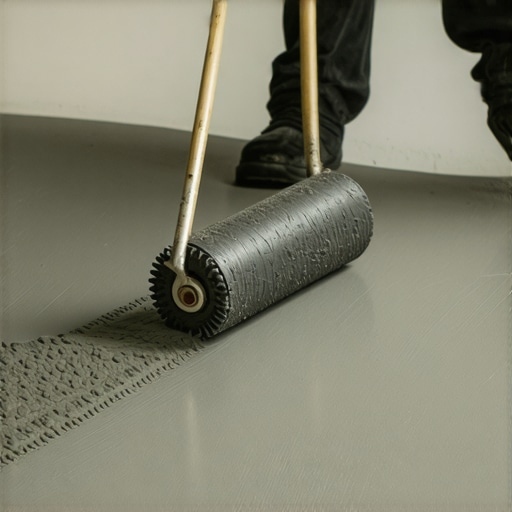
One of the biggest traps I see involves self-leveling compounds. People assume it behaves like water, but it is actually quite viscous. If you don’t use the spiky roller secret for a mirror smooth pour, you will end up with tiny ridges and air bubbles that create an uneven surface for your wood. Furthermore, the mixing paddle speed that ruins your leveling compound is a real threat; mixing too fast introduces too much air, leading to a brittle, ‘honeycombed’ finish that will crack under the weight of your furniture. Have you ever poured leveler only to have it crack a week later? Let me know in the comments—I have fallen into that trap more than once.
The Mistake of Leveling Over Dirty Surfaces
Another nuance most guides miss is the ‘bond-breaker’ factor. I once watched a neighbor pour five bags of expensive leveler directly onto a dusty concrete slab. Within a month, the whole floor sounded like he was walking on potato chips. If you don’t know why most floor levelers fail on top of painted concrete, it is because the compound can’t ‘bite’ into the surface. You must clean, prime, and sometimes even etch the surface. This is especially true if you are transitioning between materials, such as when you are installing tiles like a pro next to your fixed hardwood. If the subfloor isn’t prepped, the transition will always be your weak point. To keep your hallway looking like a professional did it, you have to look past the surface and treat the subfloor like the foundation of a house. For long-term maintenance, once the structural issues are solved, make sure you are following hardwood floor care secrets to longevity and shine to keep those joints from drying out and becoming brittle again.
The Specialized Gear That Saves My Back and Your Boards
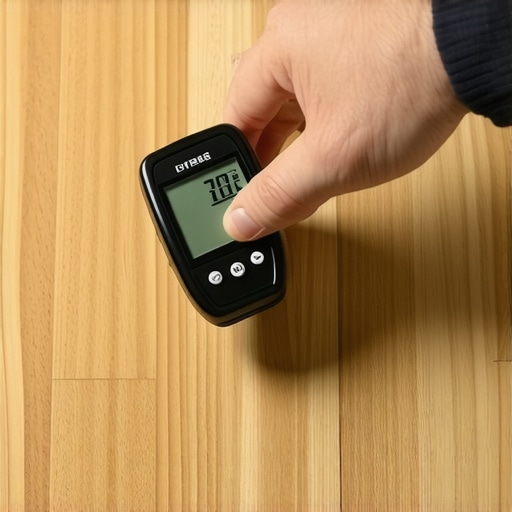
I used to think a standard hammer and a scrap piece of wood were enough to finish any hallway. I was wrong. After years of fixing my own mistakes, I’ve realized that the real secret to a floor that stays tight for a decade is having the right specialized gear. Specifically, I never start a job without a heavy-duty professional pull bar. Unlike a standard crowbar, these are designed with a thin, wide foot that slides behind the board against the wall, allowing you to lever the joints together without marring your drywall. It is one of those expert flooring installation tips that makes the difference between a ‘DIY look’ and a professional finish. I also highly recommend investing in a pinless moisture meter. According to the Wagner Meters technical documentation, moisture content in hardwood flooring should typically be within 2% to 4% of the subfloor’s moisture level before you even think about nailing a board down. If you skip this, no amount of glue will prevent those gaps from returning when the seasons change.
How do I keep my floors from separating again in five years?
Maintenance is the part everyone ignores until the boards start creaking. The most important thing you can do is control your home’s relative humidity. I keep a $10 digital hygrometer in my hallway; if the humidity drops below 30%, I know it’s time to run the humidifier to keep the wood from shrinking and opening up those gaps we worked so hard to close. When it comes to cleaning, please, for the love of your finish, stop using vinegar on your hardwood floors immediately. The acid eats away at the protective polyurethane layer, leaving the wood vulnerable to moisture. Similarly, why you should never use a steam mop on luxury vinyl or hardwood comes down to heat and pressure—it forces water into the joints, which is exactly how you end up with the buckled boards we discussed earlier.
If you are dealing with modern heating systems, you have to be even more careful. I have found that the expansion gap rule for radiant heated wood floors is non-negotiable. If you don’t leave enough room at the perimeter, the heat will expand the planks until they have nowhere to go but up. By following hardwood floor care secrets to longevity and shine, you are not just cleaning; you are preserving the structural integrity of the installation.
The Future of Smart Flooring for DIY Pros
Looking ahead, I see the industry moving toward ‘smarter’ materials and more accessible tech for us homeowners. We are already seeing the rise of self-healing finishes and planks with built-in moisture barriers that take the guesswork out of the subfloor. I predict that within five years, laser-guided leveling systems will be a standard rental at every hardware store, making installing tiles like a pro easier than ever for the average weekend warrior. Before you pack up your tools, I want you to try one thing: take a moisture reading of your floor today and again in three months. Understanding how your home ‘breathes’ is the ultimate way to prevent floor failure before it starts.
Lessons From a Thousand Squeaky Planks
After years of wrestling with wood that seems to have a mind of its own, I have learned that a gap is almost never an isolated event. It is a symptom. One lightbulb moment for me was realizing that dust is the enemy of a tight joint; if you don’t vacuum those channels until they are pristine, you’re just fighting physics. Another hard-earned truth is that you can’t out-glue a bad subfloor. If the base isn’t solid, those flooring installation mistakes to avoid for lasting results will haunt you every time the humidity shifts. Lastly, patience is your best tool. If a board won’t move, don’t hit it harder—look closer for the obstruction.
My Battle-Tested Flooring Kit
I don’t believe in buying every gadget at the hardware store, but three things are non-negotiable for me now. First, a pro-grade pull bar with a wide base; it prevents the accidental dents in your drywall when you are trying to get leverage. Second, a pinless moisture meter. It takes the guesswork out of wood movement and tells you exactly when your home is ready for a fix. Finally, I always keep a bottle of high-quality wood glue with a fine-tip applicator for those permanent locks. If you are also looking into other rooms, these tile installation pointers that save time and money will help you round out your toolkit for a full home refresh. I also frequently revisit expert flooring installation tips to stay sharp on new techniques.
Now Go Fix That Midnight Pinch
You don’t need a massive budget or a crew of contractors to reclaim your hallway. By focusing on the prep work—cleaning those grooves and checking your subfloor—you can achieve a seamless look that lasts for decades. Taking the time to choose the right hardwood floors for your home is just the first step; keeping them tight is where the real pride of ownership comes in. Once those gaps are closed, remember to follow hardwood floor care secrets to longevity and shine to protect your hard work. Your successful flooring installation project is within reach—just take it one plank at a time. Have you ever managed to close a gap only to have it pop open again a week later? Let me know in the comments!