
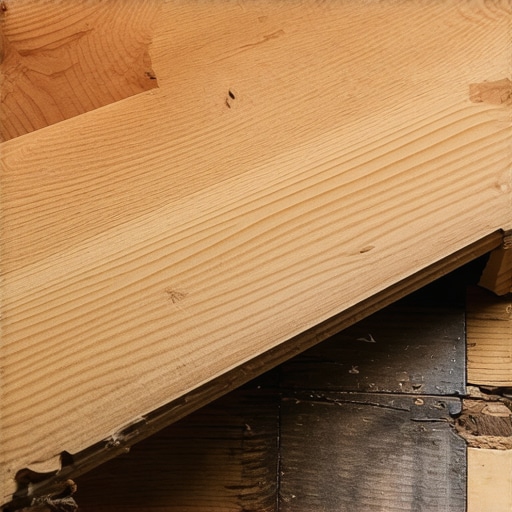
I remember standing in the middle of my 1910 bungalow, staring down at a subfloor that looked more like a rolling ocean than a foundation for a new floor. I’d just ripped up three layers of linoleum and a moth-eaten rug, only to find wide-plank pine boards that were bowed, gapped, and screaming for help. My first instinct was to just throw down some plywood and hope for the best. That was a massive mistake. I didn’t realize back then that century-old wood moves differently, breathes differently, and demands a specific kind of respect before you ever lay a single plank of new oak on top of it. Today, I’m going to show you exactly how to bridge the gap between 1925 and 2025 so your new floors don’t end up creaking like a haunted house within six months.
Your Antique Subfloor Is Not Your Enemy
Most people panic when they see the ‘character’ of an old house’s skeleton. They see the dips and the slopes and think they need to pour gallons of leveler or rip everything out to the joists. I’ve been there, and I’ve made the mistake of ignoring floor leveling challenges that seemed minor at the start but turned into major headaches later. The secret isn’t necessarily to make it perfectly level—old houses rarely are—but to make it flat. When I first started, I thought those terms were interchangeable. They aren’t. A floor can be sloped and still be a great candidate for hardwood, but if it has peaks and valleys, your new boards will eventually crack or separate. I highly recommend using the hammer test for finding loose floor joists before you even think about your underlayment. It’s a simple trick that saved me from a lifetime of annoying ‘thumps’ in the hallway.
Can You Really Get a Flawless Finish on Old Joists?
It is the question I get asked more than anything else: is it worth the effort, or should we just settle for a ‘rustic’ look? The truth is, you can absolutely achieve a gallery-grade finish on a subfloor that has seen two world wars. According to the National Wood Flooring Association (NWFA), a subfloor needs to be flat within 3/16-inch in a 10-foot radius for a successful installation. If you are dealing with significant movement, you might need to learn how to fix a squeak in a second story subfloor by reinforcing the existing planks. I once tried to skip the reinforcement phase and just used longer nails. It was a disaster; the nails eventually worked their way up and ruined the finish of my expensive cherry wood. Don’t be like ‘Past Me.’ Take the time to secure the base. Have you ever pulled up a carpet only to realize the floor underneath was a total topographical map? Tell me about your subfloor horror stories in the comments! Before we move into the actual leveling compounds and shimming techniques, we need to talk about the ‘why’ behind the wood’s behavior.Before you even touch a bag of compound, you need to turn those loose, flapping planks into a rock-solid platform. Think of your subfloor as the chassis of a car; if it is wobbly, the ride will be miserable no matter how nice the seats are. I remember my first big renovation in that 1910 bungalow. I thought I could just ‘float’ the new floor over a particularly bouncy section near the fireplace. I skipped the step where you learn how to fix a bouncy floor with a few well-placed screws and paid for it every time someone walked past the mantle. The floor did not just squeak; it groaned. I eventually had to pull up four rows of finished oak to get back to the joists. Use 2.5-inch deck screws, not drywall screws, and drive them directly through the plank into the center of the joist.
Find the Dips Before They Ruin Your Hardwood
Next, you need to find where the floor is lying to you. Use a 10-foot straightedge or a long level. When you slide it across the room, it will reveal gaps that are invisible to the naked eye. If you do not have a laser, use the chalk dust secret for finding low spots in subfloors. I literally dump a bit of blue carpenter’s chalk on the floor and drag a straight board across it. The spots where the chalk remains untouched are your valleys. It is a low-tech way to see exactly where you need to build up the surface. 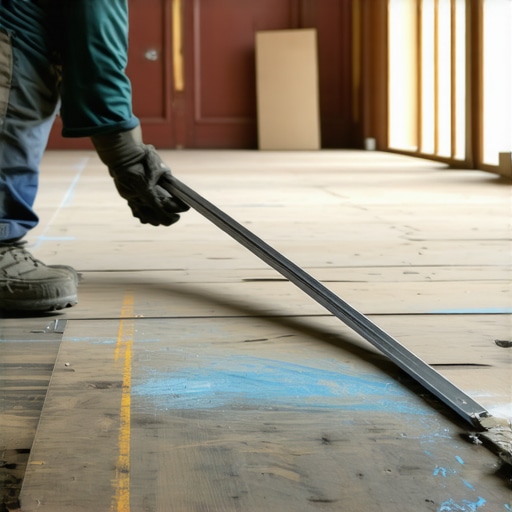
Take Down the High Spots First
While you are looking for the valleys, do not ignore the peaks. Old pine subfloors often crown at the joists due to moisture cycles over a century. Before I pour anything, I grab the belt sander. If you are working with antique wood, you need to know the sanding secret for old heart pine floors—it is much harder and more resinous than modern lumber. I once spent an entire Saturday trying to sand down a high spot with 80-grit only to realize I was just polishing the wood. Switch to a 36-grit open-coat paper and learn how to sand a floor without creating a dust storm by tenting off the area with plastic. Taking down those ‘mountains’ saves you from having to pour a massive amount of ‘valley’ filler later.
Pick Your Leveling Poison Wisely
Now comes the choice between shimming and pouring. If you are working on a second story or a floor where weight is an issue, you should look into how to level a plywood subfloor without adding weight. Heavy self-leveling pours can actually stress old joists. For minor dips, I am a huge fan of asphalt shingles. They are the perfect, non-compressible shim for hardwood. I once used scraps of cardboard—big mistake. The cardboard compressed over time, and the floor started ‘clicking’ within a month. If the dips are deeper than 1/4 inch, you will need a self-leveling compound. But beware: old wood is thirsty. If you do not prime properly, you will end up wondering why self-leveling compounds bubbled over your subfloor like a science experiment gone wrong. You must seal every gap with caulk and use a high-quality primer. To get that perfect finish, use the spiky roller secret for a mirror-smooth pour to pop air bubbles. For the edges near the walls, do not just pour and hope for the best. Use the shimming hack for leveling subfloors under cabinets to ensure your kitchen units do not sit at a slant. It is all about creating a continuous, flat plane that spans the entire room.
The Plastic Vapor Barrier Trap
Most people will tell you that the more protection you put between your subfloor and your new hardwood, the better. I used to believe that too. I’d roll out the thickest plastic sheeting I could find, thinking I was building a fortress against moisture. But here is the contrarian truth: in many century-old homes, sealing that wood too tightly is a death sentence for your joists. If your crawlspace isn’t perfectly encapsulated, you end up trapping seasonal humidity between the finish floor and the subfloor. This leads to cupping that no amount of sanding can fix. Instead of blindly laying plastic, you need to learn how to use a moisture meter to prevent floor failure. According to the National Wood Flooring Association (NWFA), the moisture content between your subfloor and your new planks should be within 2% to 4% of each other. If you skip this check, you’re just guessing, and guessing is expensive.
Stop Using Dish Soap on Your Investment
The ‘Oops’ factor usually happens about three months after the installation is done. You’ve spent thousands on materials and weeks on labor, and then you reach for the Dawn dish soap to clean up a spill. Stop! I cannot stress this enough: stop using vinegar on your hardwood floors immediately and keep the dish soap for the sink. These household cleaners are often too acidic or leave a filmy residue that dulls the finish and can even break down the polyurethane over time. I’ve seen beautiful floors turned cloudy because a homeowner thought ‘gentle’ soap meant ‘safe’ soap. Stick to pH-neutral cleaners specifically formulated for wood. 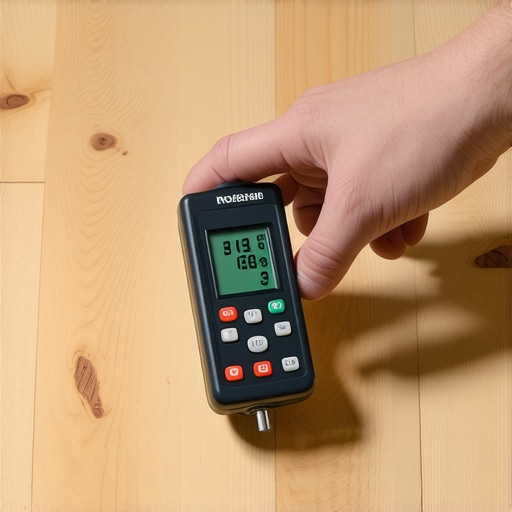
Is Your Mixing Speed Actually Ruining the Pour?
One of the most advanced mistakes I see professional-level DIYers make involves their drill. When you’re prepping a self-leveler, you probably grab a high-speed mixing paddle and go to town. That is a massive error. High-speed mixing whips air into the compound, creating tiny bubbles that turn into craters once the floor dries. I learned the hard way that the mixing paddle speed that ruins your leveling compound is anything over 650 RPM. You want a slow, folding motion, not a whirlpool. If you see foam on top of your bucket, you’ve already lost the battle for a mirror-smooth finish.
The Ghosting Effect and Floating Floors
Have you ever walked across a newly installed room and heard a rhythmic click-clack? Many people blame the product, but it’s usually a subfloor prep issue. Even if the floor looks flat, micro-dips cause the locking mechanism of the planks to rub against each other. This is exactly why your lvp floor is clicking when you walk on it. Most manufacturers require a flatness of 1/8-inch over 6 feet, which is a much tighter tolerance than most people realize. If you’re feeling overwhelmed, go back to the ultimate guide to floor leveling for a perfect finish to double-check your measurements. Have you ever fallen into the ‘it looks flat enough’ trap? Let me know in the comments—I’d love to hear how you fixed it!
Protect Your Investment Without Losing Your Mind
After the dust finally settles and you move the furniture back in, the real work of preservation begins. I have seen too many homeowners spend weeks following a step-by-step guide to flooring installation and leveling success only to watch their finish vanish within two years because they used the wrong cleaning equipment. Personally, I never let a standard vacuum with a beater bar touch my hardwood. It is the fastest way to micro-scratch your topcoat into oblivion, turning a semi-gloss into a dull, scratched mess. I use a dedicated hard-floor vacuum with a soft brush roll; it is a small investment that preserves that ‘just finished’ glow. If your layout includes stone transitions in the kitchen or bath, stop using bleach on your natural stone floors immediately. Bleach eats through sealers and can eventually migrate into the edges of your wood planks, causing the grain to swell and discolor.
The Two Professional Tools I Refuse to Work Without
If you are serious about a DIY job that looks indistinguishable from a professional hire, you need a high-quality moisture meter and a cross-line laser. The National Wood Flooring Association (NWFA) Technical Manual is very clear on this, stating that ‘the installer’s most important tool is a moisture meter.’ I personally use the Wagner Meters Orion series because it is pinless and will not leave unsightly holes in your expensive new oak planks. Before I even think about the laser level move for perfectly straight hallways, I am checking the subfloor moisture every square foot. In 2025, the industry is moving toward ‘smart’ subfloor monitoring sensors, but for now, your hands and a reliable meter are your best defense against catastrophic failure. I also swear by using a long-handle notched trowel for any glue-down jobs; it saves your lower back and ensures you are not creating thick adhesive spots that lead to those annoying, hollow-sounding ‘clicks’ later on. 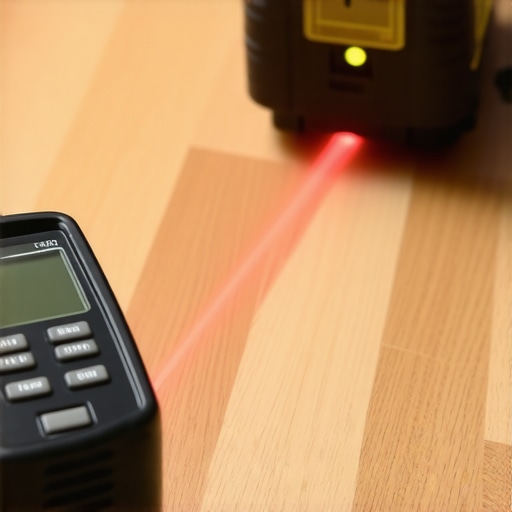
How do I maintain floor stability over time?
Real maintenance is not just about keeping the surface clean; it is about rigorous climate control. Wood is a living, breathing material that reacts to its environment. If your home humidity swings from 20% in the winter to 70% in the summer, your perfectly leveled floor will eventually buckle or crown. I keep a digital hygrometer in my main living space to ensure we stay between 30% and 50% relative humidity year-round. If you start seeing small gaps between boards in January, do not rush to fill them with wood putty. That is a rookie mistake; the putty will simply pop out and crack when the wood expands again in July. Instead, consult hardwood floor care secrets to longevity and shine to understand the seasonal cycle of your specific wood species. For those who already have a few years of wear on their installation, mastering hardwood floor refinishing expert tips for 2025 will help you decide if you need a simple screen-and-coat or a full-depth sand-down.
The Future of Flooring is Flatter and Smarter
Looking ahead, we are seeing a massive shift toward high-performance engineered cores that are almost impervious to moisture, but these modern materials actually require a much flatter base than old-school solid wood. The ‘close enough’ mentality of the 90s is effectively dead. If you want to stay ahead of the curve, invest in a 10-foot professional aluminum box level. It is a tool that never runs out of batteries and never lies to you about a dip. I strongly encourage you to grab a moisture meter before your next project starts—do not guess on the hydration of your wood. It is the single biggest factor between a floor that lasts fifty years and one that fails in five.
What the Subfloor Taught Me After Three Failed Tries
Looking back at my first few renovation projects, there are a few lightbulb moments that changed everything. First, I realized that silence is a luxury you have to build into the foundation. If you hear even a tiny click during the dry-fit, it will sound like a cannon blast once the furniture is in. Second, I learned that you cannot cheat nature; wood is essentially a sponge, and if you do not check your levels, you are playing a very expensive game of roulette. I always tell my friends to review the ultimate guide to floor leveling for a perfect finish before they even buy their first plank. Finally, remember that your eyes want the job to be done, but the level wants the job to be right. Trust the tool, not your tired eyes at 6:00 PM on a Sunday.
The Exact Kit I Use for Every Leveling Job
If you want to avoid flooring installation mistakes to avoid for lasting results, you need to move beyond basic household tools. I never start a project without my Wagner Orion moisture meter—it is the only way to know if your subfloor and your hardwood are actually compatible. I also swear by a 10-foot aluminum box level. Unlike shorter levels, this ensures you don’t miss the subtle valleys that lead to boards separating. To ensure a smooth base, I always follow how to achieve flawless floor leveling before tile laying techniques, even for wood, because the preparation logic remains the same. A spiky roller and a slow-speed mixing drill are my final two ‘must-haves’ to prevent bubbles in the compound.
Your Home Deserves a Floor That Does Not Scream
Taking the time to prep your subfloor might feel like a chore that delays the beautiful part of the project, but it is the most respectful thing you can do for an old house. When you follow a step-by-step guide to flooring installation and leveling success, you are creating a stable, quiet foundation for the next fifty years of your life. Whether you are aiming for a modern look or preserving an antique bungalow, your hardwood floors are an investment in your home’s future. Once the install is done, make sure to read up on hardwood floor care secrets to longevity and shine to protect that hard work. What is the one thing about your subfloor that is keeping you up at night? Let me know in the comments below!