
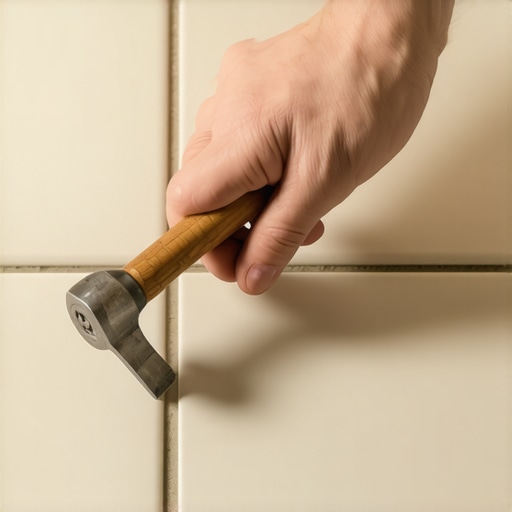
I was standing in my kitchen at two in the morning, hunting for a glass of water, when I felt it. It wasn’t a visible bump or a jagged edge, but a sound. A tiny, echoing thwack that vibrated through my heel. My heart sank immediately because I knew exactly what it was. I’d spent three grueling days installing that porcelain, feeling like a weekend warrior king. But that hollow sound? That’s the ghost of a bad installation coming back to haunt you. It’s the warning shot fired before your grout lines start crumbling into dust. [image_placeholder]
Listen for the Echo of a Failed Bond
The tragedy of a hollow tile is that it often looks perfect on the surface. You’ve cleaned the joints, you’ve admired the layout, and you might even be ready to grout. But if there is a void underneath, that tile is essentially a tiny, porcelain trampoline. Every time you step on it, it flexes. Eventually, that flex wins, and why your porcelain tile is cracking in a straight line becomes a reality you have to fix. I learned this the hard way on my first bathroom remodel. I was so focused on the speed of the job that I ignored the secret to getting a flat floor for large format tiles, which is consistent mortar coverage and back-buttering. I skipped those steps because I was tired. Two months later? I was ripping up three tiles and praying I had spares left in the garage.
Can You Just Ignore a Single Hollow Spot?
You might be tempted to think one little click under a chair leg isn’t a big deal. It is. According to the Tile Council of North America (TCNA), floor tiles require a minimum of 80% mortar coverage in dry areas to maintain structural integrity. Anything less creates a pressure point. If you don’t catch it now, you’ll eventually be dealing with the reason your grout color looks splotchy and uneven as moisture and movement take their toll. Detecting these voids early is about more than just aesthetics; it’s about saving your subfloor from damage. Have you ever felt that suspicious ‘give’ under your feet and just hoped it would go away? Don’t let it sit. Often, the problem starts long before the first tile is set, usually because someone didn’t know how to achieve flawless floor leveling before tile laying, creating air pockets where the mortar simply can’t reach. Even the hidden cost of using cheap thinset on large format tiles comes into play here, as low-quality adhesives can shrink excessively, leaving you with a hollow mess. We need to find those gaps before the grout bucket even opens, and I’m going to show you exactly how to do it with a simple ‘sound test’ that never fails.
Grab a Screwdriver and Start Tapping
To find the problem, you need to develop an ear for the “ping.” Forget expensive ultrasound tools; use the back of a plastic screwdriver handle or a wooden dowel. Walk your floor and tap the center of every single tile, then move to the corners. A solid tile produces a high-pitched, sharp “click.” A hollow tile sounds like a drum—low, echoing, and flat. I once ignored a slight “thud” on a job in a high-traffic hallway, thinking the grout would bridge the gap. It didn’t. Two weeks later, I was back on my knees because I’d ignored basic tile installation pointers that save time and money. That tiny air pocket grew into a hairline fracture that required a full tear-out.
Hunt for Voids in the Corners First
Most hollow spots happen at the edges because the installer “swiped” the trowel too quickly, leaving the corners starved for mortar. This is especially common with 12×24 or larger pieces. If you find a hollow corner, check if the subfloor is the culprit. Sometimes, movement isn’t about the tile bond at all, but a loose board underneath. In those cases, you need to know how to stop your subfloor from squeaking with one screw before you even think about applying more adhesive. If the subfloor is solid but the sound is hollow, you’ve got a coverage issue.
How to Fill the Gap Without Ripping Up Your Floor
If you’ve already set the tile and the thin-set has cured, you have two choices: surgery or a “fix.” For a single hollow corner, you can use a tile repair adhesive injection kit. You drill a tiny hole into the grout line and squeeze in a specialized, runny adhesive that flows into the void. It’s like a medical procedure for your floor. I tried this on a limestone job once, and it worked brilliantly—but only because I made sure the area was vacuumed clean. If you don’t, the adhesive just sticks to the dust. This is why the best way to prep a dusty concrete floor for adhesive is a lesson that applies even to small repairs.
When You Must Remove the Tile Entirely
Sometimes the injection method isn’t enough. If more than 20% of the tile sounds hollow, or if it’s located in a doorway, you have to pull it. I know, it’s painful. Use a grout saw to carefully remove the grout around the affected tile so you don’t chip the neighbors. Then, use a flat pry bar to gently lift the piece. If the thin-set is still “green” (partially cured), it might come up in one piece. If not, you’re looking at a replacement. This usually happens when someone ignores flooring installation mistakes to avoid for lasting results, like failing to back-butter the tile.
The Mortar Suction Test
When you re-install that tile, don’t just slap more mud down. You want to see “suction.” Spread your mortar, set the tile, and then immediately pull it back up. If the back of the tile isn’t completely covered in ridges, your trowel notch is likely too small or your thin-set is too dry. This is often where people fail at the secret to getting a flat floor for large format tiles, which relies on 95% coverage for maximum support. For those dealing with heavy slabs, you might also need to look into how to repair a cracked concrete slab before tiling to ensure the new bond doesn’t snap immediately. A perfect bond should feel like trying to pull a boot out of thick mud—there should be physical resistance.
Stop Believing the Word Self on Your Leveler Bag
If you think pouring a bag of self-leveling compound is like filling a bathtub with water, you’re about to have a very expensive bad day. The industry calls it ‘self-leveling,’ but that is a dangerous misnomer. In reality, it is ‘highly flowable’ mortar that still requires a human hand to guide it. Most DIYers and even some ‘pros’ simply pour it out and wait. The result? Ridges, humps, and the dreaded why your self-leveler developed spiderweb cracks overnight. I’ve seen entire kitchen floors ruined because the installer didn’t realize why your self-leveler is drying faster than you can pour it. If you aren’t moving the material with a gauge rake or a spreader, you’re just making a bigger mess of an already uneven floor.
Why Flatness Matters More Than Levelness
Here is the contrarian truth: Your floor doesn’t actually need to be perfectly level (relative to the earth’s center), but it absolutely must be flat. You can have a floor that is slightly sloped but perfectly flat, and your tile will lay beautifully. However, if your floor is ‘level’ but has a 1/8-inch dip, your large format tiles will have lippage. The National Wood Flooring Association (NWFA) and the TCNA emphasize a strict flatness standard—usually 3/16 of an inch over a 10-foot radius. If you ignore this, you’re inviting the structural failure we discussed earlier. To achieve this, you need to master flooring installation fundamentals leveling for a seamless look.
Don’t Let Air Bubbles Ruin Your Bond
The ‘oops’ factor that most people miss happens at the mixing bucket. If you use a high-speed drill, you are whipping air into the mixture. Those tiny bubbles don’t just disappear; they rise to the surface and create pinholes that weaken the entire substrate. This is why the mixing paddle speed that ruins your leveling compound is a critical piece of the puzzle. To combat this, I always use the spiky roller secret for a mirror smooth pour. This tool breaks the surface tension and lets the air escape before the material sets. Without it, you’re basically laying tile on top of a giant, brittle Aero chocolate bar.
How Do You Pick a Leveler That Won’t Crack Over Radiant Heat?
For advanced installations involving heated coils, the rules change entirely. Standard compounds are often too rigid and will snap as the heating elements expand and contract. You need a fiber-reinforced or highly polymer-modified product. Learning how to choose a floor leveler that wont crack over radiant heat is the difference between a cozy bathroom and a floor that sounds like popcorn when you walk on it. Also, never forget that why most floor levelers fail on top of painted concrete is usually a lack of mechanical prep or the wrong primer. Have you ever fallen into this trap of trusting the ‘self-leveling’ label too much? Let me know in the comments.Once you have mastered the pour and the bond, the focus shifts from surviving the installation day to ensuring the floor survives the decade. I have spent thousands of dollars on gear over the years, and I have learned that the most expensive tool is the one you have to use twice because the first attempt failed. When you are scaling up from a single bathroom to a whole-house project, your gear bag needs to evolve. I stopped relying on a standard bubble level years ago. If you are serious about installing tiles like a pro step-by-step strategies for 2025, you need a 3-plane green beam laser. Why green? Because red lasers are nearly invisible in a sun-drenched living room. Setting that laser on a tripod and watching it cast a perfectly flat grid across the floor reveals every dip and hump that your eyes—and your old level—would miss. It is the only way to verify your leveling job before the thin-set is mixed.
How do I maintain the shine on my hardwood floors over time?
Maintaining that ‘just installed’ look is not about scrubbing harder; it is about understanding the chemistry of your finish. I always warn my clients to stay away from the ‘mop and glow’ products found in grocery aisles. These often contain waxes and acrylics that create a temporary shine but eventually turn into a sticky, cloudy mess that traps dirt. Instead, focus on hardwood floor care secrets to longevity and shine by using a pH-neutral cleaner specifically formulated for polyurethane finishes. If you have inherited a floor that is already showing its age, you might need to dive into mastering hardwood floor refinishing expert tips for 2025 to bring back the depth of the grain without a full, dusty sand-down.
The Moisture Meter is Your Secret Insurance Policy
Most DIYers ignore moisture until they see their expensive planks cupping or buckling. According to the National Wood Flooring Association (NWFA) Technical Manual, the moisture content of your subfloor and your hardwood planks should ideally be within 2 to 4 percentage points of each other. I never open a box of wood without my pinless moisture meter in my hand. It is a non-destructive way to ensure the home’s environment is ready for the wood to live there permanently. Learning how to use a moisture meter before you lay wood floors is the absolute best way to avoid flooring installation mistakes to avoid for lasting results.
Look Toward an Automated Future but Keep Your Hands Dirty
I predict that in the next few years, we will see consumer-grade lidar-equipped robots that can sand a floor to a perfect finish while we sleep. We are already seeing this technology in commercial sectors, and it is only a matter of time before it hits the residential market. But until that day comes, the ‘feel’ of the tool in your hand remains everything. For instance, when you are dealing with weathered surfaces, the sanding secret for restoring greyed-out teak floors is knowing exactly when to stop—too much pressure and you lose the natural character of the wood. My advice for your next project? Grab a laser level this weekend and map out your project area just to see how ‘off’ it really is. You will be surprised at what you have been missing while relying on your naked eye.
Lessons from the Bottom of the Thin-Set Bucket
I used to think I could out-trowel a bad subfloor, but I was wrong. Real flooring installation success starts with the realization that your surface is only as good as what is underneath it. One of my biggest lightbulb moments was realizing that “good enough” is the enemy of longevity. If you find a dip, fix it now. I have seen floor leveling challenges common mistakes and how to avoid them ruin high-end projects simply because the installer did not want to wait an extra hour for primer to tack up. Another hard-won truth? Always buy 15% more tile than you think you need—not 10%. Batch variations in grout and porcelain are real, and you will thank yourself when you are not hunting for a discontinued lot number three years from now.
[image_placeholder]
Upgrade Your Gear Bag Before Your Next Pour
If you are tired of guessing where the humps are, it is time to invest in tools that tell the truth. I never start a project without my 3-plane green beam laser; it is the gold standard for mastering floor leveling pro secrets for perfect installations. I also highly recommend keeping a high-quality pinless moisture meter in your truck. It is your insurance policy against cupping wood. For those looking for a comprehensive roadmap, I always point people toward a step by step guide to flooring installation and leveling success to ensure no small detail—like perimeter expansion gaps—is overlooked.
Take the First Step Toward a Flawless Finish
Your home deserves a floor that does not just look great on day one, but feels solid for decades. By focusing on the prep and respecting the chemistry of your materials, you are building something that lasts. Once your installation is complete, remember that maintenance is the final chapter, so keep some hardwood floor care secrets to longevity and shine in your back pocket. You have the knowledge; now it is time to get your hands dirty and create something beautiful. Have you ever heard that hollow ‘thwack’ after you thought you were done? Tell me your flooring horror stories in the comments below!