
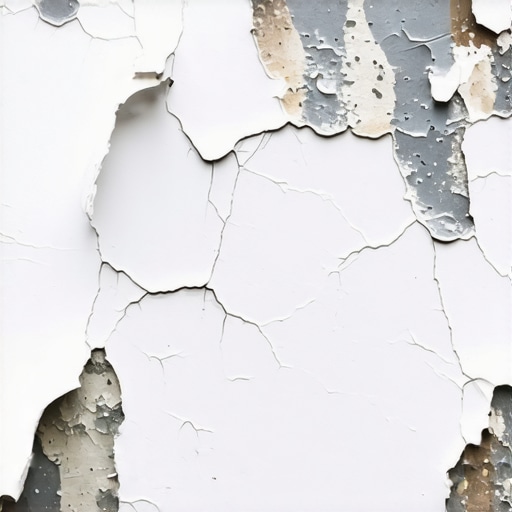
I still remember the first time I saw it. I had spent the entire weekend prepping my subfloor, thinking I’d done everything by the book. I applied the primer, let it dry, and started my morning coffee. When I walked across the room, a six-inch strip of primer didn’t just crack—it literally peeled up and stuck to the bottom of my slipper. It looked exactly like a bad sunburn flaking off after a weekend at the lake. It’s a gut-wrenching feeling because you know, deep down, that if the primer isn’t sticking, nothing you put on top of it will last either. Today, I’m going to help you figure out exactly why your bond is failing and how we can get that surface ready for a flawless finish.
Stop Watching Your Hard Work Flake Away
We’ve all been there. You want to get to the fun part—laying the tile or pouring the leveler—so you might rush the prep. But flooring is only as good as its foundation. If your primer is peeling, it’s usually screaming at you about a hidden problem. Maybe it’s moisture, maybe it’s a ‘bond breaker’ like old wax, or maybe you made the same mistake I did years ago: trying to prime over a surface that wasn’t properly etched. When I first started, I thought prepping a dusty concrete floor just meant a quick pass with a broom. I was wrong. That tiny layer of dust acts like a layer of ball bearings, preventing the primer from ever touching the actual slab. According to the National Wood Flooring Association, moisture imbalances are responsible for over 75% of flooring failures, and primer issues are the first warning sign. If your subfloor is ‘sweating’ or if you’ve ignored common flooring installation mistakes, the primer is the first thing to let go.
Is a dedicated floor primer actually worth the extra trip to the store?
I get this question from my neighbors all the time. ‘Can’t I just use some leftover wall primer?’ The short answer is a loud, resounding no. Floor primers are engineered to handle the compression and tension of footsteps and furniture. When you see floor levelers fail on top of painted concrete, it’s often because the primer couldn’t bite into the slick surface. Have you ever had a project where the floor just seemed to ‘reject’ whatever you put down? I’d love to hear about it—it helps to know we’re not alone in these DIY frustrations. We’re going to dive into the ‘why’ behind the peel so you never have to scrape up a failed project again. It’s time to move past the reasons why leveler didn’t bond and start building a floor that actually stays put.
Identify Your Bond Breakers Before Starting
Before you even open a bucket of primer, you have to play detective. A ‘bond breaker’ is anything that prevents the primer from physically grabbing onto the subfloor. This could be old carpet adhesive, drywall mud, or even overspray from a painter who visited the site weeks ago. If you are working over an old slab, remember that mechanical profiling is your best friend. In 2016, I was rushing a laundry room project and thought the existing paint was ‘flat enough’ to accept a bond. Within a week, the floor sounded hollow. I had to rip out twenty square feet of tile because I skipped a ten-minute scuffing session. Don’t make that mistake; learn the best way to prep a painted floor for new tile to ensure your foundation is rock solid.
Give the Primer Something to Bite Into
Think of your subfloor like a piece of glass. If you try to paint it, the paint slides right off. But if you hit that glass with sandpaper, the paint has tiny ridges to grab onto. Your concrete or wood subfloor needs that same ‘tooth.’ For concrete, this often means using a diamond cup wheel on a grinder to open the pores. For wood, it might mean a heavy-duty sanding. If you are dealing with extremely smooth surfaces, you need a primer specifically designed with suspended sand or grit to create a bridge between the slick substrate and your new floor. This is a critical step in how to achieve flawless floor leveling before tile laying, as it prevents the leveler from skating across the surface.
Perform the Plastic Sheet Moisture Test
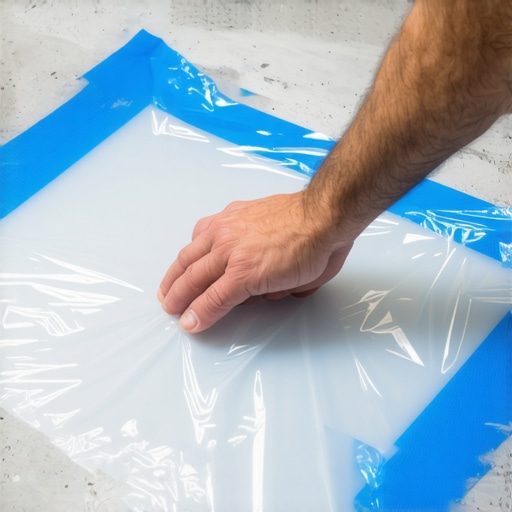
Moisture is the silent killer of floor primers. Even if a floor looks dry, vapor could be rising through the slab and pushing the primer right off the surface. I always use the painters plastic trick for testing concrete moisture before I commit to a full pour. Simply tape a square of clear plastic to the floor for 24 hours. If you see condensation or a dark patch under the plastic, your slab is breathing too much water for a standard primer. In those cases, you’ll need a moisture vapor barrier. Ignoring this is the fastest way to find out why your self-leveler developed spiderweb-cracks overnight, as the escaping gas and water disrupt the curing process.
Seal the Pores to Stop the Bubbles
If your subfloor is very porous—like a dry, old concrete slab—it will act like a sponge. When you pour primer or leveler over it, the floor sucks the moisture out of the product too fast, causing ‘pinholes’ or bubbles. This is exactly why self-leveling compounds bubbled over your subfloor in past projects. To prevent this, apply your primer in two thin coats rather than one thick one. The first coat seals the ‘straws’ (the pores) in the concrete, and the second coat provides the actual bonding surface. It’s a double-layer insurance policy for your hard work.
Mix Like a Pro to Avoid Chemical Failure
Chemistry matters more than most DIYers realize. When mixing your primer (if it’s a concentrate) or your leveling compound, you must watch your RPMs. Using a high-speed drill creates a vortex that sucks air into the mixture, leading to a weak, brittle bond. Always check the mixing paddle speed that ruins your leveling compound before you start your drill. I once ruined three bags of high-end leveler because I used a high-speed mud mixer that turned the compound into a frothy mousse. It looked fine when I poured it, but once it dried, I could crush it with my thumb. To get that mirror-finish, use the spiky roller secret for a mirror smooth pour after the primer has set and you’ve moved on to the leveling phase. It breaks any remaining surface tension and ensures the product lays perfectly flat.
Self-Leveling is a Marketing Lie
There is a massive misconception in the DIY world that ‘self-leveling’ compound behaves like water. People assume they can just dump it on the floor, walk away, and return to a glass-smooth surface. In my experience, that is how you end up with high spots that make installing large format tile without lippage an absolute nightmare. The reality? These compounds are ‘self-smoothing,’ not truly self-leveling. You have to guide the product. If you don’t use a gauge rake to set the depth and a spiky roller to release the surface tension, the material will often ‘mound’ or follow the existing slope of your house. According to the Tile Council of North America (TCNA) Handbook, the substrate must be within specific tolerances before you even think about tile, and relying on the product to do 100% of the work is a recipe for failure. Have you ever poured a floor only to find it was still slanted the next morning? Let me know in the comments—I’ve definitely been there.
Does your plywood actually need a chemical primer for tile?
I see this debate on forums all the time. Some guys swear by raw plywood, while others won’t touch a job without a specialized latex primer. Here is the nuance: if you are using a modified thinset on high-grade wood, the bond is usually decent. But even if you use the plywood grade you need for a stable tile underlayment, the wood is incredibly thirsty. It will suck the moisture out of your mortar before the chemicals have a chance to cure. This is exactly why your porcelain tile is cracking over plywood seams. The primer isn’t just for ‘stickiness’; it’s a moisture regulator. It keeps the hydration in the mortar where it belongs. If you’re planning a hardwood transition, this prep is just as vital as mastering hardwood floor refinishing techniques to ensure the heights match up perfectly.
The Deadly Temptation of the ‘Extra Cup’ of Water
This is the most common ‘trap’ for beginners. You start mixing the compound, and it looks a little thick. You think, ‘If I just add one more cup of water, it’ll flow into those corners better.’ Stop right there. This is a chemical reaction, not a soup recipe. Over-watering causes ‘segregation,’ where the heavy sand sinks to the bottom and the polymers float to the top. When it dries, the surface will be a soft, chalky mess that you can literally scratch away with a fingernail. 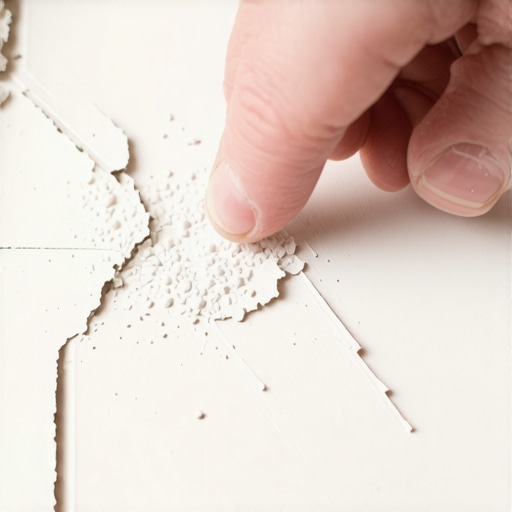 This is a classic example of flooring installation mistakes to avoid if you want a floor that survives more than a season. If your mix is too thick, it’s usually because your water was too hot or your drill speed was too high, not because you need more liquid. Always use a cool, measured amount of water to prevent the mix from ‘flashing’ or drying too fast.
How can I tell if my old floor is too ‘flexible’ for leveler?
If you are working on an old house, you might be dealing with a subfloor that has too much ‘bounce.’ No amount of primer or high-end leveler will fix a structural deflection issue. If you pour a rigid product over a trampoline, it will crack. Before you commit, use the hammer test for finding loose subfloor nails and ensure everything is screwed down tight. If the joists are undersized, you might need to sister them or add a layer of plywood. Taking these extra steps is the only way to achieve flawless floor leveling that won’t crumble under the weight of your new furniture. It’s better to spend a day reinforcing the structure than a week chipping up cracked concrete later.
Once you have moved past the structural repairs and the initial pour, you enter the phase where the right equipment makes the difference between a ‘good enough’ job and a professional-grade finish. If you’re still trying to level a room with a basic four-foot carpenter’s level, you’re making life harder than it needs to be. I personally swear by a 360-degree rotary laser. It’s the only way to establish a consistent benchmark across multiple rooms, ensuring your transitions stay flush. For those tackling a large pour, don’t forget the spiked shoes. They look like something out of a medieval torture chamber, but they allow you to walk right into the wet compound to address high spots without leaving giant footprints. This is a vital part of the spiky roller secret for a mirror smooth pour, as it gives you the mobility to lead the material where it needs to go. I’ve seen too many DIYers get ‘trapped’ in a corner because they didn’t have the right footwear to reach a bubbling section in the center of the room.
The One Tool You Should Never Skip
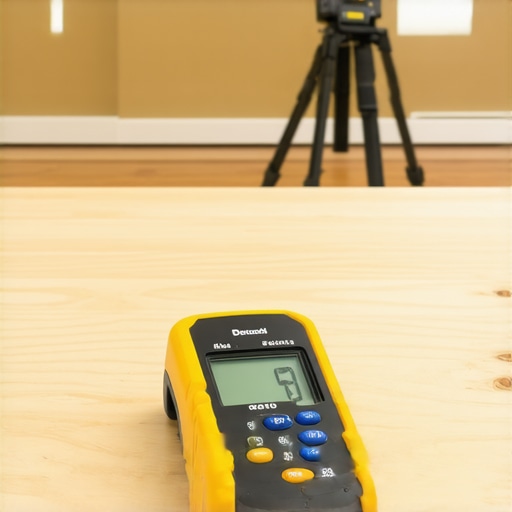
If I could only gift one tool to a new homeowner, it would be a high-quality moisture meter. Before you even think about mastering hardwood floor refinishing or laying down expensive planks, you have to know what’s happening inside the wood or concrete. I’ve learned the hard way that a floor can feel dry to the touch while still being saturated enough to cause warping a month later. Knowing how to use a moisture meter before you lay wood floors is your best defense against ‘cupping’ or adhesive failure. According to the ANSI A118.4 standards for modified dry-set cement mortars, the environmental conditions and substrate moisture significantly impact the final bond strength. If you ignore the readings, you’re essentially gambling with your budget. I recommend taking at least twenty readings for every 1,000 square feet to get a true map of your home’s hydration levels.
How can I keep my new floor looking fresh for the long haul?
Maintenance is where most people drop the ball. You spend thousands on materials, only to ruin them with a $20 steam mop or the wrong chemical cleaner. To truly protect your investment, you need to understand hardwood floor care secrets to longevity and shine. This means ditching the harsh vinegars and opting for pH-neutral cleaners specifically formulated for your floor type. For tile, it’s all about the grout sealer. A high-quality penetrating sealer applied every six to twelve months will prevent those beautiful lines from turning a dingy gray. If you’ve already seen some wear, look into revamp your home with expert flooring installation tips for refreshing surfaces without a full replacement. Consistency is better than intensity; a daily sweep with a microfiber pad does more for your floor than a monthly ‘deep scrub’ that might actually strip your finish.
The Future of Flooring is Smart and Measured
Looking ahead, the days of ‘guessing’ the levelness of a floor are coming to an end. We are already seeing the rise of LiDAR-based smartphone apps that can scan a room and generate a 3D topographic map of your subfloor. This technology will soon be standard for every serious DIYer, allowing you to see exactly how many bags of leveler you need before you even leave for the store. I predict we’ll also see a shift toward more sustainable, ‘breathable’ primers that handle moisture vapor better than the acrylics of the past. For now, focus on flooring installation fundamentals: leveling for a seamless look and trust the tools that have stood the test of time. My best advice? Go buy a pinless moisture meter right now. It is the single most effective way to guarantee your floor doesn’t fail six months down the road. It’s time to stop guessing and start measuring like a pro.
Lessons I Paid for in Sweat and Scrapers
If I could go back to that first failed job, I’d tell myself that patience is the most expensive tool you own. First, never assume a ‘clean’ floor is actually clean; if you can wipe a black cloth across the concrete and see grey, you still have a bond-breaker. Second, the ‘Thumb Test’ is my secret weapon—if you can’t make a dent in the primer with your nail, it’s ready, but if it feels gummy, stop and wait. Finally, remember that temperature affects chemistry. If the room is too hot, your primer will skin over like an old pudding, leaving the bottom wet and weak. These small observations separate a floor that lasts decades from one that fails in a month.
The Short List of Tools That Actually Matter
You don’t need a truck full of gadgets, but you do need a few essentials to avoid flooring installation mistakes that haunt your budget. I never start a pour without a pinless moisture meter. It’s the only way to be certain of what’s happening beneath the surface, especially if you’re learning how to use a moisture meter before you lay wood floors. I also swear by the spiky roller secret for a mirror smooth pour, as it is not just for bubbles—it helps move the material without destroying the level. Lastly, keep a set of spiked shoes handy. Being able to walk through the wet compound to fix a missed spot in the center of the room is a game-changer for achieving the ultimate guide to floor leveling results.
Go Build Something That Stays Put
Floor prep isn’t the most glamorous part of a home renovation, but it is the most vital. When you take the time to properly etch, prime, and measure, you’re not just installing a surface—you’re creating peace of mind. No one wants to hear a hollow ‘click’ or see a crack six months after finishing a beautiful project. By mastering the science of the bond, you ensure your floor leveling efforts lead to a professional, seamless finish that you can be proud of for years. Have you ever had a project where the primer just refused to stick no matter what you did? Let me know in the comments—I’d love to help you troubleshoot it!