
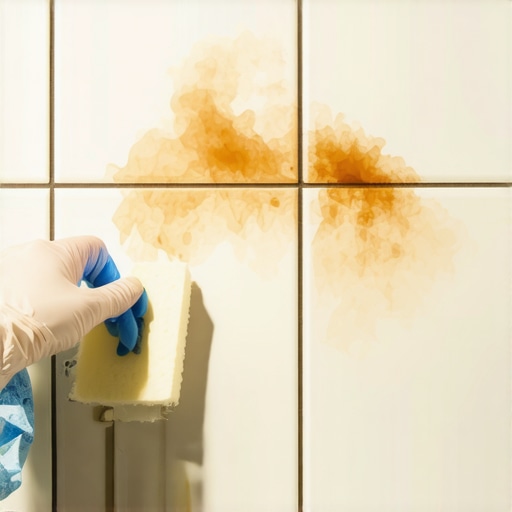
I remember the morning I moved that old metal plant stand in my sunroom. Beneath it sat a hideous, vibrant orange ring, mocking me from the center of my light-colored porcelain. It felt like a punch in the gut. I had put so much effort into mastering floor leveling for that specific room, ensuring every tile was flush and elegant. To see a permanent-looking stain on a surface I had babied was heartbreaking. In my panic, I grabbed the first bottle of industrial cleaner I found under the sink. That was a disaster. I nearly committed one of those flooring installation mistakes to avoid by using a harsh abrasive that could have scratched the glaze forever. Today, I am going to save you from that panic. We are going to walk through the exact steps to lift those stubborn rust spots safely, so your floors look as good as the day they were laid. Have you ever moved a piece of furniture only to find a rusty ‘gift’ left behind? Drop a comment and let me know I am not the only one who has faced this headache!
Why those orange rings won’t just scrub away
Rust is a chemical reaction, not just a bit of dirt sitting on top of your floor. When iron, moisture, and oxygen meet, they create iron oxide, which bonds surprisingly well to the microscopic pores of your tile and grout. If you have light-colored floors, that orange hue stands out like a neon sign. My biggest mistake early on was thinking I could just use a heavy-duty scrub brush and some dish soap. It did nothing. I even considered if I would have to learn how to fix a chipped tile because I was scrubbing so hard I feared I would damage the material. You cannot out-muscle chemistry. You have to use a solution that breaks the bond between the iron oxide and the tile surface without eating into the finish.
Is DIY rust removal actually worth the hype?
Many folks worry that homemade remedies are just old wives’ tales that waste time. I was a skeptic too, especially after the vinegar mistake that eats through your natural stone tiles taught me a very expensive lesson about acidity and floor care. However, when done correctly and with the right pH-balanced approach, you can absolutely clear these stains without calling in a professional. According to the Tile Council of North America (TCNA), certain acidic cleaners can permanently etch the surface of tiles if left too long or used on the wrong material. That is why we are focusing on methods that prioritize the integrity of your flooring while being ruthless on the rust itself.
Identify your surface before you apply a drop
I learned the hard way that not all floor finishes are created equal. Last summer, I was helping a friend clean a ‘slate’ entryway that had been neglected for years. I thought I would be a hero and use a concentrated citric acid to melt away the rust. Within minutes, the stone started fizzing like a science fair volcano. It was not slate; it was a low-quality limestone-based imitation. If you do not know how to identify real slate vs ceramic imitations, you risk permanent etching that no amount of buffing can fix. For porcelain or ceramic, you have much more leeway, but you should still always test a tiny, hidden corner first. Use a cotton swab to apply your cleaning agent and wait ten minutes. If the shine remains intact and the color doesn’t bleed, you are ready to proceed to the main event. Scrubbing a rust ring is like trying to sand a floor with a wet sponge; if you don’t have the right chemical reaction, you are just wasting your afternoon.
Lift the stain with a homemade poultice
For most light-to-moderate orange rings, you do not need a hazardous chemical cocktail; you need a thick, consistent paste. Mix fresh lemon juice and table salt until it reaches the consistency of wet sand. The natural acid in the lemon works to break the iron oxide bond, while the salt grains act as a mild, non-scratching abrasive to physically lift the particles. 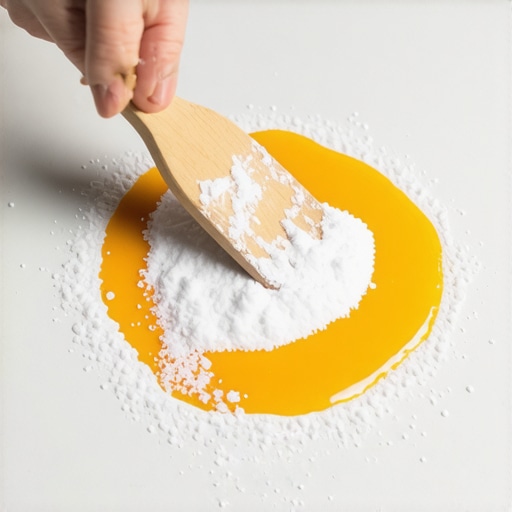 Spread this mixture generously over the orange ring and let it sit for at least 30 minutes. I once left this exact mixture on a stubborn spot in my laundry room for over an hour while I was distracted by mastering hardwood floor refinishing in the adjacent hallway. When I finally wiped it away with a damp microfiber cloth, the rust came with it, leaving the tile as bright as the day it was installed. If the stain is particularly deep-seated, you can swap the lemon for white vinegar, but remember my earlier warning: keep vinegar far away from natural stone like marble or travertine.
When to bring in the commercial big guns
Sometimes a DIY paste just will not cut it, especially if the rust has migrated deep into the grout lines. Grout is essentially a hard, cementitious sponge; it absorbs liquids and minerals greedily. In these cases, look for a pH-neutral rust remover specifically labeled for masonry or tile. Avoid anything containing hydrofluoric acid, as it can literally dissolve the silica in your tile glaze. Apply the professional remover and use a soft-bristled nylon brush to work it in gently. If you find the grout is so stained and brittle that it is starting to flake away, you might actually need tile installation pointers that save time and money regarding a localized regrout rather than just a surface cleaning. High-quality products should do the heavy lifting for you, so avoid the urge to put your entire body weight into the scrubbing.
Rinse and seal to prevent a comeback
Once the orange hue is gone, the work is not quite finished. You must neutralize the area. Acids left on the floor—even natural ones like lemon juice—will attract dust and dirt like a magnet, eventually creating a dark, grimy spot. Wipe the area at least three times with fresh, clean water to ensure all residue is gone. To ensure you never have to face this headache again, once the area is bone dry, apply a high-quality penetrating sealer to the grout. This is one of those hardwood floor care secrets to longevity and shine that applies equally well to tile: protection is always easier than restoration. A well-sealed surface keeps the iron oxide from finding a home in the pores of your floor, making the next cleanup as simple as a quick swipe with a damp mop. Just like achieving a flat surface when installing large format tile without lippage, the secret to a clean floor is all in the preparation and the follow-through.
Flatness and levelness are not the same thing
We often use the terms interchangeably, but in the world of high-end flooring, they are worlds apart. You can have a floor that is perfectly flat—meaning no bumps or dips—but is still sloped like a ski ramp. I have seen DIYers spend a fortune on self-leveling compound only to realize their floor still has a 2-inch drop across the room. If you are trying to figure out how to level a floor that has a 2 inch drop across the room, you are dealing with structural slope, not just surface irregularities. For large-format tiles, flatness is the holy grail to prevent lippage, but for furniture and cabinetry, levelness is what keeps your drawers from sliding open on their own. Most people focus on the ‘dip’ in the middle of the room, while the pros are looking at the perimeter where the floor meets the wall.
How much slope can your new floor actually handle?
According to the National Wood Flooring Association (NWFA), the industry standard for subfloor flatness is 3/16 of an inch within a 10-foot radius. If you ignore this, you are inviting structural failure. I once worked on a project where the homeowner insisted on skipping the prep because the floor ‘looked fine’ to the naked eye. Within six months, they were calling me back because their flooring installation mistakes to avoid had manifested as hollow-sounding spots and snapping tongue-and-groove joints. You simply cannot expect a thin layer of underlayment to bridge a structural canyon.
The self-leveling trap that ruins your weekend
Everyone assumes self-leveling compound is a ‘pour and forget’ solution. It is not. The most common ‘oops’ factor I see is using the wrong speed on the drill. Using a high-RPM setting is the mixing paddle speed that ruins your leveling compound because it whips air into the mixture. When that air tries to escape as the compound cures, it leaves behind thousands of tiny pinholes, often called ‘spiderwebbing.’ If you have ever seen why your self-leveler developed spiderweb cracks overnight, it is usually because the subfloor was too thirsty and sucked the moisture out of the mix, or the air bubbles created a brittle honeycomb structure. 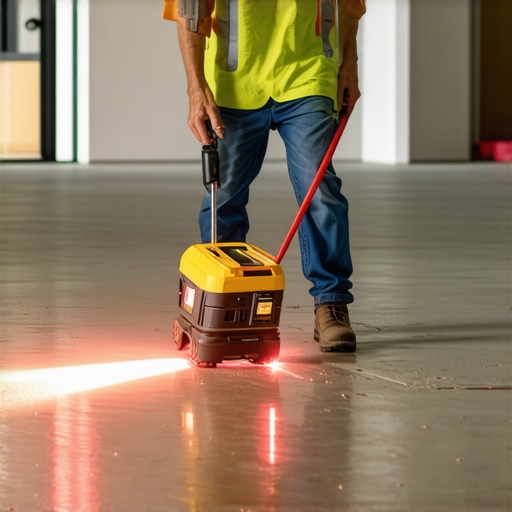 Always prime your subfloor first to seal the pores; otherwise, the wood or concrete will rob the leveler of the water it needs to hydrate properly. This is the difference between mastering floor leveling and just making a mess. Have you ever poured leveler only to have it disappear into a gap you forgot to seal? Let me know in the comments if you have ever fallen into this trap!
Stop guessing and start measuring subfloor moisture
I have seen more floors fail because of invisible water than any other reason. If you are serious about flooring installation and leveling success, you cannot rely on a ‘touch test.’ I personally use a pinless moisture meter for every single job. Why? Because it allows me to scan the subfloor without leaving holes in a client’s expensive plywood. You need to know exactly how to use a moisture meter before you lay wood floors because even a 2% difference in moisture content can cause planks to cup or crown within weeks. According to technical documentation from Schluter-Systems, thinset and self-leveling mortars require specific substrate conditions to achieve a mechanical bond that won’t shear off over time. Ignoring these specs is like building a house on quicksand.
The spiky roller is my favorite secret weapon
If you want that glass-like finish on a self-leveled floor, you need to use a spiked roller. This isn’t just a fancy tool for pros; it is the only way to effectively pop the thousands of tiny air bubbles that rise to the surface during the pour. When I first started, I thought I could just ‘trowel out’ the bubbles. I was wrong. Using the spiky roller secret for a mirror-smooth pour ensures the compound settles into a truly flat plane without those annoying pinholes that weaken the structure. 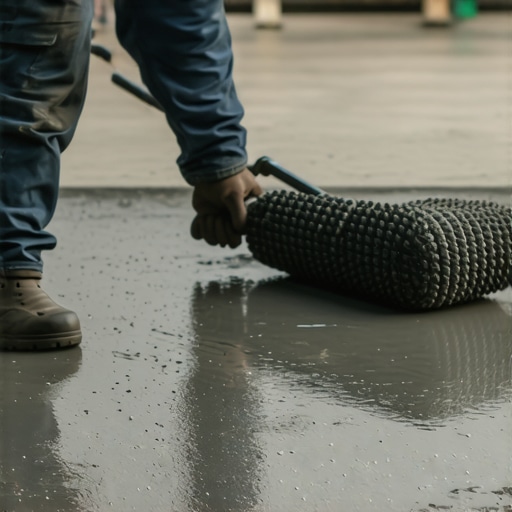 It is satisfying to watch the bubbles vanish, and it prevents the dreaded ‘spiderweb’ cracks that ruin a perfect pour overnight. If you are still trying to level a floor with just a bucket and a prayer, this tool will change your life.
How do I keep my high-end floors looking brand new for decades?
Maintenance is where most homeowners drop the ball. We spend thousands on the install and then clean it with whatever is on sale. This is a tragedy. For example, the truth about using steam mops on luxury vinyl planks is that the heat can actually delaminate the wear layer over time. Stick to pH-neutral cleaners and microfiber pads. For wood, the goal is to manage the finish. I always tell my clients that hardwood floor care secrets to longevity and shine aren’t found in a spray bottle, but in consistency—dusting daily and checking for scratches before they penetrate the sealer. If you have tile, remember that grout is your floor’s weakest link. Resealing it every year or two is the only way to prevent that deep-seated orange rust or gray grime from returning.
What the future of flooring actually looks like
I am keeping a close eye on the rise of ‘breathable’ flooring systems and smart underlayments. We are moving away from completely sealing off subfloors and moving toward systems that allow for moisture vapor transmission without damaging the surface. This is especially relevant for people dealing with the moisture barrier rule for basement vinyl floors. In the next few years, I expect to see sensors embedded in underlayments that can alert your smartphone if a leak is detected under your hardwood. It sounds like sci-fi, but when you consider the cost of a full floor replacement, it is the logical next step. For now, focus on the basics: prep the subfloor, use the right tools, and never skip the sealer. My big advice for your next project? Invest in a high-quality spiked roller before you pour your next bag of leveler—it is the difference between a DIY look and a professional masterpiece.
The Hard Truths I Learned While Scraping Rust and Pouring Leveler
After years of trial and error, I’ve realized that the most expensive mistakes usually happen when I’m trying to save five minutes. First, never assume a subfloor is dry just because it looks dusty to the naked eye. I’ve seen moisture trapped deep in concrete ruin a perfect flooring installation and leveling success story within weeks of the furniture being moved back in. Second, your mixing speed isn’t a suggestion; it is a chemistry requirement. If you ignore the mixing paddle speed that ruins your leveling compound, you are essentially baking a cake with half the flour—it just won’t hold up over time. Lastly, always keep a high-intensity work light low to the ground. It reveals ‘ghost’ rust spots and subfloor lippage that overhead lights hide completely, allowing you to catch issues before the adhesive sets.
The Gear That Saved My Sanity on the Job
If you are building your toolkit for a renovation, there are a few non-negotiables I swear by to ensure professional results. For any leveling project, skip the plastic rollers and invest in a high-quality metal-frame spiked roller; it is the spiky roller secret for a mirror-smooth pour that separates the amateurs from the veterans. I also never start a project without a reliable pinless moisture meter. Learning how to use a moisture meter before you lay wood floors or tile will save you from the heartbreak of buckled planks or failing grout bonds. For reading material, I always recommend the TCNA Handbook for Ceramic, Glass, and Stone Tile Installation. It is the industry bible that helps you avoid flooring installation mistakes to avoid by sticking to proven science rather than guesswork.
Your Path to a Flawless Floor Begins Today
Taking on a floor restoration or a full install can feel overwhelming, but remember that every pro started exactly where you are—staring at a messy rust ring or a sloping subfloor wondering where to begin. You now have the chemical knowledge to lift stains safely and the technical insight to handle mastering floor leveling like a veteran. Don’t be afraid to take it slow and double-check your measurements at every stage. A beautiful, long-lasting floor isn’t built on speed; it’s built on the care you put into the prep work and the patience to let things cure properly. Have you ever encountered a rust stain or a subfloor dip that seemed impossible to fix? I’d love to hear how you handled it—drop a comment below and let’s talk shop!