
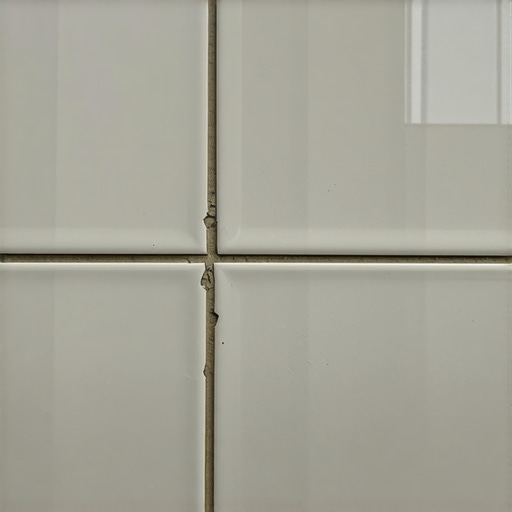
I remember standing in my kitchen at 2:00 AM, the house finally quiet, and then I heard it. A sharp, crystalline *crack* that sounded like a gunshot in a library. My heart sank right into my slippers. I had just spent two weeks and a small fortune installing those beautiful slate tiles, and now they were talking back to me in the most terrifying way possible. If you are hearing that same unsettling popping or crunching underfoot, I know exactly what you are feeling. It is a mix of frustration and the sudden fear that your subfloor is about to give way. But before you start looking for a sledgehammer, let me tell you that most of the time, this isn’t a ghost in the machine—it is physics, and usually, it is a physics problem we can solve without losing our minds.
The Heart-Stopping Sound of a Floor Settling In
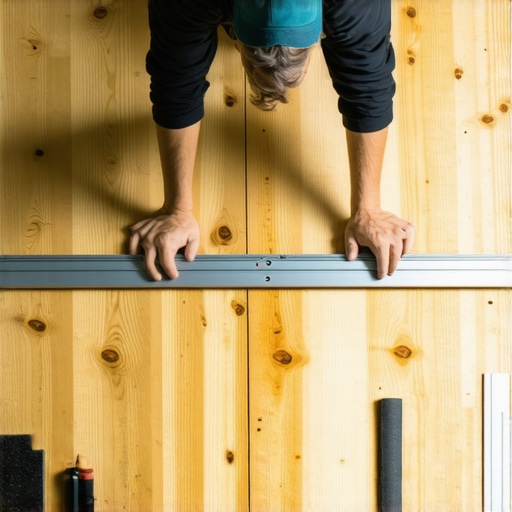
When you hear that snapping noise, your first instinct is to look for a hairline fracture. Sometimes you find one; sometimes the tile looks perfectly fine. In my early days as a DIY enthusiast, I made a massive mistake: I assumed that as long as the subfloor looked flat to the naked eye, it was ready for thinset. I skipped the part where you actually check for high spots with a 10-foot straightedge, and boy, did I pay for it later. That cracking sound is often the result of ‘bridging,’ where the tile is suspended over a tiny void. When you step on it, the tile flexes just enough to snap the bond or, worse, the ceramic itself. Today, I am going to walk you through exactly why your installation is noisy and how we can determine if it is a simple fix or a deeper structural issue.
Do I really need to rip everything out and start over?
This is the question that keeps every homeowner awake at night. The short answer is usually no, but it depends on what is causing the noise. Often, the culprit is the real reason your floor joists are making your tile crack, which usually boils down to ‘deflection’ or how much your floor bends under weight. According to the Tile Council of North America (TCNA), the standard for floor deflection under a concentrated load should not exceed L/360 for ceramic tile. If your joists are too bouncy, no amount of expensive grout will keep those tiles quiet. I have seen folks try to ignore it, only to find that their trowel size was ruining the tile bond from the start because they didn’t get enough coverage to handle the movement. We are going to look at the subfloor, the adhesive, and the layout to find the weak link. Have you noticed the cracking sound getting worse in specific areas, like near the dishwasher or the entryway? Let me know in the comments, because the location usually tells the whole story.
Listen for the Hollow Thud to Spot Failure Early
Before you take a hammer to the grout, you need to diagnose the ‘where’ and the ‘why.’ Think of your tile as a drum skin. If it’s perfectly bonded to the subfloor, it sounds solid—like tapping a brick. But if there is even a microscopic pocket of air, it will ring with a hollow, higher-pitched ‘thud.’ Take a wooden broom handle or a heavy screwdriver and gently tap across the center and the corners of your noisy tiles. I once spent three hours doing this in a bathroom where the owner swore the floor was falling in, only to realize the noise was isolated to three tiles near the door. By learning how to measure subfloor flatness before you start installing, you can prevent this ‘drum’ effect from happening in the first place.
Stop the Bounce with a Plywood Sandwich
If your floor feels like a trampoline, the noise isn’t the tile breaking; it is the subfloor screaming for help. This is where most DIYers panic, but there is a structural trick I’ve used on several century homes. If the joists are accessible from below, you can reinforce them. However, if they aren’t, you need to stiffen the floor from the top. We call it the plywood sandwich trick for fixing bouncy floor joists. By adding a second layer of 1/2-inch or 5/8-inch exterior-grade plywood—glued and screwed perpendicular to the first layer—you eliminate the flex that causes ceramic to snap. I remember a kitchen remodel where I thought a single layer of 3/4-inch subfloor was enough. Two weeks later, the grout lines looked like a spiderweb. I had to pull it all up and use the sandwich method. It was a painful lesson, but that floor hasn’t made a peep in ten years.
Watch the Angle of Your Trowel for Better Coverage
The most common cause of that ‘cracking’ sound is poor thinset coverage. If you pull up a loose tile and see neat, parallel lines of dried mortar on the floor but a clean tile back, you’ve been a victim of poor transfer. This usually happens when your trowel size is ruining your tile bond because the notches aren’t deep enough to collapse and create a solid bed. You must hold your trowel at a consistent 45-degree angle. If you lay the trowel too flat, the ridges are too short; if you hold it too vertical, they might be too tall and uneven. To ensure a death-grip bond, you should be back buttering large format tiles the right way, which means applying a thin, flat layer of mortar to the back of the tile before setting it into the combed ridges on the floor.
Seal the Gaps Before the Pour
If you decide the floor is too wavy and needs a self-leveler, you have to treat the room like a swimming pool. Leveler is as thin as milk when you pour it, and it will find every tiny crack in your plywood to leak into the basement. I once watched $200 worth of leveler disappear into a tiny hole around a radiator pipe in less than five minutes. It’s vital to learn how to stop your floor leveler from leaking through the subfloor using spray foam or silicone caulk. Once that surface is glass-smooth, your tile has a much better chance of staying quiet. Use the trowel notch secret for getting full thinset coverage to finish the job, and you’ll never have to worry about 2:00 AM ‘gunshots’ in your kitchen again.
One of the biggest lies told in the home improvement world is that your floor needs to be ‘level.’ In reality, if you are working on a house built before the moon landing, trying to achieve a perfectly level floor is often a recipe for a structural nightmare. What you actually need is flatness. There is a massive difference. You can have a floor that slopes two inches from one side of the room to the other, and as long as it is flat, your tile won’t crack. But if you have a 1/4-inch hump in a perfectly level room, your installation is doomed. According to the Tile Council of North America (TCNA) and ANSI A108.02 standards, large-format tiles require a flatness of 1/8 inch over 10 feet. If you ignore this, you will be fighting lippage on every single row.
Why did my perfect leveling job turn into a moon landscape?
The ‘Oops’ factor often comes from the chemistry of the pour. People treat self-leveler like pancake batter—they just mix and dump. But if you haven’t mastered the secret to mixing leveler for a glass-smooth finish, you are going to end up with a gritty, unworkable mess. Even worse, if you skip the primer, you will quickly see exactly why your self-leveler is bubbling over plywood. Plywood is incredibly thirsty; it literally sucks the moisture out of the leveler, forcing air up and creating tiny pinhole craters. I have seen pros lose entire days of work because they thought they could save twenty bucks on a bottle of primer. Have you ever fallen into this trap? Let me know in the comments because I have been there, and it is a mess to grind down.
Stop the air bubbles before they start
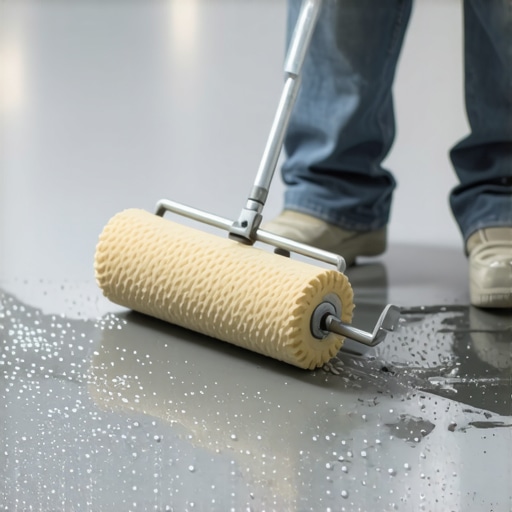
Another nuance that most beginners miss is the ‘pour and pray’ method. Just because it is called ‘self-leveling’ doesn’t mean it does all the work for you. If your mix is too thick, you’ll find why your self-leveler didn’t flow into the low spots as promised. You need to assist the material. Using a spiked roller or a gauge rake isn’t just for professionals; it is a necessity to break the surface tension and release trapped air. This is especially true when navigating floor leveling challenges and common mistakes like perimeter sealing. If you don’t dam the edges, the leveler will simply disappear into your wall cavities, leaving you with an empty bag and a very messy subfloor.
The moisture trap most installers ignore
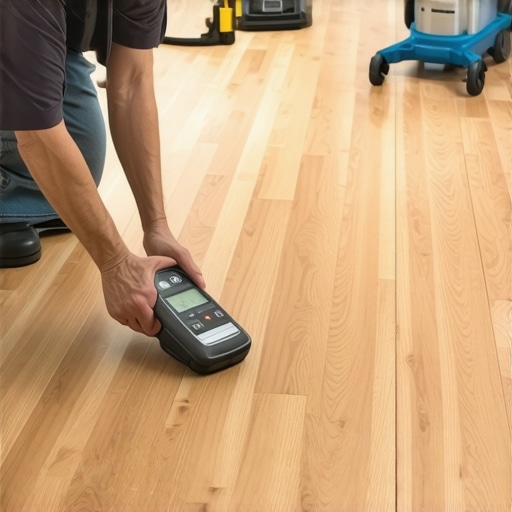
Before you even think about the leveler or the tile, you have to talk about the moisture. Many people assume that since they are tiling over wood, it’s ‘dry enough.’ However, wood subfloors expand and contract based on the ambient humidity of the room below. I always tell my clients to use a moisture meter before installing wood floors or any rigid tile assembly. If the plywood has a high moisture content when you seal it with leveler, that moisture has nowhere to go but up, which can eventually weaken the bond and lead to those clicking sounds we talked about earlier. Taking these extra steps—measuring for flatness rather than levelness and respecting the drying time of your substrate—is what separates a ‘good enough’ job from one that lasts thirty years.
Once you have conquered the leveling and the layout, you are in the home stretch, but this is where the pros pull ahead of the pack by choosing the right gear for the long haul. I have found that a standard shop vac just does not cut it when you are working with fine cement dust or wood particles. I personally use a HEPA-rated extractor with the vacuum attachment that actually picks up fine sawdust rather than blowing it back into the room. It is a small investment that saves hundreds in cleaning bills later. Also, do not even think about starting a hardwood project without a pinless moisture meter. The National Wood Flooring Association (NWFA) standard for job site conditions, specifically in Technical Manual Section I, emphasizes that hardwood should be within 2-4% of the subfloor’s moisture content before you ever fire a nail gun. I have seen beautiful installs ruined because someone did not use a moisture meter before installing wood floors and ended up with massive gaps six months later.
The Gear That Separates Amateurs From Pros
Maintenance is where most homeowners drop the ball. If you have gone with slate or marble, you have to throw away your citrus cleaners immediately. You should never use acid-based cleaners on natural stone because they literally eat the calcium out of the surface, leaving it dull and porous. I always provide my clients with a ‘cheat sheet’ based on hardwood floor care secrets to longevity and shine, which usually involves microfiber and a neutral pH cleaner. If you just finished tiling, the ‘haze’ period is critical. I always use the wet rag trick for cleaning up wet grout haze to avoid that cloudy residue that is nearly impossible to remove once it cures.
How do I keep my new floor looking brand new for decades?
Consistency is more important than chemicals. For hardwood, humidity control is your best friend. I advise using a humidifier in the winter to keep your hardwood floors from gapping in the winter. For tile, it is all about the grout. Even the best installation can look dated if the grout fails. For the love of your finish, never mop new hardwood for at least two weeks to let the finish fully cross-link and harden. Using a steam mop might seem efficient, but you should never use a steam mop on click-lock floors because the heat and moisture can force their way into the core, causing permanent swelling and delamination.
Predicting the High-Tech Future of Flooring Underlayments
Looking toward 2025 and beyond, I predict we will see the rise of ‘intelligent’ underlayments that can alert homeowners to subfloor moisture spikes via a smartphone app before the wood even begins to cup. We are already seeing hybrid self-leveling compounds that cure in half the time while offering double the flexural strength. For now, however, we rely on solid technique and the right preparation. If you want to take your work from ‘good enough’ to professional grade, my challenge to you is to try the blue tape trick for grouting without making a mess on your next backsplash or entryway floor. It sounds tedious when you are taping, but the clean-up is a breeze and the lines come out looking laser-perfect.
Hard Truths from the Trenches of Subfloor Repair
After years of scraping up dried thinset and re-doing ‘finished’ rooms, I have realized that the most expensive part of a floor is the part you never see. My biggest lightbulb moment was when I finally stopped fighting the subfloor and started respecting it. I used to think I could just ‘float’ out a dip with extra mortar, but that only leads to trouble. Now, I never start a job without checking for voids because I know exactly how to fix a lippage problem in your new tile layout before it becomes a permanent eyesore. Another hard lesson was the chemistry of the mix. I once rushed a batch and learned the hard way how to stop thinset from skimming over before you set tile. If you lose that sticky bond, the tile is basically just sitting on sand. Finally, remember that patience is a tool. Rushing the grout or walking on a floor too early is the quickest way to ruin thousands of dollars in materials.
The Gear That Saved My Sanity on Every Job
If you are serious about DIY, stop borrowing tools and invest in a few specifics. First, a high-quality spiked roller is non-negotiable for anyone using precise floor leveling techniques to achieve flawless surfaces. It removes the bubbles that otherwise turn your floor into a honeycomb. Second, get a dedicated grout paddle. Hand-mixing is fine for a backsplash, but for a whole room, you need the correct way to mix grout so it doesn’t change color, which requires a slow, consistent mechanical spin. Lastly, never underestimate the power of a simple 10-foot straightedge; it is the ultimate truth-teller in a world of wavy plywood.
Build a Foundation That Lasts for Decades
Flooring installation can feel like a mountain of work, but when you stand on that first row of perfectly set tile or polished hardwood, the effort vanishes. You aren’t just putting down a surface; you are creating the stage where your life happens. By avoiding the most common flooring installation mistakes to avoid for lasting results, you are ensuring that your home remains a sanctuary of quiet and beauty. Don’t be afraid to take that first measurement and start your project today. Have you ever encountered a subfloor that was so unlevel you didn’t know where to start? Let me know your stories in the comments below!