

It was a brutal Tuesday morning in February when I realized my beautiful oak floor was literally trying to leave me. I was walking to the kitchen for coffee when I saw it: a gap between two planks so wide I could have dropped a guitar pick straight through to the basement. I’d spent thousands on these floors, yet they looked like they were falling apart before my eyes. I felt like a total failure. For years, I’d told friends I was a DIY pro, but there I was, staring at a floor that looked more like a zebra than a solid surface because of those stark, dark lines. I even had a neighbor over for a beer that afternoon, and he asked if the house was settling. I was so embarrassed I blamed it on the previous owners. [IMAGE_PLACEHOLDER]
Your Floor is Breathing and That is a Problem
I made a classic rookie mistake during my first big remodel: I assumed that once the boards were nailed down, they’d stay put forever. I completely ignored the physics of moisture and the fact that wood is basically a giant sponge. When you are choosing the right hardwood floors for your home, you aren’t just buying a product; you are adopting a living, breathing material that reacts to your furnace just as much as your skin does. According to the National Wood Flooring Association, wood is hygroscopic, meaning it is constantly reaching for an equilibrium with the moisture in the air. When the winter air gets bone-dry, the wood gives up its internal water and shrinks. I eventually discovered hardwood floor care secrets to longevity and shine that solved this, but it took a few cold winters of shivering and staring at floor gaps to figure it out. My biggest mistake was skipping the acclimation period. I brought the wood from a cold warehouse and installed it the same day. That wood was doomed from the start. We’re going to stop that seasonal shrink-and-swell cycle today without needing to rip everything out or start over.
Is a Whole-House Humidifier Really Worth the Expense?
I know what you’re thinking because I thought it too: “I’m not spending another grand on a humidifier just for some wood planks.” But trust me, it’s the only real way to win this war. Even the real reason your bamboo floors are shrinking in the winter is the exact same lack of humidity that affects traditional oak or maple. If you notice why your new floor is squeaking near the heat vents, it’s usually the first sign of a larger shrinkage problem caused by localized dry air. Have you ever looked down in January and wondered where half your floor went? I’d love to hear your horror stories in the comments—misery loves company, and it helps us all learn from each other’s “oops” moments. In this guide, I’ll show you how to manage your home’s climate and use the right tools so those gaps stay closed for good and your subfloor remains hidden where it belongs.
Get Your Subfloor Flat Before the First Plank Hits the Ground
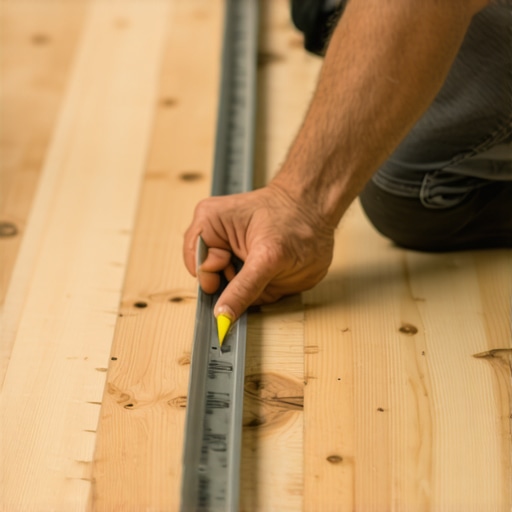
The most heartbreaking thing I’ve ever seen was a neighbor who spent eight thousand dollars on exotic walnut only to have it start “trampolining” within a month. He thought the wood would just conform to the subfloor. Wrong. Before you even think about the finish, you have to master flooring installation fundamentals leveling for a seamless look. If your subfloor has a valley, your hardwood will bridge it, creating a hollow space that eventually leads to cracked tongues and massive gaps. I learned this the hard way when I ignored a slight slope in my own hallway; I ended up having to research how to level a floor that has a 2 inch drop across the room just to save the adjacent rooms from the same fate. During my first big project, I thought a few sheets of roofing felt would level out a dip in the dining room. I was wrong. The felt compressed, the floor moved, and by Christmas, the gaps were wide enough to see the gray subfloor beneath. Use a 10-foot straightedge and mark every low spot with a crayon. It feels tedious, but it is the difference between a floor that lasts decades and one that fails in a year.
Stop the Squeaks with a Single Screw
There is nothing that ruins the high-end feel of hardwood faster than a persistent, rhythmic squeak every time you walk to the kitchen. Usually, that squeak isn’t the hardwood itself—it’s the subfloor rubbing against the joists. Before the new planks go down, walk the entire room. If you hear a chirp, find the joist and drive a 2.5-inch deck screw through the subfloor into the wood below. I’ve found that knowing how to stop your subfloor from squeaking with one screw is the single most satisfying DIY win you can have. Once that subfloor is rock solid and silent, you’ve built a foundation that won’t shift and pull your floor planks apart during the dry season. This simple step prevents the micro-movements that eventually widen those ugly gaps.
Don’t Force the Fit or You’ll Regret it Later
When you start laying the rows, it’s tempting to bash the boards together to make them look perfect right now. I once destroyed an entire box of pre-finished oak because I didn’t realize the rubber mallet mistake that damaged your click lock edges was causing micro-fractures in the locking mechanism. These fractures aren’t visible at first, but as the wood expands and contracts, the damaged edges fail, and gaps open up that no amount of wood filler can fix. Instead of brute force, rely on the dry-fit rule that prevents costly cutting mistakes. Lay out at least three rows ahead of yourself to check the grain pattern and ensure the joints are staggered by at least six inches. This “rack and stack” method allows you to spot potential issues before you ever reach for the nailer or glue. One final pro tip: always check your work for flooring installation mistakes to avoid for lasting results, like nailing too close to the end of a board, which can split the wood and create a permanent gap you will be staring at for the next ten years.
The standard advice you’ll hear in every big-box store is that more fasteners mean a more secure floor. I’m going to go against the grain here: over-nailing is actually a silent killer for your hardwoods. If you don’t leave room for the natural movement we discussed earlier, you’re essentially creating a ticking time bomb of tension. Expert installers at the National Wood Flooring Association (NWFA) point out that wood must be able to expand across its width; if it’s pinned down too aggressively, it will cup or crown regardless of your humidity levels. This is where mastering floor leveling pro secrets for perfect installations becomes even more vital—if the floor isn’t flat, your nails won’t seat properly, leading to those micro-movements that eventually widen into gaps. Have you ever fallen into this trap where you thought more was better? Let me know in the comments because I spent a whole weekend pulling up staples once I realized my mistake.
Why Does Your Leveler Crack Despite Following the Bag Instructions?
One of the most common ‘oops’ moments happens long before the wood even touches the floor. I’m talking about the self-leveling compound. People often skip the primer because it looks like an unnecessary extra step. But without it, the thirsty subfloor sucks the moisture out of the leveler too fast, leading to a weak bond. This is exactly why your self-leveler developed spiderweb cracks overnight. If you’ve ever seen why your floor primer is peeling off like a sunburn, you know that preparation is 90% of the battle. Even when you’re moving into other rooms and considering why your large format tiles need back-buttering every time, the principle remains the same: mechanical bonds require proper hydration and surface prep. 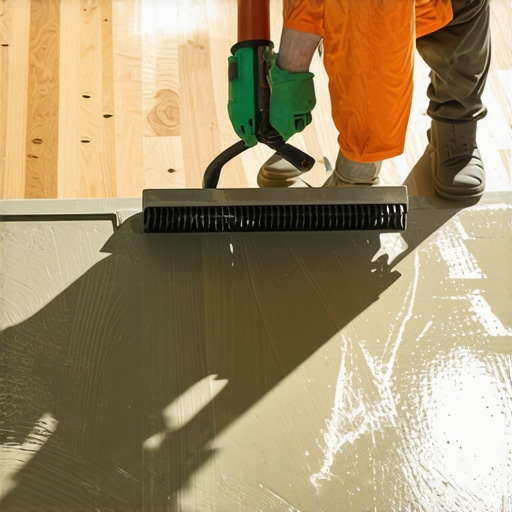 I’ve seen pros try to save time by adding extra water to make the mix ‘flow better,’ but that’s a recipe for a soft, chalky surface that will fail under the weight of your furniture.
If you’re mixing materials, like a hardwood hallway meeting a tiled kitchen, don’t assume they’ll just naturally align. The deflection in your joists matters more for tile than it does for wood. While wood can flex slightly, the real reason your floor joists are making your tile crack is often a lack of structural rigidity that wood floors hide. You have to account for that height difference early, or you’ll find yourself wondering why you need a transition strip between different flooring heights that looks like a literal speed bump in the middle of your house. It’s these tiny, advanced nuances—the things the manuals don’t emphasize—that separate a ‘good enough’ DIY job from a professional-grade transformation.
If I could go back in time to my very first installation, I wouldn’t buy more wood—I’d buy a moisture meter. For years, I just guessed when it came to humidity, but a $50 pinless meter is the difference between a floor that stays flat and one that cups like a Pringles chip. When you’re installing luxury vinyl over a concrete slab with high moisture, that meter is your only defense against a total failure. I also learned that the vacuum attachment that actually picks up fine sawdust is worth its weight in gold; standard shop-vacs just blow the fine particles back into the air, which then settle into your finish. It’s about the small specialized gear, not just the big power saws. 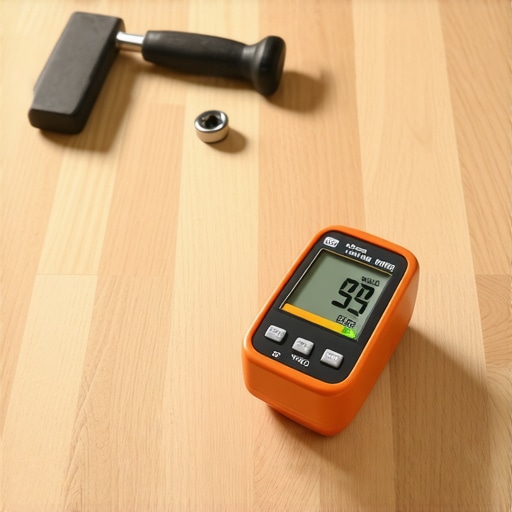
How do I keep my floors looking brand new for decades?
The biggest trap I fell into was the ‘deep clean’ obsession. I used to think a steam mop was the ultimate way to sanitize my home, but the truth about using steam mops on luxury vinyl planks—and especially hardwood—is that you are literally forcing moisture into the joints. It’s the fastest way to ruin a floor. For real longevity, you need to stick to the hardwood floor care secrets to longevity and shine, which usually means a microfiber mop and a pH-neutral cleaner. And please, for the love of your finish, remember why you should never mop new hardwood for at least two weeks. The finish needs time to fully cross-link and cure. Even if you are dealing with stone in the bathroom, avoid the vinegar mistake that eats through your natural stone tiles. Acid is the enemy of calcium-based stones like marble and limestone.
Future-Proof Your Investment with Modern Refinishing
I predict that in the next five years, we’re going to see a massive shift toward smart home integration where floor sensors automatically trigger humidifiers. Until then, you are the sensor. If you start seeing wear, don’t wait until the wood is bare. I’ve started mastering hardwood floor refinishing expert tips for 2025, and the biggest takeaway is that a ‘screen and coat’ today saves you from a full sand-down tomorrow. As noted by the experts in the National Wood Flooring Association (NWFA) Technical Manual, maintaining a consistent interior environment between 60 to 80 degrees Fahrenheit and 30% to 50% relative humidity is non-negotiable for wood stability. I want you to go grab a digital hygrometer from the hardware store this weekend. It’s a five-minute setup that will save you five thousand dollars in future repairs. If you can control the air, you can control the floor.
Hardwood Secrets That Saved My Sanity
Looking back at my first few projects, the biggest ‘aha’ moment wasn’t about a specific tool, but about time. I realized that patience is the most valuable tool in any flooring project. If you’re feeling rushed, walk away for an hour. One tiny oversight—like a single grain of sand trapped under a plank—can telegraph through and ruin the finish of your hardwood floors. I’ve learned that a floor speaks to you through its sound; if you hear a strange noise, stop immediately. Usually, how to stop a floating floor from clicking when you walk involves checking for those microscopic debris bits or uneven spots in the subfloor you thought you could ignore. Always buy 10% more material than you think you need; you will thank me when you encounter a box with wood ‘character’ that doesn’t fit your aesthetic. Finally, trust your straightedge more than your eyes. I always how to check for high spots with a 10-foot straightedge before a single board touches the ground to ensure a lifetime of stability.
[IMAGE_PLACEHOLDER]
The Gear I Actually Use Every Day
I don’t keep a massive shop, but there are a few items I never start a job without. First is a pinless moisture meter—it tells me the truth when the wood looks dry but isn’t. Second is a 10-foot aluminum straightedge. If you want a floor that doesn’t feel like a roller coaster, this is non-negotiable. I also swear by the NWFA Technical Manual; it is the industry standard and has saved me from making the sanding mistake that leaves swirl marks on your wood more times than I can count. For those of you tackling complex transitions into the kitchen, the blue tape trick for grouting without making a mess is a complete life-saver for keeping your new wood planks pristine while the tile work finishes up.
Take the First Step Toward a Perfect Home
Don’t let the fear of a few gaps or a squeaky board stop you from transforming your space. Every professional you see today started exactly where you are—staring at a pile of boxes and wondering if they were in over their heads. By following these revamp your home with expert flooring installation tips, you aren’t just putting down boards; you’re building a foundation for your family’s memories. Your flooring installation project is a long-term investment that pays off every time you walk across a smooth, solid surface. Have you ever battled a persistent floor gap that just wouldn’t close no matter how hard you tried? Let me know your struggle in the comments below!