
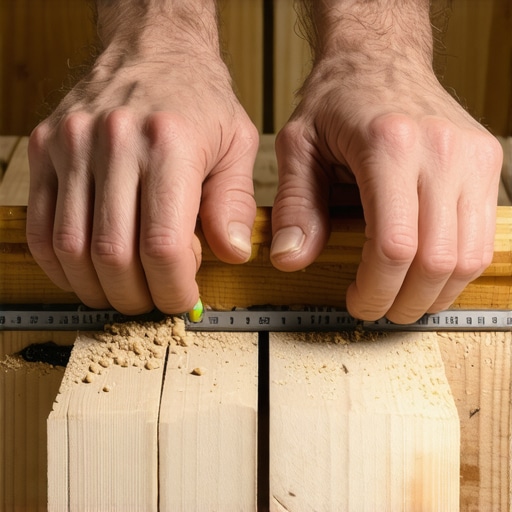
I remember staring down at a beautiful piece of wide-plank white oak, a $45 board I had just notched for a doorway. My heart sank into my work boots. I had measured three times, marked it with a sharp pencil, and made the cut with total confidence. But as I went to tap it into place, it was a half-inch short. I hadn’t accounted for the expansion gap at the far wall. That mistake didn’t just cost me forty-five bucks; it cost me a two-hour round trip to the supplier and a whole lot of pride. We have all been there, standing over a pile of ruined material, wondering why our math failed us. That was the day I swore off the ‘measure and pray’ method and became a disciple of the dry-fit. [image-placeholder]
The Day I Learned That Tape Measures Can Actually Lie
You see, flooring isn’t just about numbers; it’s about how pieces actually interact with the quirks of your subfloor and the wonky, out-of-square walls in your home. Whether you are dealing with flooring installation mistakes to avoid for lasting results or just trying to finish a bathroom, the dry-fit rule is your best friend. It simply means laying out your pieces—completely dry, no glue, no nails, no thinset—to see exactly how they sit before you commit to the cut. It’s the only way to catch the ‘ghost gaps’ that your tape measure misses. I used to think I was too fast for this step, but after I had to learn how to fix a deep gouge in a pre-finished wood plank because of a slipped tool during a rushed cut, I realized that slowing down actually gets me finished sooner.
Wait, Isn’t This Just Extra Work?
I know what you’re thinking: ‘I have a job to finish, and laying everything out twice sounds like a nightmare.’ It’s a valid fear. However, when you consider that flooring waste can account for 10% to 20% of your total budget when mistakes happen, the math changes. According to data from the National Association of the Remodeling Industry (NARI), material waste is one of the primary reasons DIY projects go over budget. When you dry-fit, you see the layout as it truly is. You’ll notice that your secret to cutting laminate without a splintered mess won’t matter if the plank is the wrong size to begin with. Have you ever made a ‘perfect’ cut only to realize the wall was actually curved?
Why Your Eyes Are Better Than Your Pencil
Your pencil is a liar because it can’t feel the tension of a board or the way a tile spacers sits against an uneven wall. When I was learning how to cut a doorway notch in a hardwood plank without a jigsaw, I realized that actually sliding the wood into the space—the physical act of dry-fitting—revealed angles my eyes had missed. Today, we are going to walk through how to implement this rule into your workflow so you can stop throwing money in the scrap bin and start feeling like a pro. How many boards have you had to toss because of a ‘simple’ measuring error?
Map Your Path Before You Glue
Before you even think about opening a bag of mortar or tapping your first nail, you need to map the terrain. Think of your subfloor like the foundation of a skyscraper; if it is off by a fraction at the bottom, the top floor is going to lean. I remember a kitchen remodel where I ignored a slight hump in the plywood. When I finally reached that spot with my hardwood, the boards started ‘telegraphing’ the bump, making it look like a mini mountain range in the middle of the floor. This is why mastering precise floor leveling techniques to achieve flawless surfaces is the literal groundwork for everything else.
The Chalk Line Never Lies
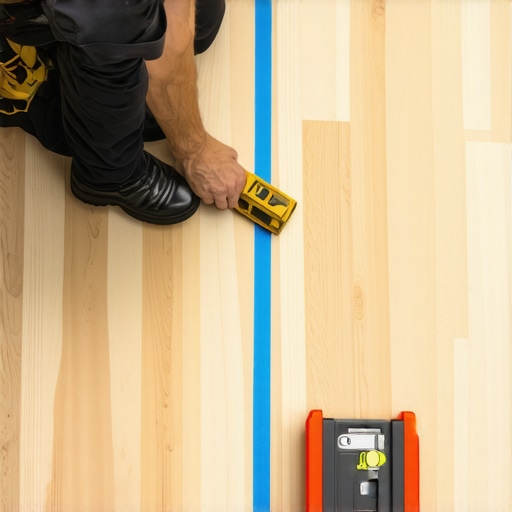
Your first move should be snapping a chalk line. Most people try to align their first row with the wall, but walls are notoriously curvy. Instead, measure out from your wall at two points and snap a line that represents a true straight edge. Then, lay out your first three rows of material along that line without any adhesive. This is your ‘control group.’ During one project in a 1920s bungalow, my dry-fit revealed that if I followed the wall, my last row would be a tiny, ugly sliver only a quarter-inch wide. By shifting my starting line just two inches, I ended up with full-looking planks on both sides of the room. This phase is also the best time to perform the hammer test for finding loose subfloor nails; if you hear a hollow thud or a squeak now, you can fix it before it is buried forever.
The Small Room Trap
Bathrooms and hallways are the ultimate tests of patience. In a tight space, the dry-fit isn’t just about straight lines; it is about managing the ‘flow’ of the pattern. I once jumped straight into a master bath with expensive marble tiles. I started at the back wall and worked my way toward the door. When I got to the vanity, I realized I had to cut a series of ‘L’ shapes that were incredibly fragile. Had I known why you should always start your tile layout from the center, I would have seen those difficult cuts coming and adjusted the whole grid to avoid them. Now, I lay the tiles out completely, spacers and all, to see exactly where the cuts will fall. It is much easier to move a tile six inches to the left on a dry floor than it is to scrape up wet thinset. If you are working with larger materials, remember the secret to getting a flat floor for large format tiles often involves checking your dry layout with a long straightedge to ensure there is no ‘lippage’ where one tile sits higher than another.
Don’t Skip the Subfloor Prep
You might be tempted to just ‘fill the holes with extra glue’ as you go. That is a recipe for disaster. If your subfloor isn’t flat to within an eighth of an inch over a ten-foot span, your planks will eventually click, groan, or even separate. Take the time to learn how to achieve flawless floor leveling before tile laying. I once watched a friend skip this, thinking the thick-set mortar would compensate. Within three months, his beautiful porcelain tiles began to crack in a perfect line right where the subfloor dipped. A dry-fit would have shown him exactly where the floor was ‘diving’ and saved him a week of tear-out work. Trust the process, lay the boards, and look for the gaps before the clock starts ticking on your adhesive.
One of the biggest lies told in DIY aisles is that you can ‘float’ a floor level by just adding a little extra mortar or glue under the low spots. I’ve seen pros and novices alike try to compensate for a dip by building up a mountain of thinset. But here’s the reality: thick-setting material that isn’t designed for it will shrink as it cures, pulling the tile down and creating the very lippage you were trying to avoid. Instead of shortcutting, you need to commit to mastering floor leveling pro secrets for perfect installations. Using the right product, like a dedicated self-leveler, is non-negotiable. If you try to save twenty bucks on a bag of leveler, you’ll spend hundreds on the hidden cost of using cheap thinset on large format tiles when those tiles start to ‘tent’ or crack under foot traffic.
Why Your Moisture Meter is the Most Important Tool You Own
The most dangerous mistake you can make is assuming a subfloor is ready just because it looks dry. I once laid a beautiful engineered oak floor over a concrete slab that had sat for three months. To the naked eye, it was perfect. Two weeks later, the planks started to cup. The slab was still ‘breathing’ moisture from deep within the pour. According to the National Wood Flooring Association (NWFA), moisture-related failures account for over $1 billion in flooring damages annually. This is why you must learn how to use a moisture meter before you lay wood floors. If you don’t have a meter, at least use the painters plastic trick for testing concrete moisture to see if condensation forms overnight. Ignoring this nuance is the fastest way to turn an expensive upgrade into a dumpster fire.
Can You Ever Truly Install New Flooring Over a Concrete Slab Too Soon?
Advanced installers know that concrete is a living, breathing sponge. Even if the surface is flat, the internal relative humidity (RH) might be 90% while the surface is 75%. If you seal that moisture in with a non-breathable flooring like LVP without a proper barrier, you’re creating a petri dish for mold. You have to know how to install luxury vinyl over a concrete slab with high moisture by using the correct vapor retarders. A ‘flat’ floor that isn’t a ‘dry’ floor is a ticking time bomb.
The Invisible Trap of Skipping the Primer
Another nuance people miss is the chemical bond. You can’t just pour self-leveler onto old concrete or wood and expect it to stay. I’ve walked onto jobs where the leveler was literally crunching under the floor because it didn’t bond. This usually happens because the installer didn’t understand why your floor primer is peeling off like a sunburn or, worse, skipped it entirely. Whether it’s why your self-leveler didn’t bond to the wood subfloor or a dusty concrete slab, the primer is the ‘glue’ that ensures your flooring installation fundamentals hold up over time. Have you ever fallen into this trap of trying to ‘glue away’ a subfloor problem or skipping a ‘minor’ prep step? Let me know in the comments.
The Multi-Tool That Saved My Sanity
I spent years trying to undercut door jambs with a manual pull saw, sweating through my shirt and leaving ragged edges that I’d eventually have to hide with a messy bead of caulk. Then I bought a high-end oscillating multi-tool. It was a game-changer. If you are still struggling with manual cuts, you are essentially choosing to suffer. Whether you are learning how to cut a doorway notch in a hardwood plank without a jigsaw or just trimming a transition, this tool gives you the surgical precision that a hammer and chisel never could. But the tool is only as good as the cleanup. I’ve found that using the vacuum attachment that actually picks up fine sawdust is the only way to keep the workspace breathable and ensure no grit gets trapped under your new planks.
Stop Cleaning Your Tiles with Kitchen Scraps
You’ve just spent thousands on a beautiful new floor, and the first thing most people do is reach for the white vinegar. Stop right there. I’ve seen homeowners destroy the finish on a $10,000 installation because they thought ‘natural’ meant ‘safe.’ You need to understand the vinegar mistake that eats through your natural stone tiles before you ruin your grout. For wood, the stakes are just as high. Standard household cleaners often leave a waxy buildup that makes your floor look like it’s covered in a layer of gray fog. Instead, lean on hardwood floor care secrets to longevity and shine that focus on pH-neutral cleaners. If you do happen to drop a heavy pot, don’t panic; learning how to fix a chipped tile without replacing the whole piece can save you from a full-day repair job.
How do I maintain my floor for the next twenty years?
Maintenance isn’t just about mopping; it’s about structural awareness. According to the Tile Council of North America (TCNA) Handbook, expansion joints are not optional; they must be installed every 20 to 25 feet in interior installations to prevent ‘tenting’ where tiles pop up like a mountain ridge. As we move into the future, I predict we will see more ‘smart’ underlayments that can alert homeowners to subfloor moisture via a smartphone app before the first sign of cupping appears. Until then, your best defense is a proactive offense. Every six months, walk your floor and look for movement. If you catch a loose board early, you can implement how to stop your subfloor from squeaking with one screw before the noise drives you crazy. My advanced tip for you today? Go buy a high-quality suction-cup tile lifter. Even if you aren’t a pro, having the ability to pull a single ‘bad’ tile without damaging the surrounding ones is the ultimate insurance policy for your DIY legacy.
Hard-Won Truths from My Flooring Failures
I used to think flooring was about the finished surface, but I was dead wrong. It’s about what you can’t see. My biggest takeaway is that moisture is a silent predator; you might think a slab is dry, but without checking, you’re gambling with your budget. I also realized that ‘good enough’ is the enemy of a professional finish. If a subfloor feels slightly off, it will definitely feel off once you’re walking on it daily. That’s why the ultimate guide to floor leveling for a perfect finish is so essential to keep in your bookmark bar.
The Gear That Actually Saved My Back
You don’t need a truckload of tools, but you need the right ones. I swear by my oscillating multi-tool for undercutting those stubborn door jambs. I also never start a job without a high-quality suction-cup tile lifter; it’s saved me from tearing out whole sections just to fix one bad tile. For those tackling more advanced projects, checking out mastering hardwood floor refinishing expert tips for 2025 will give you the edge you need. And honestly? A simple chalk line is worth more than a expensive laser if you know how to use it correctly. If you’re looking for efficiency, these tile installation pointers that save time and money are absolute gold.
Go Ahead and Lay That First Row
The hardest part of any flooring installation is the transition from planning to doing. You’ve read the guides, you’ve dry-fit your planks, and you’ve checked your moisture levels. Now, it’s time to trust your preparation. Every professional started exactly where you are—staring at a blank subfloor and a pile of boxes. Follow a step-by-step guide to flooring installation and leveling success and take it one row at a time. You’ve got the skills, you’ve got the knowledge, and now you’ve got the confidence to create a floor that lasts a lifetime. Have you ever been halfway through a project and realized your layout was off by a fraction? Let me know your biggest flooring ‘uh-oh’ moment in the comments below!