
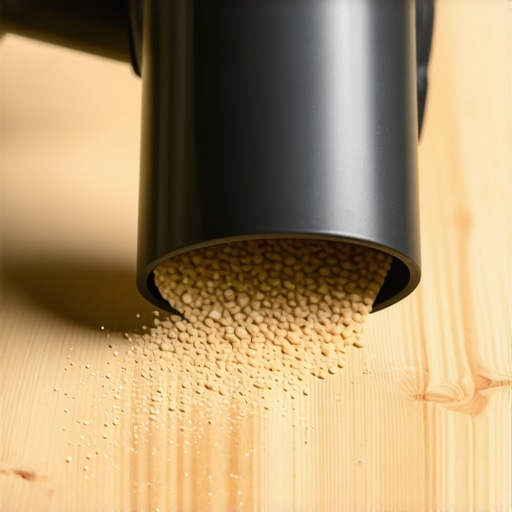
I stood there in the middle of my newly finished living room, admiring the rich grain of the oak I’d spent three days installing. Then, I saw it. As the afternoon sun poured through the window, a shimmering cloud of fine white flour-like dust was suspended in the air, slowly settling back onto the surface I had just vacuumed for the fourth time. It felt like I was fighting a ghost. My wife walked across the room in a pair of fresh black socks, and within three steps, the soles were stark white. I had made a classic rookie move: I assumed my high-powered shop vac was enough. I learned the hard way that brute force suction doesn’t mean a thing if your attachment is just stirring the pot. Back when I was first learning the ropes of flooring installation and leveling, I realized that dust wasn’t just a nuisance; it was an active enemy of a perfect finish.
The Day I Almost Gave Up on Clean Floors
If you’ve ever tackled a hardwood floor refinishing project, you know that fine sawdust is different. It’s microscopic, clingy, and somehow defies the laws of physics. My mistake early on was relying on the standard wide floor nozzle with those stiff bristles. I thought those brushes were helping me scrub the dust loose, but in reality, all I was doing was flicking the finest particles back into the air, only for them to land once I turned the machine off. It was frustrating and, frankly, embarrassing when I had to explain to my client why the ‘dust-free’ promise wasn’t quite living up to the name. Today, I’m going to show you exactly which attachment creates the seal you need to actually pull that dust out of the grain and the cracks for good. We are going to solve the haze problem once and for all so your finish actually looks like the professional job you worked your tail off to do.
Does a Specialized Attachment Actually Make a Difference?
You’re probably thinking, ‘It’s just a vacuum, how much better can a different plastic head be?’ I was a skeptic too. I thought more suction power or a bigger motor was the only answer. But according to the American Lung Association, fine particulate matter from wood dust can settle deep into the lungs, and standard shop vac filters often just exhaust the smallest particles right back into your breathing zone if the airflow isn’t managed at the source. It wasn’t until I switched to a felt-bottomed, high-velocity floor tool that I saw the difference. Have you ever spent hours cleaning only to find a layer of grit the next morning? Drop a comment below if you’ve been there, because I felt like I was losing my mind. This isn’t just about hardwood floor care secrets; it’s about the physics of airflow at the floor level. If you want a dust-free move when you’re finishing your space, you need the right interface between the vacuum and the wood. We’ll look at why those standard bristles fail and why a rubber-bladed or felt-strip attachment is the secret weapon you’ve been missing in your toolkit.I once spent six hours prepping a client’s dining room. It was a beautiful red oak, and I was convinced I had it perfect. I was rushing, using a standard shop-vac head with plastic bristles. Every time I moved the wand, I could see the dust dancing in the sunlight, but I figured the vacuum was getting most of it. I was wrong. When I laid the first coat of oil-based polyurethane, those microscopic particles stood up like tiny spikes. It felt like walking on a cat’s tongue. I had to wait for it to dry, screen it back, and start over. That’s when I learned that your vacuuming technique needs to be as precise as your precise floor leveling techniques if you want a surface that truly shines.
Stop Brushing the Dust and Start Sealing the Surface
Most people think the brushes on a vacuum floor tool are there to help. In reality, they act like a thousand little catapults, flicking dust out of the suction zone before the air can grab it. Think of it like trying to clear a driveway with a rake when you really need a snowblower. To get a dust-free move, you need a specialized floor tool with felt or rubber strips. These strips create a localized low-pressure zone. Instead of just blowing air around, the tool hugs the wood, forcing the vacuum’s entire airflow to pull from the tiny gap right at the floor surface.
Slow Down to Speed Up Your Cleanup
The biggest mistake is the ‘mop motion.’ We’re all used to swinging a vacuum back and forth quickly, but wood dust is heavy and often wedged deep into the grain. If you move too fast, the air doesn’t have time to overcome the inertia of the dust particles. You have to move at a snail’s pace—about one inch per second. It feels tedious, but it’s the difference between a floor that looks clean and one that actually is. This same patience is required in flooring installation fundamentals; if you rush the prep, the finish will always betray you.
Tackle the Cracks Before the Finish Hits the Wood
Dust loves to hide in the expansion gaps and the bevels between planks. If you don’t extract it, the moment your brush or roller hits the floor, it will pull that dust out of the cracks and swirl it into your wet finish. I use a crevice tool for every single perimeter inch and every visible gap. It sounds like overkill, but hardwood floor care secrets always start with what you can’t see. By the time you’re done, you should be able to wipe a white microfiber cloth across the floor and see nothing but the natural color of the wood. If there is even a hint of gray on that cloth, you are not ready for the finish coat yet.
I see it all the time with DIYers and even some pros who should know better: the obsession with ‘smoothness.’ Everyone assumes that if you sand a floor up to a 220-grit finish, it’s going to look like glass. But in my experience, chasing that ultra-fine grit is actually a recipe for disaster. When you go too high on the grit scale, you aren’t just smoothing the wood; you’re burnishing it. You’re essentially closing the wood’s pores through friction and heat, which means your stain or sealer can’t actually bite into the fibers. According to the National Wood Flooring Association (NWFA), skipping more than one grit in your sequence or over-sanding leads to poor finish adhesion and uneven color. You end up with a blotchy, shallow look that no amount of extra coats can fix.
Why does your stain look splotchy despite a perfect vacuuming job?
The answer usually lies in the friction. If you’ve been ‘polishing’ the wood instead of cutting it, the harder latewood and softer earlywood will react differently to the heat generated by the sander. Have you ever fallen into this trap? Let me know in the comments, because it’s a soul-crushing moment when you realize you’ve worked too hard for a worse result. This is one of those mastering hardwood floor refinishing expert tips for 2025 that separates the amateurs from the true craftsmen.
Let’s talk about another nuance that gets overlooked: the chemistry of the bond. I once took a job where the homeowner had already prepped their basement for tile by mopping the old painted concrete. They thought it was clean enough. But if you’re trying to achieve precise floor leveling techniques, you have to realize that paint isn’t a structural surface. It’s a film. If you pour leveler over it, the leveler bonds to the paint, but the paint isn’t bonded to the concrete well enough to hold the weight of a new floor. This is why most floor levelers fail on top of painted concrete—they literally peel off like a giant, brittle sticker because the bond was only as strong as the thirty-year-old paint underneath.
Stop trusting old paint to hold your floor together
The ‘Oops’ factor here is huge. You think you’re saving time, but you’re actually building on a foundation of sand. Whether you are learning flooring installation mistakes to avoid for lasting results or trying to figure out how to choose a floor leveler that wont crack over radiant heat, you must mechanically profile the floor. Grind that paint off. If you don’t see raw, porous concrete, you aren’t ready to pour. These nuances are what keep the floor beautiful for decades rather than just a few months.
When I finally transitioned from being a weekend warrior to a professional, the biggest shift wasn’t my skill with a hammer; it was my reliance on precision instruments. To get those mastering floor leveling pro secrets right, I stopped guessing about moisture. I started using a Tramex MEP moisture meter for every single job. Why? Because guessing if a slab is dry is a gamble with your reputation. If you don’t use a meter, you’re just hoping the adhesive holds. I also never pour a bag without a spiked roller in hand. Most people skip this step, thinking the liquid will just settle perfectly. However, the roller selection that prevents air bubbles in leveler is what actually eliminates the tiny outgassing pinholes that cause thin-set to fail months down the line.
What’s the best way to keep these surfaces looking new for a decade?
Maintenance isn’t just about a mop; it’s about atmospheric control. For any choosing the right hardwood floors for your home project, the real work starts after the finish dries. I tell my clients that the most important tool in their kit is actually a humidifier. According to the International Concrete Repair Institute (ICRI), maintaining a consistent Concrete Surface Profile (CSP) is vital for the initial bond, but for the wood itself, maintaining 30% to 50% relative humidity is the only way to prevent structural failure. If you ignore this, you’ll eventually be searching for how to stop hardwood floors from gapping in the hallway because the wood is physically shrinking beyond its limits.
Looking ahead, the industry is moving toward carbon-fiber-reinforced self-levelers and smart sensors embedded in the subfloor to monitor moisture in real-time. This tech is already filtering down to high-end residential work. If you want to stay ahead of the curve, stop treating flooring installation and leveling as a purely manual labor task and start viewing it as a chemistry and physics problem. My best advice? Go out today and buy a high-quality digital moisture meter. It is the single most important investment you can make to ensure your flooring installation mistakes to avoid for lasting results list remains empty. Don’t wait for a floor to buckle to realize you should have checked the slab’s pour-readiness first.
The Hardest Lesson I Learned While Chasing a Perfect Finish
If there is one thing I could go back and tell my younger self, it is that the floor tells its own story whether you like it or not. I spent years thinking I could hide a shortcut under a thick layer of polyurethane, but fixing a wood floor that was sanded against the grain taught me that the prep work is 90% of the battle. You cannot rush the dry time, and you certainly cannot ignore the environment. One winter, I ignored a slight humidity spike and ended up researching why your hardwood floor is crowning and how to dry it out before the client even moved their furniture back in. It was a humble reminder that we are working with a living, breathing material that demands respect for its natural properties.
My Personal Arsenal for Flawless Floors
I do not leave my workshop without a few specific tools that have saved my reputation more times than I can count. First, never underestimate a high-quality moisture meter; I have learned that knowing how to use a moisture meter before you lay wood floors is the only way to sleep soundly at night. Second, if you are pouring any liquid subfloor, the roller selection that prevents air bubbles in leveler is non-negotiable—those spiked rollers are the difference between a smooth surface and one riddled with pinholes. Lastly, keep a box of high-tack microfiber cloths and a dedicated vacuum with felt strips; if the surface is not surgical-grade clean, your final finish will never reach its potential.
It is Time to Stop Planning and Start Prepping
Flooring installation can feel like a mountain of overwhelming details, but once you master the physics of the bond and the chemistry of the wood, it becomes a form of art. You now have the tools, the knowledge, and hopefully a little more respect for the microscopic dust that used to be your greatest enemy. Take it one square foot at a time, trust the process, and do not be afraid to slow down to get that glass-like finish your home deserves. Have you ever had a grit or dust issue ruin your finish at the very last moment, or did you manage to catch it in time? Let me know your biggest struggle with hardwood floors in the comments below!