
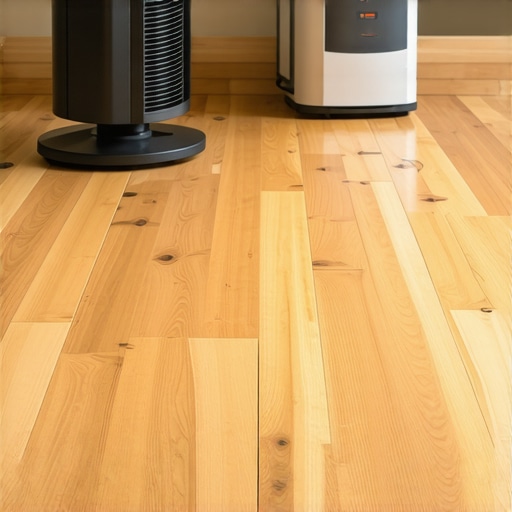
I was walking through my living room at 2 AM, hunting for a glass of water, when my foot hit a ridge that felt like a miniature mountain range. My beautiful oak planks, which I had invested a small fortune in, were bulging upward in the center of each board. It looked like a series of tiny speed bumps had moved into my house overnight. This, my friends, is crowning, and if you are seeing it, your floor is screaming for help. I have been exactly where you are, and let me tell you, the panic is real. Early in my DIY journey, I made the massive mistake of thinking I could just sand those ridges flat immediately to make the floor look normal again. It was a total disaster because once the wood finally dried and shrunk back down, I was left with concave, weakened boards. Today, I am going to show you how to avoid that heartache and actually fix the moisture issue at the source. Have you noticed your floor starting to feel like a washboard lately? Let me know in the comments if you are currently dealing with this nightmare!
Your Floor Is Doing the Wave and It Is Not a Celebration
When a hardwood floor crowns, it means the center of the plank is higher than the edges. It is the exact opposite of cupping, and it usually signals that the moisture is trapped within the wood or that the floor was sanded before it was fully acclimated to the home’s environment. Following hardwood floor care secrets to longevity and shine can prevent many surface issues, but once structural crowning happens, you need a strategic plan. According to the National Wood Flooring Association, wood is a hygroscopic material that will always try to reach an equilibrium with its environment, meaning it expands and contracts based on the air around it. If your humidity levels spike or a leak occurs, those planks have nowhere to go but up. I have seen homeowners dive into mastering hardwood floor refinishing way too early in the process, only to realize they have permanently ruined their floor’s wear layer because the wood had not settled yet.
Can You Actually Save These Planks Without Tearing Them Out?
People often ask if a crowned floor is a total loss that requires a full tear-out. The short answer is no, but you have to be incredibly patient. I remember a neighbor who spent three days running a commercial dehumidifier only to give up and rip out the whole room in a fit of frustration. He did not realize that drying out thick oak or maple can take weeks, or sometimes even a full month, depending on the saturation level. You are likely worried about the cost of replacement, but the real secret is aggressive moisture control. If you catch it early and use the right equipment, you can often coax those boards back into a flat position without spending thousands on new lumber.
The Hidden Moisture Trap Under Your Feet
Before you can fix the bulge, you have to find the water. It might be a leaky dishwasher, a damp crawlspace, or even just a mop that was a little too wet for too long. You absolutely have to learn how to use a moisture meter before you lay wood floors—or in this case, before you try to fix them—to see exactly what you are dealing with underneath the finish. One of the most common flooring installation mistakes to avoid for lasting results is ignoring the subfloor’s moisture content during the initial build. If the air in your home is bone dry but the subfloor is soaked, that moisture is going to migrate up into your hardwood, causing the very crowning you see now. We need to stabilize the environment and bring the wood back to its target moisture level before we even think about touching a sander.
Stop the Bleeding by Finding the Leak First
You cannot fix a bulge by ignoring the water. If you don’t stop the moisture source, your floor will just keep growing until it hits the walls. I start by checking every appliance and pipe within thirty feet. One time, I spent three days trying to dry a living room only to realize a tiny pinhole leak in a refrigerator line was feeding the subfloor through the kitchen. If you suspect the concrete underneath is the culprit, you should use the painters plastic trick for testing concrete moisture to see if condensation is trapped beneath the wood. 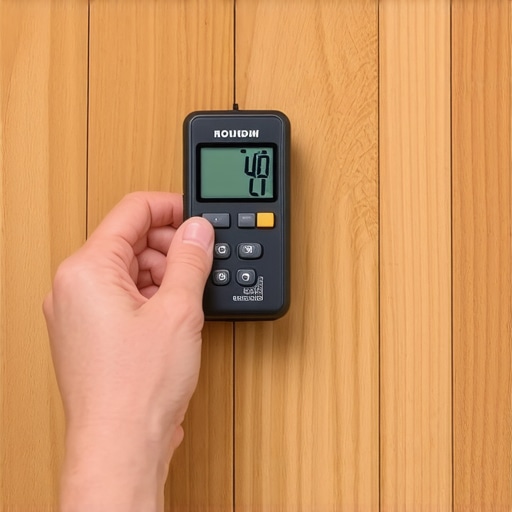
Blast the Air but Keep the Temperature Steady
Once the leak is stopped, you need to move air. Not heat—just air. I once made the mistake of putting a space heater directly on a crowned cherry floor, thinking it would speed things up. The top of the wood dried too fast while the bottom stayed saturated, and the planks actually splintered from the internal stress. Now, I use high-velocity floor fans and a commercial-grade dehumidifier. Set the dehumidifier to 35% or 40% and let it run 24/7. This is where flooring installation fundamentals leveling for a seamless look come into play later, but for now, your only job is to stabilize the environment.
Trust the Meter Instead of Your Eyes
You might look at the floor after a week and think it looks flatter, but wood is deceptive. You absolutely must continue to how to use a moisture meter before you lay wood floors or repair them to get an objective reading. You are looking for a moisture content (MC) that matches the rest of your house—usually between 6% and 9%. I check the crowned area and then check a ‘dry’ area in another room to compare. If the crowned planks are still 3% higher than the rest of the house, keep the fans running. Patience here saves you from the nightmare of flooring installation mistakes to avoid for lasting results, like sanding wood that hasn’t finished moving.
Don’t Touch the Sander Until the Wood Relaxes
The biggest trap in flooring is the urge to sand the ridges off. If you sand a crowned floor while it is still wet, you are removing the ‘peak’ of the board. When the wood finally dries and shrinks, that peak becomes a valley, and you end up with a cupped floor that is structurally thinner. I have seen pros who should know better dive into mastering hardwood floor refinishing far too early. If you do reach a point where the wood is dry but still slightly uneven, you must be careful not to create new problems. Specifically, you need to know how to fix a wood floor that was sanded against the grain if you lose control of the drum sander during the leveling process. Wait at least two weeks after the moisture readings stabilize before you even think about the abrasive paper.Even after your hardwood has flattened out, the battle for a perfect floor is often just beginning. Most people assume that once the wood is dry, the hardest part is over, but that is exactly when the most expensive mistakes happen. I have seen DIYers and even some pros fall into the trap of thinking self-leveling compound is a magic, set-it-and-forget-it liquid. The industry calls it self-leveling, but that is a massive misnomer. In reality, it is a temperamental chemical soup that requires surgical precision. If you treat it like a pour-and-walk-away solution, you are practically inviting a disaster into your home.
Why does my self-leveler look like a spiderweb after only twelve hours?
This is a question I get constantly from homeowners who thought they followed the instructions to a T. Usually, the culprit is substrate preparation—or a complete lack of it. According to the Tile Council of North America (TCNA) Handbook, substrate preparation is the single most critical factor in the success of any floor covering. If you do not use the specific primer meant for your subfloor, the dry wood or concrete will act like a sponge, sucking the water out of the leveler so fast that it shrinks and cracks before it can even begin to bond. This leads to why your self-leveler developed spiderweb cracks overnight, and once those cracks appear, there is no patching them; you are looking at a full, back-breaking demo. I have seen guys try to save twenty dollars by skipping the specialized primer and using watered-down PVA glue instead. Do not be that person. You will end up with a hollow sounding floor that eventually crunches under your footsteps because the bond failed at the molecular level.
The Mixing Speed Trap That Creates a Lunar Landscape
One of the biggest nuances in mastering floor leveling pro secrets for perfect installations is the RPM of your drill. Most people grab their standard high-speed construction drill and go to town. This is a fatal error. High-speed mixing whips air into the mixture, creating thousands of tiny bubbles. When you pour that compound, those bubbles rise to the surface and pop, leaving you with a floor that looks like the surface of the moon. This is why you must understand the mixing paddle speed that ruins your leveling compound. You need a low-RPM, high-torque mixer to keep the product smooth, dense, and air-free. 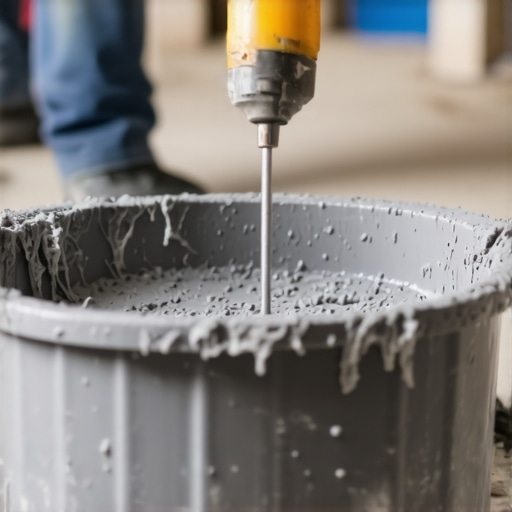
Master the Mix or Prepare for a Jackhammer
I cannot stress enough how sensitive these compounds are to water ratios. Adding even a single cup of extra water to make the leveler flow better actually destroys the polymer chain that gives the material its strength. You end up with a dusty, weak surface that will eventually cause why your lvp floor is showing telegraphing from the subfloor because the leveler is literally crumbling into powder underneath your luxury vinyl. To get that glass-like finish, you need to use the spiky roller secret for a mirror-smooth pour, which helps break the surface tension and release any remaining air trapped in the pour. Every time I see someone skipping the primer or eyeballing the water measurement, I know they will be calling a professional in six months to fix the shifting planks. Have you ever fallen into this trap? Let me know in the comments! If you are still feeling unsure about the prep, checking out precise floor leveling techniques to achieve flawless surfaces can save you thousands in wasted material and labor. The nuanced difference between a level floor and a flat floor is what separates a frustrating DIY attempt from a professional masterpiece that lasts for decades.Once you move past the initial leveling phase, you need a long-term strategy to ensure your hard work doesn’t buckle six months later. I never step onto a job site without my Tramex MEP moisture meter. While many DIYers grab the cheapest pin-style meter they can find at a big-box store, those little pins leave unsightly holes in your finish and only measure the very top layer of the wood. According to technical documentation from Tramex, non-destructive impedance testing allows you to map out the moisture profile of the entire subfloor without damaging a single plank. This is one of those expert flooring installation tips that separates the weekend warriors from the professionals. If you know the exact moisture content (MC) of your subfloor relative to the ambient air, you can predict exactly how your wood will react to seasonal changes.
How Can I Keep My Floors Flat Forever?
The answer isn’t a magic chemical or a secret sealant; it is strict climate control. You need to invest in a high-quality digital hygrometer to monitor your home’s Relative Humidity (RH) every single day. If you let your home drop below 30% humidity in the winter or spike above 55% in the summer, you are asking for the wood to expand and contract beyond its limits. Following hardwood floor care secrets to longevity and shine won’t help you if the air in your living room is bone dry and your expensive oak planks start to shrink and create massive gaps. I always tell my clients that their floor is a living, breathing thing that needs a stable environment to thrive. #IMAGE_PLACE_HOLDER_D#
Buy These Three Tools Before You Start
Beyond a professional-grade meter, you need the right application tools to achieve a gallery-quality look. For example, the roller selection that prevents air bubbles in leveler is just as important as the quality of the leveler itself. If you’re working with radiant heating systems, make sure you know how to choose a floor leveler that wont crack over radiant heat to avoid catastrophic failures during the first cold snap. I personally use a weighted 18-inch T-bar applicator for the final finish coat because it provides a much more even build than a traditional paint roller. This prevents the ‘orange peel’ texture that ruins many refinishing projects and ensures a mirror-like sheen.
Stop the Steam Mop Madness
I see so many people destroy their multi-thousand-dollar investment because they fell for a glossy TV commercial. You must learn the truth about using steam mops on luxury vinyl planks and hardwood floors alike. High-pressure steam forces vapor deep into the seams and the core of the planks, which is the fastest way to cause edge peaking, delamination, or permanent rot. Instead, use a simple microfiber mop and a pH-neutral cleaner. Looking forward, I predict we will soon see smart-flooring technology where Bluetooth-enabled moisture sensors are embedded into the subfloor during a step-by-step guide to flooring installation and leveling success. These sensors will send an alert to your smartphone the second a dishwasher leaks or the humidity drops too low. For now, you have to be the sensor. I challenge you to go out and buy a $15 digital hygrometer today—it’s the cheapest insurance policy you’ll ever buy for your home.
The One Mistake That Cost Me a Full Week of Ripping Out Oak
One thing I have learned after years of seeing floors fail is that wood has a long memory. If you force a board to stay flat while it is still holding onto 12% moisture, it will eventually buckle elsewhere or split from the internal pressure. I once tried to rush a job by using precise floor leveling techniques to achieve flawless surfaces before the subfloor was actually ready. The result was a ‘ghost crowning’ effect that returned three months later because the core of the wood was still wet. Now, I never start a project without knowing how to use a moisture meter before you lay wood floors or repairing them, and I wait until the readings are identical to the ‘dry’ zones of the house for at least 72 hours.
My Personal Toolkit for a Floor That Stays Flat
To do this right, you need more than just a hammer and good intentions. I rely on three specific items to ensure my projects last: a non-destructive moisture meter to track the heart of the wood without damaging the finish, a digital hygrometer to watch the ambient air for humidity spikes, and a high-torque mixer for any subfloor preparation. If you are finishing with a leveler to correct old damage, using the spiky roller secret for a mirror-smooth pour will give you that professional look you see in high-end galleries without the headache of air bubbles or pits. I trust these tools because they remove the guesswork and let the physics of the materials do the work for you.
Take the First Step Toward a Flawless Restoration
Don’t let the sight of a crowning floor paralyze you. It is not always a death sentence for your wood; often, it is just a signal that the environment has shifted and needs your attention. By following hardwood floor care secrets to longevity and shine and being disciplined with the drying process, you can save your investment and your sanity. Every successful flooring installation starts with a calm plan, the right tools, and the patience to let the wood tell you when it is ready. #IMAGE_PLACEHOLDER_E#
Have you ever seen your hardwood start to crown after a minor spill, or did it happen out of nowhere? Let me know below!