
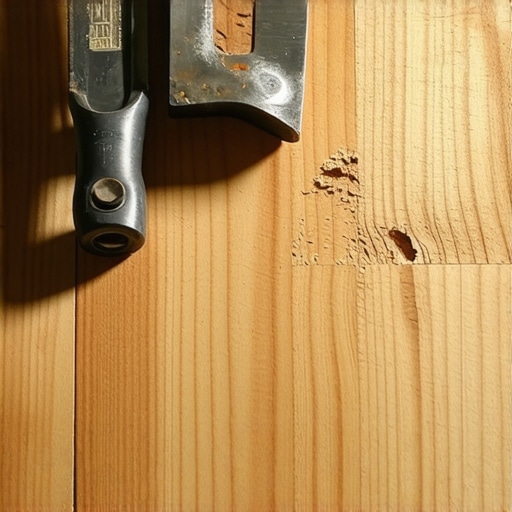
I still have the scar on my thumb—and the dent in my pride—from the first time I tried to force a hardwood plank into a doorway notch without the right gear. I was staring at a beautiful piece of solid oak, the very last board needed to bridge the gap between the hallway and the bedroom, when I realized my jigsaw was miles away at my brother’s house. I tried to ‘wing it’ with a dull utility knife and a prayer, which resulted in a splintered mess and an embarrassing trip to the hardware store for a replacement board. If you’ve ever felt that sinking feeling when a project stalls because of one missing tool, I’m here to tell you that you don’t need power tools to get a professional finish. Today, I’m showing you how to tackle those tricky doorway corners with simple hand tools you likely already have in your garage. Whether you are following a step-by-step guide to flooring installation or just winging it like I used to, precision is everything. [image_placeholder_1]
Why a Jigsaw Isn’t the Only Way to Handle Tight Corners
Many folks think that without power tools, their DIY flooring project is doomed to look amateurish. I fell into that trap early on, making some classic flooring installation mistakes that I still regret today. But here is the secret: hand tools often give you more control than a vibrating jigsaw blade ever could. When you’re working around a door jamb, that extra control is the difference between a seamless transition and an ugly gap. According to the National Wood Flooring Association (NWFA), the precision of a cut significantly impacts the structural integrity of the floor’s expansion joints. If you cut too much, you lose stability; cut too little, and you risk buckling.
Can You Really Get a Clean Edge with Just a Hand Saw?
I know what you’re thinking—won’t a hand saw just tear up the wood? It’s a valid fear. I used to worry about the same thing until I discovered the power of a Japanese pull saw combined with a sharp wood chisel. It’s not about brute force; it’s about the technique and the grain. You also have to be incredibly careful not to make the rubber mallet mistake that ruins tongue and groove joints while you are trying to dry-fit your piece into a tight doorway space. Have you ever found yourself stuck on a project because you didn’t have the ‘required’ power tool? Tell me about your most creative workaround! We’re going to look at the exact manual method that guarantees a snug fit every time, ensuring your home looks like you hired a high-end contractor.
Get Your Markings Right Before the Saw Touches the Wood
To get a clean notch, you have to treat your pencil like a surgical instrument. I remember a project three summers ago where I was installing a beautiful hickory floor. I thought I could eyeball the door casing depth, but because I didn’t account for the subtle curve of the trim, I ended up with a quarter-inch gap that looked like a canyon. Now, I use the ‘overlap’ method. Lay your plank exactly where it will sit against the wall, but shifted over so it rests against the door jamb. Use a small scrap piece of your flooring as a guide to trace the exact depth of the notch onto your target board. This ensures your cut reflects the actual reality of your doorway, not just a measurement on a tape. Precision here is just as vital as following flooring installation fundamentals to ensure the rest of your layout stays square.
Stop the Splintering with One Simple Tape Trick
Even the best hand saw can catch a grain and pull a nasty splinter right off the finished surface of your oak or maple. To prevent this, apply a strip of painter’s tape over your cut line before you start. This provides extra tension to the wood fibers, holding them in place as the teeth of the saw pass through. This masking tape move for splinter-free cuts is a lifesaver when you are working with expensive pre-finished boards where you can’t just sand out a mistake. 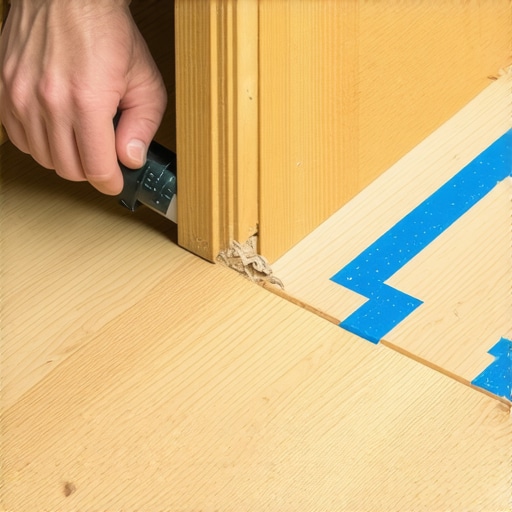
Why the Japanese Pull Saw is Your Secret Weapon
If you’re used to a standard Western push saw, switching to a Japanese pull saw feels like trading a broadsword for a fencing foil. Because the blade cuts on the pull stroke, it can be much thinner without buckling. This thinness allows for an incredibly narrow kerf, meaning you’re removing less material and maintaining better control. When I was finishing my own hallway, I found that the pull saw let me get right up against the vertical face of the notch without the blade wandering. Start your cut at the edge of the board with light, rhythmic pulls. Don’t force it; let the weight of the saw do the work. It’s a meditative process that produces a far cleaner edge than a high-speed jigsaw ever could.
Clear the Waste and Check Your Level
Once your two vertical cuts are made with the saw, you’ll likely have a small block of ‘waste’ wood still attached. This is where your wood chisel comes in. Place the flat side of the chisel against the waste piece and give it a firm, controlled tap with your palm or a mallet. Always work from the top (the finished side) down to avoid blowing out the back of the wood. After the piece is removed, don’t just hammer the board into place. Use the dry-fit rule to see how it sits. If the board won’t sit flat, it’s often because of a high spot in the subfloor right at the threshold. Dealing with a transition between tile and uneven concrete or wood requires you to be patient; sometimes you need to pare away a tiny bit more wood from the underside of the plank to get it to lie flush. If you find yourself struggling to get that final row tucked in, remember the scrap wood move for snapping last row planks to protect your edges while applying leverage.
Let’s Dig Deeper into the Science of Your Subfloor
While the Japanese pull saw handles the visible aesthetics, the true longevity of your floor happens where no one ever looks: the subfloor chemistry. A common myth I see circulating in DIY circles is that self-leveling compound is a ‘liquid floor in a bag’ that magically fixes every structural flaw. It isn’t. In fact, if you don’t respect the physics of the pour, you can actually make your floor worse. Everyone says you can just mix and pour, but in my experience, the chemical bonding and the speed of your work are far more critical than the brand of leveler you buy. The Tile Council of North America (TCNA) emphasizes that subfloor deflection—the literal ‘bounce’ of your floor—must be strictly controlled. Even the most careful tile selection won’t save you from cracked grout if your joists are too far apart. You might need to learn how to fix a bouncy floor with blocking or sistering before that leveler even touches the wood.
Why Do Most Leveling Pours Fail on Painted Concrete?
This is a sophisticated trap for anyone renovating an older home. Most people assume that if the paint isn’t peeling, it’s a solid base for a new pour. However, levelers require a mechanical bond to stay attached. Pouring over paint without concrete etching or a specialized primer is a recipe for delamination. It might look great for a week, but once the hardwood starts to expand and contract, the leveler can pop off like a scab. Another ‘oops’ factor is the mixing paddle speed that ruins your leveling compound. If you run your drill at high RPMs, you whip air into the slurry. Those bubbles eventually rise, leaving you with a surface that looks like the moon’s craters. I always recommend using the spiky roller secret for a mirror-smooth pour to release that trapped air before it sets. 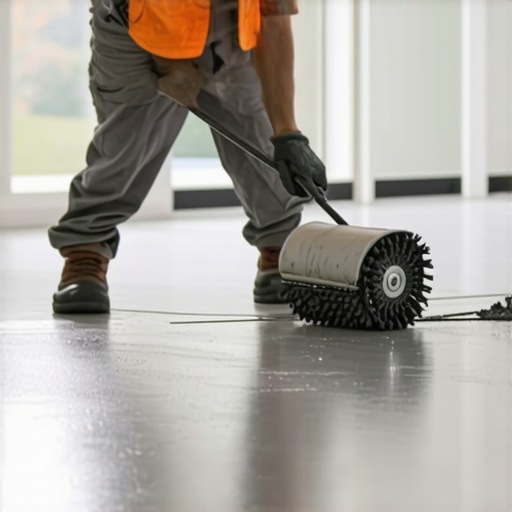
Don’t Gamble with Hidden Subfloor Moisture
One of the most expensive mistakes you can make is ignoring the invisible water vapor rising through a concrete slab. I’ve seen beautiful oak planks cup and buckle because the installer thought a dry-to-the-touch slab was safe. Before you start your layout, you must learn how to use a moisture meter. A simple reading can be the difference between a floor that lasts decades and one that fails in six months. If the readings are high, you’ll need a robust moisture barrier, especially in basements where hydrostatic pressure is a constant threat. We often talk about expansion gaps, but the *depth* of that gap matters just as much as the width; if your door casing is cut too high, you lose the ability to hide the expansion space needed for high-humidity seasons. It’s these small, invisible calculations that separate a master installer from a weekend warrior. Have you ever fallen into this trap where you thought the surface was ready, but the floor had other plans? Let me know in the comments if you’ve ever had a ‘perfect’ pour go wrong!Once the dust settles, you realize that the installation was only the first chapter. I’ve seen homeowners spend $15,000 on premium wide-plank oak, only to destroy it in eighteen months with a steam mop and a ‘natural’ vinegar solution. My personal kit for long-term success includes a high-end moisture meter and a dedicated microfiber system. I swear by the Wagner Orion 950 because it tracks the equilibrium moisture content (EMC) without leaving pinholes in your beautiful finish. This level of detail isn’t just for pros—it’s how you ensure your hardwood floor care secrets actually work to preserve your investment.
How do I maintain my floors without damaging the protective finish?
It starts by ditching the DIY cleaning myths. You need to stop using vinegar on your hardwood floors immediately because the acidity eventually eats through the polyurethane. Similarly, why you should never mop your floors with dish soap is a lesson usually learned after the floor becomes a sticky, dull mess that attracts every speck of dust. For daily upkeep, a simple dry microfiber sweep is king. If you’re dealing with high-traffic areas, consider the natural oil vs polyurethane debate carefully; oils are easier to spot-repair, whereas poly requires a full screen and recoat. 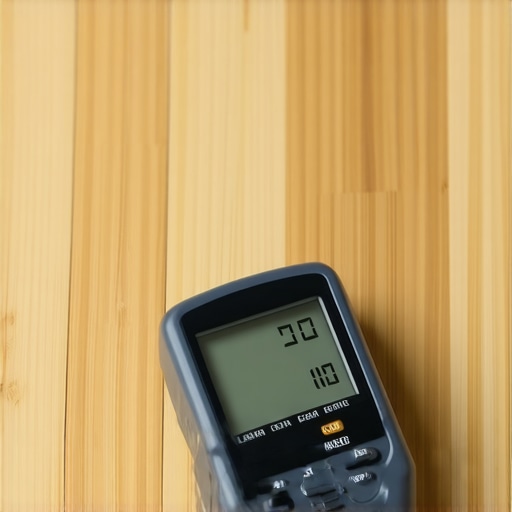
Why Precision Instruments Trump Your Gut Feeling
Beyond the broom, I always keep a digital hygrometer in the room. The National Wood Flooring Association (NWFA) Technical Manual Section R200 states that keeping a consistent relative humidity between 30% and 50% is non-negotiable for wood stability. If you ignore this, you’ll see gapping in winter and cupping in summer, regardless of how well you learned how to use a moisture meter during the install. I also recommend a good set of felt pads for every piece of furniture—it’s the cheapest insurance policy you’ll ever buy. If you find the finish is starting to look tired despite your best efforts, you might need to look into mastering hardwood floor refinishing to bring that depth back and repair minor surface scratches.
The Coming Era of the ‘Talking’ Floor
I suspect we are moving toward a world where your floor talks to your thermostat. We’re already seeing innovative tile designs that incorporate heating elements, but the future is in ‘smart subfloors.’ Within the next few years, I predict embedded sensors will become standard, alerting your smartphone if a pipe leaks under the floorboards or if the subfloor moisture levels spike. It takes the guesswork out of the ‘invisible’ threats we discussed earlier. Maintaining a perfectly level subfloor also means keeping an eye on your transition points; if you are managing a transition between tile and uneven concrete, check for fine cracks in the grout annually. If you want to be ahead of the curve, start by mastering the fundamentals of protection today. I challenge you to try the spray bottle hack for testing floor sealer coverage on your next maintenance day—it’s a game-changer for knowing exactly when your floor needs a fresh coat.
Hard Truths from a Decade of Dust and Sawdust
After years of installing these surfaces, I have realized that the wood is actually the easiest part. The real challenge is the invisible math happening underneath. One major lightbulb moment for me was realizing that expansion gaps are not just a suggestion; they are a legal contract between you and the humidity. If you do not leave that gap, the house will eventually win. Another lesson? Never trust your eyes over a tool. I used to think I could spot a low spot from across the room, but now I rely on the laser level move for perfectly straight hallways to keep things honest. Finally, remember that patience is your most valuable tool; rushing the cure time of a leveler or the acclimation of your boards is the fastest way to double your workload later.
[image_placeholder_E]
My Personal Arsenal for a Professional Edge
You do not need a warehouse full of machinery, but you do need a few “holy grail” items. First, the Wagner Orion 950 is my go-to for moisture testing because it is non-destructive and incredibly accurate. Second, a Suizan Japanese Pull Saw is what I use for every single door jamb notch; the control it offers is unmatched. Third, I always keep a digital hygrometer in the room for a week before and after the flooring installation. This helps me understand the baseline environment. If you are feeling overwhelmed by the technical side of the subfloor, I highly recommend checking out mastering floor leveling pro secrets for perfect installations to see the gear the veterans use daily.
Your Vision Deserves This Level of Care
There is a unique kind of pride that comes from walking across a floor you laid with your own two hands, knowing every joint is tight and every board is level. Do not let the fear of a complex doorway or a wavy subfloor stop you from starting. By following the ultimate guide to floor leveling for a perfect finish, you are already ahead of most DIYers. Your new hardwood floors are going to transform your home into a space that feels intentional and high-end. If you ever hit a snag or need specific advice on a tricky transition, feel free to contact us for more specialized guidance. Have you ever faced a doorway notch that made you want to give up? Let me know in the comments below!