
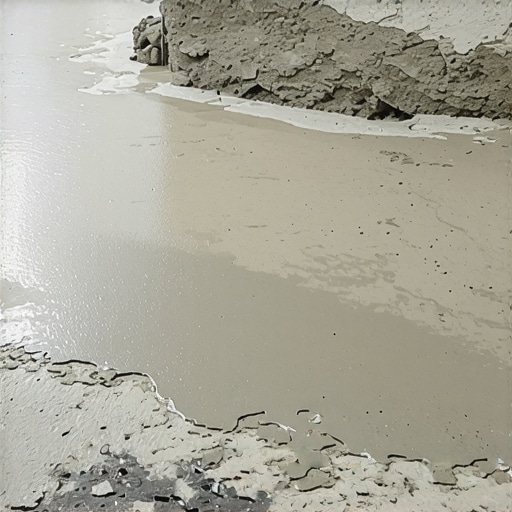
I remember standing in my kitchen at 2 AM, staring at a $400 puddle of gray goop that refused to move an inch. I had followed the instructions on the bag—or so I thought—and poured it out with the confidence of someone who had watched exactly three YouTube videos. But instead of the glassy, level surface I needed for my new tile, I had a lumpy, textured mess that completely ignored the deep dip near the refrigerator. It was a heart-sinking moment that nearly made me give up on DIY flooring altogether. I had basically created a speed bump in my own kitchen. If you’ve ever felt that pit in your stomach while watching your renovation budget literally harden in the wrong place, I know exactly what you’re going through. We are going to fix that today.
Turn Your Uneven Subfloor into a Glassy Surface
The biggest mistake I made during that first disastrous attempt was assuming that ‘self-leveling’ meant the product possessed some kind of internal GPS for gravity. It doesn’t. I completely skipped the primer, thinking it was just an extra ten bucks the hardware store wanted to squeeze out of me. Big mistake. Because the subfloor was thirsty, it sucked the moisture out of the mix instantly, causing it to freeze in place. This is one of the most common floor leveling challenges, common mistakes, and how to avoid them that homeowners run into. You also have to consider the reason your leveler is setting up too fast, which often comes down to water temperature or mixing speed. If the water is too warm, the chemical reaction happens in double-time. [image_placeholder] Learning the secret to mixing the perfect bucket of self-leveler every time changed the game for me, and it will for you too. We’re going to walk through the physics of flow, why surface tension is your enemy, and the exact tools you need to force that liquid into the low spots instead of letting it pile up in the middle.
Is ‘self-leveling’ just a clever marketing gimmick?
I hear this all the time from neighbors and friends who have tried it and failed: ‘It doesn’t actually level itself!’ Well, they’re half right. The Tile Council of North America (TCNA) Handbook specifically notes that substrates must be properly primed to prevent the premature dehydration of cementitious underlayments, which is exactly why your mix stops flowing. They aren’t magic; they are chemistry. If the viscosity is off because you measured the water by eye—another classic ‘neighbor’ mistake I’ve been guilty of—the mix simply won’t have the energy to travel across the floor. Have you ever poured a bag only to watch it sit there like a stubborn puddle of oatmeal instead of spreading out like water? Let me know in the comments: have you ever faced this specific problem? It’s frustrating, expensive, and totally preventable. By the time we’re done here, you’ll understand how to prep your subfloor so it actually cooperates, ensuring you how to achieve flawless floor leveling before tile laying without the 2 AM panic attacks. We’ll look at why that mix stops flowing and how a simple spiked roller can be the difference between a professional finish and a total demo job.
Stop the Leaks Before the Flood
The first thing you need to realize is that self-leveler is essentially liquid concrete. If there is a hole the size of a pencil in your subfloor, that liquid will find it. I once spent three hours prepping a small bathroom, only to watch my expensive mix disappear through a gap near the toilet flange. I literally heard it dripping onto the drywall in the basement below. To avoid a disaster, you need to learn how to dam a doorway before pouring self-leveler and use a high-quality sealant or spray foam for every tiny crack. If you don’t, you aren’t just leveling a floor; you’re remodeling the ceiling downstairs. Knowing how to stop your floor leveler from leaking through the subfloor is the difference between a successful Saturday and a very expensive insurance claim.
Seal the Surface or Suffer the Bubbles
Once the room is watertight, you have to tackle the primer. Think of your subfloor like a giant sponge. If you pour leveler directly onto dry wood or old concrete, it will suck the life right out of the mix. This causes the leveler to drag and eventually peel. You might see why your subfloor primer is bubbling on old concrete if you don’t clean the dust off first. Every speck of dust acts like a tiny ball bearing, preventing the primer from grabbing onto the actual floor. I usually do two coats of primer—one to seal the pores and a second to provide the tack the leveler needs to bond. This ensures your the ultimate guide to floor leveling for a perfect finish starts with a foundation that won’t fail you.
Measure Your Water Like a Chemist
This isn’t the time for close enough. If the bag says 5.25 quarts, don’t give it 5.5. Over-watering is the fastest way to ruin the structural integrity of the floor. This leads to a weak, dusty surface that will eventually cause your tile to pop. It’s also a major factor in why your self-leveler developed spiderweb cracks overnight. I keep a dedicated measuring bucket that never leaves my side. When you master the secret to mixing the perfect bucket of self-leveler every time, you’ll see the mix transform from a gritty soup into a silky, flowing river that moves exactly where you want it. #IMAGE_PLACE_HOLDER_B#
Push the Puddle with Purpose
Despite the name, you still need to help the product along. I use a gage rake set to the depth of my lowest spot. This isn’t about smoothing like you’re icing a cake; it’s about distributed volume. You are moving the mass of the material to the areas that need it most. Using precise floor leveling techniques to achieve flawless surfaces involves a spiked roller to break the surface tension and release any trapped air bubbles. If you skip this, you will end up with tiny pinholes that look like a moonscape once it dries. If you want to avoid flooring installation mistakes to avoid for lasting results, treat the spiked roller as a mandatory tool, not an optional accessory. By the time the pour is finished, your floor should look like a dark, still pool of water reflecting the lights above.
Most DIYers and even some pros get obsessed with the bubble on their spirit level, but I’m here to tell you that ‘level’ is often a liar. In the world of high-end renovations, being level is secondary to being flat. You can have a floor that is perfectly level across the room but contains a series of waves and dips that will snap a large format tile in half the moment you step on it. This is where most people fail: they pour more product to fix a slope but ignore the peaks. If you want to avoid a catastrophe, you need to learn how to check for high spots with a 10-foot straightedge before you even open a bag of mix. According to the ANSI A108 standards for ceramic tile installation, surfaces receiving large format tiles must not vary more than 1/8 inch in 10 feet. If you ignore this, you’ll find out the hidden cost of using cheap thinset on large format tiles when your grout lines start cracking. #IMAGE_PLACE_HOLDER_C#
Will self-leveler fix a bouncy subfloor?
This is the most common ‘advanced’ trap I see. Homeowners think that adding 500 pounds of wet stone to a room will somehow stabilize the structure. It won’t. In fact, it often makes the problem worse. If your floor has a spring to it, the leveler—which is inherently brittle—will simply crack as the floor flexes under foot traffic. You are essentially pouring a giant sheet of glass over a trampoline. You must address the underlying structural integrity first. Understanding the real reason your floor joists are making your tile crack is vital before you commit to a pour. In many cases, you might need to employ the plywood sandwich trick for fixing bouncy floor joists to create a rigid enough substrate. Have you ever fallen into this trap of thinking more material equals more strength? Let me know in the comments.
Don’t let your primer become a bond breaker
Here is a nuance that even experienced floor guys miss: the ‘over-dry’ primer failure. While we talk a lot about under-priming, if you apply your primer and wait three days to pour your leveler, the primer can ‘skin over’ and actually collect household dust, turning it into a bond breaker instead of a bond promoter. This is why your floor primer is peeling off like a sunburn later on. You want to pour while the primer is still slightly tacky or within the specific window mentioned on the technical data sheet—usually 4 to 24 hours. When you are mastering floor leveling pro secrets for perfect installations, you realize that timing is just as important as the mix ratio. If you miss that window, you’re basically pouring expensive mud over a layer of dust. Always remember that why your large format tiles need back-buttering every time starts with what’s happening three layers below the tile itself.
The Three Items That Live in My No-Fail Toolbox
After a decade of bruised knees and wasted product, I’ve realized that the ‘DIY’ section of the hardware store is often a trap. If you want a result that doesn’t look like a high school shop project, you need to step up your gear. I’m not talking about buying a bulldozer, but I am talking about the specific tools that bridge the gap between a lumpy mess and a showroom finish. First on that list is a high-quality spiked roller with individual nylon tines. Most people think a rake is enough, but a spiked roller actually degasses the mix. It pops the thousands of tiny air bubbles that form during the chemical reaction. If you skip this, your floor will look like the surface of a sponge. I also never start a job without the vacuum attachment that actually picks up fine sawdust. Dust is the enemy of adhesion; if your subfloor isn’t surgically clean, even the best leveler won’t stick. Using precise floor leveling techniques to achieve flawless surfaces means having a clean slate from second one.
How do I keep my new floor from shifting in five years?
Maintenance starts before the first piece of flooring is even laid. I’ve seen beautiful installs fail because the homeowner didn’t account for environmental shifts. According to the National Wood Flooring Association (NWFA) Technical Publication No. A100, the moisture content between the wood flooring and the subfloor must be within a 4% margin for strip flooring and a 2% margin for plank flooring. I use a Wagner pinless moisture meter because it allows me to scan the subfloor without poking thousands of holes in it. If those numbers are off, your floor will inevitably fail. Long-term success is also about climate control; you need to learn how to keep your hardwood floors from gapping in the winter by maintaining a consistent humidity level. This isn’t just about aesthetics; it’s about protecting the structural integrity of your investment. Beyond humidity, knowing the hardwood floor care secrets to longevity and shine—like avoiding the ‘wet mop’ disaster—will keep your home looking professional for decades. 
Where flooring is headed by 2030
I’m seeing a massive shift toward ‘smart’ underlayments and digital mapping. Within the next few years, I predict we will see DIY kits that include laser-mapping sensors that talk to your phone, telling you exactly how many bags of leveler you need to buy for a specific room’s topography. No more ‘eye-balling’ the dip near the fridge. We are also moving toward mastering hardwood floor refinishing expert tips for 2025 that include UV-cured finishes that are dry to the touch in seconds rather than days. The goal is always to reduce the human error factor. If you really want to stay ahead of the curve, stop treating your floor as a flat surface and start treating it as a dynamic system. My best advice? Go out and buy a 10-foot straightedge today. Don’t rely on a 4-foot level; the longer the edge, the more the truth comes out. Try using a straightedge to map your high spots tonight—it’s the single most eye-opening thing you can do for your renovation project.
I remember standing in my kitchen at 2 AM, staring at a $400 puddle of gray goop that refused to move an inch. I had followed the instructions on the bag—or so I thought—and poured it out with the confidence of someone who had watched exactly three YouTube videos. But instead of the glassy, level surface I needed for my new tile, I had a lumpy, textured mess that completely ignored the deep dip near the refrigerator. It was a heart-sinking moment that nearly made me give up on DIY flooring altogether. I had basically created a speed bump in my own kitchen. If you’ve ever felt that pit in your stomach while watching your renovation budget literally harden in the wrong place, I know exactly what you’re going through. We are going to fix that today.
Turn Your Uneven Subfloor into a Glassy Surface
The biggest mistake I made during that first disastrous attempt was assuming that ‘self-leveling’ meant the product possessed some kind of internal GPS for gravity. It doesn’t. I completely skipped the primer, thinking it was just an extra ten bucks the hardware store wanted to squeeze out of me. Big mistake. Because the subfloor was thirsty, it sucked the moisture out of the mix instantly, causing it to freeze in place. This is one of the most common floor leveling challenges, common mistakes, and how to avoid them that homeowners run into. You also have to consider the reason your leveler is setting up too fast, which often comes down to water temperature or mixing speed. If the water is too warm, the chemical reaction happens in double-time. Learning the secret to mixing the perfect bucket of self-leveler every time changed the game for me, and it will for you too. We’re going to walk through the physics of flow, why surface tension is your enemy, and the exact tools you need to force that liquid into the low spots instead of letting it pile up in the middle.
Is ‘self-leveling’ just a clever marketing gimmick?
I hear this all the time from neighbors and friends who have tried it and failed: ‘It doesn’t actually level itself!’ Well, they’re half right. The Tile Council of North America (TCNA) Handbook specifically notes that substrates must be properly primed to prevent the premature dehydration of cementitious underlayments, which is exactly why your mix stops flowing. They aren’t magic; they are chemistry. If the viscosity is off because you measured the water by eye—another classic ‘neighbor’ mistake I’ve been guilty of—the mix simply won’t have the energy to travel across the floor. Have you ever poured a bag only to watch it sit there like a stubborn puddle of oatmeal instead of spreading out like water? Let me know in the comments: have you ever faced this specific problem? It’s frustrating, expensive, and totally preventable. By the time we’re done here, you’ll understand how to prep your subfloor so it actually cooperates, ensuring you how to achieve flawless floor leveling before tile laying without the 2 AM panic attacks. We’ll look at why that mix stops flowing and how a simple spiked roller can be the difference between a professional finish and a total demo job.
Stop the Leaks Before the Flood
The first thing you need to realize is that self-leveler is essentially liquid concrete. If there is a hole the size of a pencil in your subfloor, that liquid will find it. I once spent three hours prepping a small bathroom, only to watch my expensive mix disappear through a gap near the toilet flange. I literally heard it dripping onto the drywall in the basement below. To avoid a disaster, you need to learn how to dam a doorway before pouring self-leveler and use a high-quality sealant or spray foam for every tiny crack. If you don’t, you aren’t just leveling a floor; you’re remodeling the ceiling downstairs. Knowing how to stop your floor leveler from leaking through the subfloor is the difference between a successful Saturday and a very expensive insurance claim.
Seal the Surface or Suffer the Bubbles
Once the room is watertight, you have to tackle the primer. Think of your subfloor like a giant sponge. If you pour leveler directly onto dry wood or old concrete, it will suck the life right out of the mix. This causes the leveler to drag and eventually peel. You might see why your subfloor primer is bubbling on old concrete if you don’t clean the dust off first. Every speck of dust acts like a tiny ball bearing, preventing the primer from grabbing onto the actual floor. I usually do two coats of primer—one to seal the pores and a second to provide the tack the leveler needs to bond. This ensures your the ultimate guide to floor leveling for a perfect finish starts with a foundation that won’t fail you.
Measure Your Water Like a Chemist
This isn’t the time for close enough. If the bag says 5.25 quarts, don’t give it 5.5. Over-watering is the fastest way to ruin the structural integrity of the floor. This leads to a weak, dusty surface that will eventually cause your tile to pop. It’s also a major factor in why your self-leveler developed spiderweb cracks overnight. I keep a dedicated measuring bucket that never leaves my side. When you master the secret to mixing the perfect bucket of self-leveler every time, you’ll see the mix transform from a gritty soup into a silky, flowing river that moves exactly where you want it.
Push the Puddle with Purpose
Despite the name, you still need to help the product along. I use a gage rake set to the depth of my lowest spot. This isn’t about smoothing like you’re icing a cake; it’s about distributed volume. You are moving the mass of the material to the areas that need it most. Using precise floor leveling techniques to achieve flawless surfaces involves a spiked roller to break the surface tension and release any trapped air bubbles. If you skip this, you will end up with tiny pinholes that look like a moonscape once it dries. If you want to avoid flooring installation mistakes to avoid for lasting results, treat the spiked roller as a mandatory tool, not an optional accessory. By the time the pour is finished, your floor should look like a dark, still pool of water reflecting the lights above.
Most DIYers and even some pros get obsessed with the bubble on their spirit level, but I’m here to tell you that ‘level’ is often a liar. In the world of high-end renovations, being level is secondary to being flat. You can have a floor that is perfectly level across the room but contains a series of waves and dips that will snap a large format tile in half the moment you step on it. This is where most people fail: they pour more product to fix a slope but ignore the peaks. If you want to avoid a catastrophe, you need to learn how to check for high spots with a 10-foot straightedge before you even open a bag of mix. According to the ANSI A108 standards for ceramic tile installation, surfaces receiving large format tiles must not vary more than 1/8 inch in 10 feet. If you ignore this, you’ll find out the hidden cost of using cheap thinset on large format tiles when your grout lines start cracking.
Will self-leveler fix a bouncy subfloor?
This is the most common ‘advanced’ trap I see. Homeowners think that adding 500 pounds of wet stone to a room will somehow stabilize the structure. It won’t. In fact, it often makes the problem worse. If your floor has a spring to it, the leveler—which is inherently brittle—will simply crack as the floor flexes under foot traffic. You are essentially pouring a giant sheet of glass over a trampoline. You must address the underlying structural integrity first. Understanding the real reason your floor joists are making your tile crack is vital before you commit to a pour. In many cases, you might need to employ the plywood sandwich trick for fixing bouncy floor joists to create a rigid enough substrate. Have you ever fallen into this trap of thinking more material equals more strength? Let me know in the comments.
Don’t let your primer become a bond breaker
Here is a nuance that even experienced floor guys miss: the ‘over-dry’ primer failure. While we talk a lot about under-priming, if you apply your primer and wait three days to pour your leveler, the primer can ‘skin over’ and actually collect household dust, turning it into a bond breaker instead of a bond promoter. This is why your floor primer is peeling off like a sunburn later on. You want to pour while the primer is still slightly tacky or within the specific window mentioned on the technical data sheet—usually 4 to 24 hours. When you are mastering floor leveling pro secrets for perfect installations, you realize that timing is just as important as the mix ratio. If you miss that window, you’re basically pouring expensive mud over a layer of dust. Always remember that why your large format tiles need back-buttering every time starts with what’s happening three layers below the tile itself.
The Three Items That Live in My No-Fail Toolbox
After a decade of bruised knees and wasted product, I’ve realized that the ‘DIY’ section of the hardware store is often a trap. If you want a result that doesn’t look like a high school shop project, you need to step up your gear. I’m not talking about buying a bulldozer, but I am talking about the specific tools that bridge the gap between a lumpy mess and a showroom finish. First on that list is a high-quality spiked roller with individual nylon tines. Most people think a rake is enough, but a spiked roller actually degasses the mix. It pops the thousands of tiny air bubbles that form during the chemical reaction. If you skip this, your floor will look like the surface of a sponge. I also never start a job without the vacuum attachment that actually picks up fine sawdust. Dust is the enemy of adhesion; if your subfloor isn’t surgically clean, even the best leveler won’t stick. Using precise floor leveling techniques to achieve flawless surfaces means having a clean slate from second one.
How do I keep my new floor from shifting in five years?
Maintenance starts before the first piece of flooring is even laid. I’ve seen beautiful installs fail because the homeowner didn’t account for environmental shifts. According to the National Wood Flooring Association (NWFA) Technical Publication No. A100, the moisture content between the wood flooring and the subfloor must be within a 4% margin for strip flooring and a 2% margin for plank flooring. I use a Wagner pinless moisture meter because it allows me to scan the subfloor without poking thousands of holes in it. If those numbers are off, your floor will inevitably fail. Long-term success is also about climate control; you need to learn how to keep your hardwood floors from gapping in the winter by maintaining a consistent humidity level. This isn’t just about aesthetics; it’s about protecting the structural integrity of your investment. Beyond humidity, knowing the hardwood floor care secrets to longevity and shine—like avoiding the ‘wet mop’ disaster—will keep your home looking professional for decades.
Where flooring is headed by 2030
I’m seeing a massive shift toward ‘smart’ underlayments and digital mapping. Within the next few years, I predict we will see DIY kits that include laser-mapping sensors that talk to your phone, telling you exactly how many bags of leveler you need to buy for a specific room’s topography. No more ‘eye-balling’ the dip near the fridge. We are also moving toward mastering hardwood floor refinishing expert tips for 2025 that include UV-cured finishes that are dry to the touch in seconds rather than days. The goal is always to reduce the human error factor. If you really want to stay ahead of the curve, stop treating your floor as a flat surface and start treating it as a dynamic system. My best advice? Go out and buy a 10-foot straightedge today. Don’t rely on a 4-foot level; the longer the edge, the more the truth comes out. Try using a straightedge to map your high spots tonight—it’s the single most eye-opening thing you can do for your renovation project.
The Hardest Lesson I Learned About Surface Prep
After years of trial and error, I’ve realized that the prep work isn’t just ‘part’ of the job; it is the job. One major lightbulb moment was respecting the primer’s drying window. If you wait too long, you’ll find out why your floor primer is peeling off like a sunburn as soon as the leveler starts to cure. Another hard-earned secret is controlling the climate. If the room is too drafty or hot, you’ll encounter the reason your leveler is setting up too fast, which often results in unsightly ridges. Finally, I stopped worrying about the bubble on my level and started focusing on the gap under my straightedge. In the tile world, a flat floor is far more valuable than a perfectly level one that still has waves.
The Toolkit That Separates Amateurs from Pros
If you want a surface that looks like a sheet of ice, you need to ditch the ‘good enough’ tools. I never pour a bag without a high-quality spiked roller to remove air bubbles; it is essential for mastering floor leveling pro secrets for perfect installations. You also need to be surgically clean. I use the vacuum attachment that actually picks up fine sawdust because any debris left behind is a bond-breaker waiting to happen. [image_placeholder] Lastly, don’t ignore the importance of a calibrated water bucket. Even a half-cup of extra water can compromise the strength of your floor, leading to cracks later on.
It Is Time to Stop Planning and Start Pouring
A smooth, professional-grade floor isn’t reserved for people with fancy trucks and expensive crews. By following the ultimate guide to floor leveling for a perfect finish, you are giving your home the foundation it needs for a lifetime of beauty. Don’t be afraid of the mix. Prep your space, measure your water, and trust your tools. You’ve got this! What is the one specific part of the leveling process that makes you the most nervous? Let me know in the comments below!