
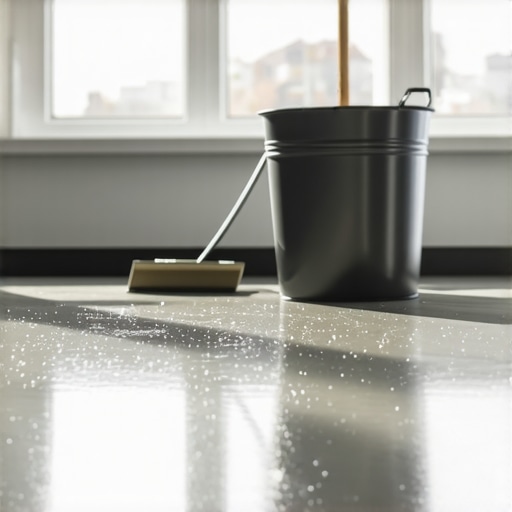
I was standing in the middle of what used to be my guest bathroom, holding a spiked roller like a useless plastic wand, while three hundred dollars worth of self-leveling underlayment turned into a lumpy, unworkable mess right before my eyes. It wasn’t just a bad day; it was a total disaster that required a jackhammer to fix. If you have ever felt that cold sweat prickle your neck because your floor prep is hardening faster than a quick-set epoxy, you are not alone. We have all been there, staring at a product that is doing everything except leveling itself. I learned the hard way that the clock starts ticking the second the water hits the powder, and if you are not prepared, the house always wins. In this guide, I am going to show you exactly how to take back control of your open time so you can achieve those flawless surfaces without the panic attack.
Stop Your Floor Leveler from Hardening Too Soon
One of the biggest mistakes I made early on was ignoring the ambient temperature of the room and the water. I thought room temp was fine, but a hot July afternoon in a room without A/C meant my substrate was basically a frying pan. When I poured my mix, the thirsty subfloor sucked the moisture right out of the leveler. It is a common floor leveling challenge that catches even seasoned pros off guard. If you do not prime correctly, you are essentially asking for a failure. I once skipped the second coat of primer on a porous concrete slab, and the leveler set up so fast I couldn’t even move it with a rake. Understanding why your self-leveler is drying faster than you can pour it is the first step toward a successful install. According to technical data from the Portland Cement Association, every 10-degree rise in temperature can roughly halve the setting time of cement-based materials. That means if your water is sitting in a hot truck, you are already losing the battle before you start. Have you ever had a batch of leveler go south on you mid-pour?
Is self-leveling underlayment actually a DIY nightmare?
Many homeowners fear that they simply cannot move fast enough to get a smooth finish, and honestly, that fear is valid if you are working solo. To combat this, I always tell my neighbors to focus on mixing the perfect bucket every single time using cold water. Using ice-cold water is a pro trick that buys you precious extra minutes of flowability. When you combine the right temperature with a solid plan for how to achieve flawless floor leveling, the process becomes much less intimidating. We are going to look at how to manage your workflow so you are never chasing the dry edge again. Before we dive into the mixing ratios, you should also ensure you have a clear path and all your tools ready, as even a thirty-second search for a misplaced gauge rake can result in a visible seam in your finished floor. Setting up your workspace correctly is just as important as the pour itself.
Stop the Leaks Before They Start
You wouldn’t fill a bathtub without a plug, yet I’ve seen countless DIYers (and my younger self) pour self-leveler without realizing it has the consistency of pancake batter—it will find every single hole in your subfloor. I once poured a gallon of leveler into a master bath only to find it dripping through the light fixture in the kitchen below. It was a nightmare that cost more in ceiling repair than the actual floor. Now, I always learn how to dam a doorway before pouring self-leveler using foam strips or even simple weather stripping. Seal every vent, every pipe penetration, and every gap between the wall and the floor. This containment is part of the flooring installation fundamentals that keep the product where it belongs.
Measure Your Water Like a Chemist
Precision isn’t just a suggestion here; it’s the law. If the bag says 5.5 quarts, do not “eye-ball” it. Too much water causes the polymers to separate, leading to a weak, chalky finish. Too little water, and you’re back to the “hardening too fast” problem. I use a dedicated measuring bucket marked clearly with a Sharpie. Following a step-by-step guide to flooring installation means treating your mixing station like a lab. #IMAGE_PLACE_HOLDER_B#
Keep the Wet Edge Alive with a Two-Person Team
Leveling a large room alone is like trying to paint a mural with a Q-tip—you just can’t move fast enough. You need one person mixing and one person pouring. The goal is to maintain a “wet edge.” This means you pour the next bucket into the edge of the previous one while it’s still liquid. If the first pour starts to skin over, the second pour won’t blend, creating a ridge that will haunt your precise floor leveling techniques.
The Magic of the Spiked Roller
Once the product is on the floor, don’t just leave it to “self-level.” Use a spiked roller to release trapped air bubbles and help the material knit together. It’s like aerating a lawn but for your floor. If you skip this, why your floor leveler pitted during the drying process becomes painfully obvious once the floor is dry and full of tiny craters. These air pockets are flooring installation mistakes to avoid if you want a professional-grade substrate for your future tile or hardwood.
Don’t Overwork the Material
There is a point of no return. After about 10 to 15 minutes, stop touching it. I learned this the hard way during a kitchen remodel where I kept trying to “smooth out” one tiny ripple, and instead, I created a giant, jagged scar because the leveler had already begun its chemical set. Trust the product to do its job. Mastering these pro secrets for perfect installations is mostly about knowing when to step away from the rake.
I used to believe the label on the bag: ‘self-leveling.’ It sounds like a magic potion that you just dump on the floor while you go grab a coffee. But here is the hard truth that most manufacturers bury in the fine print: self-leveling underlayment is actually just ‘self-smoothing.’ If you expect it to find its own level across a twenty-foot room without your help, you are going to end up with a very expensive, very wavy mess. I have seen too many people trust the name of the product more than their own laser level. You have to actively manage the flow, especially when dealing with precise floor leveling techniques that require more than just a bucket and a prayer.
Why ‘Self-Leveling’ is the Most Misleading Name in Construction
Everyone says the product is ‘liquid gold’ because it flows like water, but in my experience, the surface tension of most cementitious mixes is far higher than you think. If you do not mechanically assist the product with a gauge rake or a spreader, it will ‘mound’ at the pour site. The Tile Council of North America (TCNA) emphasizes that substrate preparation and the mechanical distribution of material are vital for achieving the L/360 deflection standards required for natural stone. If you just pour and walk away, you will likely find high spots where you started and low spots where the material ran out of steam. Have you ever fallen into this trap? Let me know in the comments because I certainly did on my first three jobs.
#IMAGE_PLACE_HOLDER_C#
The Structural Trap That Shatters Your Progress
The biggest ‘oops’ factor I see with advanced DIYers isn’t the pour itself; it is ignoring the bounce in the floor joists. Self-leveler is incredibly strong in compression but it is as brittle as a cracker when it comes to tension. If your subfloor has even a millimeter of vertical movement, your beautiful new leveler will fail. This is the real reason your floor joists are making your tile crack months after you thought you did everything right. Before you pour, you must address deflection. I’ve learned to use the plywood sandwich trick to stiffen up the floor first. If you skip this, you will inevitably wonder why your self-leveler developed spiderweb cracks overnight despite using the best primer on the market.
What happens when you need a second lift over a bad pour?
A common question from folks who messed up their first attempt is whether they can just pour another layer on top. The answer is yes, but it is a nuance-heavy ‘yes.’ You cannot just pour over dried leveler; you have to re-prime the surface as if it were a brand-new subfloor. Dried leveler is incredibly thirsty and will suck the life out of your second batch instantly. Using pro secrets for perfect installations means acknowledging that your first layer is now a non-porous substrate that needs a specialized primer bond. Ignoring this leads to delamination, where the top layer eventually peels off like a scab, causing you to detect a hollow tile later on. When you are moving into high-end finishes, the hidden cost of using cheap thinset on top of a poorly bonded leveler becomes a nightmare you can’t wake up from. Success is found in the layers you never see, so take the time to treat the second pour with the same respect as the first.
I have spent thousands on specialized tools over the years, but if I could go back and tell my younger self one thing, it would be to stop burning out my cordless drills. If you are serious about this, you need a dedicated, high-torque paddle mixer. I personally use a Collomix because it is geared specifically for the heavy drag of cementitious materials. When you use a standard drill, the RPMs are too high and the torque is too low, which whips air into the mix and leads to those annoying pinholes that ruin your substrate. Following the ultimate guide to floor leveling for a perfect finish starts with having the muscle to mix two bags at once without the motor smoking or the batter becoming lumpy.
Stop Killing Your Drills and Get a Real Mixer
Mixing is the most physically demanding part of the process, and any inconsistency in the slurry will show up on the floor. A high-torque mixer ensures that every polymer and additive is fully hydrated. I’ve seen people try to save money here, only to end up with flooring installation mistakes to avoid for lasting results because the leveler didn’t chemically bond correctly. According to the MAPEI Technical Bulletin 15 on Surface Preparation, a minimum bond strength of 72 psi is often required for self-leveling materials over wood to prevent delamination. You simply cannot achieve that consistency with a kitchen whisk or a cheap drill attachment. 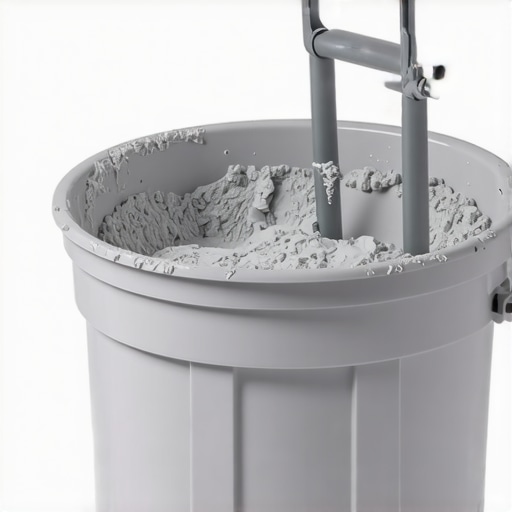
Check Your Work with a 10-Foot Straightedge
You cannot trust your eyes when it comes to flatness. After the floor is dry, the first thing I do is grab my 10-foot aluminum straightedge. I slide it across the room to how to check for high spots with a 10-foot straightedge. This tool is the judge, jury, and executioner of your hard work. If you see light under that bar, you still have work to do. This is especially critical if you had to how to level a floor that has a 2-inch drop across the room, where the volume of material makes it easy to lose your reference points. High spots need to be ground down with a diamond cup wheel, and low spots might need a feather-finish patch. It’s the difference between a floor that looks good and a floor that lasts forever.
How do I maintain these flat results for years to come?
Maintenance actually starts before the finish floor even goes down. You must ensure the environment remains stable. I always how to use a moisture meter before you lay wood floors or tile to confirm the slab has fully cured. Once your beautiful hardwood or tile is installed, keeping the humidity between 30% and 50% is the golden rule. Drastic swings in moisture will cause the subfloor to expand and contract, which can eventually stress the leveler underneath and cause cracking. Following hardwood floor care secrets to longevity and shine is about more than just cleaning; it’s about protecting the structural integrity of the entire assembly.
The High-Tech Future of Floor Prep
Looking ahead, I predict we are going to see a massive shift toward LIDAR-based floor scanning apps for smartphones. We are already seeing pros use 3D scanners to map out a room’s topography before a single bag of leveler is opened. This allows for precise calculations of exactly how many bags you need, eliminating waste and guesswork. As these tools become more accessible to DIYers, the era of ‘eyeballing it’ will finally be over. For now, stick to the precise floor leveling techniques that have been proven in the field for decades. Go out and rent a professional high-torque mixer for your next pour instead of using your cordless drill—your shoulders and your floor will thank you.
Lessons from the Trenches of Subfloor Prep
Looking back at my early disasters, I realized the biggest ‘lightbulb moment’ wasn’t about the product itself, but the environment. I used to think a slightly damp floor was okay, but I learned that moisture trapped in the slab is the enemy of a long-term bond. Always wait for that primer to go from milky to completely clear and tacky. Another hard-won truth: ignore the ‘self’ in ‘self-leveling.’ You are the pilot of that liquid, and if you don’t steer it with a gauge rake, it will just pool in the easiest spot. These tile installation pointers that save time and money only work if you respect the chemistry of the mix. Finally, never mix more than you can pour in five minutes; once that bucket is empty, the clock for the next one is already halfway gone.
The Essential Arsenal for Flat Surfaces
I have narrowed my toolkit down to three non-negotiables that I believe every homeowner should have before they break a seal on a bag. First, the Collomix DLX Paddle; its design pulls material from the bottom to ensure no dry clumps remain. Second, a 10-foot magnesium straightedge is your only honest critic—if it says there is a dip, believe it. Third, I highly recommend the TCNA Handbook for anyone doing tile work, as it clarifies the standards for deflection that leveler alone cannot fix. Following a step-by-step guide to flooring installation and leveling success becomes a lot more predictable when you are using pro-grade gear instead of trying to make do with a garden rake and a standard drill. #IMAGE_PLACEHOLDER_E#
Confidence Starts with a Level Slab
There is a unique kind of peace that comes when you lay your first piece of large-format tile and it sits perfectly flat without a single shim. That feeling is the reward for all the frantic mixing and the sweat you poured into the subfloor. Mastering flooring installation fundamentals is the bridge between a ‘DIY look’ and a professional-grade masterpiece. Don’t be afraid of the fast set-time; just respect it, prepare for it, and move with purpose. You have the techniques, the tool list, and the warnings to avoid the common pitfalls. Now, it is time to get that floor flat and move on to the beautiful finish you have been dreaming of. Have you ever had a self-leveling pour go wrong because the room was too hot or the water was too warm? Let me know your horror stories or wins in the comments below!