
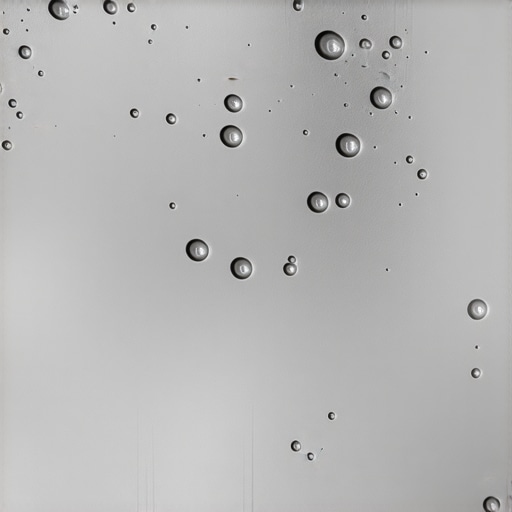
I was standing in my kitchen at 3:00 AM, flashlight in hand, staring at what I thought was going to be a masterpiece. Instead, my self-leveling underlayment looked like the surface of the moon. I’d spent hours studying mastering floor leveling pro secrets for perfect installations, or so I thought, only to find my floor covered in tiny, frustrating pinholes. If you’ve ever poured a ‘liquid floor’ and watched it dry into a disaster of pits and craters, I know exactly how you feel. It’s devastating, it’s expensive, and honestly, it’s a little bit embarrassing when you’ve told your spouse you’ve got it all under control. Today, I’m going to pull back the curtain on why this happens and how you can stop it before you waste another bag of expensive compound. [IMAGE_PLACEHOLDER_1]
The Morning My Leveler Looked Like the Moon
I remember my first ‘big’ pour vividly. I had prepped the subfloor, swept every speck of dust, and felt like a flooring god. I mixed those bags, poured the slurry, and watched it seek its own level like magic. I went to bed dreaming of a perfectly flat tile installation. But when I walked in the next morning, my heart sank. The floor wasn’t smooth; it was riddled with hundreds of tiny holes. It looked like the leveler had ‘fizzed’ while I was asleep. I realized then that flooring installation fundamentals leveling for a seamless look isn’t just about the pour—it’s about what’s happening underneath the surface. I had made the classic rookie mistake of underestimating the ‘breath’ of the concrete slab below.
Is a few tiny pinholes actually worth the stress?
You might be tempted to just slap your thinset down and ignore the pits. I’ve been there. ‘The tile will cover it,’ I told myself. But here is the reality: those pits are signs of poor bonding and trapped air. If your leveler is pitting, it might also be hollow or brittle underneath. According to technical bulletins from the Tile Council of North America (TCNA), outgassing—the air escaping from the substrate—is one of the most common causes of surface defects in underlayments and can compromise the bond between the leveler and the floor. Plus, if you are going for a thin-set tile application or a glue-down vinyl, those craters will telegraph right through your finished product. It’s worth fixing, but more importantly, it’s worth preventing.
Stop Blaming the Product and Start Checking Your Primer
The most common culprit for a ruined pour is a phenomenon called outgassing. Think of your subfloor like a giant, dry sponge. Concrete and wood are incredibly porous materials. When you pour a wet, heavy liquid on top, the air inside the floor is forced out. As it bubbles up through the leveler, it creates a tiny volcano. If the leveler is still very wet, the hole closes up. But if the leveler is starting to set—which happens faster than you’d think—the bubble pops and the crater stays frozen in time. I once made the mistake of skipping the second coat of primer because the floor ‘looked sealed,’ and I paid for it with a day of grinding. I learned the hard way that the secret to mixing the perfect bucket of self-leveler every time is only half the battle; you also have to seal that ‘sponge’ until it can’t breathe anymore. If your primer isn’t right, you’ll end up wondering why your subfloor primer is bubbling on old concrete instead of admiring a flat floor. Have you ever poured a floor that looked perfect for ten minutes before turning into a bubbly mess? I’d love to hear your horror stories in the comments so we can troubleshoot them together.
Seal the Subfloor Until It Stops Drinking
Think of your concrete slab or wooden subfloor as a giant, thirsty sponge. If you just splash some primer on and call it a day, that ‘sponge’ will suck the moisture right out of your leveler, leaving it brittle and full of holes. I learned this the hard way on a bathroom remodel where I thought one coat of primer was ‘enough.’ The result? The leveler didn’t just bubble; it literally detached. That is why your floor primer is peeling off like a sunburn—it didn’t soak in, it just sat on the surface like a piece of dead skin. You need to apply at least two coats, sometimes three if the concrete is old and porous. Scrub the first coat in with a stiff-bristled broom. You want to force that liquid into every pore. If you’re dealing with a massive slope, knowing how to level a floor that has a 2 inch drop across the room starts with this sealing process; otherwise, the weight of the thick pour will force air up through the liquid for hours.
Wait for the Tacky Phase
Patience is the hardest part of DIY, but pouring over wet primer is a death sentence for your floor. The primer needs to turn from a milky white or blue to a clear, tacky film. If you pour too early, the primer mixes with the leveler, diluting the bond. If you wait too long (usually over 24 hours), dust settles on the primer and ruins the stick. You have a goldilocks window. When I’m working on precise floor leveling techniques to achieve flawless surfaces, I always do the ‘finger test.’ If I touch the floor and my finger sticks slightly without picking up any wet residue, it’s go-time.
Precision is Your Only Friend at the Mixing Station
Mixing leveler is more like baking a delicate soufflé than mixing standard concrete. If you add even a quarter-cup too much water, you’ll see ‘tiger stripes’—white, chalky lines on the surface that indicate the polymers have separated. This makes the floor weak. I used to eyeball the water line in a bucket until I ruined three bags of high-end compound. Now, I use a dedicated measuring pitcher. You also need to understand the secret to mixing the perfect bucket of self-leveler every time: it’s all about the RPM of your drill. Too fast and you whip air into the mix (more bubbles!); too slow and you get ‘eggs’ of dry powder at the bottom. Aim for a smooth, lump-free consistency that looks like heavy cream.
The Spiked Roller is Not Optional
Once the pour starts, the clock is ticking. This is often why your self-leveler is drying faster than you can pour it—you’re trying to move the product with a flat trowel instead of letting gravity and the right tools do the work. Enter the spiked roller. This tool looks like something out of a medieval movie, but it is your best defense against pinholes. As you roll it through the wet slurry, the spikes break the surface tension and allow those trapped air bubbles to escape before the leveler sets. It also helps ‘knit’ the different bags together so you don’t end up with visible ridges between buckets. #IMAGE_PLACE_HOLDER_B# I remember a kitchen pour where I skipped the roller because I didn’t want to spend the extra $30. I spent the next two days with a hand grinder, wearing a respirator and covered in gray dust, trying to flatten out the ridges and ‘waves’ that a roller would have smoothed in seconds. It was a miserable lesson in ‘buying the right tool the first time.’ Your goal is a continuous, glassy surface, and the roller is what makes that happen by releasing the pressure that builds up as the chemical reaction begins to generate heat within the mix.
People often think ‘level’ is the holy grail of flooring. I’ll be the first to tell you: it’s not. In the pro world, we care much more about ‘flatness’ than being perfectly level with the horizon. You can have a floor with a slight pitch that looks stunning with hardwood, but a floor that is level yet ‘wavy’ will result in lippage that trips you every time you walk. This is a crucial part of flooring installation mistakes to avoid for lasting results. If you’re installing 24×48 porcelain, a 1/8-inch dip over ten feet is a disaster, even if the floor is technically level.
The Invisible Bounce That Ruins Perfect Pours
The biggest mistake I see advanced DIYers and even some ‘pros’ make is ignoring the structural deflection of the joists. You can pour the most expensive self-leveling compound in the world, but if your subfloor has too much ‘give,’ that rigid leveler is going to snap like a cracker the moment you walk on it. This is exactly why your self-leveler developed spiderweb cracks overnight. It’s not a product failure; it’s a physics failure. The Tile Council of North America (TCNA) specifies in their handbook that for ceramic tile, the maximum allowable deflection is L/360—meaning the floor shouldn’t bend more than the span divided by 360 under a heavy load. For natural stone, that requirement doubles to L/720. If you don’t stiffen the floor first, you’re just throwing money down a very level drain.
How do you calculate deflection before the first bag is opened?
Before you even think about mastering hardwood floor refinishing expert tips for 2025 or laying tile, you need to check your joist span and thickness. I use a simple deflection calculator or the ‘jump test’—if I can feel a vibration in my heels when I land, the floor needs another layer of plywood or blocking underneath. 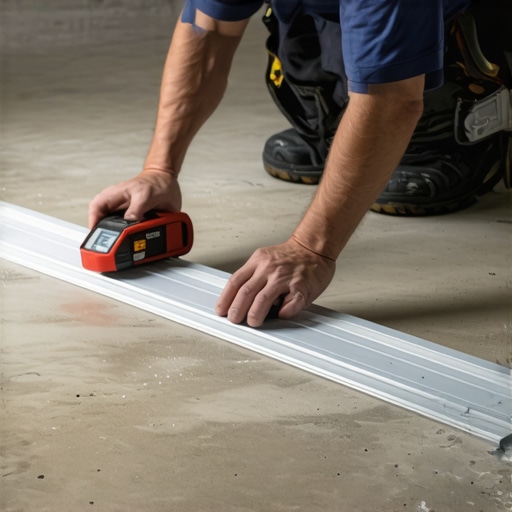 This structural integrity is the foundation of the secret to getting a flat floor for large format tiles. If your substrate is moving, no amount of primer or spiked rolling will save the installation.
Don’t Trust Your Eyes—Trust a Moisture Meter
Another nuance that gets missed is the ‘invisible’ moisture inside a slab. Even if a floor looks dry, it might be holding onto high levels of humidity that will blow your leveler right off the surface in a few months. Professional installers know how to use a moisture meter before you lay wood floors or pour compounds. If the moisture vapor emission rate (MVER) is too high, you need a moisture vapor barrier, not just a standard primer. Have you ever fallen into this trap where everything looked perfect until the seasons changed? Let me know in the comments so we can swap notes.
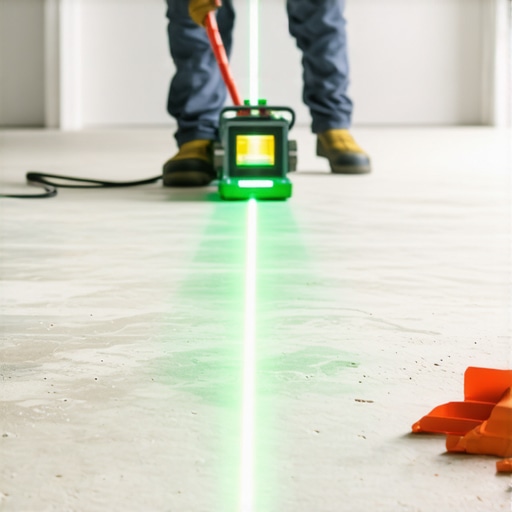
Once you’ve mastered the chemistry of the mix and the physics of the subfloor, the difference between a ‘good enough’ job and a professional-grade finish comes down to your toolbox. I used to rely on a standard 4-foot bubble level and my own eyesight, but that is a recipe for disaster when you are working with large-format tiles. Now, I never start a pour without a 360-degree green beam laser level. By setting the laser at a fixed height and using a simple measuring stick (or even just driving screws into the subfloor until the heads hit the laser line), you create a perfect topographic map of your floor. This is the heart of precise floor leveling techniques to achieve flawless surfaces. It takes the guesswork out of how many bags you need and where the deep spots actually are.
Your Angle Grinder is the Secret Weapon Against High Spots
Even the best self-leveling job can occasionally have a small ridge or a splash that dries too high. Instead of crying over a ruined floor, I keep a 5-inch angle grinder with a vacuum-shroud attachment and a turbo-cup diamond wheel ready to go. This tool allows you to ‘sculpt’ the floor after it has cured. If you find a hump that’s going to cause lippage, you can grind it down in seconds. Just be careful not to create a valley—you want to avoid the sanding mistake that leaves swirl marks on your wood or underlayment by keeping the grinder moving in a light, circular motion. This level of detail is what separates a DIYer from someone who understands flooring installation fundamentals leveling for a seamless look.
How do I keep my subfloor stable for decades?
Maintenance for a leveled floor actually happens before the finished flooring even goes down. According to the National Wood Flooring Association (NWFA) technical guidelines, a substrate must be flat within 1/8 inch over a 10-foot radius to ensure the long-term health of hardwood. To maintain this stability, you must control the environment. If you’ve leveled a floor but allow the humidity in your crawlspace or basement to spike, that moisture will eventually migrate upward and weaken the bond of your leveling compound. Consistent climate control is the real secret to hardwood floor care secrets to longevity and shine. Without it, even the most perfect pour will eventually succumb to the expansion and contraction of the house.
Smarter Polymers are the Future of Flooring
Looking ahead to 2025 and beyond, we are seeing a massive shift toward fiber-reinforced leveling compounds. These products use microscopic synthetic fibers to create a mesh-like internal structure, almost like rebar for your ‘liquid floor.’ This technology makes the compound much more resistant to the micro-movements of a home, which is vital for mastering hardwood floor refinishing expert tips for 2025 when you’re dealing with older, shifting structures. We are also seeing ‘smart’ primers that change color when they are perfectly tacky and ready for the pour, removing the ‘finger test’ guesswork I mentioned earlier. Following a step-by-step guide to flooring installation and leveling success will soon involve much more high-tech chemical assistance than we have today. I strongly encourage you to try the ‘screw-mapping’ method with a laser level on your next project; it’s a game-changer that will save you from under-ordering materials and ensure your tile lines remain perfectly straight for the life of the home.
Lessons That Changed My Pours Forever
The most profound realization I had after years of trial and error is that floor leveling is actually a race against the clock where you aren’t the driver—the temperature is. On a hot summer day, your working time evaporates. I started pre-chilling my mixing water with ice to buy myself an extra five minutes of flow. It sounds crazy until you see the results.
Another ‘lightbulb moment’ came when I stopped trying to fix every pinhole while the leveler was wet. If you over-work the material, you break the surface tension and make the problem worse. Sometimes the best move is to let it dry and address it with a skim coat or minor grinding later. I learned this while studying the ultimate guide to floor leveling for a perfect finish.
The Gear That Saved My Sanity
If you are serious about getting a professional result, there are three things I recommend keeping in your van. First, a high-quality 360-degree laser level. This is non-negotiable for how to achieve flawless floor leveling before tile laying because it reveals high spots your eyes simply can’t see.
Second, the Tile Council of North America (TCNA) Handbook. It is the gold standard for specifications and will keep you from making structural errors that void warranties. Finally, invest in a dedicated mixing station with a high-torque, low-RPM drill. Standard drills whip too much air into the mix, creating the very bubbles we are trying to avoid. These are the kind of tile installation pointers that save time and money in the long run. [IMAGE_PLACEHOLDER_E]
Building a Foundation You Can Trust
At the end of the day, a perfectly flat floor isn’t just about vanity or making the tile job easier. It is about the peace of mind that comes from knowing you’ve built something that will last for decades. When you take the time to master floor leveling, you are protecting your investment in high-end tile or hardwood. Don’t be afraid to take it slow on your first few bags. Every pro started with a floor that looked like the moon; the difference is they didn’t stop until it looked like glass. Have you ever dealt with a floor that felt more like a trampoline than a foundation? Tell me your subfloor stories below!