
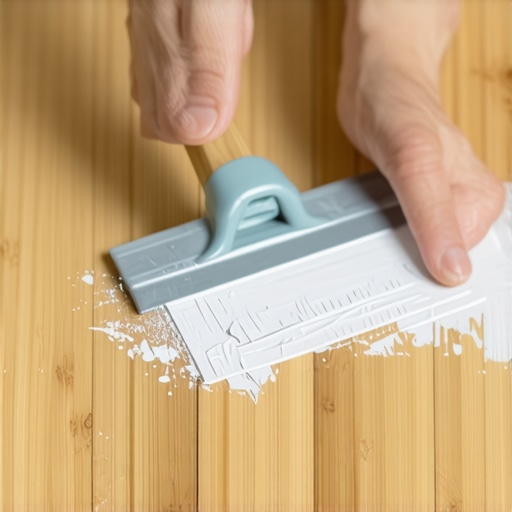
I remember standing in the middle of my first fixer-upper, peeling back a layer of dusty, moth-eaten carpet only to find a literal crime scene underneath. Not a real crime, mind you, but a DIY tragedy: decades of neon-pink and clinical-white paint splatters across what should have been gorgeous, honey-toned oak. My first instinct was to run to the hardware store and rent the biggest, loudest drum sander I could find. I am so glad I didn’t. Sanding isn’t just back-breaking work; it’s a permanent choice that strips away precious millimeters of your floor’s life. If you are staring at a mess of dried latex or oil-based drips, take a breath. You can fix this with a little patience and the right household chemicals, leaving that original finish exactly where it belongs.
Skip the Sandpaper and Save Your Finish
Most homeowners assume that once paint hits wood, the two are bonded for eternity. I used to think the same until I realized that most paint just sits on top of the sealer like a stubborn scab. Early in my DIY journey, I made the mistake of using a sharp metal scraper on a cold floor, which led to a series of deep gouges I later had to match the wood grain for during a very tedious repair. It was a classic example of more brawn than brains. Today, we are focusing on methods that prioritize the health of your boards. We want to lift the pigment without triggering hardwood floor care secrets that involve expensive professional interventions. Whether you are dealing with a few droplets or a large spill, the goal is a clean slate that doesn’t involve a dust mask and three days of vacuuming.
Is it actually possible to get clean results without a pro?
I know what you’re thinking: if it were this easy, wouldn’t everyone do it? The skepticism is fair. You worry about chemicals eating through the polyurethane or leaving a dull, hazy ghost of the paint behind. However, the National Wood Flooring Association notes that many modern floor finishes are surprisingly resilient to mild solvents as long as they aren’t left to soak for hours. The real secret isn’t the chemical itself; it’s the mechanical action you use to lift the softened paint. If you’ve been avoiding your guest room because of those ugly beige splotches, you’re in the right place. Have you ever tried a ‘hack’ you saw online only to have it fail miserably on your specific type of wood? I’d love to hear your horror stories—trust me, I’ve been there too. Before we start softening that old paint, we need to ensure the rest of the room is in good shape, checking for issues like why your hardwood floor is crowning, which can make any cleaning process much more difficult. Let’s get into the specifics of what tools you actually need.
Pick Your Solvent Based on the Paint’s DNA
I once took a heat gun to a stubborn patch of beige gloss in my hallway. I thought I was being clever, but within seconds, the polyurethane bubbled up like a burnt marshmallow. I wasn’t just removing paint anymore; I was facing a full-blown repair. That’s when I had to learn how to match the wood grain when patching a hole in oak just to hide my impatience. Learn from my singed boards: heat is a last resort. Instead, your first step is identifying the paint type. Latex paint (water-based) is the most common culprit and luckily the easiest to handle. If you can pick at it with a fingernail and it feels slightly rubbery, it’s latex. For this, high-percentage isopropyl alcohol is your best friend. It breaks down the binders in the paint without dissolving the factory-sealed finish of the wood. If the paint feels brittle and rock-hard, it’s likely oil-based, requiring mineral spirits. This is the foundation of hardwood floor care secrets that pros use to avoid expensive refinishing bills.
The Gentle Art of the Plastic Scrape
Once you’ve applied your solvent with a cotton swab—don’t pour it, just damp it—let it sit for about sixty seconds. You are looking for the paint to ‘bloom’ or slightly swell. This is where most people fail by reaching for a metal putty knife. Don’t do it. A plastic scraper or even an old credit card provides enough tension to lift the paint without gouging the wood. Think of it like removing a price tag from a delicate gift box; you want to slide under the edge, not dig into the surface. If you find that the paint has permeated too deeply into the grain, you might eventually need to look into mastering hardwood floor refinishing expert tips for 2025, but for 90% of spills, the plastic-and-alcohol combo is magic. I’ve used this method on everything from 100-year-old maple to modern pre-finished planks, and it consistently saves the day.
Why Precision Beats Power for Small Drips
For those tiny ‘stardust’ splatters that happen when a roller flicks, don’t treat the whole floor. Use a Q-tip dipped in your chosen solvent and target only the dot. This prevents you from dulling a large area of the floor’s sheen. You might even discover that what you thought was paint is actually old residue, which is where the simple hack for removing wax from new hardwood comes into play. If the solvent makes the area look slightly hazy afterward, don’t panic. A quick buff with a microfiber cloth and a drop of floor-specific polish usually restores the glow. This detailed approach is a core part of how to revamp your home with expert flooring installation tips because it teaches you that preservation is often better than replacement. For those working with older materials, achieving the secret to a perfect finish on reclaimed pine often starts with these exact cleaning protocols. Focus on one square foot at a time to ensure you aren’t leaving chemicals on the wood for too long.
Once that paint is gone, you might realize the floor underneath isn’t as perfect as you hoped. I’ve spent twenty years in this industry, and I’m here to tell you that ‘level’ is often a secondary concern compared to ‘flatness.’ Most homeowners get this wrong. If your 100-year-old house has a structural slope, trying to make it perfectly level could create a massive step-up at your doorway that you’ll trip over for years. What actually matters is that there are no dips or humps. According to the World Floor Covering Association (WFCA), most click-lock and large-format tiles require a surface that does not deviate more than 1/8th of an inch over a ten-foot span. This is why you need to learn how to check for high spots with a 10-foot straightedge before you even think about laying your first board.
The Priming Mistake That Ruins Everything
One of the biggest ‘traps’ I see DIYers fall into is assuming that ‘clean’ concrete is ready for self-leveling compound. You might have scrubbed it with soap and water, but if you didn’t test for porosity, your expensive leveler is going to fail. If you pour a small amount of water on the slab and it beads up instead of soaking in, your primer—and subsequently your leveler—won’t bite. This is the primary reason why your floor primer is peeling off like a sunburn. I’ve seen entire living rooms worth of leveler pop off like a giant, brittle potato chip because someone skipped a five-minute water test. Have you ever fallen into this trap? Let me know in the comments.
Why is my floor sweating even though I used a vapor barrier?
This is a question I get from the more advanced crowd, and it’s a tough one: hydrostatic pressure. Even with a plastic barrier, if your subfloor wasn’t properly acclimated or if the edges weren’t sealed with the correct tape, moisture finds a path. This is particularly dangerous for modern materials. You might eventually notice why your concrete floor is sweating under the rugs, which is usually the first indicator of a failure in your moisture mitigation strategy. Mastering pro secrets for perfect installations means acknowledging that the invisible chemistry of the slab is just as important as the aesthetics of the finish.
Don’t Ignore the Expansion Gap Myth
Many people think the baseboard is there just to look pretty. In reality, it is a structural necessity that hides the most important part of your floor: the expansion gap. I’ve seen beautiful floors buckle and peak because the installer wedged the planks tight against the drywall. This leads to the frustrating issue of the hidden reason your floating floor is pinching. A floor needs to breathe and move with the seasons. If you take away that space, the floor has nowhere to go but up.
I’ve spent years learning that the difference between a floor that lasts five years and one that lasts fifty often comes down to the gear you keep in your truck. If you’re still using a standard circular saw blade for everything, you’re asking for trouble, especially with tougher materials. I’ve seen beautiful projects ruined because someone didn’t realize why you need a specific blade for cutting bamboo planks. It’s about more than just the cut; it’s about heat management and preventing the fibers from splintering before they’re even laid down. For me, the ‘must-have’ list starts with a high-quality moisture meter and a real straightedge. You might think you’ve got a smooth surface, but the moment you start precise floor leveling techniques to achieve flawless surfaces, the flaws scream at you. I never step onto a job site without my 10-foot straightedge. It’s the only way to accurately learn how to check for high spots with a 10-foot straightedge. If you’re serious about a pro-level finish, stop relying on those tiny bubble levels; they’re meant for hanging pictures, not supporting thousands of dollars in hardwood.
Ditch the steam mop to save your seams
One of the most heartbreaking calls I get is from a homeowner who just installed a gorgeous click-lock floor, only to have the seams swell and peak six months later. When I ask how they clean it, the answer is almost always a steam mop. Please, I’m begging you, understand why you should never use a steam mop on click lock floors. That high-pressure vapor is forced right into the core of the plank, causing irreversible damage that no amount of drying can fix. Instead, stick to a dry microfiber setup and a vacuum that won’t scratch the finish. I personally use the vacuum attachment that actually picks up fine sawdust because it handles the grit without dragging it across the wood like a piece of sandpaper. These small habits are the real hardwood floor care secrets to longevity and shine.
How do I maintain these floors without losing my weekends?
The key is consistency over intensity. Rather than a deep scrub once a month, a quick daily pass with a soft-bristle head keeps the abrasive dust at bay. This is even more critical if you’ve followed the ultimate guide to floor leveling for a perfect finish and have a perfectly flat surface where every speck of dust is visible. According to the Tile Council of North America (TCNA) Handbook, specifically the EJ171 standard, movement joints are a structural requirement for any large run of tile, and keeping those joints clear of debris is essential for the floor’s health. Looking ahead, I suspect we will soon see smartphone-integrated LIDAR apps that allow us to map floor deviations with 99% accuracy before we even mix a bucket of thinset. Until then, the old-school tools are your best bet. If you want to see an immediate difference in your next project, try the blue tape trick for your grout lines—it’s a total game changer for keeping things clean from the start.
The Hardest Lesson I Learned While Chasing a Level Surface
Looking back at my early projects, I realized I spent way too much time worrying about whether a floor was perfectly level relative to the earth’s core, rather than ensuring it was flat enough for the material. One of the biggest ‘lightbulb moments’ came when I stopped fighting the house’s natural settling and started focusing on precise floor leveling techniques to achieve flawless surfaces. I also learned that you can’t rush the drying process; if you do, you’ll end up wondering why your self leveler didn’t flow into the low spots as intended. Preservation is always cheaper than replacement. Taking an extra hour to gently lift paint with alcohol is a small price to pay for keeping the original character of your home intact.
The Toolkit I Wish I Had on Day One
If I could go back in time, I’d hand my younger self a few key items that would have saved me thousands in ruined materials. First, a real straightedge is non-negotiable; you need to know how to check for high spots with a 10-foot straightedge before you even open a bag of leveler. Second, never underestimate the power of the right cutting edge—I learned the hard way why you need a specific blade for cutting bamboo planks to avoid splintering. Finally, a reliable moisture meter is your best defense against future buckling. I trust these tools because they take the guesswork out of a job that relies heavily on hidden variables like humidity and subfloor tension.
#IMAGE_PLACEHOLDER_E#
Don’t Let the Fear of a Mess Stop Your Progress
It’s easy to get paralyzed by the ‘what-ifs’ when you’re staring at a damaged floor, but remember that every pro started with a single messy project. Whether you’re experimenting with hardwood floor care secrets or diving into mastering hardwood floor refinishing expert tips for 2025, the key is to take it one square foot at a time. Your home is a canvas, and even the deepest paint stain or the wonkiest subfloor can be corrected with the right approach and a little bit of grit. You’ve got the knowledge—now it’s time to get your hands dirty and create a floor you’re proud to walk on every day. Have you ever found a surprise under your old carpet that made you want to call a pro immediately? Let me know in the comments below!