
I stood in my hallway, coffee in hand, staring at a ridge in my flooring that wasn’t there yesterday. It looked like a miniature mountain range right under the door frame. I’d spent three days installing that ‘easy’ click-lock system, only to have it pinch and protest the moment the sun hit the living room. My mistake? I assumed ‘floating’ meant the floor stayed put while everything else moved. In reality, it is the other way around. If you have ever felt your floorboards pushing against each other like tectonic plates, you know exactly how frustrating it is. Today, I am going to show you exactly why your floor is binding up and how to give it the elbow room it’s screaming for so you can finally stop that annoying clicking sound.
Give Your Planks Some Room to Grow
When I first started messing around with flooring installation fundamentals, I was terrified of seeing a gap at the baseboard. I pushed my planks tight against the drywall, thinking I was being precise. I wasn’t being precise; I was being a disaster. A floating floor is a living, breathing entity that expands and contracts with the seasons. If it hits a wall or a heavy kitchen island, it has nowhere to go but up. This creates a ‘pinch point.’ I learned the hard way that when you cram boards in too tight, you end up with LVP floors that feel like they are bouncing or, worse, joints that snap under the pressure. According to the National Wood Flooring Association (NWFA), most installation failures aren’t caused by bad materials, but by a lack of proper expansion space. Even a 10-degree shift in your home’s temperature can cause a large floor to grow by nearly a quarter of an inch. Have you ever walked across your room and felt a ‘bounce’ or heard a sharp ‘crack’ that made you jump?
Is a quarter-inch gap really enough to stop the buckling?
You might think that tiny sliver of space won’t make a difference, but it is the difference between a floor that lasts twenty years and one that fails in two. I used to worry about the gap being ugly, but that is what baseboards and shoe molding are for. If you don’t leave enough room, you will eventually see the reason your vinyl plank is separating at the most inconvenient spots. I once made the rubber mallet mistake of hammering the joints so hard that I crushed the locking mechanism, which made the pinching even worse because the boards couldn’t slide naturally. We need to look at how your subfloor and the weight of your furniture are conspiring to trap your floor in place.
Release the Tension and Give Your Floor Room to Move
To fix a floor that is already binding, you have to act like a surgeon rather than a demo crew. Most people assume they need to tear the whole thing up, but usually, the culprit is just one or two spots where the floor is ‘choking.’ I remember a job in a small sunroom where the owner was convinced the product was defective because the middle of the floor was humped up like a camel’s back. I pulled the baseboard on the far wall and found that the flooring was jammed so tight against a door casing that I couldn’t even slide a piece of paper into the gap. I took an oscillating multi-tool, trimmed back the bottom of the casing, and watched the hump literally deflate in front of my eyes. This is why following a step-by-step guide to flooring installation and leveling success is critical; it teaches you to respect the gap. #IMAGE_PLACE_HOLDER_B#
Locate the Stealth Binds Under Your Trim
Start by removing your baseboards in the area where the buckling is most prominent. You are looking for any plank that is touching the drywall or the wall studs. Even a single screw for a door stop or a heavy kitchen island leg can act as an anchor, pinning the floor down and preventing it from moving as a single unit. Think of your floor like a massive sheet of ice on a lake; if one side is frozen to a pier, the rest of the ice will crack as the water level shifts. If you find a spot that is too tight, use a pull bar or a chisel to create at least a quarter-inch of breathing room. In large open-concept spaces, the weight of the furniture itself can sometimes create these binds, which is why you need a transition strip between different flooring heights or in doorways to break the floor into smaller, more manageable sections.
Eliminate Subfloor Peaks That Cause Friction
Sometimes the bind isn’t at the wall; it is underneath the boards. If your subfloor has a high spot, the planks are forced to climb over it, creating tension at the joints. When the floor expands, that tension has nowhere to go but upward. I’ve seen DIYers try to ‘beat’ the floor flat with a hammer, but you are just damaging the locking mechanism. Instead, you need to know how to check for high spots with a 10-foot straightedge before you even open a box of material. If you skip this, the friction between the underside of the plank and the peak of the subfloor will cause the boards to bind and eventually separate. This is exactly why your lvp floor is showing telegraphing from the subfloor and why it feels like it is sticking when you walk. If you find a high spot after the floor is down, your only real option is to pull the planks back to that point, sand down the high spot or fill the surrounding low spots, and relay the floor correctly. It’s a pain, but it is the only way to kill the click and the buckle for good.
Stop Chasing the Bubble and Start Chasing Flatness
Let’s dig deeper into a myth that kills more weekend projects than anything else: the obsession with being ‘level.’ I’ve walked onto job sites where the homeowner spent three days trying to make a 100-year-old subfloor perfectly level with the horizon. Here is the truth: your house is settling, and unless you want to re-frame the entire foundation, ‘level’ is often a pipe dream. What actually matters for your warranty and the life of your planks is flatness. I once saw a beautiful oak install fail because the installer focused on the bubble in his spirit level instead of a massive dip hidden in the center of the room. If the floor isn’t flat, the tongue-and-groove joints will eventually ‘fret’ or rub together, which is exactly how to stop a floating floor from clicking when you walk before it even starts. The Tile Council of North America (TCNA) explicitly differentiates between these two concepts in their handbook, emphasizing that ‘flatness’ is the primary requirement for large format tiles and hardwood alike. Mastering this distinction is one of those mastering floor leveling pro secrets for perfect installations that separates the pros from the frustrated DIYers. 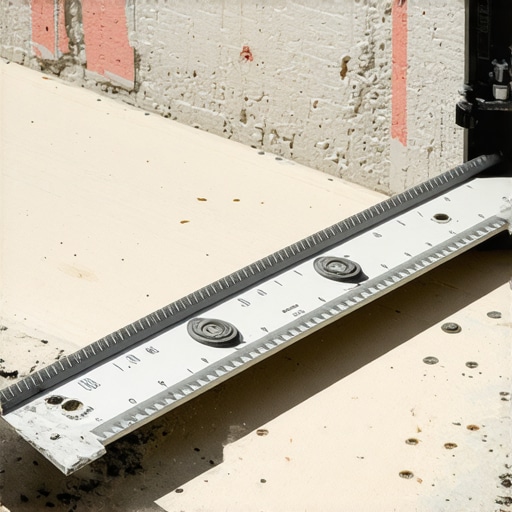
The Moisture Trap That Ruins Perfect Bonds
Then there is the primer trap. Most people think more is better, but why your floor primer is peeling off like a sunburn usually comes down to ‘puddling.’ If you leave thick pools of primer on a wooden subfloor, it never truly cures; it just creates a film that the self-leveler can’t grab onto. It’s a gut-wrenching feeling to hear a hollow ‘clack’ when you walk over a fresh pour because the bond failed underneath. This is a classic example of flooring installation mistakes to avoid for lasting results. You want a thin, even coat that disappears into the pores of the wood, not a shiny lake of chemicals.
Why does my self-leveler look like a dry lake bed the next morning?
If you see spiderweb cracks after a pour, it’s rarely a bad product. Usually, it’s because the subfloor was too thirsty. If you don’t seal the wood or concrete properly, it sucks the moisture out of the leveler before the chemical reaction finishes. This is why your self-leveler developed spiderweb cracks overnight. You have to strike a balance between a damp subfloor and a puddled one. This is especially true when you are trying to find the secret to getting a flat floor for large format tiles, where even a hairline crack can telegraph through to your expensive porcelain. Have you ever fallen into this trap? Let me know in the comments.
The Tool I Never Step on a Job Site Without
In my early days, I relied on my ‘gut feeling’ to tell if a subfloor was dry. That was a recipe for disaster. Now, I won’t even open a box of planks until I’ve performed a thorough check. Learning how to use a moisture meter before you lay wood floors changed my entire workflow. I personally use a pinless meter because I don’t want to poke holes in expensive finish grade plywood, but I keep a pin-style on hand for checking deep into joists. The ASTM F2170 standard for relative humidity in concrete is something I follow religiously; it’s the only way to prove you did your due diligence if a floor ever fails. If your subfloor is more than 4% different from your flooring material, you’re walking into a trap of warping and gapping. 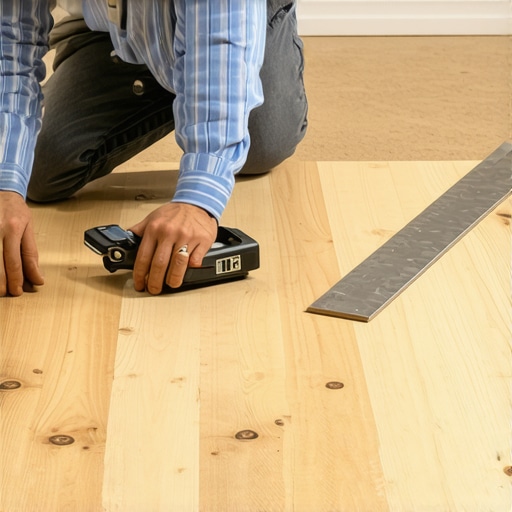
Stop Using Steam Mops on Your Hardwood
I see it all the time: someone spends five figures on a gorgeous install and then ruins it with a $50 steam mop. The heat and moisture from those machines force water into the joints, which is exactly how you end up with crowning or finish failure. Instead, I stick to the hardwood floor care secrets to longevity and shine that pros actually use, which starts with a high-quality microfiber pad and a pH-neutral cleaner. And for heaven’s sake, remember the waiting period for mopping after a fresh install. If you introduce water before the finish has fully cured, you are essentially sealing in cloudiness that you’ll have to sand out later.
How can I make my floor finish last ten years?
The secret isn’t just the cleaner; it’s the grit. I tell my clients that the biggest enemy of their floor is the invisible dust that acts like sandpaper under your shoes. I invested in a high-efficiency fine sawdust management system for my shop, and I suggest homeowners use a vacuum with a soft brush attachment designed specifically for hard surfaces. If you stay on top of the grit, you can push off the need for mastering hardwood floor refinishing for another decade.
The Future of Measuring is Already in Your Pocket
We are moving into an era where ‘eyeballing it’ is becoming obsolete. I’ve started using Lidar-based apps on my phone to create high-resolution maps of floor flatness before I ever mix a bag of leveler. In the next few years, I predict we will see smart-flooring sensors that alert homeowners to subfloor moisture spikes before the wood even starts to buckle. This tech is making the ultimate guide to floor leveling for a perfect finish much easier to execute for DIYers. My advice? Don’t just guess where the low spots are. Use a 10-foot straightedge or a laser level to visualize the ‘ocean’ of your subfloor. Before you lay your next plank, go buy a pinless moisture meter and map out your subfloor—it’s the single best insurance policy you can buy for your home.
The Heavy Cost of Ignoring Humidity
If there is one thing that years of flooring installation have taught me, it is that you cannot win a fight against physics. I used to think that as long as the subfloor was dry to the touch, I was safe. I was wrong. The air moisture matters just as much as the subfloor moisture. One of the biggest flooring installation mistakes to avoid for lasting results is rushing the acclimation process. I once watched a beautiful wide-plank oak floor cup within two weeks because the HVAC system wasn’t running during the install. Now, I never start a job unless the home has been at its ‘living temperature’ for at least a week.
- Acclimation isn’t a suggestion; it is a requirement for the wood’s cells to stabilize before they are locked into place.
- Always check the moisture content of the subfloor and the planks—they should be within a 2-4% range of each other to prevent structural stress.
- A floor that looks perfect today can fail in six months if you ignore the seasonal expansion cycles that happen in your climate.
Where to Get the Professional Edge
You don’t need a truck full of gear, but you do need the right gear. For those looking to revamp your home with expert flooring installation tips, I recommend starting with a high-quality pinless moisture meter. It allows you to scan your subfloor without leaving unsightly marks. I also swear by a 10-foot straightedge; it is the only way to ensure precise floor leveling techniques to achieve flawless surfaces. Lastly, don’t overlook your cleaning tools. Using a pH-neutral cleaner is one of the essential hardwood floor care secrets to longevity and shine that keeps your finish from looking dull after just a few months of foot traffic.
#IMAGE_PLACEHOLDER_E#
Build a Floor That Stands the Test of Time
Installing your own floors is one of the most rewarding home improvement projects you can take on. It changes the entire feel of your home, and once you master the basics of expansion and leveling, you will have a surface that lasts for decades. Don’t be intimidated by the technical details; every pro started exactly where you are today. With the right prep and a little patience, your flooring installation will be the envy of the neighborhood. Have you ever encountered a buckling floor that seemed to have a life of its own after you finished the job? Let me know your stories in the comments below!