
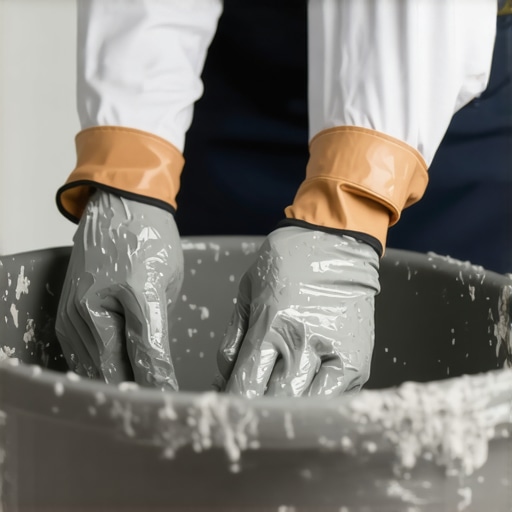
I’ll never forget the feeling of standing in my guest bathroom doorway, coffee in hand, watching the morning sun hit my brand-new slate floor and seeing… spots. Not intentional design spots, but ugly, uneven gray patches where a rich charcoal should have been. I’d followed the bag instructions to the letter—or so I thought. I made the classic mistake of adding ‘just a splash more water’ to make the mix easier to spread. That ‘splash’ cost me an entire weekend of scraping out hardened cement. If you’ve ever felt that sinking feeling in your gut when the grout dries three different shades of beige, you’re not alone. Today, we’re going to fix that. I’m going to show you exactly how to mix your grout so the color stays true from the first bucket to the last, ensuring your installing tiles like a pro dreams don’t turn into a mottled nightmare.
The Real Reason Your Grout Looks Like a Dalmatian
[image] It’s easy to blame the manufacturer or a ‘bad batch,’ but ninety percent of the time, the culprit is the person holding the drill. When we mix grout, we aren’t just making mud; we are triggering a delicate chemical reaction. If you add too much water, you dilute the pigments and create microscopic voids where minerals can rise to the surface. This is why the reason your grout color looks splotchy and uneven usually boils down to a lack of ‘water-to-powder’ discipline. Early in my DIY journey, I used to eyeball it. I thought a ‘pancake batter’ consistency was the goal, but that’s a fast track to disaster. According to the Tile Council of North America (TCNA), excessive water in the mix is the primary driver of efflorescence, that chalky white film that masks your expensive pigment. You have to treat your grout like a precise cake recipe, not a casual soup.
Can You Really Fix Color Issues Without Starting Over?
It’s the question that keeps every renovator up at night: ‘Is it worth the hype to be this meticulous?’ The answer is a resounding yes, because the alternative is living with a floor that looks permanently dirty. I’ve learned the hard way that you should always mix the entire bag of grout at once to avoid ‘shading’—where one section of the floor is a hair darker than the next because the pigment wasn’t perfectly distributed in the bag. Have you ever stepped back from a finished job only to realize your ‘Sandy Beach’ looks more like ‘Wet Cardboard’ in the corners? Let me know in the comments if you’ve faced that frustration. Before you even open that bag, you need to how to spot a bad batch of grout before you apply it so you aren’t fighting a losing battle from the first minute.To move beyond the ‘guess-and-check’ phase, you have to embrace a bit of science.
Master the Physics of the Bucket
Just like how to achieve flawless floor leveling before tile laying, mixing grout is about precision. If you’ve ever seen a pro with a measuring cup and a scale, they aren’t being pretentious; they are protecting their reputation. One of the primary flooring installation mistakes to avoid for lasting results is treating water as an ‘approximate’ ingredient.
Weight the Bag Like a Professional Baker
I remember a specific job—a small powder room with white subway tiles and a deep ‘espresso’ grout. I was in a rush, grabbed a dirty bucket, and eyeballed the water. Within an hour of drying, the bottom half was nearly black and the top was a dusty charcoal. I had to scrape it all out. Now, I use a digital scale. Most grout bags tell you exactly how many pints or quarts of water per pound of powder. When you follow these ratios to the gram, you eliminate the variable that causes 90% of color shifting. 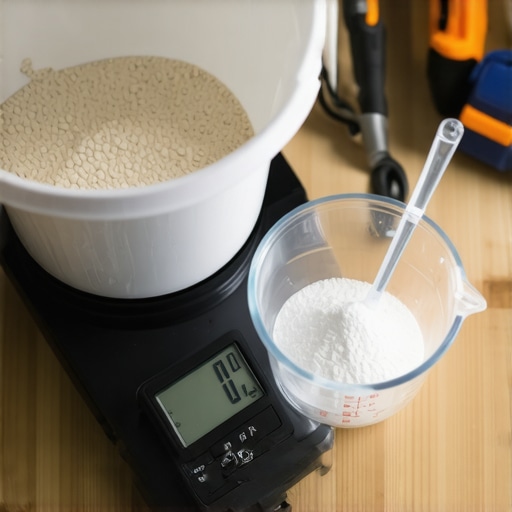
Why Speed is the Enemy of Your Color
It is tempting to crank your drill to the highest setting to get the ‘chunks’ out faster. Don’t do it. High speeds whip air into the mixture, creating tiny bubbles that will pop and leave pinholes in your joints. Even worse, high-speed friction can cause ‘flash setting,’ where the grout starts to harden before the pigment is fully hydrated. Keep your drill below 350 RPM. If your mixture feels too thick, don’t just add water; check if you are using the right paddle. Using the wrong tool can be as detrimental as the secret to mixing the perfect bucket of self-leveler every time being ignored—you end up with a structural failure disguised as a cosmetic one.
The Slake is Where the Chemistry Happens
Once your grout reaches a peanut-butter consistency, you have to stop and walk away. This five-to-ten-minute ‘slake’ period allows the water to fully penetrate the dry polymers in the powder. I once worked with a guy who thought slaking was a ‘lunch break excuse.’ He skipped it, and the grout was so brittle it literally crumbled out of the joints a week later. During this rest period, the chemical bond matures. After the wait, give it one final, slow stir by hand—do not add more water! If the floor isn’t perfectly flat, you might find yourself needing to know how to fix a transition between tile and uneven concrete, but at least your grout lines will look like they were carved from a single piece of stone.
Clean Water Means Clean Color
Always use cool, potable water. If your tap water has high mineral content or iron, it will react with the pigments. I’ve seen beautiful white marble jobs ruined because the installer used ‘yellow’ well water that stained the grout from the inside out. If you wouldn’t drink it, don’t mix your grout with it. This is especially true when you are working on complex layouts where you might be tempted by the pencil and string method for laying out curved tile borders; the more intricate the design, the more any color variation will stand out as a mistake rather than a feature.Even if you follow every mixing rule to the letter, there is one final ‘boss level’ hurdle that ruins more floors than anything else: the cleanup sponge. Most DIYers—and even some ‘pros’—treat the cleaning process as a race. They use a bucket of water and a sponge that is dripping wet, thinking they are being thorough. In reality, you are performing a ‘surface-level dilution’ that wreaks havoc on the pigment.
Stop Over-Washing Your Joints
The common belief is that the more you wipe, the cleaner the tile. I’m here to tell you that’s a lie. Excessive water during the wash phase is the secret the reason your grout color looks splotchy and uneven. When you drag a soaked sponge over fresh grout, you pull the pigment out of the top layer. This leaves the joints weak, dusty, and prone to early failure. I’ve seen beautiful charcoal floors turn into a ghostly, streaky mess because the installer wouldn’t wring out their sponge until it was nearly bone-dry. If you see a puddle in the joint, you’ve already lost. Have you ever fallen into this trap? Let me know in the comments.
The Myth That Sealer Fixes Structural Problems
People often ask if they can just ‘seal away’ their mistakes. They think a high-end sealer will bond together a mix that was too watery. It won’t. In fact, if the grout is soft because of poor mixing, the sealer will just sit on top of a crumbling foundation. This is one of the most overlooked flooring installation mistakes to avoid for lasting results. According to the Tile Council of North America (TCNA) and ANSI A118.7 standards, the structural integrity of the grout is entirely dependent on the initial crystalline structure formed during the first 24 hours. A sealer is a raincoat, not a skeleton.
Does Your Subfloor Choice Dictate Your Grout Type?
This is a nuance many overlook. If you are working on a wood subfloor that has even a tiny bit of deflection, using a standard cement grout is a recipe for disaster. This is why your grout is falling out of the joints in the hallway—it’s not a bad mix; it’s a lack of flexibility. For these scenarios, you need high-performance calcium aluminate cements or epoxy-modified grouts. Before you even mix the bag, you need to ensure you’ve mastered the secret to getting a flat floor for large format tiles, because any lip or dip will put uneven pressure on those grout lines.
The Invisible Danger of Hollow Tiles
If you hear a ‘clack’ when you walk, the best grout in the world won’t save you. You must learn how to detect a hollow tile before the grout starts cracking. Grout is meant to compress, not to support the weight of the tile. If the thinset isn’t 100% bonded, the grout will inevitably crack. I’ve even seen cases why your white grout turned orange in the shower because water sat in the voids behind a hollow tile and reacted with iron in the setting material. Don’t let your hard work be undermined by what you can’t see.To truly move from being a weekend warrior to a master of the craft, you have to stop looking at the day the grout dries as the ‘finish line.’ That’s actually just the beginning. I used to think the job was done when I packed up my truck, but real mastery is about how that floor looks five years from now. This is where your choice of equipment and your maintenance routine separate the pros from the pretenders.
The Gear That Actually Makes a Difference
It is easy to get sucked into the ‘tool aisle’ at the big box store and buy every plastic gadget on the shelf. Don’t do it. If you want to avoid flooring installation mistakes to avoid for lasting results, you only need a few high-quality precision instruments. My absolute non-negotiable is a high-end digital pinless moisture meter. I personally use one on every single job because I once made the mistake of laying a gorgeous white oak floor over a subfloor that looked bone-dry but was secretly holding 18% moisture. Within a month, the boards started crowning, and I had to eat the cost of the entire tear-out. You absolutely must learn how to use a moisture meter before you lay wood floors if you want your work to survive the change of seasons.
How do I keep these floors looking brand new for a decade?
Maintenance isn’t just about a mop and bucket; it’s about chemistry. For hardwood, the biggest killer is moisture and the wrong cleaners. I’ve seen homeowners ruin 20-year finishes in six months because they thought they were being ‘natural.’ You have to avoid the vinegar mistake that eats through your natural stone tiles and strips the sheen off your wood. Instead, stick to pH-neutral cleaners specifically formulated for the finish type—whether it’s oil-based or waterborne. According to the National Wood Flooring Association (NWFA) Technical Manual, the moisture differential between your subfloor and your hardwood planks should never exceed 4% for strip flooring. This level of precision is why hardwood floor care secrets to longevity and shine always start with climate control and the right testing tools.
Why Wood and Tile Need Different Love
We often treat all hard surfaces the same, but tile and hardwood have opposite ‘enemies.’ While wood hates water, tile and grout hate neglect. If you aren’t sealing your grout lines annually, they will eventually absorb oils and dirt that no amount of scrubbing can remove. If you are already dealing with a floor that has seen better days, you might need to look into mastering hardwood floor refinishing expert tips for 2025 to bring back that original glow. I predict that in the next few years, we are going to see a massive shift toward ‘smart’ flooring systems—tiles with built-in sensors that can detect sub-surface leaks before they cause mold. Until then, we rely on our eyes and our prep work. If you haven’t mastered your substrate yet, revisit the step-by-step guide to flooring installation and leveling success to ensure your foundation is as solid as your finish. My challenge for you on your next project: don’t just ‘feel’ if the subfloor is ready—buy a moisture meter and prove it with data.
The Hardest Lessons a Splotchy Floor Taught Me
Looking back at my first few dozen jobs, the most painful mistakes weren’t about physical strength; they were about chemistry and patience. One lightbulb moment was realizing that grout color is a living thing until it fully cures. If you’ve ever seen why your white marble tiles are turning yellow from the bottom up, you know that moisture behaves in mysterious ways. Another hard-earned truth: the light in the store is never the light in your bathroom. Always test a small patch and let it dry for a full 24 hours before committing to the whole floor. Finally, remember that your sponge is a precision tool, not just a rag; if it’s too wet, you are literally washing your money down the drain.
My Toolkit for a Zero-Failure Finish
I don’t step onto a job site without a few specific items that ensure my tile installation pointers that save time and money actually produce results. First, a simple digital kitchen scale is far superior to a measuring cup for consistent grout batches. Second, I swear by the Tile Council of North America (TCNA) Handbook—it is the industry ‘bible’ that settles every technical argument on-site. Third, a high-quality margin trowel is essential for scraping the sides of the bucket to ensure no dry powder is left behind to create streaks later. If you are transitioning from tile to wood, you will also need to master mastering hardwood floor refinishing expert tips for 2025 to keep your gear and skills relevant for the whole home.
Your Path to a Professional Result
The difference between a frustrating DIY project and a professional-grade flooring installation is found in the details that most people never see. When you take the time to measure your water to the gram and let your grout slake properly, you aren’t just laying tile; you’re creating a permanent legacy in your home. Don’t be afraid of the technical side—embrace the science of the mix. If you ever feel stuck or run into a substrate issue that seems impossible, you can always contact us for expert guidance. Your home deserves a foundation that is as beautiful as it is durable. Have you ever had a grout color disaster that looked perfect until it dried? Let me know in the comments below!