
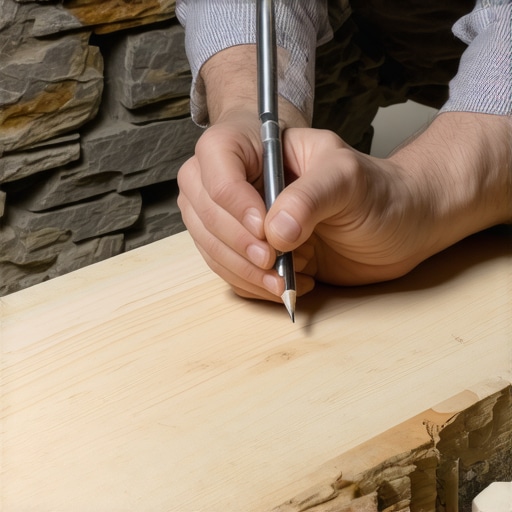
I was sitting on my subfloor, covered in a fine layer of white oak dust, staring at a gap between my new flooring and the hearth that could have swallowed a whole deck of cards. I had done everything by the book up to that point. I spent weeks obsessing over how to use a moisture meter before installing wood floors to ensure the boards wouldn’t buckle, yet here I was, defeated by a few pieces of uneven fieldstone. My wife walked into the room, looked at the jagged one-inch void where the wood was supposed to meet the stone, and didn’t say a word. She didn’t have to. My ‘eyeball and pray’ method had failed spectacularly. If you have ever tried to force a straight board against a crooked, bumpy stone surface, you know that sinking feeling in your gut when you realize a standard straight cut just won’t cut it.
Why Scribing is the Only Way to Save Your Sanity
The problem isn’t your saw; it is the fact that nature doesn’t grow in straight lines. Stone fireplaces are notoriously irregular, and if you want that high-end, custom-built look, you cannot just slap a piece of quarter-round over the gap and call it a day. I learned the hard way that skipping the prep work leads to a messy finish. You really have to embrace the dry-fit rule that prevents costly cutting mistakes before you even think about reaching for the adhesive. Scribing is simply the process of transferring the unique profile of the stone onto your wood plank so they fit together like puzzle pieces. When I first started, I thought I could just use a pencil and follow the edge by hand. I ruined three expensive planks of heartwood because my hand shook, or the pencil lead snapped at the worst possible moment. It was a mess. But then, an old contractor neighbor saw me struggling and handed me a simple school compass. That little tool changed everything. It allows you to maintain a consistent distance between the stone and the wood, regardless of how many bumps or dips the masonry has. According to the National Wood Flooring Association, transitions are the most common area for aesthetic failure in DIY projects, and nothing ruins a room faster than a glaring gap at the focal point of the house.
Is This Level of Detail Really Worth the Hassle?
I know what you are thinking because I thought it too. Is it really worth spending forty minutes on a single board? You might be tempted to just fill the gap with color-matched caulk, but let me tell you from experience: caulk shrinks, it collects dust, and it eventually looks like a cheap bandage. If you want a result that looks like a professional spent a week on it, you have to do the legwork. By using a compass to scribe, you are ensuring that the floor looks like it was built around the fireplace, not just shoved up against it. This is especially vital when you are dealing with flooring installation fundamentals like leveling for a seamless look. If the floor isn’t flat to begin with, the scribe will be even harder to execute. Have you ever stared at a massive gap in your flooring and wondered if you could just hide it with a rug, or are you ready to finally master the tool that makes those gaps disappear?To get started, you need to position your plank exactly where it will sit, but shifted back just enough to cover the irregular area. This is where most people get tripped up. If you try to scribe a board that isn’t already perfectly parallel to your floor’s run, the whole angle will be off. Think of it like aligning a car; if the wheels are skewed, it doesn’t matter how straight you hold the steering wheel.
Line Up Your Board Like a Pro
Start by laying the plank on top of the row you just finished, butted right up against the stone. This is essentially a specialized version of the dry-fit rule that prevents costly cutting mistakes. You want to make sure the board is parallel to the installed floor. If your subfloor isn’t flat, your compass will jump and skip, which is why the ultimate guide to floor leveling for a perfect finish is usually the first thing I tell people to read before they even buy wood. Once the board is pinned in place—I usually use a couple of heavy weights or a helper’s foot—look for the deepest ‘valley’ in the stone. That gap is your baseline. Open your compass so the metal point touches the stone and the pencil lead touches the wood at that widest point.#IMAGE_PLACE_HOLDER_B#
Follow the Stone Without Overthinking
Hold the compass perfectly perpendicular to the board. If you tilt it, the line will wander. I remember a humid Tuesday in July when I was rushing through a fieldstone scribe; I tilted the compass just a few degrees and ended up with a gap that looked like a lightning bolt. It was a waste of a beautiful piece of white oak. Slow and steady wins here. As you drag the point along the stone, the pencil mimics every bump and crater onto the wood. If you are working with dark wood, use a white grease pencil or a piece of the painters tape secret for perfectly straight grout lines applied to the board first so the line actually shows up.
Cut for a Tight Friction Fit
Now comes the scary part: the cut. A standard miter saw won’t help you here. You need a jigsaw with a fine-tooth blade. If you use a coarse blade, you’ll tear the fibers of the wood, and no amount of hardwood floor care secrets to longevity and shine will hide those jagged edges later. I always cut just a hair on the ‘waste’ side of the line. This gives me room to use a belt sander or a wood rasp to fine-tune the fit. It is better to have to take a little more off than to realize you have cut too much. While you’re at it, make sure you have the vacuum attachment that actually picks up fine sawdust ready, because scribing creates a mountain of fine debris that loves to settle into your pre-finished grooves. When you finally slide that board into place and it clicks against the stone with zero gap, the satisfaction is better than a cold beer at the end of the day.
Everyone tells you to get the wood as close to the stone as possible. In fact, most pros pride themselves on a fit so tight you couldn’t slide a razor blade between them. But here is the controversial truth: if you live in a climate with high humidity, that ‘perfect’ fit is a ticking time bomb. While we strive for precision, wood is a hygroscopic material that never stops moving. If you scribe a board into a rigid stone fireplace with zero tolerance, you aren’t leaving any room for the natural expansion of the fibers. This is one of the most common flooring installation mistakes to avoid for lasting results because, eventually, that board will have nowhere to go but up.
Stop Aiming for a Zero Gap Connection
In my early days, I thought a gap was a sign of failure. I later learned that the National Wood Flooring Association (NWFA) actually recommends a small expansion space even at vertical obstructions. The secret isn’t a tight fit; it is a perceived tight fit. I often back-bevel my scribe cuts at a 45-degree angle. This allows the top edge of the wood to kiss the stone while the bottom of the plank stays slightly back, creating a hidden pocket for the wood to expand into. If you ignore this, you might find that why your expansion gap is closing up in the summer becomes a very personal and expensive problem. Have you ever fallen into the trap of making a cut too tight only to have it buckle later? Let me know in the comments.
#IMAGE_PLACE_HOLDER_C#
How Do You Handle Expansion When the Scribe is Tight?
The real ‘oops’ factor comes when you realize that different species react to moisture at different rates. If you are working with white oak, it is relatively stable, but if you switch to something like hickory, you better leave double the space. I always keep my how to use a moisture meter before installing wood floors routine consistent even for that final board. A common myth is that ‘the stone will hold the wood down.’ It won’t. The force of expanding wood can actually crack grout lines or even shift loose stones in older hearths. According to a study by the Forest Products Laboratory, wood can exert several hundred pounds of pressure per square inch as it absorbs moisture. This is why you must understand how to keep your hardwood floors from gapping in the winter while simultaneously planning for the summer swell. If you aren’t careful, you’ll spend your spring researching the sanding mistake that leaves swirl marks on your wood as you try to fix the damage. Precision is great, but physics is non-negotiable.
Once you’ve accepted that wood needs room to breathe, your focus shifts to the toolkit that actually makes those intricate cuts possible. I used to think any old jigsaw would work, but I quickly realized that a cheap, vibrating saw is the fastest way to turn a $200 plank into firewood. I personally swear by a barrel-grip jigsaw. The lower center of gravity gives you way more control when you’re following a tight scribe line. And don’t even get me started on blades. You need a down-cutting, fine-tooth blade. If you use a standard up-cut blade, it’ll splinter the top finish of your oak or hickory. I learned this while researching why you need a specific blade for cutting bamboo planks—the principle is the same: the cleaner the entry, the less work you have later. Beyond the saw, I’ve found that a simple wood rasp is my best friend for those final micro-adjustments. You won’t get it perfect with just a saw. You need to ‘tickle’ the wood back until it fits. I always keep a vacuum nearby because if even a tiny pebble of sawdust gets between the stone and the wood, it will throw off your alignment. I actually use the vacuum attachment that actually picks up fine sawdust to keep the scribe area pristine.#IMAGE_PLACE_HOLDER_D#
How do I maintain my scribed floor joints over the years?
The work doesn’t end once the board is nailed down. Because this is a high-movement area near a fireplace or transition, you need to be vigilant. My biggest piece of advice is to avoid moisture like the plague. If you’ve just finished the install, you must remember why you should never mop new hardwood for at least two weeks. The wood needs to settle into its new environment. Long-term, I recommend checking the gap during the driest month of winter. If the gap opens up too much, don’t panic and fill it with wood putty. Wood putty is a temporary fix that usually cracks within a season. Instead, focus on hardwood floor care secrets to longevity and shine by maintaining a consistent indoor humidity level between 30% and 50%. Looking ahead, I suspect the manual compass and pencil will soon be relics of the past. We are already seeing digital templating tools—similar to what granite installers use—becoming affordable for high-end residential flooring. These tools use lasers to map the stone’s profile and export a file directly to a CNC or high-precision cutter. As Dr. Gene Wengert, often called ‘The Wood Doctor’ in the industry, notes, the interaction between wood and environment is a science of equilibrium. Digital tools will help us hit that equilibrium with zero guesswork. For now, though, your best bet is a sharp pencil and a steady hand. If you really want to level up your game, try the back-beveling technique on your next scribe; it’s the difference between a ‘good’ DIY job and a floor that people assume was done by a master carpenter. Before you start that next row, double-check your prep by reviewing step-by-step guide to flooring installation and leveling success to ensure your foundation is as solid as your scribing skills.
What Most Pros Won’t Admit About Irregular Stone Edges
Reflecting on those hours spent on my knees in the dust, I realized that the hardest part of the job isn’t the cut—it’s the patience. One lightbulb moment for me was realizing that your eyes will often lie to you, but a compass never does. I spent years trying to ‘visualize’ the curve before I finally surrendered to the physics of the tool. Another harsh reality is that the stone fireplace isn’t your enemy; it is the unique character of the room. If you fight it with a straight board, you lose every time. If you embrace its curves, you win. Also, always remember that mastering hardwood floor refinishing expert tips for 2025 often starts with these tiny structural details that prevent future sander snags or finish peeling at the edges.
The Gear That Actually Saved My Sanity on the Subfloor
If you’re going to tackle this, don’t walk into the battle under-equipped. I personally trust a simple brass school compass for the transfer, but I pair it with a barrel-grip jigsaw because it allows my hand to stay closer to the wood for better control during those tight turns. For those looking for the ultimate finish, I can’t recommend the works of Dr. Gene Wengert enough; his deep dives into wood science helped me understand why my gaps were moving seasonally. When you are choosing the best tile for your hardwood floor upgrade to complement your wood, having a solid understanding of how different materials meet is invaluable for a high-end look. Finally, keep a high-quality wood rasp handy—it’s the ‘eraser’ for small mistakes in your cut that allows for a custom friction fit.
Ready to Create a Focal Point That Truly Lasts
Don’t let the fear of a ruined board keep you from trying this. Scribing is one of those skills that separates the weekend warriors from the true craftsmen. Once you bridge that gap between your hardwood floors and a rugged stone hearth, the entire room feels anchored and intentional. It is about more than just aesthetics; it is about the pride of knowing you didn’t take the easy way out with a piece of clunky molding. You have the tools, you have the technique, and now you have the confidence to make it happen. Refer back to the step-by-step guide to flooring installation and leveling success if you hit a snag with the foundation, but otherwise, go grab that compass and start marking. #IMAGE_PLACE_HOLDER_E# Have you ever tried to hide a gap with caulk only to have it fail six months later, or are you ready to try scribing for the first time? Let me know in the comments below!