

I’ll never forget the sound of my first major DIY disaster—a sharp, wooden crack that echoed through the house on a sweltering Tuesday in July. I had just finished a beautiful oak install, and I was proud of it. But as the humidity rolled in, my floor started to grow until the planks were pressing against the baseboards with the force of a hydraulic press. It felt like the house was trying to eat its own flooring. That’s the thing about summer; it exposes every shortcut you took during the spring. Today, we are going to dive into why those gaps you worked so hard on are suddenly vanishing and what you can do to stop the buckling before it ruins your investment.
Summer Humidity is the Unseen Enemy of Your Floor
Wood is a living, breathing material, even after it’s been milled into planks. It’s essentially a giant sponge. When the summer air gets thick with moisture, those wood fibers drink it up and expand. If you didn’t leave enough room, those boards have nowhere to go but up, leading to that dreaded peaking. I made the mistake once of thinking a tight fit meant a better fit, but I was wrong. I actually found that the hidden reason your floating floor is pinching often comes down to ignoring the local climate’s seasonal swings. Whether you are choosing the right hardwood floors for your home or managing an existing one, you have to respect the swell. It is just as critical as knowing flooring installation mistakes to avoid for lasting results before you even lay the first board.
Is it really possible for wood to move that much?
You bet it is. The National Wood Flooring Association (NWFA) notes that wood reaches an Equilibrium Moisture Content (EMC) based on the temperature and humidity of its surroundings. In the summer, that EMC spikes, causing physical expansion that can easily bridge a half-inch gap if the room is large enough. I have seen cases where why your luxury vinyl plank is buckling near the window is directly tied to this expansion combined with direct solar heat. It’s not just about the gap; it’s about how you manage the environment around it and ensuring you follow hardwood floor care secrets to longevity and shine to prevent long-term warping. Have you noticed your floors feeling a bit tighter or even bouncy since the temperature started to rise? I’d love to hear your stories below so we can troubleshoot together.
Stop the Squeeze Before the Planks Pop
If you’ve noticed your floor feeling bouncy or seen a slight lift at the seams, the first thing you need to do is verify your expansion gaps. I like to think of these gaps as the lungs of your floor; if they can’t expand, the floor can’t breathe. Grab a coin and use the quarter trick for checking expansion gaps in luxury vinyl floors. Slide the quarter between the floorboard and the wall. If it’s tight or won’t fit, your floor is already gasping for air. This is often the hidden reason your floating floor is pinching and causing those unsightly peaks. Wood fibers are essentially microscopic sponges; when the summer humidity hits 70%, those sponges swell. Without a 1/4 to 1/2 inch gap around the entire perimeter, that energy has nowhere to go but up.
Trim the Board Without Ripping Up the Whole Floor
I remember a job in a tight sunroom where I forgot to account for the heavy transition strip. By July, the floor was pushing so hard against the door frame that it started to cup. Instead of tearing everything out, I used an oscillating saw to carefully trim 1/4 inch off the boards right against the wall. It was surgery on a floor. As soon as the blade cleared the tension, I heard a literal ‘thud’ as the floor relaxed back into place. If you find your gaps are non-existent, you can remove your baseboards and use a toe-kick saw or an oscillating tool to create that necessary space. It’s a dusty, tedious job, but it’s the only way to save a floor that has already begun to peak.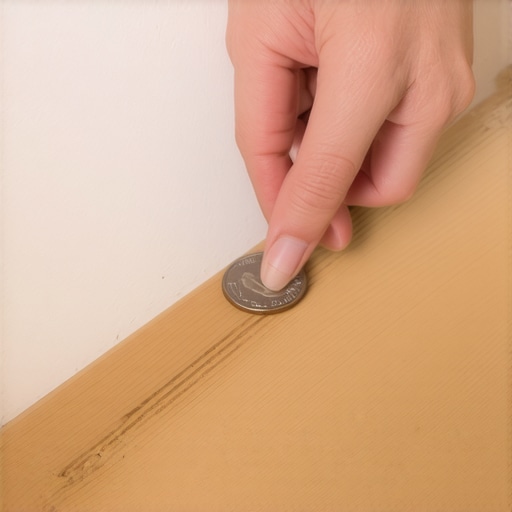
Master the Humidity Before You Lay a Single Board
Prevention is always cheaper than a mid-summer repair. Before you even think about opening a box of planks, you need to know what you are working with. One of my non-negotiable rules is to learn how to use a moisture meter before installing wood floors. If your subfloor is holding 12% moisture and your hardwood is at 6%, you are inviting a disaster. The wood will drink that moisture from below, swell up, and ruin your finish. Think of it like putting a dry sponge on a wet countertop; the result is predictable and messy. You want your floor and subfloor to be within 2-4% of each other before you drive the first nail or click the first plank.
Fix the Foundation to Prevent Future Buckling
Sometimes the expansion isn’t just about the walls; it’s about what’s happening underneath. If your subfloor has high spots, the plank has to ‘climb’ over them, which puts extra stress on the joints. I always recommend learning how to measure subfloor flatness before you start installing. A simple 10-foot straightedge can save you thousands in future repairs. Humps in a subfloor act like a fulcrum on a seesaw; as the wood expands and tries to move, that high spot forces the joint to hinge upward, creating a weak point that eventually snaps.
Leveling is Your Best Defense Against Movement
If your floor isn’t flat, it will never be stable. Following a step-by-step guide to flooring installation and leveling success ensures that your planks sit flush and move as a single unit. When a floor is perfectly level, the expansion happens horizontally, as intended. When it’s uneven, the expansion forces the planks into each other at angles, causing the edges to chip or separate. For those dealing with a really rough slab, checking out the ultimate guide to floor leveling for a perfect finish can give you the technical edge needed to prep a surface that stays beautiful through every season.
The Cushion Trap: Why Thicker Underlayment Won’t Save a Bad Subfloor
Most DIYers and even some pros think they can hide a dip in the subfloor by doubling up on underlayment or using a thicker foam. In my experience, this is the quickest way to ruin a floor. Soft, thick padding creates excessive vertical deflection. Every time you walk, the joints flex more than they were designed to. Eventually, those click-locks snap. According to the National Wood Flooring Association (NWFA), a subfloor must be flat to 3/16 of an inch within a 10-foot radius. If it is not, padding won’t help; you need precise floor leveling techniques to achieve flawless surfaces to solve the structural issue rather than masking it.
Why Do Advanced Installers Back-Butter Every Large Format Tile?
If you are moving from hardwood to tile in an adjacent room, you might think a standard notched trowel is enough for a strong bond. It isn’t. The common trap here is air pockets. For large tiles, you must apply a thin layer of mortar to the back of the tile itself. I have seen countless jobs fail because why your trowel size is ruining your tile bond became a painful reality when the homeowner heard a hollow clack under their feet. This extra step ensures 100% coverage, which is vital for preventing cracks in high-traffic zones. 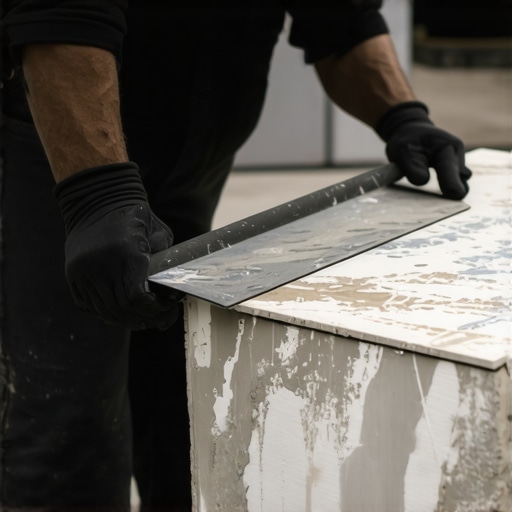
Avoid the Sticky Mess of Rapid-Set Levelers
One of the most common high-level mistakes is rushing the pour without preparation. I once watched a crew lose an entire room of material because they did not realize why your leveler is setting up before you can finish spreading it. They skipped the primer, and the thirsty plywood subfloor sucked the moisture out of the leveler in seconds, leaving a jagged, unworkable mess. This often leads to a secondary disaster where why your self-leveler is bubbling over plywood becomes your new headache. Always follow flooring installation fundamentals leveling for a seamless look to ensure the substrate is sealed and the mixture has time to flow. Have you ever fallen into this trap and had to grind down a bad pour? Let me know in the comments so we can share the hard lessons learned on the job.
Gear That Separates the Pros from the Weekend Warriors
If you’ve ever looked at a perfectly smooth self-leveling job and wondered how they got it looking like glass, the secret isn’t just in the mix—it’s in the spikes. I used to fight air bubbles for hours until I learned how to use a spiked roller for the perfect leveling pour. This tool is a game-changer; it breaks the surface tension and releases trapped gas that otherwise leaves your floor looking like the surface of the moon. Similarly, the mess of a hardwood install can be overwhelming. I finally invested in the vacuum attachment that actually picks up fine sawdust, and it saved my lungs and my client’s HVAC system. When you are revamping your home with expert flooring installation tips, the difference between a good job and a great one often comes down to having the specialized equipment to handle the debris and the physics of the material.
How do I keep my floors looking brand new for decades?
The biggest mistake people make happens the moment the installer walks out the door. They want to clean. But you have to resist the urge to scrub. In fact, I tell everyone why you should never mop new hardwood for at least two weeks. The finish needs time to fully cross-link and harden. If you introduce moisture too early, you risk clouding the finish. Long-term success also requires understanding the chemistry of your topcoat; for example, if you are doing a DIY refinish, you need to know why you must sand between polyurethane coats to ensure the next layer actually bonds. Without those microscopic scratches, the top layer can eventually peel off like a sunburned layer of skin. I follow the National Wood Flooring Association (NWFA) Technical Manual C200, which emphasizes that proper abrasion is the only way to guarantee inter-coat adhesion. 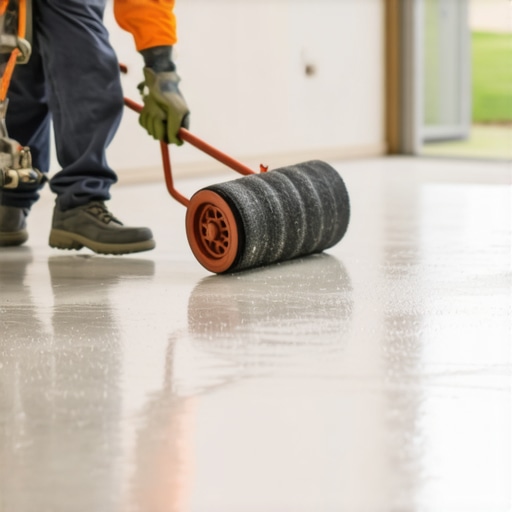
The Future of Smart Flooring is Closer Than You Think
I predict that within the next five years, we won’t be guessing about moisture levels. We are already seeing the rise of embedded sensors in subflooring that sync to your phone, alerting you if a pipe is leaking under your hardwood before the cupping even starts. Until then, you have to be the sensor. This means using precise floor leveling techniques to achieve flawless surfaces and keeping a close eye on your HVAC’s dehumidifier. If you’re planning a project for 2025, look into best tile trends for complementing hardwood floors this year to create a durable, tech-ready home. My challenge to you: before your next install, go out and buy a high-quality moisture meter. It’s the single most important tool in my bag, and it will save you more money than any fancy saw ever could.
Hard Truths About Wood Movement That Saved My Career
Looking back at that cracked oak floor from years ago, I realized that flooring isn’t just about nailing planks; it is about managing an ecosystem. One of the biggest shifts in my thinking came when I stopped viewing expansion as a problem to solve and started viewing it as a predictable physical law. First, never assume a dry looking subfloor is actually dry. I have seen seasoned pros get humbled because they skipped the data. Second, the quarter trick isn’t just for amateurs; it is a sanity check that prevents your boards from turning into a structural nightmare. Third, acclimation is a process, not a checkbox. If the wood doesn’t match the room’s moisture level, it isn’t ready to lay, regardless of how long it has been sitting in the house. I always tell my clients that hardwood floor care secrets to longevity and shine start long before the first coat of poly is applied.
The Essentials I Never Leave Home Without
If you want to move from DIY enthusiast to a precision installer, there are a few things you need in your arsenal. I personally swear by a professional-grade digital moisture meter because how to use a moisture meter before installing wood floors is the only way to guarantee stability. Next, keep an oscillating multi-tool handy for those surgical adjustments when a gap is too tight near a door casing. Finally, I always refer back to the NWFA Technical Manuals and mastering floor leveling pro secrets for perfect installations whenever I encounter a subfloor that looks more like a rolling hill than a flat foundation. These resources have saved me thousands in rework costs over the years and keep my results consistent across every season.
Take Control of Your Home’s Climate
Your floor is likely the largest piece of furniture in your house, and it deserves the same respect as a fine piano. By staying ahead of the humidity and following tile-installation pointers that save time and money, you are not just fixing a floor; you are protecting your home’s value. Don’t be afraid of the technical side—leveling, moisture tracking, and precision cutting are skills that anyone can master with a bit of patience and the right guidance. Whether you are mastering hardwood floor refinishing expert tips for 2025 or simply trying to stop a summer buckle before it pops, remember that the best floors are built on a foundation of environmental control. Have you ever had a floor start to grow on you during a particularly humid week? Let me know your survival stories below so we can keep the conversation going.