
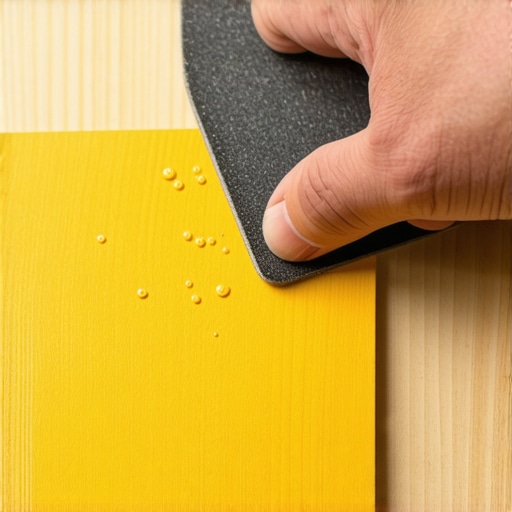
I stood in my living room, the sun hitting my brand-new finish at just the right angle, and my heart sank. It looked okay from the doorway, but under my socks, it felt like walking on a beach of tiny, dried-up needles. I had rushed the job. I thought I could outsmart the instructions because I wanted to be done by dinner. I didn’t sand between my coats of poly, and let me tell you, the floor didn’t care about my tight schedule. It rewarded me by trapping every stray dust mote and raised wood grain forever. It’s a gritty, disappointing feeling you never forget. [image_placeholder_1]
Stop Chasing a Smooth Finish Without the Sandpaper
We’ve all been there. You’ve spent hours prepping, maybe even dealing with floor leveling challenges, and you just want the project done. You see that first coat of polyurethane go down, and it looks like a sheet of glass. ‘Why would I mess this up by scratching it?’ you think. Well, I made that exact flooring installation mistake early on, and I spent the next three years regretting it every time I walked barefoot to the kitchen. I promised myself I’d never skip that step again, and today, I’m going to show you why it’s the secret to that high-end look.
Sanding isn’t just about making things smooth; it’s about mechanical bonding. Without those micro-scratches, the next layer of poly is just sitting on top, like oil on water. If you don’t do it, you might find that your polyurethane is peeling in sheets later on. Trust me, stripping a floor you just finished is a special kind of DIY heartbreak. It’s even worse than dealing with swirl marks on your wood from a previous step because you’ve already put in so much effort. You want the layers to melt into each other, forming a single, durable shield.
Wait, Do I Really Need to Sand Every Single Layer?
I get the skepticism. It feels like busy work. But here’s the reality: wood grain raises when it gets wet with finish. Little dust nibs fall out of the air. Bubbles happen. If you don’t knock those down, you’re just burying them under more plastic, creating a bumpy, ‘trashy’ feel that no amount of wax can fix. This is one of those hardwood floor care secrets that separates a pro job from a weekend warrior disaster. I once ignored a few bubbles on a refinished oak project, and I ended up with a bubbly finish that required a full redo.
According to the National Wood Flooring Association (NWFA), proper inter-coat abrasion is absolutely critical for finish adhesion, especially with modern water-based finishes that dry incredibly hard. If the previous coat is too smooth, the new one has nothing to ‘grab’ onto. Think of it like trying to paint a piece of glass versus a piece of paper. Have you ever finished a floor only to realize the texture was all wrong because you skipped a step? Let me know in the comments if you’ve been tempted to skip the sanding before—I promise I won’t judge!
Grab the 220-Grit and Don’t Look Back
I learned the hard way that using the wrong abrasive is like bringing a sledgehammer to a surgery. When you are looking for that buttery smooth texture, you need to reach for a 220-grit sandpaper or, even better, a maroon synthetic finishing pad. This isn’t heavy-duty sanding; it’s a “scuff.” Think of it as exfoliating the wood. I once tried to save time by using a leftover 100-grit belt on a hand block during a small bedroom project. I figured I’d just be ‘gentle.’ The result was a series of deep, ugly gouges that mastering hardwood floor refinishing experts would have laughed at. Every scratch was magnified by the glossy topcoat. Now, I stick to the high-grit rules because why your hardwood finish feels rough after drying is usually a direct result of improper abrasion or skipping it entirely.
Keep Your Pressure Light and Consistent
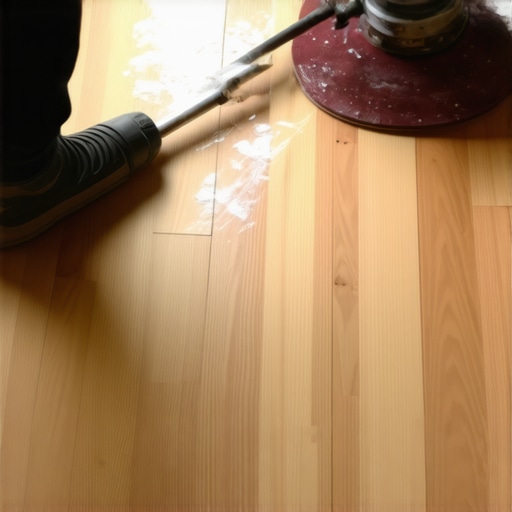
This is where the magic happens—or where it all falls apart. You aren’t trying to remove the finish you just put down; you are just knocking off the ‘nibs.’ These are the tiny bumps caused by dust or raised grain. Use a pole sander if you’re doing a large area, and move in the direction of the wood grain. If you go across the grain, you risk creating micro-scratches that will haunt you. I recall a client’s living room where I got a bit aggressive with the pressure near a doorway. I ended up sanding right through the first coat down to the bare wood. It created a ‘halo’ effect that no amount of blending could hide. If you find uneven areas, you might need to how to check for high spots with a 10-foot straightedge before your final pour to ensure the surface is actually flat, not just smooth.
Attack the Dust Before It Becomes Permanent
Once you’ve scuffed the floor, it will look dull and chalky. This is normal. But if you leave that white powder behind, your next coat will look like a muddy mess. This is the part that takes the most patience. First, I vacuum every square inch using the vacuum attachment that actually picks up fine sawdust. Then, I follow up with a tack cloth or a microfiber mop slightly dampened with mineral spirits for oil-based finishes or water for water-based ones. I once did a ‘quick’ wipe with a dirty rag on a kitchen floor, and I spent the next week looking at tiny hairs trapped in the poly. It was a classic flooring installation mistake that could have been avoided with five extra minutes of cleaning.
Manage the Environment for a Flawless Flow
Before you open that next can of poly, check the room. Is the HVAC blowing? Turn it off. Is there a dog running around in the next room? Keep the pets away. Dust is the enemy of a smooth finish. If you’re transitioning between rooms, make sure you know the best direction to run flooring in a narrow hallway to keep your wet edge consistent. For those dealing with uneven subfloors, you might have already followed the ultimate guide to floor leveling for a perfect finish, but the surface finish is what everyone ultimately sees. You want the light to bounce off the floor without being interrupted by a single stray particle. It’s about creating a controlled environment where the finish can self-level into a glass-like sheet.
Most DIYers treat self-leveling compound like it’s a ‘set it and forget it’ miracle liquid. They pour it out and expect it to behave like water in a swimming pool. In reality, self-leveler has significant surface tension that can leave it lumpy or uneven if you don’t actively manage the flow. This is one of those floor leveling challenges that often humbles even the most confident weekend warrior. If you aren’t using a spiked roller for the perfect leveling pour, you are likely trapping micro-bubbles that will manifest as pinholes in your final surface. 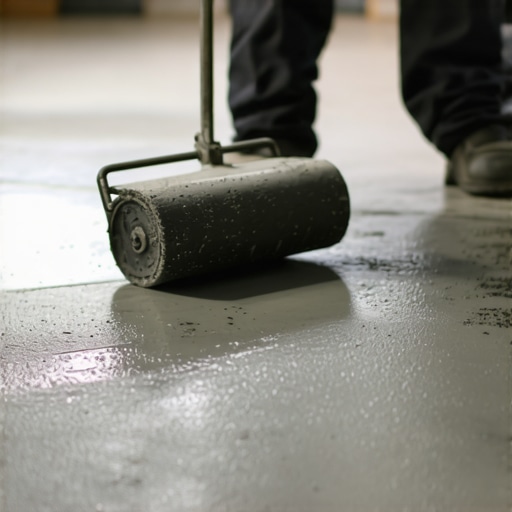 I’ve seen so many people skip the subfloor primer because they think the concrete is ‘clean enough.’ However, the Tile Council of North America (TCNA) emphasizes that proper substrate priming is the single most critical factor for ensuring a permanent bond. Skipping it is the fastest way to find that your self-leveler is pulling away from the concrete after the first change in seasonal humidity. It is a gut-wrenching feeling to walk across a brand-new floor and hear that hollow ‘clack’ of a failed bond.
Is Your Moisture Meter Giving You a False Sense of Security?
One of the biggest mistakes I see is a blind reliance on technology without understanding the context. You might have learned how to use a moisture meter before installing wood floors, but a single reading at noon doesn’t tell the whole story. Surface moisture is often deceptive. I once worked on a project where the surface was bone dry, but the core of the subfloor was still holding onto moisture from a previous leak. Within weeks, the planks began to cup. Have you ever fallen into this trap where the tools said ‘go’ but your gut said ‘wait’? Let me know in the comments. We also need to talk about the ‘plywood sandwich’ myth—the idea that you can fix a bouncy floor simply by stacking more layers of underlayment. If your foundation is moving, more wood just means more squeaks. You have to investigate the real reason your floor joists are making your tile crack before you even think about the decorative layer. It’s about structural physics, not just aesthetics.
Why Three Thin Coats Beat Five Thick Layers Every Time
When you finally transition to the finish, remember that more isn’t always better. While you might be tempted to apply four or five coats of poly for ‘extra protection,’ you risk creating a plastic-looking film that obscures the natural beauty of the wood. Following the mastering hardwood floor refinishing standards usually means three well-applied coats. This ensures the floor remains flexible enough to expand and contract without the finish becoming brittle and cracking. Thick layers take significantly longer to cure and often stay soft for weeks, making them a magnet for pet hair and debris.
Ditch the Steam Mop if You Love Your Joints
I’ve watched homeowners spend thousands on choosing the right hardwood floors for your home, only to melt the finish off with a $50 steam mop. It’s a common tragedy. Heat and pressurized moisture are the sworn enemies of wood fibers and adhesives. This is exactly why you should never use a steam mop on click-lock floors or even solid oak. It forces water into the seams, causing the edges to swell and the finish to cloud. I’ve switched my entire maintenance routine to a pH-neutral spray cleaner and a high-quality microfiber swivel mop. It’s faster, safer, and preserves that glass-like surface we worked so hard to achieve.
My Go-To Kit for Zero-Stress Floor Care
The tools required for flooring installation and leveling success are vastly different from what you need for the long-term win. I swear by a canister vacuum with a dedicated felt-bottom floor tool. You must avoid beater bars; they are essentially mechanical sanders that create micro-scratches over time. If your project involved tile, keep in mind that you should never use acid-based cleaners on natural stone. They will eat through your sealer and etch the stone, leaving it dull and porous. #IMAGE_PLACE_HOLDER_D# For smaller repairs, I always keep a roll of painters tape handy—the blue tape trick for grouting without making a mess isn’t just for the initial install; it’s perfect for touch-ups around door frames later on.
How do I maintain my hardwood floors over time without a full refinish?
The secret is the ‘screen and coat’ method. Instead of sanding all the way down to bare wood—which is messy and expensive—you simply scuff the existing top layer of finish with a fine-grit screen and apply a fresh coat of polyurethane. This is one of those hardwood floor care secrets that can extend the life of your floor by decades. If you notice your hardwood floors are gapping in the winter, don’t panic. It’s usually just the wood reacting to dry air. I keep a hygrometer in my main living space and aim for 35-50% humidity to keep the planks tight and happy.
Looking ahead, the future of flooring is shifting toward ‘self-healing’ coatings. Industry leaders like Bona are currently developing ceramic-fortified finishes that utilize nanotechnology to resist deep scratching. According to technical standards from ASTM D4060 (the Taber Abrasion test), modern water-based finishes are now routinely outperforming traditional oil-based alternatives in terms of sheer durability and color retention. My advice? Don’t be afraid to embrace the new tech. Take a look at your high-traffic hallways this weekend. If they look a little tired, try the screen and coat method on a small section. It’s the single best way to protect your investment without the headache of a full remodel.
Why My Best Floors Usually Started With a Failed Project
Looking back at that ‘needle beach’ floor I created years ago, I realize now that the biggest mistake wasn’t just skipping the sandpaper—it was a lack of respect for the process. I’ve learned that mechanical bonding is non-negotiable. If you don’t scuff, you’re just stacking layers of plastic that will eventually fail. I also realized that you can’t fix a bad subfloor with a good finish. If you didn’t learn how to achieve flawless floor leveling before tile laying or wood installation, the best poly in the world won’t save you from a bouncy, uneven mess. Finally, the ‘lightbulb moment’ for me was discovering that a ‘perfect’ finish isn’t poured; it’s built, layer by agonizingly clean layer.
The Toolkit That Keeps Me Out of Trouble
I don’t start any project without a few specific items that I trust implicitly. First, I always consult the NWFA Technical Manuals; they are the gold standard for avoiding floor leveling challenges and common mistakes. For the actual work, I never skip using a high-quality moisture meter to check the wood and substrate—knowing how to use a moisture meter before installing wood floors has saved me from at least three potentially disastrous installs. [image_placeholder_e] I also swear by the 3M Maroon Pads for inter-coat abrasion; they provide the perfect ‘bite’ without the risk of deep gouges. If you’re tackling a mixed-media space, I highly recommend checking out installing tiles like a pro step-by-step strategies for 2025 to ensure your transitions are as smooth as your poly.
Your Journey to a Floor You Love
There is a specific kind of pride that comes with walking across a floor you finished yourself—especially when it feels like silk under your feet. Don’t let the fear of a few extra hours of sanding stop you from achieving that professional result. Whether you are currently knee-deep in flooring installation fundamentals and leveling for a seamless look or you’re just about to crack open your first can of finish, remember that patience is your most valuable tool. You have the knowledge now to avoid the grit and the peeling sheets. It’s time to revamp your home with expert flooring installation tips and create a surface that lasts for decades. Have you ever been tempted to skip the sanding between coats, or did you learn the hard way like I did? Let me know your biggest flooring ‘oops’ moment in the comments!